Vestment Cave
Thank you for printing this page from www.SuperCheats.com.
Remember to come back to check for updates to this guide and much more content for Bravely Default
Follow this guide to hear about updates
Last Updated:

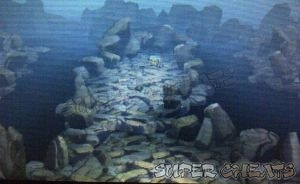
1F
Follow the straightforward path and make your way to the southwest corner of the cave to find a chest containing a Hi-Potion. Head to the northwest corner to find a Phoenix Down as well. Head to the northeast and take the stairs down.

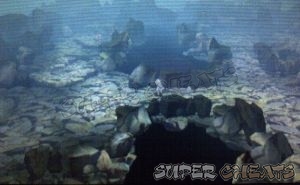
B1
Go south and continue past the split to find a chest at the end containing 500pg. There's another locked blue chest in the middle so ignore it for now. Go to the left then make your way up to find another chest. Open it to get a Remedy.
From that chest, keep heading straight south and you'll find a set of stairs going down. Go downstairs and get the Mage Shell from the chest. Backtrack and return to the previous floor. Now backtrack to the middle and take the path there going southeast. Go downstairs after that.

B2
Head to the west and when you reach the split on the road, take the southern path first as it leads to a chest containing Echo Herbs. Walk to the northwest to find an Ether from the chest. Continue to the right and you'll find yet another split. Head south and you'll find 1000pg from the chest in the middle of the area.

Backtrack to the split. The path leading to the northeast corner has a chest containing a Teleport Stone. Now backtrack and take the last path that leads to a stairway. Go downstairs.

B3
There's an adventurer here so set up your equipment before moving forth. The boss is weak against water so you can edit your Specials and add Water parts on them to make your job easier. Make sure to remove Fire parts as well. When ready, head north for a scene and a boss battle afterward.
| Dragon |
| HP: 7500, Weakness: Water, Immunity: Fire, FAM: Dragon |
 |
| This boss only has two attacks: Mow Down and Bully. It attacks twice in a row but as long as your party's level is high enough (I fought him around LV14 at this point) and your equipment is upgraded, anyone can survive a Mow Down + Bully combo as long as he/she has full HP. Your Special attacks will make a lot of difference here, especially if you have fully equipped parts slots. |
| If you have Protect, use it regularly during the battle then keep healing your party to make sure no one goes below 50% of thier HP. If you have a Knight and a Black Mage (which you should at this point of the game), the Knight's „Protect Ally“ specialty and the B. Mage's LV5 skill Damage Dispersion will help you in some tight occassions. Assist your White Mage with healing and revival items in case he/she can't keep up healing the damage the boss inflicts. |
You'll obtain the Thunder Charm from the dragon after defeating it. Use a Teleport Stone to return to the entrance and make your way back to Yulyana Woods Needleworks.
Talk to the Sage to deliver the rainbow thread. The next morning, the vestments will be finished. You'll have to return to the Temple afterward. Before leaving, view the new party chat. (Ringabel's Reconnaissance)

Anything missing from this guide?
ASK A QUESTION for Bravely Default
Comments for Vestment Cave
Add a comment
Please log in above or sign up for free to post commentsNo comments yet. Tell us what you think to be the first.
Table of ContentsClose
- Basics
- Asterisks / Job Classes
- Jobs Guide
- Extras
- Intro
- Chapter 1
- Chapter 2
- Chapter 3
- Chapter 4
- Chapter 5
- Chapter 6
- Chapter 7
- Chapter 8
- The End
- Sub-Scenarios (Ch1)
- Sub-Scenarios (Ch2)
- Sub-Scenarios (Ch3)
- Sub-Scenarios (Ch4)
- Sub-Scenarios (Ch5)
- Sub-Scenarios (Ch6)
- Sub-Scenarios (Ch7)
- Sub-Scenarios (Ch8)
Guide Updates
Get notified of updates to this guide
Many of our guides get updated with additional information. To get an email when this guide is updated click below.
 Join us on Discord
Click to close