Chapter 05: Hunter and Hunted
Thank you for printing this page from www.SuperCheats.com.
Remember to come back to check for updates to this guide and much more content for Hitman: Absolution
Follow this guide to hear about updates
By CMBF

Last Updated:
The daunting task of making our way to Dexter and learning what we needed to know, and then escaping from the police should have you fired right up! As the opening CS for this Chapter begins we see Dexter having a sitdown with the thug, Wade, he wants to snatch Victoria. Dexter tells him to take his son Lenny with him – and the pair heads off. We cut away to Birdie who is briefing 47 in a rapid-fire he must be coked up patter, and 47 gets his next target.
Are you ready for some more action in the Windy City? Good! Because our first destination is The Vixen Club, a local strip joint that may offer our first clue to protecting Victoria. Birdie explained that the owner of the club, Don Osmond, is the source that Blake Dexter is using in Chicago, but in the mission briefing 47 makes it clear that he is aware that Birdie has his own ulterior motives for sending 47 after Osmond, who may or may not be what Birdie claims.

Making your way to The Vixen Club
Primary Suit Only and Infiltrator Run-through
There are actually several ways that you can approach the club, either using the tunnels or heading up and around the parking lot area where the cops and their cop cars are... I chose to head up to the parking lot and make my way around the edges, as that only required taking out a single cop, after which I was able to pick a lock and open a door giving access to another set of tunnels that offered several different access points to the club.
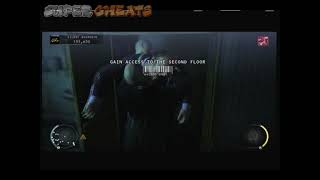
Once in the second set of tunnels – or basement, not sure which – you can use a pair of heating ducts to gain direct access to the club, but that route comes out behind the counter and there are customers and a dancer or hostess there, which might be a problem. Plus you really need to gain access to the office and that means getting past them somehow and picking your way in – since inside there are items you need.
An easier way (in relative terms) is to ignore the heating vents and instead use the stairs that lead up the street in front of the club, and ninja your way up to the window that gives you direct access to the office without having to get past anyone except for the cops outside.

Taking out Don Osmond
The Vixen Club
To gain access to the office simply go up the stairs and immediately turn left and climb up on the ledge, then move to the window and go inside. In the office be sure to grab the Evidence (Evidence 1 of 4), the Keycard, and the silenced Jagd P22G, which in addition to being silenced has four more bullets than the revolver you are carrying...
Make your way out of the office discretely via the door to the club and then go through the crowded main dance area through to the second dance area and then the hall that leads to the door that requires the keycard to let yourself in. Before you go down the hall and use the keycard be sure to use the nearby checkpoint and then incap the guard there - just leave his body as close to the checkpoint as you can manage.
Now head to the keycard door, go inside and wait for Osmond to appear in the private lapdance room on the other side of the one-way mirror, and then he gets a lap dance from a stripper that you get to watch through the one-way mirror window. Once the dancer finishes her audition and he sends her away, go out the door and around the corner through the curtains and kill him!
Now wait for the other stripper who is in the hall to move to a point where you can incapacitate her, then drag her back to the keycard door and inside, and stash her body in the container there, and then do the same with the dead target so that their bodies are not discovered. Basically you cannot hide him unless you deal with her – so sadly she will have to wake up in a crate with a corpse on top of her!
Now head back to the stairs where the checkpoint is and open the door - throw the bottle you picked up in the office against the far left wall to distract the guard there and immediately head up the stairs, picking the lock to open the door. As you exit you complete the club level and you should also unlock the Private Dance Challenge as well as the Dominated Challenge (if you used your garrote for the kill).

Navigating through the Dressing Rooms
The Dressing Rooms
This area can be a lot harder on you than it has to be if you try to explore it rather than just get through it, and since we are doing a Suit Only and Infiltrator run-through getting through as quick as we can and without being detected is the way to go!
So from the door sneak past the hostile guards on the left and continue to the other side of the dressing room area and turn left, follow that to the end and then right, and make your way into the office from here. Listen to the message on the phone answering machine and you then get a CS in which 47 checks for clues and finds them, then rings up Birdie to warn him of the impending doom.
After that all you need to do is reach the exit, which you can easily do.
Navigating through the Derelict Building
The Derelict Building
This is a little trickier. Basically what you need to do is work your way along the right side of the building to the back, go up the stairs and climb the ledge, then go into the room past the video monitors and find the dead stripper at the end of the hall. Drop her over the edge and the cops will go to look while you head along the hallway to just above where they were and, when they are all looking at the dead stripper, you drop down and head to the right.
There is a fat cop on the stairs ahead, so hide and wait for him to come down and go to the back of the room so that his back is to you, then sneak up the stairs and use the exit to end this level with no detection and go you!

Navigating through the Convenience Store
Convenience Store
From the start make your way to the end of the path and climb down to the ledge, then ease along to the other side avoiding being seen by the cop in the building whose ledge you are on. Cross the wooden plank and then use the ledge to get to the window. Wait until the cop inside is headed away then go in and down to the store below, and sneak through to find the fireworks room and, next to it a small room with a checkpoint.
Use the checkpoint and then go to the room opposite the fireworks room and turn off the water main for the fire sprinklers. Return to the fireworks room and light them, and in the ensuing confusion, noise, and smoke, sneak past the cop and the workers to the exit and make your way out easey-peasey!
Doing the fireworks also completes the Challenge Fire Sale.

Navigating through the Loading Area
Loading Area
As you work your way through the Loading Area you will see that the cops have very predictable patrol routes – working your way along the left side of the area head up the stairs and into the office. There is an Evidence on the desk here, and after you grab that, head out the door once the fat cop has walked past to the right, and duck behind the corner to break the sight line then quickly head to the door and break the sight line again.
At the door all you need to do is step up to it and pick the lock – once you do 47 will automatically go through, which ends this level, and begins the next!

Navigating through the Chinese New Year Area
Chinese New Year
For this level there are three of Wade's men you need to take out – these are basically goons – so head to the crowd and you will see two of them ahead of you and one to the right when you use your Eagle Vision. Follow the one who goes to the left when the pair near you split up, and he will walk through the crowds and meet up with some Chinese guy and then take him into an ally. The problem is that the ally is guarded by a cop, and since we are doing the Infiltrate and Suit Only we cannot grab a Disguise to get past him!
Instead before the thug heads into the ally walk past him and continue along to the stairs and go up then drop down into the ally. Climb into the dumpster there and wait for them to enter that back section, and for the thug to question and then incap the Chinese guy by pistol-whipping him. At that point leave the dumpster and kill the thug, then climb back out of the ally and look for the second guy.
You will find him near the stairs down to the area where the Dealer kept his stash from the earlier level here. Just go there and down the stairs and hide in the dumpster at the bottom to wait for him, as that is the safest way to do this without being detected.
The final guy you will track down to a warehouse with some fireworks in it and a machine on the left back of the area. When he is on the phone and not paying attention, sabotage the fuel pump so that it dumps highly flammable fuel all over the floor and then hide behind the half-wall. During the conversation on the phone the last thug will light a cigar and then toss the match, catching the oil on fire and burning himself to death!
Now distract the cop at the entrance and slip back through the window hole and hit the exit!
Well done you! You now unlock the Achievement “Forepost” (10G) You assassinated Wade's men in Chinatown.
You also unlocked the Techniques Iron Man I, Throwing I, Weapon Handling II, Chameleon II, Instinctive Shot II, and Pain Suppression II.
For the Challenges you should have unlocked Infiltrator, Suit Only, Private Dance, Fire Sale, Damage Control, Fire Him, Two Rights Make a Right, and if you used the Garotte in the strip club, Dominated.
Clean-Up Replays
You will very likely be doing a number of Clean-Up Replays for this level in order to collect all of the Weapons as well as the Challenges – which we will now cover:
Item List
- Jagd P22G (from the office or cops)
- HX UMP (from cops)
- Police M590 12GA (from cops)
- Store Clerk Disguise (from Store Clerk)
- Chicago Police Officer Disguise (from Police Officer)
- Chipmunk Disguise (from warehouse)
- Strip Club Bouncer Disguise (from Bouncer)
- Bottle (multiple locations)
- Knife (multiple locations)
- Cleaver (multiple locations)
- Fire Extinguisher (multiple locations)
- Gasoline Can (multiple locations)
- Katana (on table under Tattoos sign)
- Keycard (the strip club office or from a Bouncer)
- Metal Pipe (multiple locations)
- Birdie's File (in the warehouse through the vent at the stash spot)
- Rat Poison (at a food stall in Chinatown)
- Remote Explosives (in the warehouse through the vent at the stash spot)
- Sledge Hammer (in the warehouse alley in Chinatown)
While completionists will want to have collected everything, technically for the Challenges you really only need to collect the disguises and the Evidence, and for the other collection the Weapons.
Challenges Strategies
Chameleon
Pick up all of the disguises in the level. This one is one of the Challenges that is best obtained during your Rambo play-through. The disguises are the Store Clerk Disguise (from Store Clerk), Chicago Police Officer Disguise (from Police Officer), Chipmunk Disguise (from warehouse), and the Strip Club Bouncer Disguise (from Bouncer).
Evidence Collector
Find all of the Evidence in the level. This one is one of the Challenges that is best obtained during your Rambo play-through.
Evidence 1: The Courtyard
Collect the dossier from the hood of the police car in the middle of the courtyard. Note that having a police Disguise will be necessary to obtain this.
Evidence 2: The Vixen Club
Collect the videotape from the small office in the club - entering through the window instead of the main entrance allows you to get in undetected and obtain the Evidence AND a key card, so you may want to do that instead of trying to subdue the guard inside first.
Evidence 3: A Derelict Building
Collect the dossier from the box near the police gathered in the main area who are talking with each other.
Evidence 4: The Convenience Store
Collect the videotape from the counter inside near the clerk.
Evidence 5: Loading Docks
Collect the dossier from the small office inside the Loading Docks.
Evidence 6: Chinese New Year Celebration Area
Collect the dossier from the alley where you rescue the vendor from being killed by the thug..
Infiltrator
Avoid being spotted. You will unlock this by following the main play-through illustrated above.
Suit Only
Avoid using disguises. You will unlock this by following the main play-through illustrated above.
Private Dance
Kill the target and hide the body, then escape undetected. You will unlock this by following the main play-through illustrated above.
Garroting Osmond for a Domination Challenge
Dominated
Kill the target with your garrotte, hide the body, and then escape undetected. The easiest and least-likely to be bugged approach to doing this is to go to the bathroom, incap the guard there and hide his body, and then wait for Osmond to go to the bathroom and Garrote him, then hide his body, and then escape from the level undetected. Using checkpoints can bug this so you want to avoid doing that.
Schadenfreude
Kill the target by dropping the disco ball on them. This is an accidental kill and you will probably want to do this on a level replay specifically to get it.
Fire Sale
Turn off the convenience store sprinklers and light the fireworks. You will unlock this by following the main play-through illustrated above.
Two Rights make a Right
Save the market vendor before he is killed by the target in the alley. You will unlock this by following the main play-through illustrated above.

Arranging an Electric Pee Moment for Larry Clay
Moment of Bliss
Electrocute the target by rewiring the loose cable then throwing the switch.
Fire Him
Kill the target by sabotaging the fuel pump near the fireworks. You will unlock this by following the main play-through illustrated above.
X Marks the Spot
Kill the target by dropping the cargo load in the alley where he takes the market vendor (Two Rights) who you rescue in the other Challenge. Note that the cargo pallet is in the alley where it turns so you have to shoot it with good timing.

Steal Birdie's file to get the cop to kill Dole
Lieutenant Bad
Steal Birdie's file and cause the corrupt cop to kill the target. Basically you go down to the area where the Dealer kept his stash and crawl through the vent, steal Birdie's file off of the counter, then go back into the vent. The cop sees that the file is missing, gets made, and kills the target, Dole, which nicely eliminates him for you!
Cleaning up Chinatown
Complete Lieutenant Bad, Fire Him, X Marks the Spot and Moments of Bliss.
Damage Control
Clear the mission.
Swordplay - Part 1
Kill Wade's Henchman with the Katana in stealth mode. If you are thinking about getting the Chipmunk Disguise and starting in on the two below, do not bother. They are locked, and this one has to be completed to unlock Challenge 2, and 2 has to be completed to unlock 3. So just grab the Katana off of the market table and kill one of the thugs to complete this and unlock Part 2.
Swordplay - Part 2
Kill all of Wade's Henchmen with the Katana in stealth mode. This is a lot easier than you might think since really you can follow the standard run through for the level and substitute the Katana kills for the other methods that were used. Kill the trio to unlock Part 3 and complete this one.
Swordplay in a Chipmunk Suit
Swordplay - Part 3
Kill all of Wade's Henchmen with the Katana in stealth mode while wearing the Chipmunk Disguise. Obtaining the disguise is easier if you wait for the Henchmen to go down into the basement to talk to the Lieutenant, and for the other cop to go to the back of the ally to pee. Take him out, change into the suit and then leave. To complete the kills just do what you did for Part 2.
Mastery
Complete all of the Challenges in the level. This will unlock after you unlock all of the other Challenges.
Anything missing from this guide?
ASK A QUESTION for Hitman: Absolution
Comments for Chapter 05: Hunter and Hunted
Add a comment
Please log in above or sign up for free to post commentsNo comments yet. Tell us what you think to be the first.
Table of ContentsClose
- Introduction
- Hitman Video Game Series Overview
- Dossiers: Agent 47
- Dossiers: Important Supporting Characters
- What is New in Absolution
- Assassin Kit and Weapon Briefing
- Assassin Technique Focus
- Challenge Focus
- Disguise Focus
- Evidence Focus
- Play Style Focus
- Downloadable Content (DLC)
- Absolution Achievements
- Absolution Trophies
- Absolution Easter Eggs and Trivia
- Game Walkthroughs
- Hitman: Sniper Challenge
Guide Updates
Get notified of updates to this guide
Many of our guides get updated with additional information. To get an email when this guide is updated click below.
 Join us on Discord
Click to close