Return to E.D.N. III - C3
Lost Planet 2 Walkthrough and Guide
Return to E.D.N. III
Chapter 3
Mission 1
At the start of the level, head up the slope to your left and walk along the ridge until you encounter an enemy soldier. Gun down the soldier as you approach, then look northeast and kill the enemy soldiers around the bridge and the Shotgun-wielding soldier behind the cover at the other end.
Data Post 1 is under this bridge, so activate it before moving on. The T-ENG chest on this bridge holds a Shield, which is best left there if you're playing single player.
Objective: Break Through the Front Line!
Broke Through: No Casualties -- Complete the level without a single death on your team to earn this award. AI partner deaths do count, so this is best attempted with human allies.
Objective: Destroy the Turrets!
All Turrets Silenced -- Destroy both of the turrets in the enemy base to earn this GJ award.
 Use Hand Grenades to destroy the first turret. |
You can silence the first turret with a couple of Hand Grenades, but you'll need to get in position first. Continue heading north on the west ridge and pick up the Hand Grenades along the way. Kill the two enemy soldiers through the barred window further up and then stand at the end of the ridge. You have a clear view of the turret from here, so lob a couple of Hand Grenades at the turret and shoot them when they reach the turret to destroy it.
Remain on the ridge and use your Machine Gun to clear away any enemy soldiers still below before dropping down. Pick up the Shotgun by the stairs at the east end of the area and proceed up the stairs. You'll encounter some more enemies at the top of the stairs, so be ready with your Shotgun.
The T-ENG chest at the west end of the middle walkway holds a Rocket Launcher. Collect this Rocket Launcher before anchoring onto the upper walkway. On the upper walkway, gun down the two enemy soldiers near Data Post 2 and then activate the Data Post to add 500 points to your team's Battle Gauge. Pick up the Hand Grenades at the southwest end of the walkway before continuing up the steps across from Data Post 2.
Objective: Destroy the VS!
VS Completely Destroyed -- Destroy the enemy Nida VS on the second level of the enemy's base to earn this GJ award.
 Take out the turret and enemy VS from behind cover. |
As soon as you're up the stairs, crouch (click and hold the Left Stick) behind the chest-high cover in front of the tree. Take out the enemy soldier standing on the metal box to your right, then equip your Rocket Launcher and fire a rocket at the turret to the north to destroy it. Crouch back down to reload your weapon and then fire a rocket at the enemy VS. Three direct hits from a Rocket Launcher are enough to destroy this VS on the Normal difficulty level.
Before moving out from cover, switch back to your Machine Gun and take out the sniper in the window above the door. Clear away any enemies that remain and then get to activating the Control Posts. Activate the Control Posts and cross the red line around the door to complete the level.
Mission 2
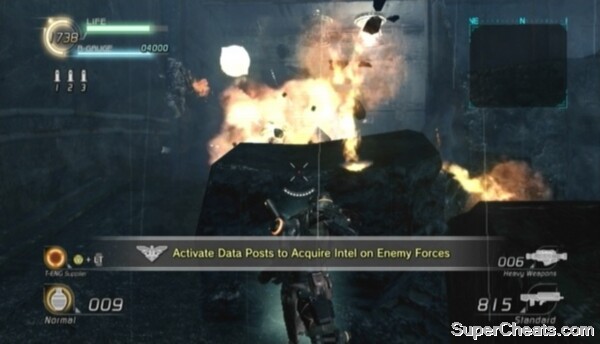
Objective: Activate Data Posts to Acquire Intel on Enemy Forces
Your first task is to activate the three Data Posts in this area. Don't worry about the Data Posts for now; concentrate on clearing out the enemies here first.
Drop down into the trench to your left at the start of the level and proceed through the doorway up ahead. There are two Sentry Turrets attached to the ceiling at the north end of the trench. The sensor tied to these Sentry Turrets is below them, so toss a Hand Grenade over the piece of wall in front of them to destroy the sensor and kill the enemy soldier standing there.
Throw a Hand Grenade to destroy the sensor and kill the enemy soldier at the north end of the trench. |
Continue north to the end of the trench once the Sentry Turrets are down. At the end of the trench, turn right to spot some stairs and an enemy Evax VS in the distance. Destroy the Evax VS by throwing Hand Grenades at it and shooting the grenades when they reach the VS. Three well-thrown Hand Grenades should do it.
After destroying the enemy VS, head up the first set of steps and turn left through the doorway at the top. Take cover behind the metal crate to avoid taking fire from the Sentry Turret in this corridor. The sensor for this Sentry Turret -- as well as the two turrets attached to the ceiling further down the corridor -- is just around the corner. Roll past the first Sentry Turret and then move behind the wall to your left to avoid the other two turrets in this corridor. The sensor is visible through the large hole in this wall. Destroy the sensor and then continue to the end of the corridor.
Proceed up the stairs at the end of the corridor and throw a grenade into the group of soldiers beyond the Data Post. Detonate the grenade by shooting it when it lands next to the soldiers. There are two enemy VS in this area: an Evax VS and one Bleed VS -- a lightly armoured and evasive VS armed with a Gatling Gun. The Evax VS will remain sitting at the west end of the area.
The Bleed VS is adept at dodging rockets and grenades, so it's best to attack while the VS is preoccupied with one of your allies. A couple of rockets should do it. Hit the Evax VS with three rockets to destroy it and then use your Machine Gun to clear out the remaining enemy soldiers.
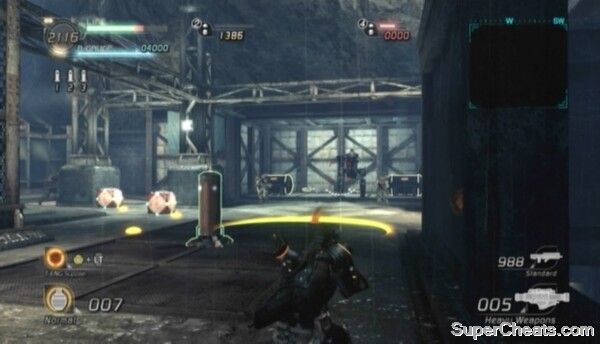 Two enemy VS and a bunch of soldiers guard Data Post 3. |
Leave the Data Post alone for now and head to the opening in the southeast corner of this area. There are a couple more Evax VSs left outside, so use a Rocket Launcher or grenades to destroy them.
Clear away the enemy soldiers outside and then activate Data Posts 1 and 2. Return to Data Post 3 and open the T-ENG chest next to the Shotgun at the west end of the area. This T-ENG chest holds a Rocket Launcher, which you'll definitely want to collect for the second part of this mission. Make sure you collect this Rocket Launcher before activating all three Data Posts.
Activate the third and final Data Post once you're ready to move on.
Activating the Data Posts
Objective: Annihilate the Jungle Pirates!
Victory: No Casualties -- Complete the level without a single death on your team to earn this GJ award. AI partner deaths do count, so this is best attempted with human allies.
You must deplete the enemy's Battle Gauge -- visible at the bottom of the screen -- to complete this mission.
Before hopping into the Bleed VS, anchor onto the eastern wall and look across to the area at the other end of the bridge. Fire a rocket at the turret emplacement at the south end of this road to destroy it. There are two enemy Evax VSs across the bridge as well you can destroy from here. Both are at the south end of the bridge. Zoom in by pressing up on the D-Pad if you are unable to see them. Move a bit closer if you still can't see them.
After destroying the turret emplacement and two VSs across the bridge, look down at the bridge and fire a rocket at the two soldiers by the cover closest to the gate. There are two more soldiers standing on the ramp onto the bridge; kill these two soldiers with a rocket as well before getting into the Bleed VS next to Data Post 3.
Objective: Use a VS in Battle!
VS Strategically Used in Battle -- Kill seven enemies while piloting a VS to earn this GJ award.
You are provided with a Bleed VS at the start, but don't worry if it gets destroyed before you're able to earn this award, as there's a Nida VS and a Multi-seat VS across the bridge you can use as well. You don't need to kill seven enemies in a single VS; you could kill four enemies in one VS and three in another and still earn the award.
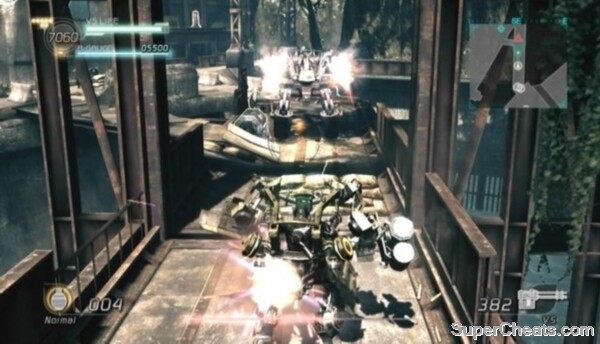 Fight your way across the bridge. |
Hop over the wall and move up to the deactivated VS beyond the open gate partway down the bridge. Start firing your Gatling Gun at the enemy Nida VS when the pilot activates it. You can throw grenades while piloting a Bleed VS, so toss a couple of grenades under the Nida VS to damage it severely. Once the VS is destroyed, continue down the bridge to the two T-ENG chests at the other end. The T-ENG chest at the very end of the bridge holds a Gatling Gun, and the chest near the makeshift bridge holds a Rocket Launcher.
There are a couple of snipers and an enemy wielding a Rocket Launcher on the platform along the east end of the road. Take out these soldiers with your Gatling Gun before stepping onto the road. You can dodge incoming rockets while in the Bleed VS by clicking and holding the Left Stick and pressing the A/X button to dash to the side.
Objective: Find the Multi-seat VS
Multi-seat VS Procured -- Drop down from the south end of the road to find the Multi-seat VS parked by a tree.
You don't need to do anything with this VS to earn this award; you just need to approach it. The Nida VS at the south end of the road is a much better choice -- especially if you're playing solo.
The vacant Nida VS at the south end of the road already has a VS Rocket Launcher attached to it. Grab the VS Shotgun under the platform where Data Post 4 is and attach it to the other side of the Nida VS. Try your best to keep this VS intact until the end of the level, as it will prove useful in the boss fight coming up in the next area.
 The Multi-seat VS is parked by the north end of the road. |
Hop in the VS once you've attached the VS Shotgun to it and start north down the road. Hit groups of enemy soldiers with VS Rocket Launcher and Blast the enemy VSs with your VS Shotgun at point-blank range. A couple of Ospreys will fly in and drop two more enemy VSs into the fray. Damage these VSs with your Rocket Launcher from a distance and then move in and hit them at point-blank range with your VS Shotgun to quickly destroy them.
Deplete the Jungle Pirate's Battle Gauge to complete the mission.
Defeating the Jungle Pirates
Mission 3
If you followed the walkthrough for Area 2, you should be in a Nida VS equipped with a VS Rocket Launcher and a VS Shotgun. Hop out and repair the VS if needed and then start down the path. Remove the VS Rocket Launcher attached to the broken-down VS at the end of the path and add the ammo to the Rocket Launcher attached to your VS.
Objective: Raise the Battle Gauge!
All Data Posts Activated -- Activate the three Data Posts on the map to earn this GJ award. This objective will trigger partway through the battle, but it's best to get it out of the way at the start.
Data Post 1 is just up ahead. The Nida and Bleed VSs have a special function that allow the pilot to activate Data Posts. To activate a Data Post while in a Nida or Bleed VS, click and hold the Left Stick and tap the B/Circle button like you normally would until the Data Post is online. Activating a Data Post is quicker when done while in one of these VSs, but there is one downside: you won't gain any T-ENG this way.
Pick up the human Shotgun near Data Post 1 and then look northeast to spot a broken-down VS on a small hill. Anchor up to this VS and remove the VS Shotgun attached to it. Add this VS Shotgun ammo to the Shotgun attached to your VS. Be sure to pick back up whichever weapon you had to swap out to pick up the VS Shotgun before moving on to Data Post 2.
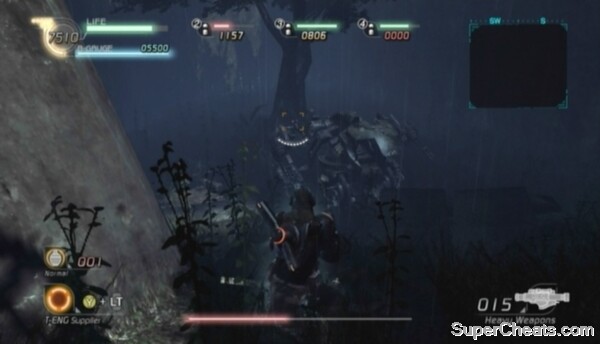
 Gordiant is a humongous, salamander-like akrid with six legs, a ridiculous number of tongues and a bulbous tail covered with retractable spikes. |
Data Post 2 is on the hill at the north end of the map. Gordiant will emerge from the waters as you approach this Data Post, but this Cat-G akrid is very slow, affording you more than enough time to get Data Post 2 online.
Data Post 3 is on the hill at the west end of the map. You can go and activate Data Post 3 now before starting your attack on Gordiant or just leave it for later.
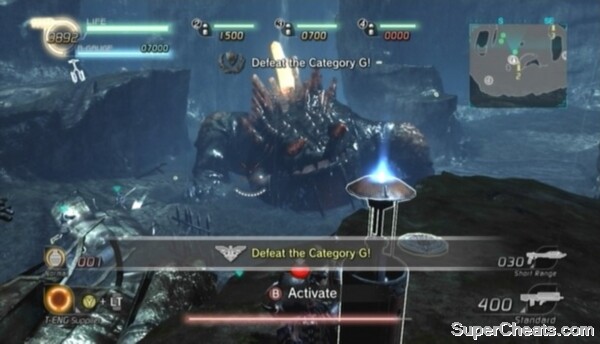
Objective: Defeat the Category G!
Total Victory -- Kill Gordiant without a single death on your team to earn this GJ award. AI partner deaths do count, so this is best attempted with human allies. You must deplete the Category G's life bar -- visible at the bottom of the screen -- to complete this mission.
Gordiant is a humongous, salamander-like akrid with six legs, a ridiculous number of tongues and a bulbous tail covered with retractable spikes. This Cat-G's downfall is the snail's pace at which it moves.
Avoid the deep water in the middle of the map, as falling in will kill you. You can walk on water that has grass sticking up out of it, but steer clear of the area Gordiant emerged from.
 Steer clear of the Gordiant's tail. |
Though Gordiant is slow, it does take long strides due to its massive size, making it difficult to escape on foot. To avoid being crushed by Gordiant, stay on the hill at the west end of the map or the hill north of Data Post 1. If in a VS, don't get too close to Gordiant's legs, as they can crush your VS with one step. As well, avoid standing below Gordiant's tail, as Gordiant will attempt to squash you with its retractable spikes.
Gordiant's most damaging move is its shockwave. When lightning flashes between Gordiant's horns and it begins to raise its head and its front and middle legs, get ready to jump or anchor to a wall. Gordiant will then hit the ground and create a massive shockwave, severely damaging anything or anyone who happens to be touching the ground. To avoid this attack, you can either jump in a VS just before Gordiant hits the ground or, if on foot, anchor to the side of something by aiming the target reticule and pressing and holding the X/Circle button.
Objective: Aim for the Core!
Core Fighter -- Damage the bright orange spire on Gordiant's back four times to earn this GJ award.
 Target the spire on Gordiant's back to deal the most damage. |
The spire on Gordiant's back is its major weak spot. Ignore its legs for now and focus on attacking the core. Hit the spire with the VS Rocket Launcher from afar and the VS Shotgun at close range (jump with the A/X button to reach it and then fire). If you're on foot, use a human Rocket Launcher (there's one by Data Post 3 and one on the hill northwest of Data Post 1), Rocket Pod (there's one attached to the broken-down VS near Data Post 3), Gatling Gun, or grenades.
Attack the spire enough and it will retract into Gordiant's body. To get at the retracted spire, you'll have to get inside. To infiltrate Gordiant's body, you must first stun it by destroying several of its legs.
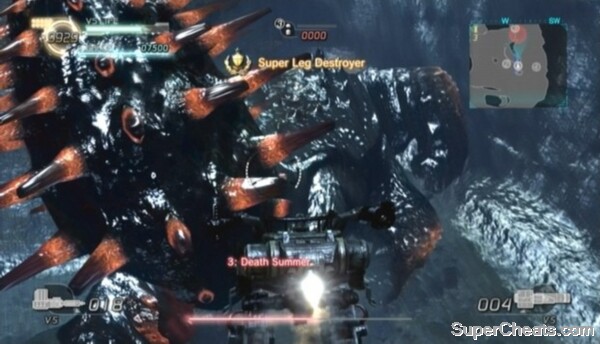
Objective: Take Out the Legs!
Super Leg Destroyer -- Destroy four of Gordiant's legs to earn this GJ award.
The orange patches on each of Gordiant's legs are weak spots. Damage them enough and the leg will break off, releasing T-ENG and a few [?] Boxes. Attacking the legs reduces Gordiant's health bar, but attacking its core deals the most damage. If you've damaged the core so much that it's completely retracted into Gordiant's body, you can get at it by infiltrating Gordiant's body and attacking it from the inside.
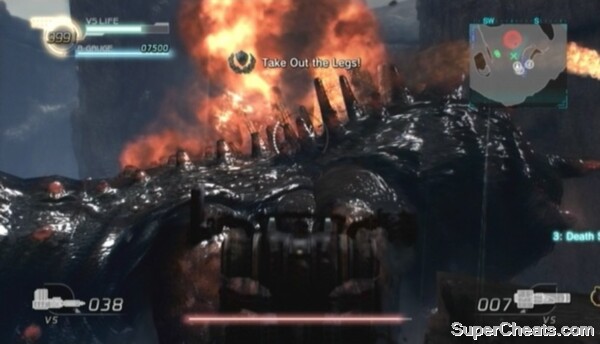
Infiltrating Gordiant's body requires first stunning it by destroying several of its legs. The VS Shotgun is great for removing the Gordiant's legs, as is the VS Rocket Launcher. Destroying three legs is usually enough to stun the Cat-G.
 Destroy several of Gordiant's legs to stun it. |
You'll know Gordiant is stunned when the orange weak spots on its remaining legs turn black and it falls over with its mouth open. You only have a few seconds to infiltrate the Category G while it is stunned, so make your way toward its mouth as soon as you notice the weak spots on its legs turn black.
Objective: Infiltrate the Category G
Infiltrated: All Players -- All four players must infiltrate the Category G while it is stunned to earn this GJ award. This award requires three human allies, so unfortunately you're out of luck if you're playing solo. You can still earn the Bronze 'Infiltrated the Category G' GJ award if one player enters Gordiant.
Although entering Gordiant is unnecessary to win this fight, doing so will allow you to attack its retracted core, which will make for a quicker fight. That said, the inside of Gordiant is very hazardous, as it contains Genessa pods, Sepia and Bolsepia. Then there's the matter of getting out.
It's best to go into the Category G with a Shotgun and Machine Gun. Once inside, use your Shotgun to destroy the Genessa pod that spawns and kill any Sepia or Bolsepia that are nearby. Genessa pods will continuously spawn inside Gordiant, so clear away just enough so you won't be killed before you manage to take a few shots at the core. Bolsepia are the red exploding akrid, so be careful when killing those.
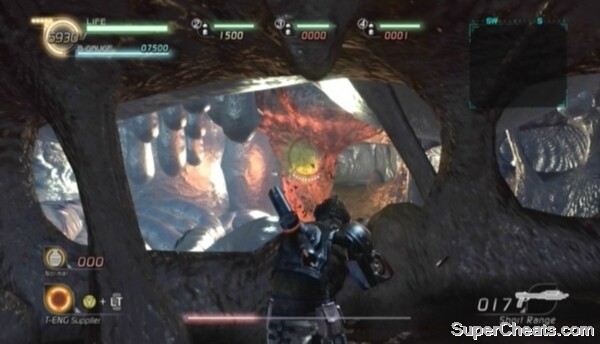 Target the Gordiant's retracted core once inside. |
The retracted core is the orange, stalactite-like object hanging in the cage in the middle of the Gordiant's innards. Blast the core with your Shotgun to push it back up. You can throw a grenade or two as well, but be careful, as a poorly-thrown grenade can be fatal in the close-quarters of Gordiant's interior.
If you're attacked by a Sepia akrid, fight it off before getting back to attacking the core. Keep attacking the core and fighting off Sepia until the Gordiant begins to flush you out. At this point, if you've sustained any damage, use your Harmonizer to recover while the fluids inside Gordiant pull your toward its backend. There are spiky bulbs at the exit point that will damage you on your way out, so you'll need the health to survive. If you do survive, just hope you don't land in the water.
Infiltrating Gordiant
Continue attacking Gordiant until he starts his death sprint around the map. Gordiant will release a bunch of [?] Boxes when he dies, so chase after him, but be careful not to get trampled.
Objective: Team Cheer
We Did It! -- To earn this GJ award during the 'chapter complete' countdown, all four players must be performing an Emote at the same time. To perform an Emote, hold the Start button and press one of the shoulder buttons or one of the buttons on the D-Pad.
Human teammates aren't required to earn this award, however AI partners aren't always reliable. You may need to perform an Emote a few times to trigger theirs.
Defeating Gordiant
There is a few points abaut the Gordiant battle that i want to point out. 1. There is a much better Nida VS parked near the water that Gordiant emerges from. The reason that this one is better is because it can hover and dash. 2. I think there is a system diference as in my game when Gordian dies he simply stands on his hind legs and roars. Then he dies. By the way my game is PS3. This comment was NOT to be negative, just wanted to point it out. And i love your walktrough just so you now.