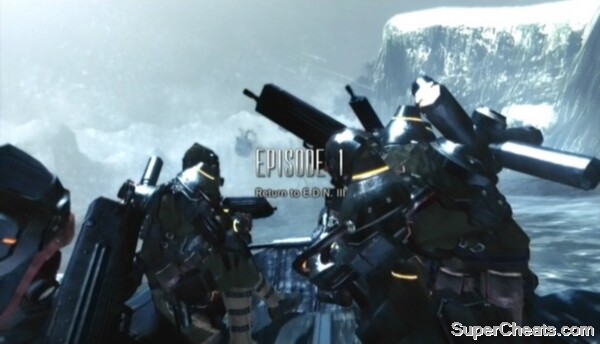
Return to E.D.N. III - C1
Lost Planet 2 Walkthrough and Guide
Return to E.D.N. III
Chapter 1
 |
Mission 1
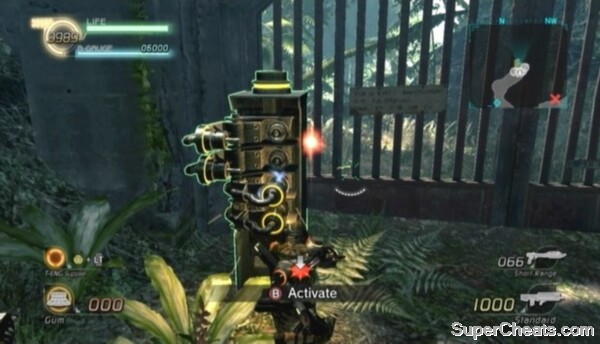
Objective: Activate All the Data Posts!
All Data Posts Online -- Activate all three data posts in the level to earn this award.
Make your way north to Data Post 1. Use your Machine Gun to shoot down the swarm of Trilid flying up ahead and collect any [?] Boxes the Trilid drop when killed. Activate Data Post 1 to add 500 points to your team's Battle Gauge and then continue heading north.
Data Post 2 is a short ways north from Data Post 1. Proceed north after activating Data Post 2 and some Genessa pods will spawn. Throw a Hand Grenade next to the Genessa pods and shoot the grenade to damage the pods and kill any Sepia that have already spawned. Your allies can finish off the weakened pods with their Machine Guns.
Continue down the path and your team will soon come to a rendezvous point with some AI allies and an Osprey VS.
Objective: Defeat the Akrid!
A Chryatis emerges from the ground at the rendezvous site and swipes the Osprey out of the air. There are two weapons nearby that can make short work of this creature: the Gatling Gun attached to the broken-down VS by the large tree to the left and the Shotgun buried in the dirt mound under the same tree. You can dig up the Shotgun by approaching the dirt mound and rapidly pressing the B/Circle button.
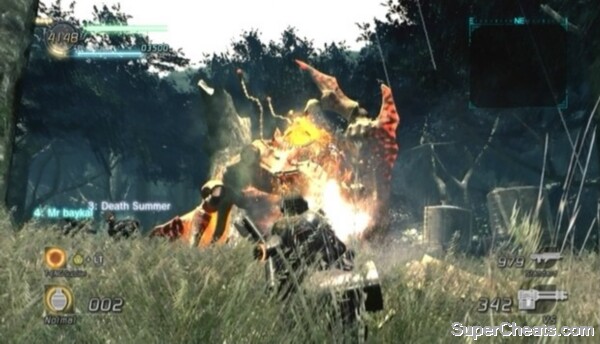 Shoot off both of the Chryatis's arms before killing it to earn the 'Akrid Decimated' GJ award. |
One clear disadvantage akrid face is that their weak spots glow orange. The Chryatis's weak spot is its glowing orange abdomen. As well, you can shoot off each of the Chryatis's arms by blasting the mass of orange protrusions near each joint. Sever both of its arms and the Chryatis will fall to the ground, unable to attack.
The Chryatis's attacks are damaging, so make use of the evasive roll manoeuvre by pressing the A/X button while crouching (click the Left Stick to crouch). Your character is invulnerable during the first part of the roll animation, allowing you to escape almost any enemy attack with the right timing.
Akrid Decimated-- Shoot off both of the Chryatis's arms before killing it to earn this award. If you're playing with friends, simply concentrate your collective fire on the mass of orange protrusions near each joint to sever both of the Chryatis's arms, and then take to attacking its orange abdomen to finish it off.
This award can be difficult to earn with AI allies because they are more likely to fire at the Chryatis's abdomen. Concentrate your fire on the Chryatis's arms and hopefully you can take them off before your AI partners kill the akrid.
 Activate all three Data Posts in the area to earn the 'All Data Posts Online' GJ award. |
When the Chryatis is dead, activate Data Post 3 in the middle of the area to earn the 'All Data Posts Online' GJ award and then start heading north. Blast the Sepia along the path and burst the T-ENG pods on the trees.
Continue down the path and step over the red line to start the area complete countdown.
Objective: Strike a Pose!
Emote: All Players -- To earn this award, all four players must be performing an Emote at the same time. To perform an Emote, hold the Start button and press one of the shoulder buttons or one of the buttons on the D-Pad.
Human teammates aren't required to earn this award, however AI partners aren't always reliable. You may need to perform an Emote a few times to trigger theirs.
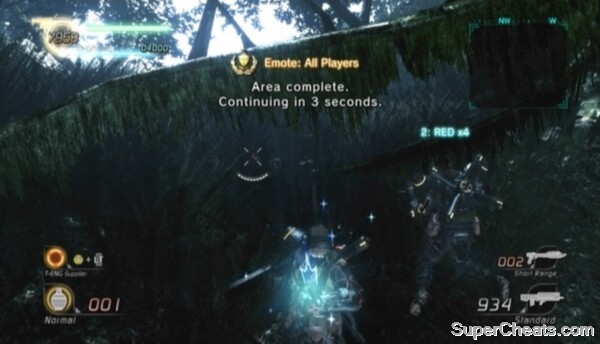 All four players must be performing an Emote at the same time to earn the Gold GJ award. |
Mission 2
There are two routes you can take at the start of this mission. Each route yields its own GJ award, so it's worth taking them both.
Objective: Break Through the Enemy Lines!
Enemy Lines Crossed: No Casualties -- Complete the 'Break Through the Enemy Lines!' objective without any deaths on your team to earn this award. AI partner deaths do count, so this is best attempted with human allies.
If you intend to run the akrid gauntlet instead, make sure you move past the torches on the other side of the river to trigger the 'Break Through the Enemy Lines!' objective before ending the mission. If you fail to do so, this award will not be given to you upon completion of the level. If you're playing with AI partners and you intend to run the akrid gauntlet, it's best to trigger this objective once you've cleared all of the enemies on the map, as you can then still earn this award even if your team has suffered one or more deaths in the process.
Objective: Run the Akrid Gauntlet!
Survived the Akrid Gauntlet -- When you reach the river at the start of the stage, head north up the river rather than crossing to the other side. Make it to the other end of this route to earn this GJ award.
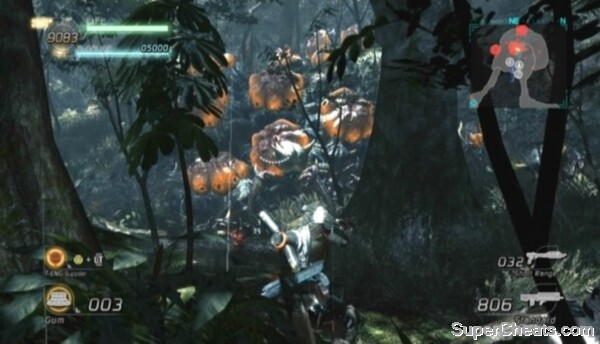 Use the Shotgun and Gum Grenades to clear the Sepia and Genessa in the akrid gauntlet. |
This route is packed with Sepia and lined with Genessa pods. Look for a Shotgun and Gum Grenades at the start of the gauntlet. Pick up the Shotgun and grenades and start down the path.
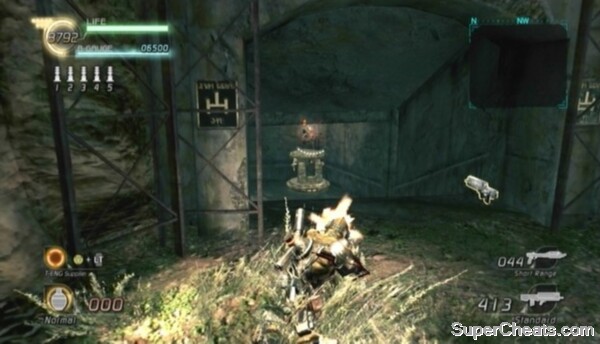
Keep to the left side of the path and head up the slope to Data Post 3. Activate Data Post 3 to add 500 points to your team's battle gauge and reveal all of the enemies' locations on the map in the top-right corner of the screen. There's another Shotgun next to Data Post 3.
Use grenades to weaken the Genessa pods and blow apart any Sepia nearby. Shoot the thrown Gum Grenades with your Machine Gun or Shotgun to set them off. Use your Shotgun to fend off Sepia and destroy Genessa pods at point-blank range. When the area is clear, drop down to the ledge at the west end to earn the 'Survived the Akrid Gauntlet' award.
Once through the akrid gauntlet, you can end the stage by heading south from Data Post 2, activating the Control Posts and stepping past the red line beyond the gate. Enemies will come down from the hill west of the Control Posts, so be ready with your Shotgun.
 Activate the Control Posts and cross the red line to complete the level. |
If you want to earn more Career Points at the end of this area, head north and clear out all of the enemies there. Be sure to activate Data Posts 1 and 2 as well. Most importantly, if you haven't triggered the 'Break Through the Enemy Lines!' objective, fight your way back to the river to trigger this objective before opening the gate, otherwise you won't be awarded the 'Enemy Lines Crossed' GJ award upon completion of the level.
Mission 3
Objective: Destroy the Mine!
Your first task is to activate all five generators in the mine. There are a ton of Sentry Turrets, enemy soldiers and enemy VSs in the mine, so you'll have to take it slow.
Start down the path toward the mine, keeping to the left, and stop when you spot a Machine Gun. There's a Sentry Turret at the start of the corridor here. To disable the turret, shoot and destroy the sensor hanging from the ceiling above it. Enter the corridor once the first turret is down. Around the corner is another turret, this one hanging from the ceiling. The sensor tied to this turret is on the ground below it. Destroy the sensor to disable the turret and then continue down the corridor.
At the end of the corridor is a room with some enemy soldiers and a turret emplacement attached to the ceiling. Gun down the soldiers with your Machine Gun and use grenades to destroy the turret emplacement. Don't move up to the cover in the middle of this room, as doing so leaves you extremely vulnerable to the snipers outside (unless you're playing co-op; perhaps then your allies have already taken care of them).
 Sentry Turrets self-destruct when the sensor tied to them is destroyed. |
If you don't have grenades but have a Shotgun, you can rush the turret instead. There are likely still enemy soldiers on the platform with the turret, so clear them out with your Machine Gun first. Rush the turret with your Shotgun when the way is clear. Get behind or below the turret emplacement so the gunner won't be able to shoot you and then blast the turret at point-blank range to quickly destroy it.
Generator 1 is on the platform with the turret. Activate Generator 1 to reveal the map in the top-right corner of the screen. With that, step onto the walkway outside and look northeast to spot two more Sentry Turrets and a sensor on the other side of the mine. Make sure there isn't also an enemy sniper on the ledge at the north end of the mine before doing anything else. If there is a sniper there, take him out with your Machine Gun and then destroy the sensor to disable the two Sentry Turrets.
Once the turrets are down, continue east and use your anchor to reach the upper walkway when you come to a ladder. Look for Hand Grenades in the small cave here and then continue down the walkway to Generator 3. Have a look around for snipers on the surrounding ledges before activating the generator.
After activating Generator 3, look northwest for a sensor visible through a rectangular window on the other side of the mine. Destroy this sensor before continuing on your way. From Generator 3, proceed north along the mountain trail and through the tunnel to reach Generator 2. There are two Sentry Turrets in the room with Generator 2. The sensor tied to these two turrets is on the other side of the wall to the left of the turret hanging from the ceiling. Unless you want to leave Generator 2 for later and come at it from the other side, you can simply move behind the wall and quickly destroy the sensor to disable the two Sentry Turrets here. Sentry Turrets do not deal much damage on the Normal difficulty level, and the Harmonizer can heal away what little damage you do sustain.
 Activate all five generators to gain access to the control units. |
Once you've activated Generators 1, 2 and 3, you need to make your way down to the bottom of the mine where Generators 4 and 5 are. There's a stairwell southwest of Generator 2 that leads down to the second level. This will afford you a good view of the central platform where Generator 4 is. There is a turret emplacement on the platform, which you can take out by throwing grenades down and shooting those grenades when they reach the turret. There might also be an enemy Evax VS in the cave at the southwest end of the mine. If there is one, destroy it with a couple of grenades before dropping down to the bottom level of the mine.
There may still be two Sentry Turrets and a sensor below the central platform. Destroy the sensor to silence the two Sentry Turrets if your allies haven't already taken care of it, then anchor up to the central platform and activate Generator 4.
After activating Generator 4, climb the ladder on the west side of the central platform to reach the Data Post. There may be an enemy sniper on the same platform, so be careful. One of the T-ENG chests on this platform contains a Rocket Pod and the other contains a Rifle. Neither of these weapons would benefit you at this point, so save your T-ENG. Activate the Data Post before dropping back down to the bottom of the mine.
Generator 5 is in the cave at the northeast end of the mine. There is an enemy Evax VS and a group of soldiers in the hallway further northeast of the generator, so clear them out with grenades before doing anything else.
There's Rocket Launcher ammo to collect before activating Generator 5. The first Rocket Launcher is on the platform right next to the generator -- collect the Machine Gun ammo here as well. The other Rocket Launcher is through the hallway northeast of the generator (where the enemy Evax was). Collect both of these Rocket Launchers and you'll have 20 Rocket Launcher ammo going into the final sequence.
 Collect the Rocket Launcher near Generator 5 before ending the level. |
Activate the fifth and final generator once your team is ready.
Objective: Keep the Control Units On!
To complete the chapter, you must destroy the mine by keeping the two boring poles attached to the central platform running for 90 seconds. Getting the boring poles going requires activating the four Control Units on the bottom level of the mine. The boring poles will only run while all four Control Units are active.
The Rocket Launcher is a must here, so hopefully you followed the instructions above. There is an enemy Evax VS on the third-level platform at the north end of the mine. Before doing anything else, destroy this VS by hitting it with two rockets. With the VS down, activate Control Units 1 and 2 near your starting point. Gun down the Gatling Gun-wielding soldier on the walkway at the northwest end of the mine and then get to activating Control Units 3 and 4 under the central platform.
Use your Machine Gun and Hand Grenades to wipe out groups of enemy soldiers. You can find more Hand Grenades between Control Units 3 and 4.
An enemy Nida VS will drop into the mine near the 45 second mark. Equip your Rocket Launcher and fire rockets at the VS to destroy it. Destroying this VS on the Normal difficulty level requires three direct hits from a Rocket Launcher.
 Keep the boring poles going for 90 seconds to complete the chapter. |
Perfect Victory -- To earn this award, you must not allow the enemy to deactivate any off the Control Units once you've started the boring poles.
This can be a difficult award to earn while playing solo, but is quite simple with three human allies. If you're playing solo, use the map in the top-right corner of the screen to determine if there are enemies near any of the Control Units. If there is one or more red dots next to one of the Control Units on the map, run over to it and kill the enemy soldiers there before they can deactivate the unit.
Keep the boring poles going for 90 seconds to complete the objective. The countdown will stop if the enemy manages to deactivate one of the Control Units. If this is the case, get the deactivated Control Units back on to continue the countdown.
Be ready for a quick time event during the cutscene that ensues after you've completed the objective. You are given an ample amount of time to press the button that appears on screen during this cutscene, and failing to press the button in time or pressing the wrong button doesn't appear to carry a penalty.
Destroying the mine
Wht can't I save and load a saved game?