Meltdown - C4
Lost Planet 2 Walkthrough and Guide
Meltdown
Chapter 4
There are multiple routes you can take to the final boss. The different routes branch into each other, making them difficult to map. For the purpose of following this walkthrough, and because this route appears to be the best one, take the route used here.
The best weapons to have with you for this mission are the Shotgun and Rocket Launcher. So always scour the area for Shotgun and Rocket Launcher ammo (and grenades) before moving on. Be sure to activate all of the Data Posts in each area to add to your team's Battle Gauge.
Area 1
Objective: Wear Down the Enemy!
Critical Condition -- Kill all of the Chryatis in the area to earn this GJ award.
Objective: Close Up the Akrid Breeding Grounds!
Akrid Production Levels Near Zero -- Destroy most of the Genessa pods in the area to earn this award.
 Kill the Chryatis and Genessa in the area to earn both Gold GJ awards. |
There are a couple of Rocket Launchers nearby at the start of the level, and there's a VS Rocket Launcher on the ledge across from Data Post 1. As well, there's a VS Shotgun (which is very effective against Chryatis) between Data Posts 1 and 2.
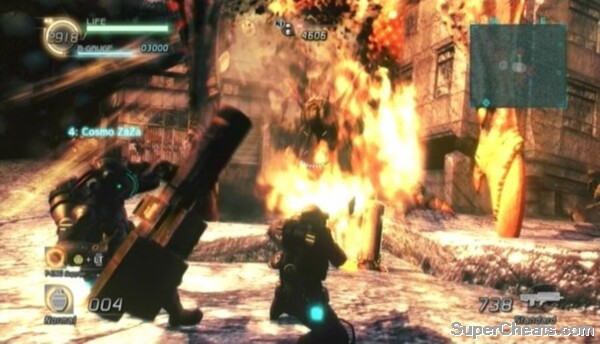
Kill all of the Chryatis and the Sydsepia in the area before turning your attention to the large Genessa pods attached to the buildings surrounding the area. Sydsepia are a stronger variant of the Sepia. They have a projectile attack that traps its target in a sticky web. If you're ever hit by this projectile, rotate the Left Stick to break free. Alternatively, a teammate can shoot a trapped ally to immediately free him.
Make sure you have both Gold GJ awards (check the PDA menu by pressing the Back/Select button) and have activated both Data Posts before crossing the red line at the northwest end of the area.
Area 2
Objective: Wear Down the Enemy!
Critical Condition -- Kill all Chryatis and destroy the Over G orbs in the area to earn this GJ award.
Objective: Close Up the Akrid Breeding Grounds!
Akrid Production Levels Near Zero -- Destroy most of the Genessa pods in the area.
Upon entering the area, activate the Data Post in front of you and then take to destroying the small Genessa pods on the sides of the crater in the middle of the area to prevent more Sydsepia from spawning.
 Destroy the Over G orbs. |
As well as the Chryatis and Sydsepia in this area, you'll also have the Over G to contend with. The Over G appears in this area as large, orange orbs. The Over G has a one-hit kill projectile attack that requires a precisely timed roll to dodge. You're safe from this attack as long as the Over G is not aiming at you. Be ready to dodge if the black dot that appears in the middle of the orb is focusing on you. Because your character is invulnerable during the first part of the roll animation, you can dodge the projectile by rolling to the side just before it hits you. The projectile travels at a slow enough pace to give you enough time to roll out of the way.
Another of the Over G's attacks involves a large, black claw emerging from the ground to attack you. When you see a bright orange circle forming below you, get away from the circle to avoid the claw. This attack won't kill you if you're at full health, but will leave you in critical condition and may stun your character.
Hit the Over G orbs with explosive weapons such as the Rocket Launcher or Grenade Launcher (or your Shotgun if you're brave enough to get close) until they retract. Keep firing at it as long as the black eye isn't focused on you, otherwise get some distance and be ready to dodge.
A large, red blip on the Radar marks the location of an Over G orb. As soon as you see one of these red blips on your Radar, turn your attention to the orb to avoid being blindsided by one of its projectiles.
 Be ready to dodge if the black eye on an Over G orb is focused on you. |
There's a Grenade Launcher on a platform in the crater in the middle of the area, which you can use to destroy the first couple of Over G orbs that appear. Aim a bit above the orb (as opposed to directly at it) so the grenades will sprinkle onto it.
There are two exits to this area: one through a ruined building north of Data Post 2 and the other beyond Data Post 3. The exit to take is the one north of Data Post 2, however make sure you have activated Data Post 3 and destroyed the Over G orb that appears at the other exit to earn the 'Critical Condition' award for this area. Use the Rocket Launcher just beyond Data Post 3 to destroy this orb.
Destroying an Over G orb
When you have both Gold GJ awards and all three Data Posts are online, cross the red line north of Data Post 2 to move on to the next area.
Area 3
Objective: Wear Down the Enemy!
Critical Condition -- Kill all Chryatis in the area to earn this GJ award.
Objective: Close Up the Akrid Breeding Grounds!
Akrid Production Levels Near Zero -- Destroy most of the Genessa pods in the area to earn this award.
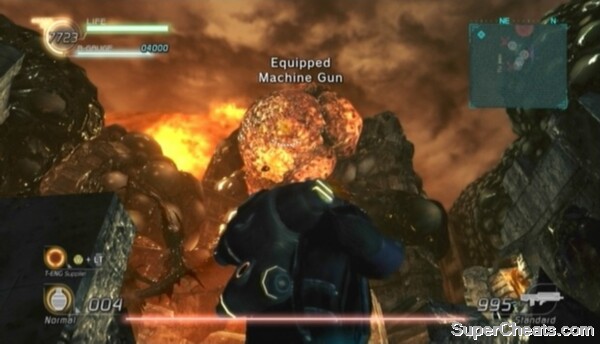
Head up the steps and blast the Genessa pod that spawns on the wall. Pick up the Shotgun in the corner and then activate Data Post 1. Push through to the other end of the corridor and pick up the Rocket Launcher, Shotgun ammo and grenades there. Remain where you are and fire your Rocket Launcher at the Genessa pods and Sydsepia on the building to the east. There's a Genessa pod attached to the wall right below you, which you can destroy at close range with your Shotgun and Hand Grenades.
When your Rocket Launcher ammo is spent, pick up the Gatling Gun at the end of the corridor and use it to further damage the Genessa pods in the area. Hop down when the area is clear and activate Data Post 2.
The exit to take is the one at the north end of the street. If you haven't earned the two GJ awards for this area, don't cross the red line just yet. Continue destroying the Genessa pods that spawn on the other side of the line and killing the Chryatis that appear until you've earned both awards.
Cross the red line at the north end of the street once you're ready to move on.
Area 4
At the start of this area, you'll be put in control of the Vagabundos and the Overland Battleship cannon. Charge the cannon and aim the beam at the Genessa pods and Chryatis below to destroy them.
Using the Overland Battleship Cannon
Continue using the Overland Battleship cannon to decimate the akrid until a cutscene is triggered.
Objective: Wear Down the Enemy!
Critical Condition -- Kill all Chryatis in the area to earn this GJ award.
Objective: Close Up the Akrid Breeding Grounds!
Akrid Production Levels Near Zero -- Destroy most of the Genessa pods in the area to earn this award.
This area is packed with akrid, so be careful. You'll get some help from the Vagabundos on the Overland Battleship, but they won't exactly mirror your performance.
Look for a VS Shotgun and Rocket Launcher ammo west of Data Post 2. Activate Data Post 2 and then clear the area of Chryatis and Genessa.
This area has four exits: one at the top of the slope east of Data Post 1, one at the northeast end of the road and two through the ruined building where Data Post 3 is. The exit to take out of this area is the exit east of Data Post 1, however the corridor to the other exit is full of akrid, making it a good way to get kills and rack up score.
To get to the ruined building with Data Post 3, start by anchoring up to the platform with the Disc Grenades just south of Data Post 2. From here, look northeast and anchor to the Gum Grenades on the platform there. Face northeast again and anchor over to the ledge there to reach the corridor entrance.
Proceed down the steps, activate Data Post 3 and then continue down the corridor. When you turn the corner, two Genessa will spawn on the wall there. When this happens, turn around and destroy the two Genessa that also spawned on the wall by Data Post 3. Then, continue down the corridor and use your Gum Grenades and whatever weapon you have to clear away all of the Genessa that spawn.
To find the second exit in the building, destroy the rubble blocking the corridor to the left of the stairs that lead up to the other exit.
Finding the hidden exits
When you have both Gold GJ awards for this area and all three Data Posts are online, scour the area for any Shotgun or Rocket Launcher ammo you may have missed and then cross the red line at the top of the slope east of Data Post 1 to move on to the next area.
Area 5
Objective: Wear Down the Enemy!
Critical Condition -- Kill all Chryatis and destroy the Over G orbs in the area to earn this GJ award.
Objective: Close Up the Akrid Breeding Grounds!
Akrid Production Levels Near Zero -- Destroy most of the Genessa pods in the area to earn this award.
Remain on the tentacle and fire down at the Chryatis, Genessa and Sydsepia below. Drop down when the area below is relatively clear and activate Data Post 1 at the southwest end. You will encounter more Over G orbs here, so be ready.
Clear out the akrid and destroy the Over G orbs to earn both Gold GJ awards for this area before crossing the red line at the north end.
Area 6
Objective: Wear Down the Enemy!
Critical Condition -- Kill all Chryatis and destroy the Over G orbs in the area to earn this GJ award.
Objective: Close Up the Akrid Breeding Grounds!
Akrid Production Levels Near Zero -- Destroy most of the Genessa pods in the area to earn this award.
You really need to be on the ball in this area. You're facing two Over G orbs at the start here, one on either end of the pass. Ignore the Sydsepia and Genessa for now and concentrate on destroying the two orbs. Keep monitoring each orb to determine if one is readying a projectile and aiming at you!
Destroying the two Over G orbs
After destroying both orbs, take to destroying the numerous Genessa pods in the area. Make sure you've earned by Gold GJ awards for this area before moving on. If you haven't earned the 'Akrid Production Levels Near Zero' award yet, scan the sides of the pass for any Genessa you've missed, as a couple of them are quite high up.
Area 7
Objective: Begin Mission 'Safe Return'!
Mission Accomplished: No Causalities -- Complete the mission with no deaths on your team. AI partner deaths do count, so this is best attempted with human allies.
Objective: Hurry!
Blink of an Eye -- Defeat the Over G Akrid in 15 minutes or less to earn this award.
This is the one part of the game that becomes easier with the fewer human teammates you have. To destroy the Over G akrid, you must attach one or more GPSs to it. If you're playing solo, you'll only need to attach one GPS to the Over G. Each human player in the game must attach their own GPS to the Over G. So, if you're playing with three other people, all four of you must attach a GPS to the Over G to complete the mission.
The Over G akrid's core is a large, gelatinous mass of thermal energy. To attach a GPS to it, you must damage one of its 'heads' until it crusts over. When one of the heads has been damaged enough to completely harden over it will begin to fall, at which point you can move in and attach the GPS to it.
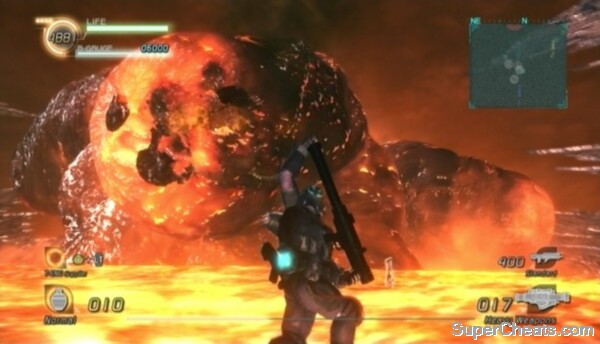 Continue firing rockets at one of the Over G's heads until it completely hardens over. |
Objective: Attach the GPS!
Anchor Master -- To earn this GJ award, attach your anchor to the rocky substance covering the Over G's head when it falls (hold the X/Square button to hang on) and press the B/Circle button while hanging there to attach the GPS. Just walking up to the Over G and pressing the B/Circle button to attach the GPS won't count.
The most effective weapon against the Over G is the Rocket Launcher. There are two Rocket Launchers right in front of the Over G. Collect the Rocket Launcher and continue firing at the centre of one of the creature's heads until that head hardens over, at which point move in and attach your GPS to it.
The Over G does have a one-hit projectile attack to watch out for. Just keep an eye on the skies and if you notice a projectile coming toward you, roll to the side just as the projectile is about to hit to dodge it.
When all humans players on the team have attached a GPS to the Over G, the cannon on the NEOS space station will fire down on it, completely depleting it's health bar.
But it's not over yet! When the Over G comes back to life, fire up at the shards of the barrier to open the way for the space station. Continue breaking up the barrier until the cutscene begins to complete the chapter and win the game!
Defeating the Over G Akrid
as a note to my previous comment, the VS weapon is located in the area just before you take charge of the Vagabundos
interestingly enough, before encountering the Over G, I found a VS plasma rifle/cannon, since it runs entirely off T-ENG, and in most cases, the floor is made of T-ENG, it makes for quite a reliable weapon in these areas
on the stage when fighting the 2 over g worms there are sorta like rings around the stage well these are t-eng they replenish the stage is 6-c3
look for the orange glow and stay in it