Libera Me - C1
Lost Planet 2 Walkthrough and Guide
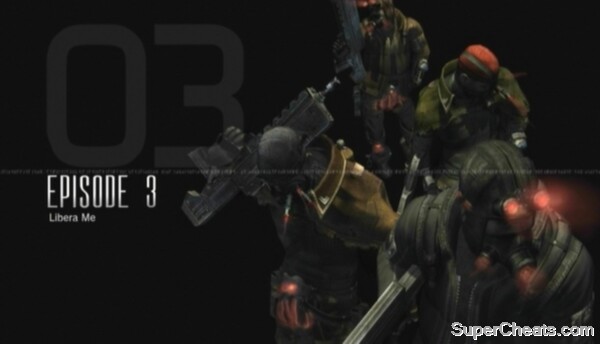
Libera Me
Chapter 1
 |
Red Eye, a gigantic, wormlike Cat-G Akrid, has appeared in the desert and is intent on devouring the train you're traveling on. The train is carrying a large amount of T-ENG, which the Waysider Leader wants loaded onto flying VSs before the groups makes their escape. You must hold off the Cat-G akrid until all of the T-ENG has been loaded onto the Ospreys (as indicated by the meter below your own life bar and Battle Gauge).
Objective: Hold Off the Cat-G!
Left the Cat-G in the Dust -- Deter Red Eye using the explosive cargo on the train at least seven times to earn this GJ award.
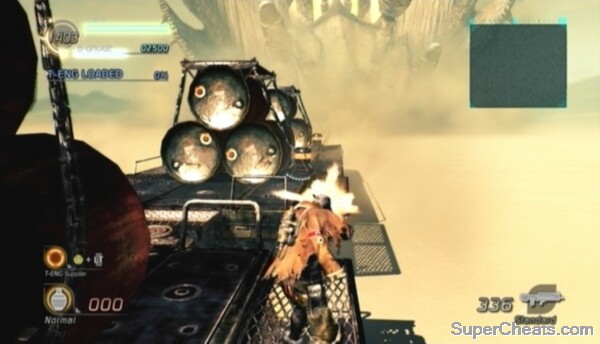
As soon as you gain control over your character, start making your way south to the other end of the train. The train is carrying many stacks of explosive barrels, which might not be the brightest idea, but they serve the purpose of allowing you to keep Red Eye at bay.
To prevent Red Eye from chomping the car at the tail end of the train, you must release one of the stacks of explosive barrels while Red Eye is approaching. Releasing a stack of barrels requires destroying the lock holding them in place. When you reach the second-to-last car on the train, Red Eye will likely be moving in to devour the car at the very end. Release the stack of barrels closest to you by shooting and destroying one of the locks (the pylon-looking things) on either side of the stack. Destroying one of these locks requires quite a bit of effort, but just keep your Machine Gun trained on it and shoot the stem when the casing comes off to release the barrels. The released barrels will fall behind the train and hit Red Eye in the mouth, causing it to retreat momentarily.
 Break the locks to release the explosive barrels. |
If you weren't fast enough to save the car at the end of the train, no worries, as there are still plenty of explosive barrels left. If you did manage to save the car, be ready to release the second stack of barrels when the Cat-G reappears and is coming toward the train with its mouth open.
There are two different types of stacks: a stack of three barrels with a lock on either side and a cage filled with 12 barrels, with a lock in each corner of the top of the cage. The three-barrel stacks are to be released when Red Eye is directly behind the train. The explosives in the cages must be used when the track the train is travelling on curves, as Red Eye will then appear over to the left or right rather than behind the train. To release the barrels in one of the cages, you must destroy both of the locks on one side (widthwise) of the cage. The two locks you need to destroy will depend on which side Red Eye is coming from. For example, if Red Eye is coming from the left, you'll have to quickly destroy both locks on the left side of the cage to release the barrels, which will roll out the left side of the cage and hit Red Eye.
When the track curves (which, if you've been quick enough, should happen by the time you've released the two three-barrel stacks at the end of the train), get on top of the cage closest to you and wait for Red Eye to appear. When Red Eye appears, immediately begin firing at one of the locks on the appropriate side. Sometimes Red Eye will appear and then dip back into the sand; if this happens, cease fire and wait for him to reappear, as sometimes he will then appear on the opposite side.
Releasing the barrels from one of these cages may seem a difficult task if you're playing solo, however you'll find you're actually given an ample amount of time before Red Eye reaches the train. If you feel you won't be able to destroy the locks fast enough on your own, you can soften them up by removing the casing on the two locks at the top or bottom of the cage. This way, you'll just have to blast one of the stems on the appropriate side, then turn around and remove the second lock to release the barrels.
If you've been keeping up with this walkthrough (i.e., you've hit Red Eye with two three-barrel stacks and emptied one cage), allow Red Eye to eat the empty car at the very end of the train the next time he appears. After that, the track should straighten out, allowing you to use at least one of the three-barrel stacks now at the end of the train.
Holding off Red Eye
This is an easy mission as long as you remain on the second-to-last car, as Red Eye will only devour the car at the very end if he manages to reach the train.
Start making your way back to the front of the train once about 90 per cent of the T-ENG has been loaded.
Objective: Strike a Pose!
Emote: All Players -- To earn this award, all four players must be performing an Emote at the same time. To perform an Emote, hold the Start button and press one of the shoulder buttons or one of the buttons on the D-Pad.
Human teammates aren't required to earn this award, however AI partners aren't always reliable. You may need to perform an Emote a few times to trigger theirs.
Once you have this award, approach the Osprey at the very front of the train to trigger the chapter complete countdown.
 Approach the Osprey at the front of the train to end the level. |
No comments yet. Tell us what you think to be the first.