Origins
Gears of War 2 Walkthrough and Guide
Gears of War 2 Guide - Act 3: Gathering Storm
Chapter 2: Origins
Collectible (1/3): At the start of the level, go through the blasted door, head up the stairs and turn into the small office on the right. The collectible (Interoffice Memo) is in the corner on the right as you enter.
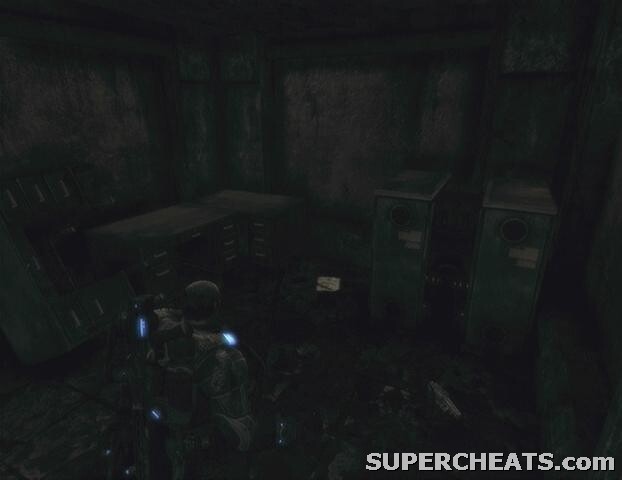 Collectible 1/3 |  Interoffice Memo |
Once you have the collectible, step out of the office and pick up the ammo container by the windows at the end of the platform. Continue through the single door when it opens after the conversation with Colonel Hoffman and head down the hall. After taking some stairs down to another hallway, turn right and kick in the door there to enter the security room. You'll spot a load of Wretches on the other side of the glass at the end of the room. Hit the switch to activate the security system, which quickly obliterates the Wretches on the other side of the glass. Before leaving the room, hit the switch again to deactivate the security system.
Exit the security room, walk down to the other end of the hallway straight ahead, and kick in the double door on the right. Head through the pair of double doors on the other side of the room and turn right at the split.
Collectible (2/3): After passing through the pair of double doors, turn right and walk down the hall until you come to an open door on your right. Head through here and kick in the door you come to. The collectible (Memo) is on the ground by the blocked door in this room.
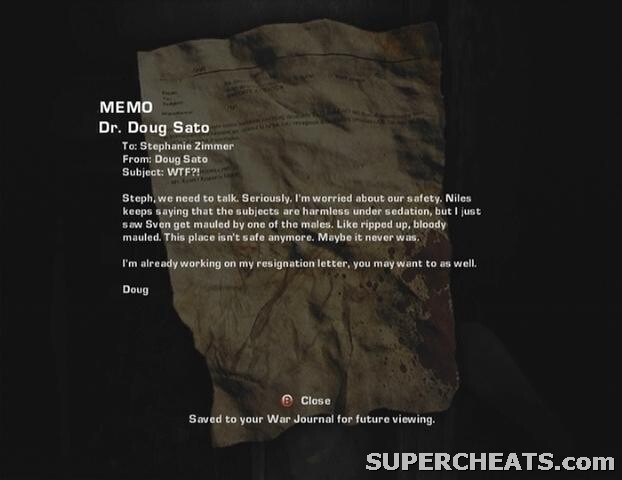 Collectible 2/3 |  Memo |
After picking up the collectible, continue down the hall. There's a Flamethrower through the door on the right just at the corner; just be sure to hold on to your Lancer if you want to pick it up. As you turn the corner you'll hear a computerised voice say “security system enabled,” which means you're now going to have to avoid the auto-turrets in the facility. Immediately duck by the open door on the right to avoid taking fire from the turret down the hall.
You need to make it through the open doorway up ahead. Wait until the searchlight from the turret passes over you to the left, then hop over the cover and move through the door. Though it isn't necessary, hit the switch below the window to deactivate the turret.
 |
In the room with the switch, head through one of the doorways along the adjacent wall and take cover between the next two doorways. Have your Flamethrower or beatdown weapon ready, because you'll soon encounter a group of Wretches.
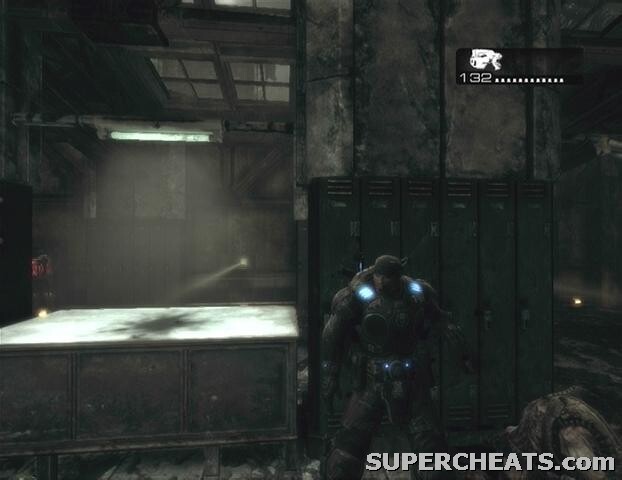
When the Wretches have been dealt with, move up and take cover behind the lockers in this room, and then move over to the table to keep out of the turret's sight. When the searchlight of the turret directly in front of you passes over you to the right, hop over the table and hit the switch to the left of the lockers at the back of the room to deactivate the two turrets.
 |
Head through the doorway next to the switch and start down the hall. As you can see there are several turrets in your path, and the switch to deactivate them is by the door up ahead. Take cover against the wall and when you're ready, quickly roll over to the door across from you. One of the turrets will likely spot you, but you should be able to make it through without taking damage. Walk over to the doorway at the other end of the room. The switch is on the wall to your left as soon as you step through this door, so wait until the turrets' searchlights are pointed away before dashing out and hitting it. After deactiving the turrets, continue through the doorway and kick in the double door here.
 |
Get your Flamethrower or pistol ready and fight off the Wretches outside. At the bottom of the steps, turn right and approach the double door straight ahead. A group of Wretches will burst through the door when you near it, so be ready. Proceed through the open door once the Wretches have been dealt with, and then roll past the auto-turret searchlight and into the room across from you.
There are a couple more security turrets in this room, as well as some Wretches. Take cover by the table and kill any Wretches that come near you. Wait until the first turret's searchlight is pointed at the wall to your right before dashing past it to the safe zone between the two turrets. Wait until the second turrets' searchlight is pointed off to the right before dashing for the exit at the other end of the room.
Once you've exited the room, turn right and make your way to the other end of the hall there. After talking to Baird, continue down the hall and you'll soon come to another turret room. Luckily this room is fairly easy to get through, as the switch to deactivate the turrets here is off to the right as soon as you enter. Hit the switch and another group of Wretches will appear, only to be gunned down by the turret in the next room. Be ready to kill any Wretches that do manage to get close to you, however.
Collectible (3/3): Head through the doorway next to the switch. The collectible (New Hope Medical File) is on the ground at the end of this small room.
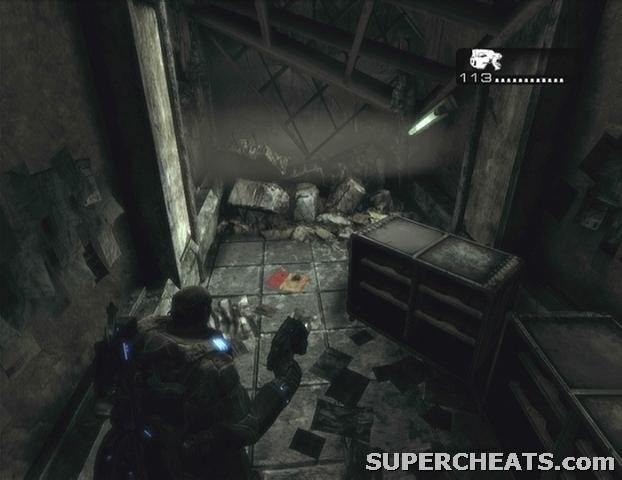 Collectible 3/3 |  New Hope Medical File |
When you have the collectible, enter the next room and walk around the two active turrets' searchlights. Pass through the two doorways at the other end of the room and head down the stairs. At the bottom of the stairs, proceed through the hallway and you will soon come to a couple of flamethrowers. Some Wretches will burst through the door at the end of this hall, so stand back and take them down. Once they've been dealt with, roadie run past the length of this hallway to avoid the flamethrowers.
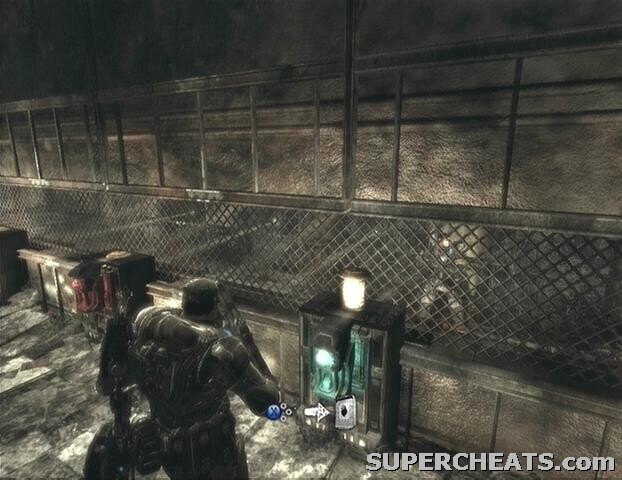
At the end of the hall, you'll reach a gate that Jack must open. Pass through the doorway and head down the stairs in this room. You'll then come to a hallway guarded by a number of turrets. Choose the “Turret Controls” path, since it's definitely the more desirable of the two options. All you have to do is hit the switches when they turn green. It's as simple as that.
 |
Hit the switch to open the vault door and reach the laboratory. Make your way to the other end of the lab and move through the doorway. Head up the steps after Jack opens the gate and flip the big switch here to complete the chapter.
GoW 2 Cheats, Hints and Walkthroughs
No comments yet. Tell us what you think to be the first.