Stages 6-10
Stage: Flames at Midnight
Difficulty Mode: Regular
Waves to clear: 12
zombie amount: 706
zombie Endurance: 800-3900
zombie Types: walker, crawler, zombie bird
Mission Briefing:
Lieutenant, the refinery you secured wasn’t secure at all. Just as we moved out our APCs new hordes of Zombies started approaching. Now at midnight it is full of them. Secure the refinery once and for all.
Strategy:
There are two spots in this stage to setup your recruits. It does not matter which spot you fill-in first for as long as you are able to outlast the horde of Zombies. The first location is the one at the bottom center of the stage. There is a tight spot covered by the pipes forming a small “y” shaped space with a single entry point. You may easily put up two enforcer recruits that would outlast the first few waves of zombies and setup a double sentry gun on the lip of the confined space, and then a “Tesla” (either a turret or a recruit) beside it to pump up the damage.
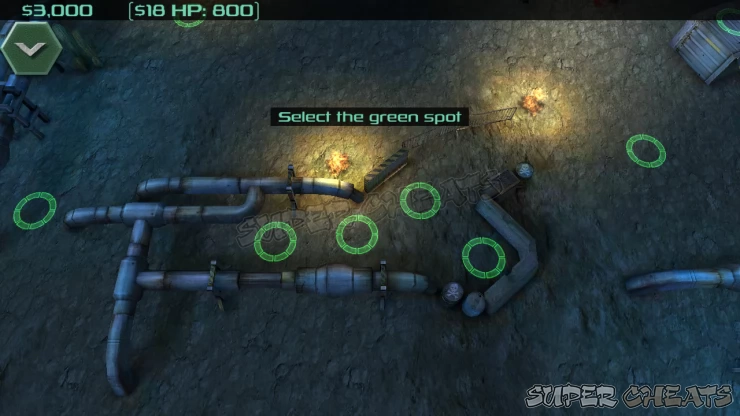
On the farther right (also at the bottom part of the map), there is also a strategic area with elevation (higher ground bonus). Without much to secure the given path, it is best to fill the spot with “Tesla” recruits. If by any chance you already have the “Chainsaw” recruit, block the entry points with them to finish off the remainder of the horde trying to reach for the recruit placed on the higher ground (as the Zombies automatically prioritize to eliminate them).
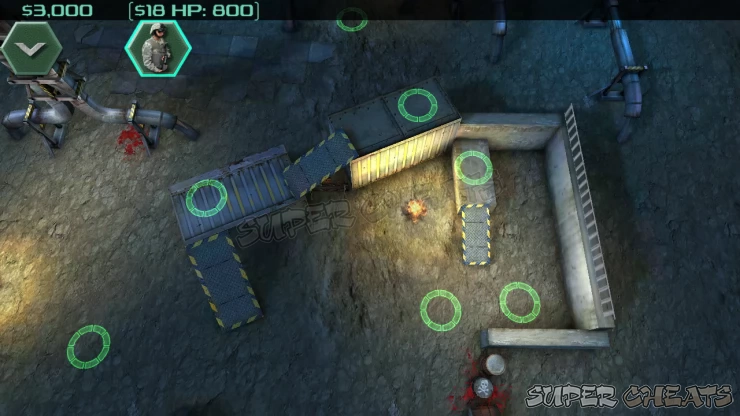
Whichever spot you decide to put up first, you’ll need to expand onto the next team as soon as you have maxed out the necessary within-mission-upgrades in order to beat the stage’s 3-star rating. It might not seem like it, but this stage is rather harder to beat since Zombies are coming from all directions and attacks in sporadic clusters.
Quick Tip:
If you already unlocked the chainsaw recruit at this point, you probably already have the best combo to beat the rest of the game. Pairing a fully upgraded chainsaw recruit and Tesla recruit can move mountains in the game, and one pair is all you’ll ever need (Regenerate should have been fully upgraded too). Anything you add to them is mainly just for an additional security measure.
Here is how it works: Tesla would trim down the number of the incoming horde, while the chainsaw recruit would act as the bait, as well as to finish off anything that the Tesla missed. With maxed out regen, a chainsaw would find no problem taking up on a boss zombie for as long as it is not a thrower type boss, which it wouldn’t be able to reach. The Tesla would also make sure every ranged type of enemy would be eliminated. (sample image of team)
Stage: Dead in the Water
Difficulty Mode: Regular
Waves to clear: 10
zombie amount: 382
zombie Endurance: 800-3200
zombie Types: walker, crawler
Mission Briefing:
Lieutenant, thanks to your efforts, we’re gradually cleansing more and more territories of the zombie plague, as our forces steadily moving south. This time, however, we will need to deploy you in an area previously secured by another squad. Last night, we lost contact with the National Guard outpost at the Redemption Bridge, which the Guardsmen had been successfully holding for over a week. Their last transmission was garbled but the audio has been decoded as: “Crawling… like crabs, too fast!” The analysts are uncertain as to the exact meaning of the words, but the Headquarters advises you to exercise caution. Investigate and secure the bridge.
Strategy:
After the “Hit the Road” stage, you get to unlock and play from two available stages, this stage or the “Black Blood”. So in a similar fashion, if you choose to take this route first, you’d be surprised with a new type of zombie -- the crawlers. Crawlers are faster than your regular walker Zombies. Also, just when you started enjoying your auto aiming sentry guns, you’ll figure out that crawlers are quite invisible to them.
Aside from this, crawlers are also faster than the walker types. So if you are accustomed with dealing with Zombies from a far range (with your choice of recruits), it might be a good time to re-evaluate your strategy. Unlocking the” Tesla” prior to engaging this stage, or from hereon would be a good idea.
One good thing about this stage is that it takes place on a bridge. This means that enemies would only come from two direction -- either east, or west. Other than that, the stage also has an elevated spot (the empty trailer) where you could benefit from bonus damage and additional range stats. If you don’t have Tesla unlocked, you may use the enforcer on your first few runs. You can easily dominate the stage with just the use of enforcers. Start by recruiting enforcers directly on top of the empty trailer to take advantage of the “higher ground” bonus. Additionally, if you happen to have unlocked the bulldozer, you may also enlist for its help to trim down the horde.
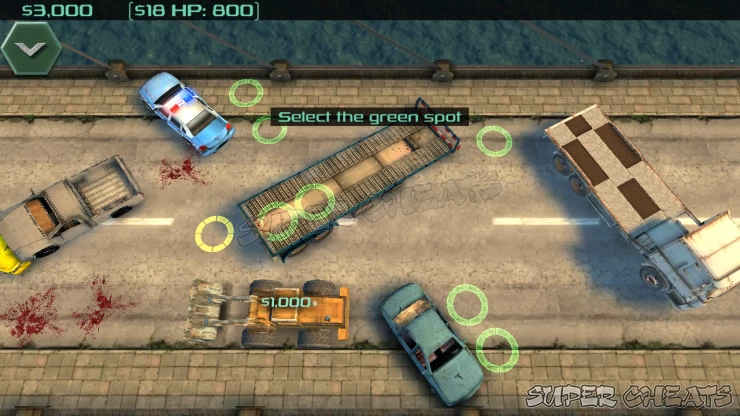
One good thing about the enforcer is that it packs a punch and does not do so bad with its fire rate and range. It also is quite tough and can easily take a hefty number of hits close to that of the Tesla. A fully upgraded enforcer’s HP is around 1200 (while the Tesla is 1400), with damage range of 2100-6300 (becoming stronger as the enemy gets closer). It is considerably cheaper to enlist too at $700 compared to the Tesla’s almost double $1200 (keep in mind that upgrade costs doubles up as you go one rank higher). One 4-Star enforcer can easily outlast the 10 waves required to clear the given stage.
Stage: Trapper’s Challenge
Difficulty Mode: Regular
Waves to clear: 20
zombie amount: 875
zombie Endurance: 800-7400
zombie Types: walker, crawler, zombie bird
Mission Briefing:
“Say what? Whatdya mean we’re cut off with the 20 waves comin? Well… ain’t the firsttime the boys have only themselves to count on!” Lieutenant, this is a difficult trial even for an experienced leader. A group of rowdy Trappers is facing an emergency – namely, the fact that they have been surrounded while shooting it out in a remote meadow. With reinforcements unavailable, the good old boys must cut through 20 waves of mayhem, blasting Zombies with their Remingtons, and blowing them to pieces with dynamite. Maintain radio contact with their leader to command the group as if you were there. To quote the man’s own words: “Take that ‘extra special’ jug, take a swig – and take charge!”
Strategy:
Another one of the unorthodox challenges in the game. Here, you are mainly limited to using trappers to clear the game. The first 20 waves really isn't the problem here, it actually is earning the 3-star rating which means you have to deal with 30 waves in total, and beat three zombie bosses.
This challenge can be pursued though later on in the game as you may continue with the main route in the mission map (this one’s leading to a dead end). Mainly because the challenge very hard, and requires a lot of unlocked passive upgrades to beat. You may choose to unlock the Team Size 32, increase the “dynamite’s damage”, increase damage, and even unlocking gold upgrade stuff like the bullets upgrade to somehow increase fire rate, as well as increase HP.
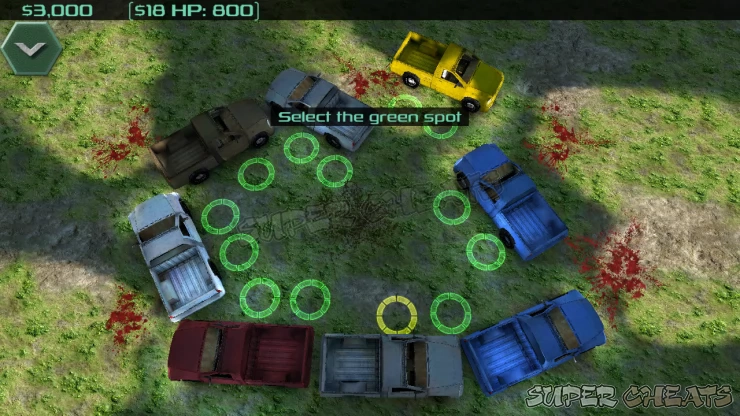
Other than beefing up the base stats of your recruit from passive upgrades, there is pretty much no strategy involved with this given stage as you can figure out from its layout. You may have to constantly slow down the time though especially when dealing with boss levels to properly utilize your dynamites and grenades, as well as to survive the barrage of accompanying minion Zombies.
(image below: Trapper's Challenge map layout)
Stage: Marine’s Challenge
Difficulty Mode: Regular
Waves to clear: 20
zombie amount: 1065
zombie Endurance: 800-7400
zombie Types: walker, crawler, zombie bird
Mission Briefing:
Lieutenant, welcome to the ruins of the outpost 320. We believe this is a perfect place to train our new marine’s recruits. So take the lead and show them how to deal with the Zombies.
Strategy:
Rather than being a unique and outrageously challenging stage to deal with, this one’s a quick one. All that really matters is that you have unlocked the Team Size 32 which you probably have from dealing with the prior stage, as well as unlocking the marine recruit.
One good thing about the marine is that it basically is an all-rounder. Heavy hitter, impressive fire rate, as well as that of it’s range. It is quite cheap to enlist as well for $500. The only letdown is its low HP – which is easily patched up by filling up every given slot in the stage with a 4-star marine. Take advantage of the stage’s layout too with several elevated vantage points, and barricades.
(image below: pick the elevated areas to earn boosts in attack power and range)
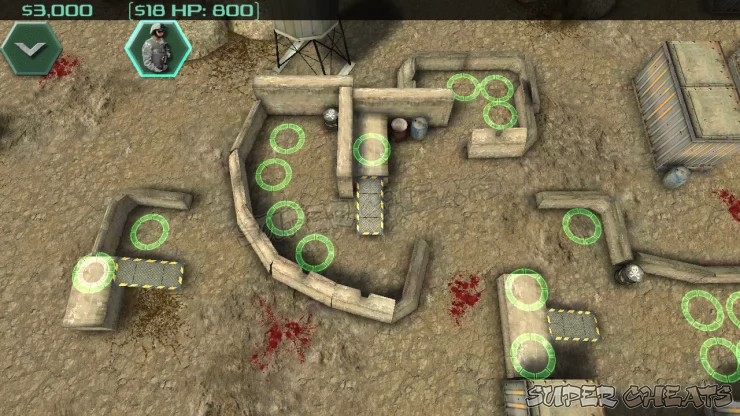
If by any chance you are still having difficulties finishing up with a 3-star rank, beefing up your HP on the gold upgrades’ “HP + 100%” would surely do the trick. On our quick run, one 4-star marine easily outlast 9 waves of the given stage.
Stage: Buried in the Sands
Difficulty Mode: Regular
Waves to clear: 10
zombie amount: 462
zombie Endurance: 800-3200
zombie Types: walker, crawler
Mission Briefing:
Lieutenant, your success has allowed the research department to recognize and inspect a new sub-species of the walking dead, the “Crawler”. For your achievement, you have been awarded an official commendation. Congratulations! Meanwhile, as you are well aware, we keep pushing south, winning at several front. Our new desert outpost is being completed, and has already had a delivery of APC vehicles for later use – but its west walls are not ready yet. With reports of the Crawlers spotted nearby, we need you to make sure that ni walking corpsemakes it into the compound.
Strategy:
Enforcers can do the trick in this stage just as well, though it might be a good idea to unlock the “Tesla” prior to delving with this one. There are two entry points in the compound in this level located in the east and west walls. Both entrances on the given compound can be fortified with APCs. APCs are great because they are never attacked by the Zombies so improving them would help you on your missions. They can easily trim down the horde on the first few waves, but gets rather useless when you reach the latter waves of the game.
(image below: there are APCs on both entrances of the compound)
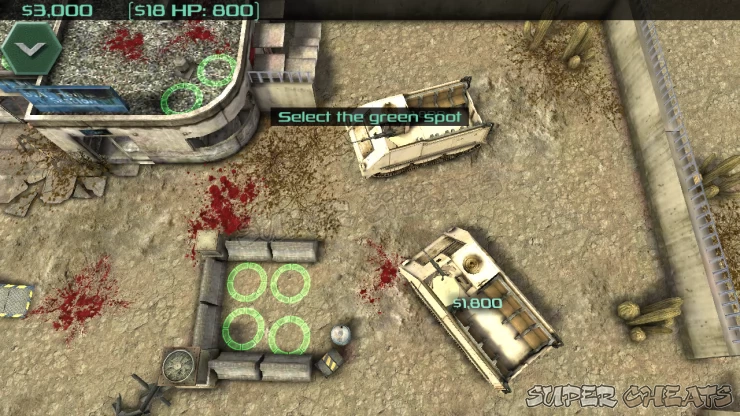
There is also a great vantage point on the northern part of the compound that should easily beef up your recruits both in power and reach. A yellow spot is also available on the leftmost part of the roof which will give you a great head start early in the game.
(image below: the elevated platform on the northern part of the compound)
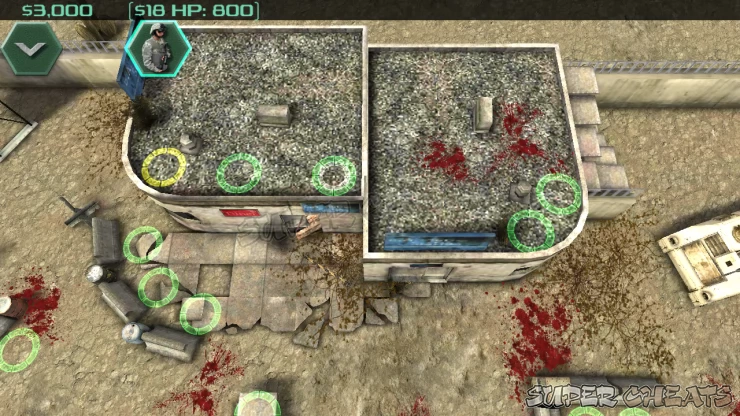
It would probably be good if you get accustomed with using the “Tesla” recruit from hereon. The only forseeable problem with this recruit is its high recruit/upgrade costs. Other than that, you’d be handsomely rewarded with the chain strike of electricity that easily sweeps any zombie on its range. Ratio wouldn’t be a problem either because the lightning strike jumps in chains to electrocute nearby Zombies. With it’s damage reaching 4200 (four star upgrade, vantage buff, and fully upgraded spot) finishing the regular level requirement with a single tesla recruit (without a scratch)will be a breeze.
To proceed with the 3 star finish, adding up a second and a third Tesla would prove to do the same effortless finish. Keep in mind to upgrade their spot’s defense to provide a relative counter-measure.
Anything missing from this guide?
ASK A QUESTION for Zombie Defense
Comments for Stages 6-10
Add a comment
Please log in above or sign up for free to post comments- Game Options
- Regular Mode Strategy Guide
- Regular Upgrades
- Gold Upgrades
 Join us on Discord
