Mutators: Warnings Guide
Deep Rock Galactic is an amazing dungeon crawler-shooter where you can play as one of the four dwarven types (class) while digging through procedurally-generated caverns and tunnels in mineral-rich locations in space. Your crew of dwarves will be tackling various missions, with sssthe usual threats and dangers that come along with the job. However, there are certain variables that can make a mission lucrative, lethal, or both. In this page, we will discuss the different Warnings that can affect each mission.
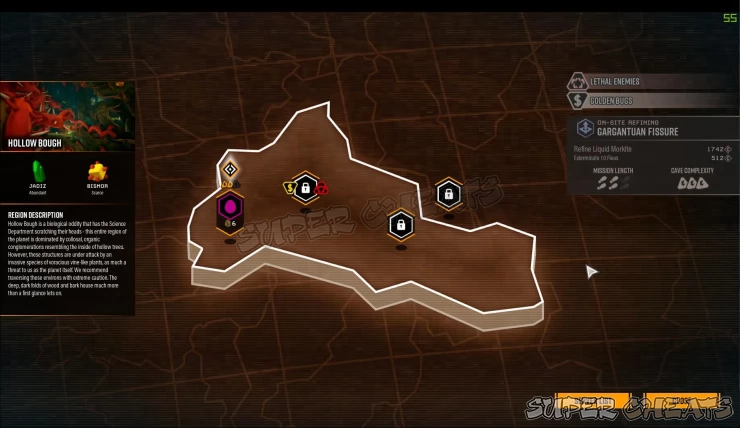
In the mission terminal, you’ll be able to see which Warning or Anomaly is currently active on a particular mission. You can both have a Warning and Anomaly on the same mission; on the other hand, it seems that you can’t have more than one anomaly or warning on one given mission at a time.

Warnings are negative mutators that can drastically increase the difficulty of a mission. However, Warnings can increase the Hazard Bonus players get from 15% up to 30%, depending on the type of warning.

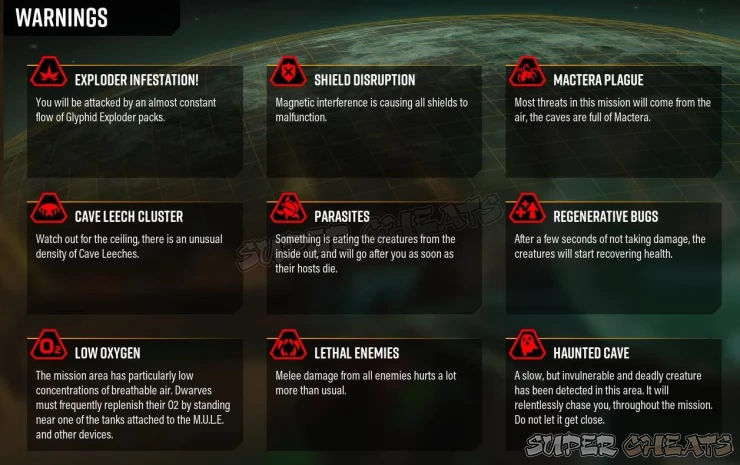
Exploder Infestation!
* A pack of Glyphid Exploders will spawn to rush your crew. These attacks are separate from the standard swarms that will trigger randomly during missions. These exploders are also unusually stealthy, capable of sneaking up behind unwary players right before they explode.
* LMG Gun platforms from Engineers are usually a great deterrent since they’ll automatically fire at these sneaky bugs.
Shield Disruption
* Shields are permanently disabled for the entirety of the mission.
* Dwarves will take 30% less damage from enemy attacks and environmental hazards. However, damage from friendly fire and caused by players on themselves will not be reduced.
* Red Sugar is effectively 30% more potent during the mission.
* Shield Link perk will have no effect and therefore, not beneficial to equip during this type of mutator.
* The Gunner’s Shield Generator will not provide personal shields. Other functions like repelling bugs and providing damage resistance will still activaten normally.
Mactera Plague
* Enemies that will spawn regularly during the mission are Mactera (Spawn, Goo Bombers, Tri-jaws, Brundles, and Grabbers). Standard glyphids will appear occasionally or during standard Swarms.
* Bring weapons with high damage output, like the Powered Minigun, M1000 classic, or upgraded LMG Platforms to help deal with this threat.
Cave Leech Cluster
* Cave leeches will spawn in higher numbers and tightly-packed clusters. They’re capable of ensnaring dwarves, with the only way to escape is with the help of allies or using the “Heightened Senses” perk.
* A careless dwarven crew may get wiped out if all of them get ensared with no means of escape.
* Always check large, open spaces where the leeches may spawn like large caverns. Use illumination often like the Scout’s Flare Gun.
* Alternatively, you can deploy the Engineer’s LMG Platform (preferably with the Hawkeye mod) to automatically find and kill these leeches from a distance.
Parasites
* Bugs will contain Carnivorous Larvae inside them, which will burst out once you kill the host. Larger enemies can have up to 3 parasites inside while smaller bugs won’t have any parasites in them.
* Parasites are comparable to standard swarmers but can be easily killed by a single pickaxe swing. Parasites also can’t survive outside their hosts and will die shortly after performing their leaping attack. The real danger is when you’re dealing with swarms, with a large number of hosts capable of releasing several parasites in a short period of time.
* Parasites can pass through the Gunner’s Bubble Shield.
* Weapons with great crowd control capabilities like LMG Platforms (Engineer), Autocannon (Gunner), and Flamethrower (Driller) can be quite effective in dealing with parasite swarms.
Regenerative Bugs
* Any damaged bug will regenerate 5% of its HP every second if it doesn’t get damaged within 3 seconds. This rate of regeneration can be interrupted whenever the creature suffers damage from any source (including environmental effects and DoTs) Thankfully, certain enemies (usually boss-type bugs) will not regenerate HP.
* On missions with higher Hazard Levels, enemies will be more resistant to damage while retaining the same Max HP.
* Glyphids tamed using the Beastmaster perk will also regenerate HP as part of this anomaly’s effect.
* Use weapons that can deal consistent damage like the Flamethrower, Cryo Grenades, Autocannon, LMG Platforms, etc.
Low Oxygen
* During this mission, the air will be toxic and the crew will be deployed only with a limited oxygen supply. A full tank of O2 will last around a minute, which gets depleted at a rate of 1.5% per second.
* If the oxygen supply runs out, the dwarf will suffer 10 damage per second. This damage is directly inflicted to the dwarf’s HP, bypassing any shield.
* Oxygen is refilled at a rate of 10% per second by staying near a Drop Pod, Resupply Pod, Mine Head, M.U.L.E, and other devices depending on the mission.
* If a dwarf goes down and gets revived, the revived dwarf will start off with 42% oxygen.
* Since the M.U.L.E acts as a mobile oxygen resupply point, the team should stay close to it and regularly relocate it as the team moves deeper in the caverns.
* During this type of mission, the main challenge lies during the extraction/escape section near the end. This is because the M.U.L.E will automatically walk back to the drop pod, forcing players to keep up with it. As much as possible, before calling for extraction, plan ahead and stick close to the MULE, especially in high-complexity caves.
Lethal Enemies
* All melee damage dealt by enemies is doubled. Ranged attacks from spitters or Mactera Spawns to name a few, are not buffed by this effect.
* During this mission type, the only way to survive to keep your distance, especially when facing heavy melee bugs like Praetorians and Grunt Slashers.
Haunted Cave
* A ghostly Bulk Detonator called the “Unknown Horror” will continuously pursue and stalk the team throughout the entire mission.
* It deals reduced damage than the standard Bulk Detonator.
* This enemy can’t be stopped or killed. However, you can still slow it down via other effects.
* Some specific missions can’t be haunted like Salvage Operations and Escort Duties.
Anything missing from this guide?
ASK A QUESTION for Deep Rock Galactic
 Join us on Discord
