Mission Types
In Deep Rock Galactic, missions make up the core gameplay. This is the only way to earn credits, XP, and materials for upgrading your equipment. The game will give the most tenacious dwarves huge bounties for completing riskier and tougher missions. In this page, we’ll discuss various mission types and various factors that can either increase the difficulty, earn better rewards, or both.
Missions Overview
There are currently seven mission types in the game. Each mission type has its own primary objective and a random secondary objective. The mission’s length will always depend on its hazard level and complexity. Higher hazard level and the more complex the cave you’ll explore, the longer the mission will take but the rewards will be higher.
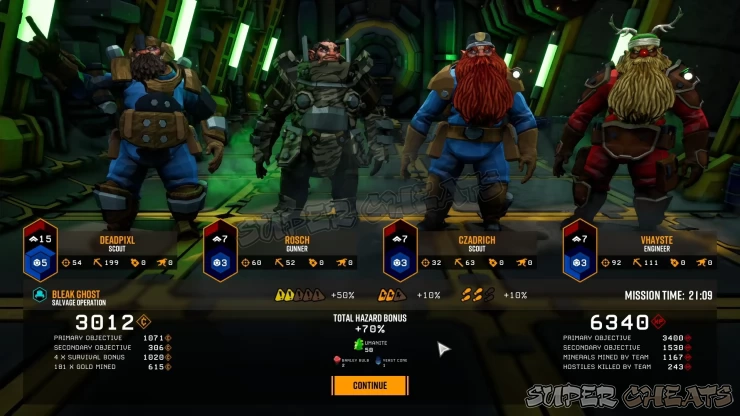
Missions can be selected from the Mission Selection Terminal located back in your home station. When playing with friends or other players, only the Host can select a mission. Missions are rotated and refreshed regularly so you’ll find different missions for different sessions. Each mission type will become available for hosting once the probationary period Assignment is completed.
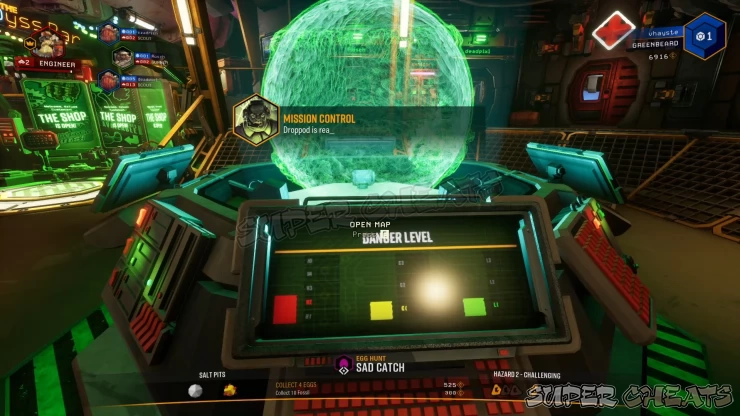
Successfully completing missions will award players with Credits and XP. Crafting materials obtained on some missions can also be used on Equipment Upgrades or Vanity/Cosmetic items. If you fail a mission, you’ll still be able to retain 25% of the credits and XP. Thankfully, the resources you’ve mined will still be retained.
Mining Expedition
This is one of the most basic missions and is immediately available to new miners. The mission’s objective is straightforward and linear; explore the interconnected caverns (usually separated by a dirt wall) until you locate the “treasure trove” deep inside the cave - a cavern full of resources to mine.
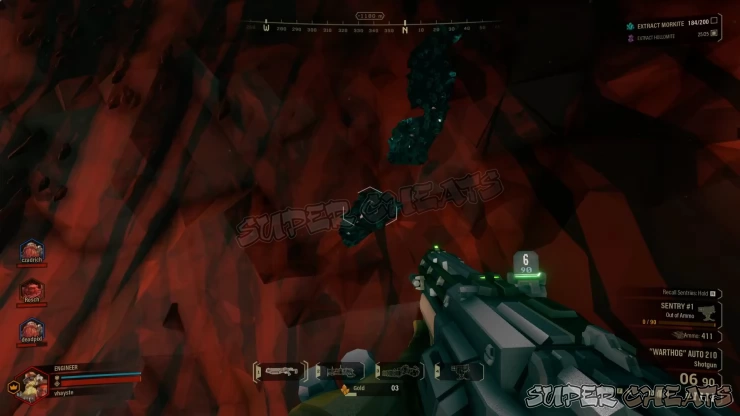
You’ll then need to collect the required amount of Morkite before you can call in the drop pod to escape the cave and return with your bounty. Optional objectives can also be completed for extra rewards. The amount of morkite required will depend on the mission’s length and complexity. After reaching the quota, you’ll have 5 minutes to reach the drop pod and complete the mission.
| Primary Objective | Complexity | Hazard Level |
|---|---|---|
| Collect 200 Morkite | 1 | 1 |
| Collect 225 Morkite | 2 | 1 |
| Collect 250 Morkite | 2 | 2 |
| Collect 325 or 400 Morkite | 3 | 3 |
| Possible Secondary Objectives |
|---|
| Collect 10 Alien Fossil |
| Exterminate 10 Fester Fleas |
| Collect 15 Apoca Bloom |
| Collect 12 Gunk Seed |
| Collect 20 Boolo Cap |
| Collect 25 Hollomite |
| Collect 14 Ebonut |
Egg Hunt
For this mission, you’ll have to find and collect Alien Eggs. These are buried inside walls and ceilings. The giveaway for these will be the obvious organic mass of fleshy tentacles and tendrils on the surface where the egg is buried. Thankfully, the eggs can also be easily seen through the Terrain Scanner.
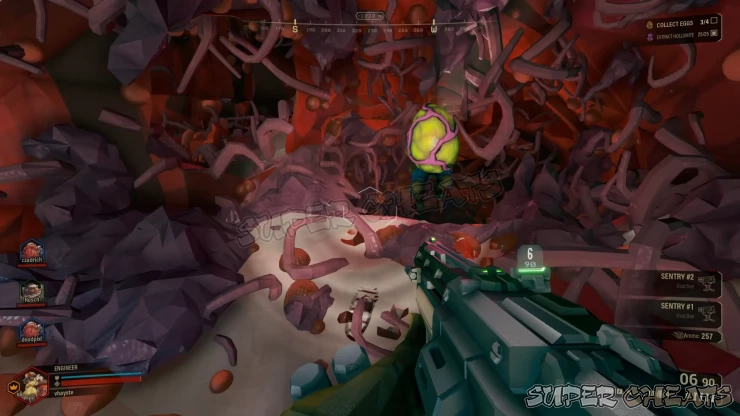
Upon collecting an egg, you’ll hear a roar and a group of bugs will spawn as a response. There’s even a chance that the egg retrieval can trigger a swarm. The eggs are bulky and heavy enough that will require a dwarf’s both arms to lift. The collected eggs must be deposited on the M.U.L.E like any other resource. The amount of eggs required will also depend on the mission length and complexity. Like other missions, there are also secondary objectives that you can complete for bonus rewards.
| Primary Objective | Complexity | Hazard Level |
|---|---|---|
| Collect 4 Alien Eggs | 1 | 1 |
| Collect 6 Alien Eggs | 2 | 2 |
| Collect 8 Alien Eggs | 3 | 3 |
| Possible Secondary Objectives |
|---|
| Collect 10 Alien Fossil |
| Exterminate 10 Fester Fleas |
| Collect 15 Apoca Bloom |
| Collect 12 Gunk Seed |
| Collect 20 Boolo Cap |
| Collect 25 Hollomite |
| Collect 14 Ebonut |
On-site Refining
This is a fairly complex mission and may take a while to complete. To make it simpler to explain, we’ll list down the steps:
1. Locate Liquid Morkite wells. These are similar to geysers but instead, they spew out blue flames. Call in Pumpjacks on those wells.
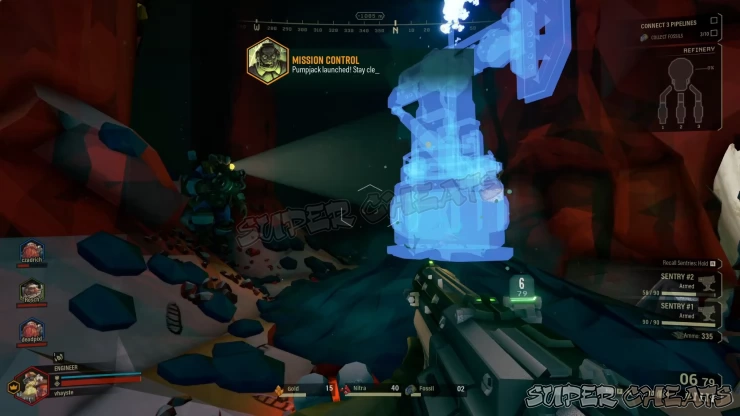
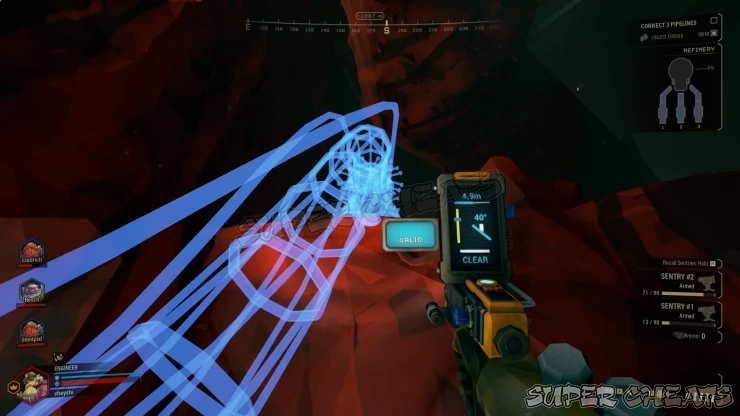
2. Once the pumpjacks have plugged the liquid morkite wells, you must install pipeline segments from the pumpjack that leads back to the main refinery. After installing the pipelines, you still need to install the actual pipes that can carry the liquid morkite back to the refinery.
3. After connecting all pipes from all pumpjacks, you can now activate the main refinery to gather the liquid morkite. During the extraction, swarms of bugs will attack, causing leaks and damage to the pipeplines. Players can grind along the pipes to quickly reach the damaged/leaking part and repair it.
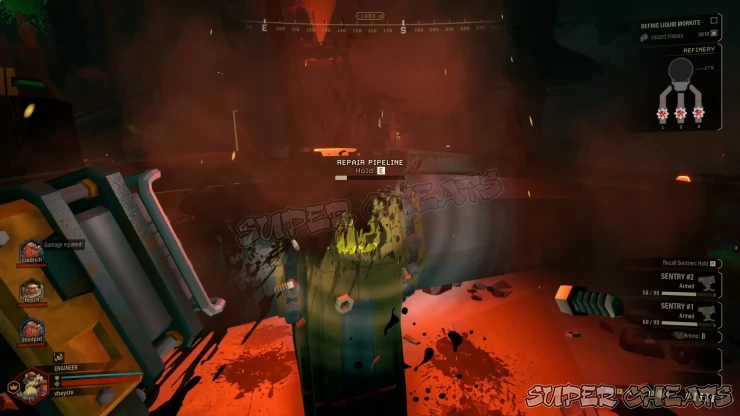
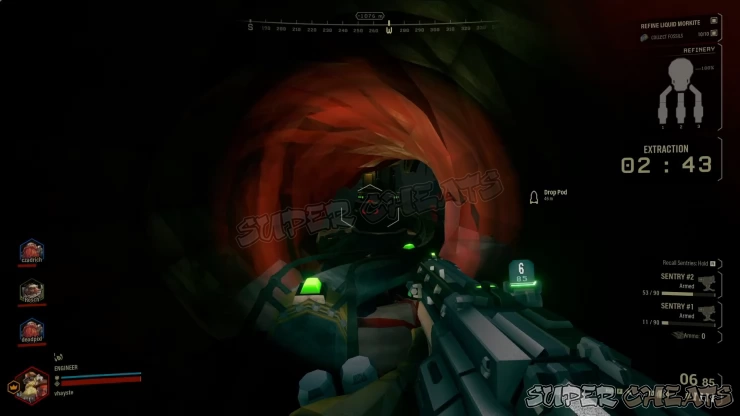
There is no M.U.L.E provided in this mission so any collected resources can be deposited on the refinery platform. After reaching the Liquid Morkite quota, players can now activate the Launch button on the refinery platform so it can launch back to orbit with the refined liquid resource inside it. After launching, players need to wait for their drop pod to arrive. Players will have only 3 minutes to reach their drop pod. Thankfully, they can still grind the installed pipelines for faster movement.
| Primary Objective | Complexity | Hazard Level |
|---|---|---|
| Refine Liquid Morkite (3 wells) | 2 | 2 |
| Refine Liquid Morkite (3 wells) | 3 | 3 |
| Possible Secondary Objectives |
|---|
| Collect 10 Alien Fossil |
| Exterminate 10 Fester Fleas |
| Collect 15 Apoca Bloom |
| Collect 12 Gunk Seed |
| Collect 20 Boolo Cap |
| Collect 25 Hollomite |
| Collect 14 Ebonut |
| Collect 100 Dystrum |
Salvage Operation
For this mission, your team needs to locate broken mini-M.U.L.Es. You can easily find these since they’ll be beeping and a green “blip” from its beacon. After locating the mini-M.U.L.Es, you’ll need to find its legs. The legs are also emitting a visual white beacon and they’re found in the immediate area around the mini-M.U.L.Es. While recovering these legs, you’ll have to deal with the occasional swarms of bugs.
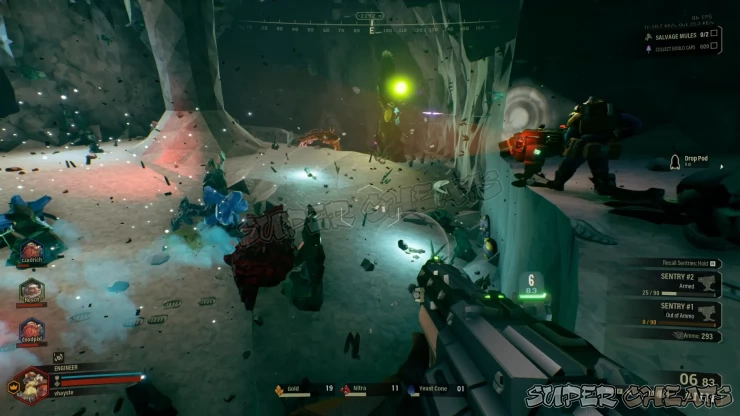
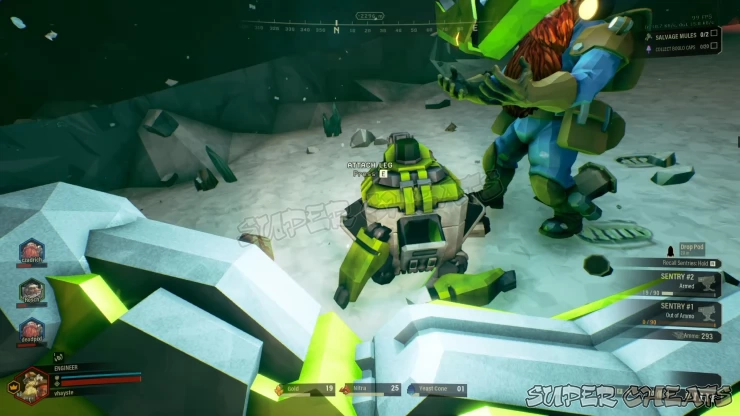
Pick up these legs and bring them back to the mini-M.U.L.Es. Interact with it while carrying the leg to attach it to the mini-M.U.L.E. The mini-M.U.L.E will only need 3 legs to repair it completely, in which it will automatically return to the pod.
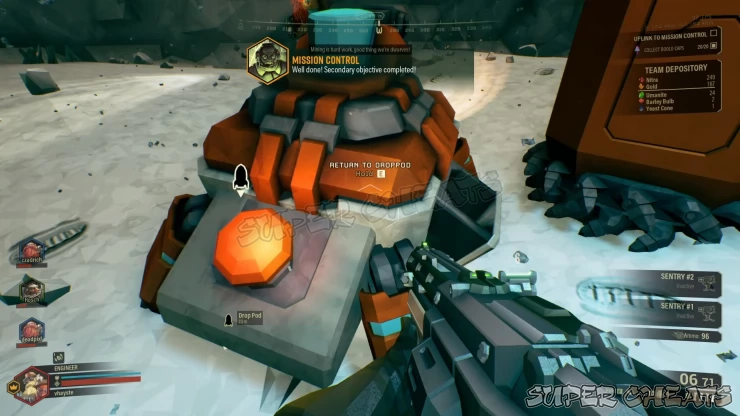
Once all the mini-M.U.L.Es have been repaired, complete the secondary objectives if you can, then press the button on your (main) M.U.L.E to have it return to the drop pod. Once the M.U.L.E returns to the drop pod, it will not be available for the remainder of the mission. However, players can still deposit their collected resources in the nearby grinder.
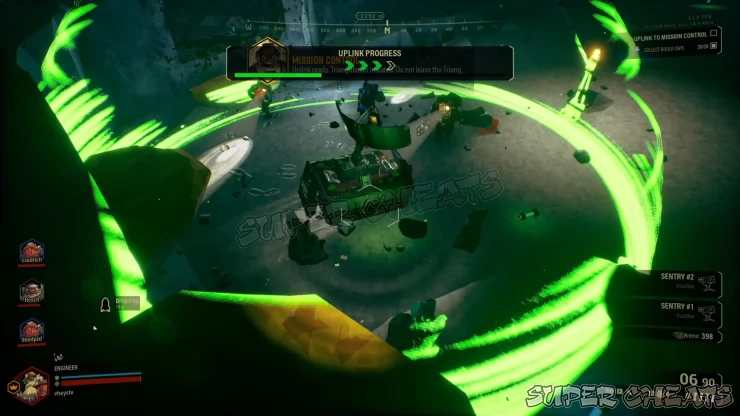
After the M.U.L.E returns to the pod, you’ll now have to establish an uplink back to mission control to triangulate your pod’s location. You can do this from the nearby communications equipment. Once activated there will be a green bubble. Players must stay inside the bubble to maintain the connection while a swarm of enemies appears and attempts to wipe the team out. If there’s no dwarf inside the bubble, the uplink progress will slow down or even start rolling back. The mission will instantly fail if the uplink regresses back to 0.
After the uplink progress is filled, you’ll have to wait for mission control to send the Fuel Cells for your drop pod. Once the fuel cells arrive, head there and interact with it to prepare the fuel line. After that, the refueling will start and another green bubble will appear. Like the uplink process earlier, dwarves must stay inside the bubble and defend themselves from the assault of bugs until the refueling is complete.
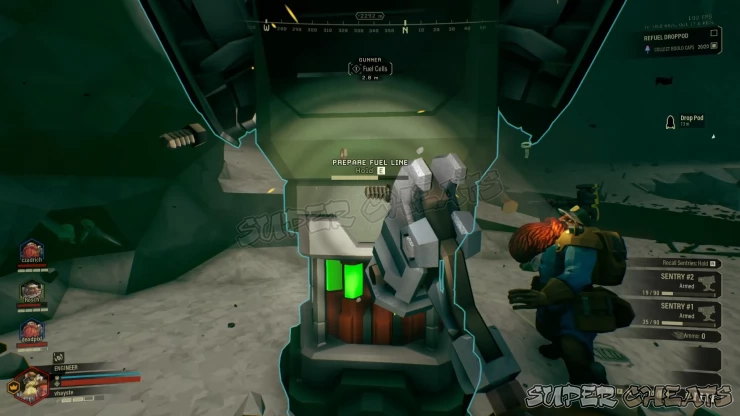
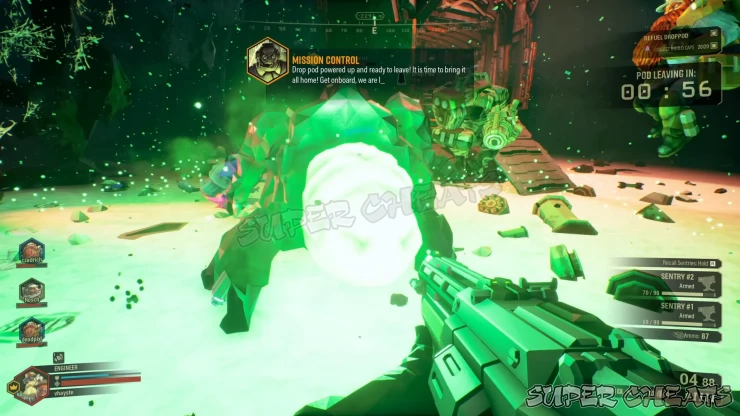
Once the refueling is complete, you still need to wait for the drop pod’s engines to fire up. Try to stay close to the drop pod during this sequence. Hold your ground and keep destroying the bugs attacking you until the engines start. The timer for this objective will appear on the upper-right corner of the screen. Once the timer is up, the drop pod will be available for extraction. You’ll only have one minute before the pod leaves so drop everything and head back to the pod to complete the mission.
| Primary Objective | Complexity | Hazard Level |
|---|---|---|
| Salvage 2 M.U.L.E.s | 2 | 2 |
| Salvage 3 M.U.L.E.s | 3 | 3 |
| Possible Secondary Objectives |
|---|
| Collect 10 Alien Fossil |
| Exterminate 10 Fester Fleas |
| Collect 15 Apoca Bloom |
| Collect 12 Gunk Seed |
| Collect 20 Boolo Cap |
| Collect 25 Hollomite |
| Collect 14 Ebonut |
Point Extraction
For this mission, your team will be dropped in along with a mining platform. The mining platform has two central deposit hatches for depositing materials, a launch button (for extraction), two slowly rotating headlights, and three auto-turrets each having 600 rounds of ammo. These turrets will disappear after eating through their ammo stock. There is no M.U.L.E provided to your team in this mission.
Your main objective for this mission is to find blue gems called Aquarq. These are hidden inside walls or ceilings. The spot where these gems can be found are given away by blue crystalline specks on the surface where they’re buried in. These gems must be carried back to the mining platform and deposited to the deposit hatches.
A huge and consistent swarm of enemies will keep pouring in so it is highly recommended to work quickly and complete the main (and secondary) objectives as quickly as possible since the longer the mission goes on, your team’s ammo and supplies (and resupplies) won’t be able to keep up with the enemy spawns.
After reaching the Aquarq quota, players have to press the Launch button on the mining platform. This will launch the said platform back to orbit, and players will have to defend themselves for two minutes before their escape pod arrives. After the pod arrives, players will have three minutes to make their way back to the pod for extraction.
| Primary Objective | Complexity | Hazard Level |
|---|---|---|
| Collect 7 Aquarq | 2 | 3 |
| Collect 10 Aquarq | 3 | 3 |
| Possible Secondary Objectives |
|---|
| Collect 10 Alien Fossil |
| Exterminate 10 Fester Fleas |
| Collect 15 Apoca Bloom |
| Collect 12 Gunk Seed |
| Collect 20 Boolo Cap |
| Collect 25 Hollomite |
| Collect 14 Ebonut |
| Collect 100 Dystrum |
Escort Duty
For this mission, you’ll have to escort and protect a Drilldozer until it reaches the Ommoran Heartstone. Waves of enemies will continuously attack the machine during the mission. The vehicle has three segments: left, right, and body. Whenever the vehicle suffers damage, the left side will take damage first, then the right, and finally the body. The damaged segment can still be repaired. However, if it isn’t repaired in time, it will get “permanently” destroyed for the remainder of the mission. The next segment will take damage next. The mission will end if the drilldozer is completely destroyed.
The vehicle’s speed is determined by the number of dwarves and bugs near it. The more bugs within its vicinity, the slower it moves. As such, it’s very important for the team to stick close to the vehicle to quickly deal with the attacking bugs and immediately repair any damage sustained by the drilldozer.
The drilldozer will eventually run out of fuel. To refuel it, players need to pick up the Fuel Canisters located at the back of the dozer. The beams emitted by the canisters can extract oil from Oil Shales. While the shales can be broken by pickaxes and other conventional methods, dwarves can’t pick them up so it’s still more efficient to use the beam from the fuel canisters to collect oil directly. Once the canister is filled, install it at the back of the vehicle and manually start the drilldozer to continue with the mission. The number of refueling sequences will depend on the mission’s length.
Once the drilldozer reaches the Ommoran Heartstone, it must be manually started to begin drilling into the structure. The shell’s lifebar is divided into 4 parts, each taking around 1:15 minutes to deplete. These parts will also have phases, as listed below.
* Phase 1: Your team has to defend against a swarm.
* Phase 2: Once the outer shell is broken, Flying Rocks summoned by the Heartstone will start dropping on the Drilldozer. Dwarves can destroy these rocks before they hit the dozer.
* Phase 3: Your team has to defend against another swarm.
* Phase 4: Crystals that emit lasers will spawn from the ground. These crystals must be mined or drilled to stop the laser beams.
Once the actual Heartstone is exposed, players can now pick it up and deposit it to complete the main objective.
| Primary Objective | Complexity | Hazard Level |
|---|---|---|
| Protect the Drilldozer (1 Refuel) | 2 | 2 |
| Protect the Drilldozer (2 Refuels) | 3 | 3 |
| Possible Secondary Objectives |
|---|
| Collect 10 Alien Fossil |
| Exterminate 10 Fester Fleas |
| Collect 15 Apoca Bloom |
| Collect 12 Gunk Seed |
| Collect 20 Boolo Cap |
| Collect 25 Hollomite |
| Collect 14 Ebonut |
Elimination
This mission is straightforward but challenging; you’ll have to search for the dangerous Dreadnought-type bugs and kill them. Each of these dreadnoughts are encased in their own cocoons. These can be seen through the Terrain Scanner and will appear as bright red egg-shaped icons.
There will be no swarm spawns during Elimination missions but there are groups of bugs that may attack even during the actual boss fight. Thankfully, you’ll also have access to a lot of nitra deposits, allowing you to call in supply drops as often as needed.
Since the dreadnoughts will not appear until their cocoons are destroyed, it is very important to prepare before triggering the boss fight. Engineers can place their sentries, Drillers can start planting explosive traps, Gunners can zipline to high grounds, and Scouts can illuminate the areas. It’s also important to call in a supply drop before the fight starts so your team can quickly resupply just in case they run out of ammo in the middle of the fight.
Here are more tips for this mission:
* Dreadnoughts can’t get inside Shield Generators.
* Weapons with Armor Breaking effects does not deal extra damage to dreadnoughts.
* Throwables and other effects that slow down enemies will not affect dreadnoughts.
* Dreadnoughts will resist fire, explosive, and electrical damage.
After taking out the required number of dreadnoughts, players can start the extraction phase by pressing the button on the M.U.L.E.
| Primary Objective | Complexity | Hazard Level |
|---|---|---|
| Kill 2 Dreadnoughts | 2 | 2 |
| Kill 3 Dreadnoughts | 3 | 3 |
| Possible Secondary Objectives |
|---|
| Collect 10 Alien Fossil |
| Exterminate 10 Fester Fleas |
| Collect 15 Apoca Bloom |
| Collect 12 Gunk Seed |
| Collect 20 Boolo Cap |
| Collect 25 Hollomite |
| Collect 14 Ebonut |
Anything missing from this guide?
ASK A QUESTION for Deep Rock Galactic
 Join us on Discord
