The Creeping Venom
Monster Hunter Tri Walkthrough and Guide
The Creeping Venom
Hunting Quest: Hunt a Gigginox
Reward: 3400z
Contract: 300z
Time: 50 min.
Area: Tundra
Subquest A: Slay 10 Giggi
Reward: 500z
Subquest B: Destroy 5 Gigginox Eggs
Reward: 500z
Hunting Quest: Hunt a Gigginox
Reward: 3400z
Contract: 300z
Time: 50 min.
Area: Tundra
Subquest A: Slay 10 Giggi
Reward: 500z
Subquest B: Destroy 5 Gigginox Eggs
Reward: 500z
Gigginox is a hideous, cave-dwelling monster that can scale cave walls and ceilings and emit poisonous gas from its body. Gigginox are also parent to those annoying Giggi whelps that populate the cave areas in the Deserted Island, Sandy Plains and Tundra zones.
This monster is weak against fire, so a weapon that deals fire damage is ideal for this fight. The Peco Flint (a step up from the Plume Flint) is the best such weapon available to you if you've been playing exclusively offline and haven't unlocked the five-star tier of quests yet. Hammers are good against Gigginox because they allow for more mobility than the Great Sword or Lance. Though you can't block while using a Hammer, being able to block is not important when facing Gigginox, as the poison it emits cannot be blocked.
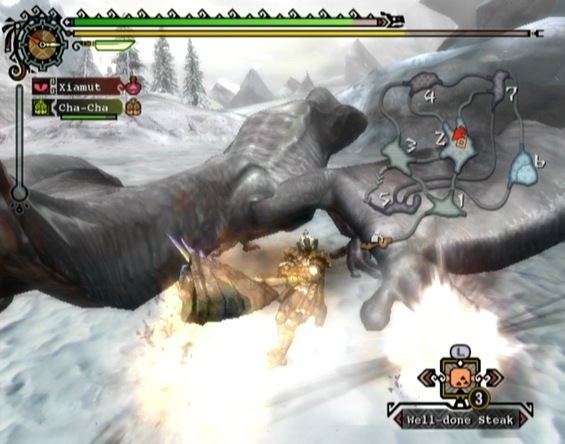
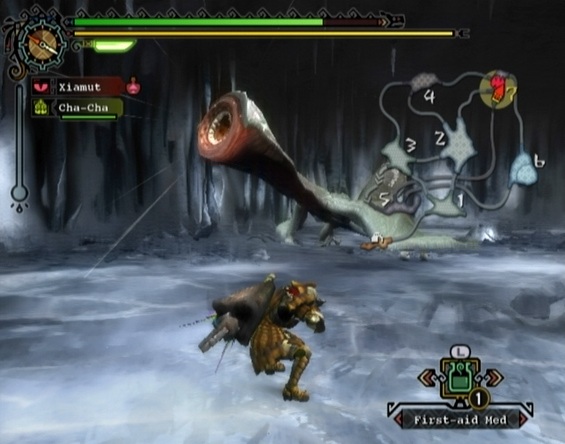 Gigginox: the stuff of nightmares |
Bring the usual 10 Mega Potions, some Raw Meat/Well-done Steaks and Whetstones. You'll also want to bring a couple of Dung Bombs and 10 Antidotes. To create a Dung Bomb, combine a Sap Plant with a Stone or Iron Ore to create a Bomb Casing and then combine that Bomb Casing with Dung. Antidotes can be purchased from the Market in Moga Village or created by combining Antidote Herbs with Blue Mushrooms.
You may want to bring a trap as well. Make a basic Pitfall Trap by combining a Spider Web with Ivy to make a Net and then combine the Net with a Trap Tool (buyable at the Market) to make the trap. Alternatively, you can make a Shock Trap by combining a Thunderbug with a Trap Tool. Though you can only hold one of a trap type in your inventory, you can also carry with you the materials for two more traps of that type and combine those materials in the field.
Remove the Map, First-aid Meds, Rations, Antidotes, Paintballs (if Cha-Cha isn't wearing his Fluffy Mask), Hot Drinks and Torch from the Supply Box at the beginning of the quest. Gigginox is in Area 5 to start, so make your way there.
Upon entering Area 1, use a Hot Drink to raise your hunter's cold endurance. A heightened cold endurance is necessary on the Tundra map in every area aside from Base Camp. A cold hunter's stamina bar will deteriorate much more rapidly than default, so be sure to down another Hot Drink when the effect of the initial drink wears off.
The cave areas 4 and 5 are dark, which can make fighting Gigginox in either area difficult. Upon entering area 4 or 5, it helps to use the Torch included in the Supply Box to light a couple of the torches posted around the area. Approach one of these torches with the Torch in your inventory unequipped and press the A button when the item icon appears above your hunter's head to light it. Alternatively, you can hold R with your Torch equipped and press the A button.
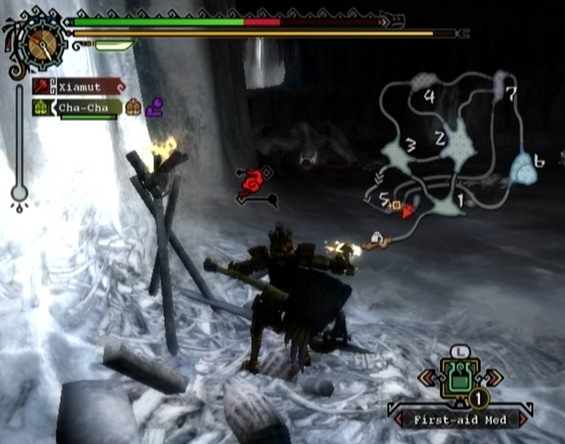 Light the torches in Areas 4 and 5 so you can make out your foe. |
If you enter Area 5 and Gigginox is nowhere to be seen, move on to Area 7, which is accessible via the west-most passage at the north end of Area 5.
Against Hammers, Gigginox's weak spot is its head. Attack its neck, stomach, legs and tail with a Hammer for considerable damage as well. Concentrate on attacking its stomach if you're using a cutting weapon such as a Great Sword or Lance. Gigginox's head, neck, legs back and tail are also vulnerable to cutting weapons.
Compared to the other monsters you've faced thus far, Gigginox is nothing you can't handle. The main issue when facing Gigginox is its excessive use of poison. Though you may usually tough it out when poisoned by minor monsters in the field, Gigginox's poison is especially potent and will greatly decrease your hunter's health if you don't remedy it with an Antidote. All in all, since the majority of Gigginox's attacks can be easily avoided, this a simple fight as long as you play conservatively.
When the Gigginox stops, arches its back and slowly begins to rise onto its hind legs, get out of the way! Gigginox will proceed to flop down onto its stomach, spreading poisonous gas all around. If you are caught by this attack, the gas will poison your hunter and knock him or her back. Use an Antidote as soon as possible to minimize health loss.
The Gigginox's body slam attack won't always result in a cloud of poison. This monster actually has two body slam attacks that share the same animation: one poisonous and the other not. When differentiating the two, know that the former attack's start up animation is slower than the latter's.
 Gigginox's poison is especially potent, so be sure to have Antidotes on hand. |
Gigginox can also spit poison from its mouth. When Gigginox takes two steps back and rears its head, it will then shoot a poison projectile at the ground several feet in front of it. As soon as Gigginox takes those two steps back, roll or step to the side to avoid getting hit by the ensuing projectile. As when facing any monster that has a projectile attack, do not allow the Gigginox to face you when it's some distance away. Move in an arc to get closer to your target rather than making a beeline for it. Steer clear of the spot the poisonous projectile lands as well, as the projectile will leave some temporary residue that will poison your hunter if he or she runs into it.
Avoid positioning your hunter in front of Gigginox when attacking it up close, as there are a couple of close-range attacks it can perform and potentially catch you off guard. One such attack is a charge forward where Gigginox pulls back, raises its left wing up and charges straight ahead while expanding and contracting its maw.
Another frontward attack to watch out for is its head whip, where the Gigginox violently arcs its head to the side. This attack is difficult to avoid if you're standing near Gigginox's head (even if not directly in front of it), so keep to Gigginox's side if there isn't an opportunity to attack its head safely.
As with any other monster, Gigginox will enter rage mode by producing a roar that will cause your hunter to flinch if he or she is too close. The Gigginox's skin turns black when it's enraged and its attacks become more quick and aggressive. It's best to simply keep your distance from Gigginox while it's enraged, as these bouts never last long.
Sticky pads on the Gigginox's feet allow it to scale cave walls and ceilings. This makes manually controlling the camera during this fight essential. You'll want to keep an eye on Gigginox while it's crawling around on the ceiling above you, as there are a couple of damaging attacks it can hit you with while up there. The most common attack Gigginox uses from the ceiling is its body slam. Gigginox will hang from the ceiling by its tail before performing this attack. Then, it will twist around and drop down onto its stomach a few feet away.
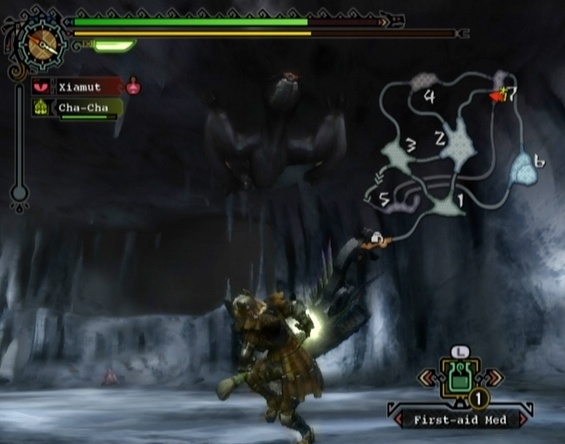 Keep your distance from Gigginox while it's crawling on the ceiling. |
Two other moves Gigginox can use while hanging from the ceiling by its tail are its head whip. Here, Gigginox attempts to strike your hunter by whipping its head from side to side. The other is the decidedly more damaging and terrifying devour attack.
Gigginox's devour attack is reason enough to keep your distance when it's on the ceiling. If your hunter is caught by this attack Gigginox will pin him or her and continuously deal damage until you're able to break free. This attack is much more of a problem if you're hunting solo. If you are hunting solo, hopefully you brought a Dung Bomb or two. Normally while pinned by a monster you would have to rotate the Left and Right Sticks to drain the bar that appears at the bottom of the screen to break free. If you have a Dung Bomb in your inventory, you can select it while pinned and throw it to dissuade the Gigginox from continuing. This attack isn't much to worry about, however, as it's easy to avoid if you're paying attention.
A sure fire way to avoid Gigginox's ceiling attacks is to simply keep your distance while it's crawling around above you. Standing below Gigginox while it's crawling on the ceiling is a definite hazard, so steer clear. Use the Right Stick or D-pad (depending on the control scheme you have set) to keep the camera focused on Gigginox while you run your hunter around the area. Continue doing this until Gigginox drops back down to the cave floor. If you're having trouble manually controlling the camera and sprinting at the same time, you can just as well track Gigginox by keeping an eye on its shadow, which should be visible even in an unlit Area 4 or 5.
To complete Subquest B you must destroy five Gigginox Eggs. Gigginox will occasionally lay one of these eggs during the fight; you can destroy the egg right after Gigginox lays it, but you may want to refrain from doing so until you've completed Subquest A. Giggi will continuously spawn from a intact Gigginox Egg, and since completing Subquest A requires you to kill five Giggi, you may want to kill a few of them rather than smashing the egg right away. The Gigginox you're facing is sure to lay several eggs during the fight, so it's easy to complete these two subquests if that's your goal.
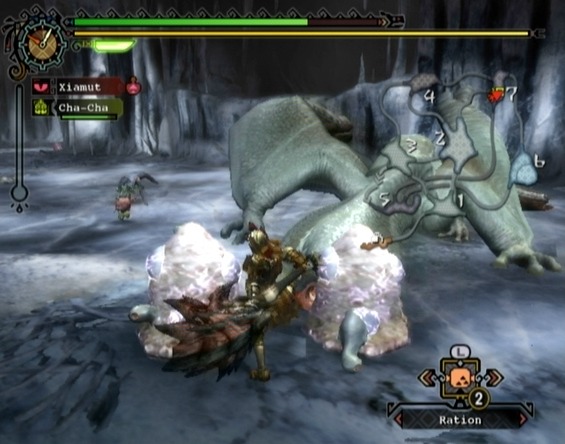 Destroy five Gigginox Eggs to complete Subquest B. Kill 10 of the Giggi that spawn from the eggs to complete Subquest A. |
Be careful while Gigginox is laying an egg, as sometimes it will lay a poisonous explosive that explodes and creates a cloud of poison-inducing gas. To be safe, keep your distance while Gigginox is laying an egg to avoid taking a hit.
As with any monster, the key to defeating Gigginox in good time is to seize opportunities that allow you to safely get a couple of hits in on its weak spot. If your hunter is wielding a Hammer, strike Gigginox's head whenever you can to deal maximum damage. The best opportunities to attack Gigginox's head are while it's laying an egg and right after. Another opportunity comes after it performs a non-poisonous body slam and another while it's recovering stamina by feeding at a bone pile in one of the cave areas.
If your hunter is wielding a Hammer and you're attacking Gigginox from the back or side to avoid its frontward attacks, aim for its head when it turns around to face your hunter. You can hit its head when it turns to face you at least once or more if it flinches. If the Gigginox doesn't flinch on the initial hit, dodge to the side to avoid taking damage.
With a cutting weapon such as a Lance or Great Sword, target Gigginox's stomach, legs and head. Gigginox's stomach is most susceptible to cutting damage and is an easy target, so focus your attention there (or on its legs) rather than its head. Avoid targeting Gigginox's wings, as any weapon type will deal minimal damage on this area.
When Gigginox leaves Area 5 it will then move between Areas 7, 4 and 2 for the remainder of the battle. It seems to enter Area 2 only when it's close to death. As per usual, Cha-Cha's Fluffy Mask will certainly come in handy, but it isn't essential since Gigginox is quite easy to track.
 Gigginox will move between Areas 5, 7, 4 and 2. |
Like most monsters Gigginox will limp when its health is low and move to another area to rest. Keep after Gigginox if you spot it limping. It will most likely return to Area 5 at this point. Continue attacking Gigginox until he falls to complete the quest.
More Monster Hunter Tri Stuff
I always tried using tinged meat to paralyze gigginox, but he never comes to eat it. Why's that? By the way thanks for helping me defeat gobul and barroth.
this could also be WAY easier by playing online first not that you have to but playing online will give you (after completing the online 3 star quests) +armor a WAY stonger version of previous armor like hunter mail+ which gives around 30 somthing defence and well i killed him with (youll regonize the names if you play online) weapon:guan dao head armor :alloy helm+ body armor:jaggi mail+ arm armor:hunter vambraces+ leg armor:hunter greaves+ he is no prob for me now
You guys don't even really have to fight this boss till you do the villager request: One Chance, since you need flabby hides and by the time you do have to fight you should already be quite strong. (Btw He is weakness is fire. I used the wyvern blade "fire" and killed him easily as he is only a 4* quest).
lol guys you re so noob... i ve beat it on first run,,simply take with you megapots, 10 pots and 10 honeys for quick combine, some antipoison,attk and defensive potions ,and dont go in mission with a jaggi armor but with at least a barroth (upgraded) -
i guess that all the people here who have problem beating monsters are simply rushing the game..no my dears you must farm for better equipment to have some chance :D
Guys...I've tried like 8 times to kill this thing.... each time I had to End via SubQuest. I don't even know it's weaknesses..... Need help man...
so do i AND IM HAVING TROUBLE WITH DIS VENOMUS FCKR!
Yea I NEED to kill what's his name!!!!!!! Love your website
Absolutely!.. what the above said!? No pressure! Loving it.
how much soon?! your guide is the more detailed I ever seen on web! I need it!