A Bard's Tale
Monster Hunter Tri Walkthrough and Guide
A Bard's Tale
Hunting Quest: Hunt a Barioth
Unlock: Complete “Heat Exhaustion” and the “Ancient Mask” Villager Request.
Reward: 4800z
Contract: 450z
Time: 50 min.
Area: Tundra
Subquest A: Wound 1 of Barioth's wings
Reward: 800z
Subquest B: Pitfall Trap Barioth
Reward: 400z
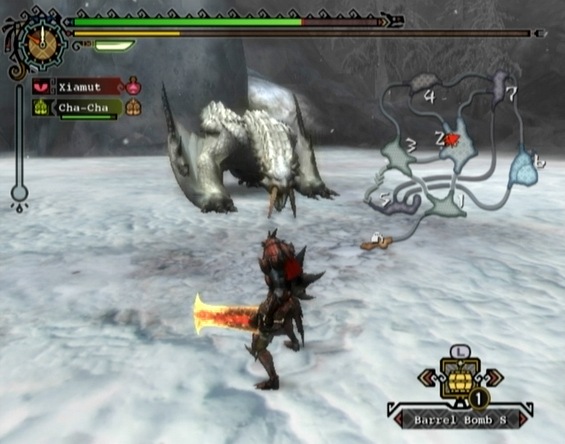
Barioth (not to be confused with the brute wyvern Barroth) is a flying wyvern with a snowy white pelt, amber tusks and piercing blue eyes that glow red when it's enraged. Barrioth's erratic and unpredictable attack pattern make it a tough fight for even a seasoned hunter, so you'd best prepare well.
Surprisingly, one of the best weapon types against Barioth is the good old Sword & Shield. The fast attack speed of this weapon type and the ability jog, roll and use items with the sword and shield out make it very effective against this quick and brutal wyvern. Not just any Sword & Shield will do, however. Barioth is weakest against Fire, so if you've been playing solely offline by far the best Sword & Shield available to you at this point is the Djinn. This weapon has a raw attack power of 196 and boasts 330 Fire elemental damage as well as considerable sharpness. Only the Blazing Falchion (268 raw power and 440 Fire damage) would be a better choice, but to craft that you would need materials only available from higher-tier quests in the online mode.
 Weapons that deal Fire damage are most effective against Barioth. |
Crafting the Djinn Sword & Shield requires Rathalos parts. This monster is featured in “The Wrath of Rathalos” quest, so replay that quest a few times until you've managed to gather the required materials. Specifically, you'll need five Rathalos Shells, three Flame Sacs and two Rath Marrow as well as 17,240z.
The weapon path to the Djinn begins with the Bone Kris. Upgrade to Bone Kris , Bone Tomahawk, then to Qurupeco Chopper and finally the Djinn. The upgrade from Bone Tomahawk to Qurupeco Chopper requires three Flintstones, so you may have to hunt Qurupeco a few times as well before you're ready for Barioth. Flintstones are a common reward at the end of the “Trapping a Trickster” three-star capture quest if Qurupeco's wing flints are broken, so replay this quest a few times and focus your attacks on the Qurupeco's wings until the flints break off.
If you really can't stand using a Sword & Shield, another weapon available to you is the Rathalos Firesword (672 raw power and 420 Fire elemental damage). A Great Sword isn't the best against Barioth, but if you feel confident enough with one, the Rathalos Firesword is an option. The weapon path to this Great Sword starts with the Bone Blade. Upgrade to Bone Blade , Jawblade, Giant Jawblade, Golem Blade, Red Wing and then finally to Rathalos Firesword. Crafting this weapon requires a lot of Rathalos parts and quite a bit of zenni, so be ready to hunt Rathalos a few times if you plan to go this route.
Once you've crafted a suitable weapon, there are a few more preparations to take before setting out. To start, make sure you have the usual 10 Mega Potions and a decent supply of Whetstones in your inventory. You'll be provided two Hot Drinks in the Supply Box once in the quest, but you may want to bring a couple extra. If you happen to have any Icethaw Pellets (which can be mined in the Sandy Plains zone), bring those along too. As well, be sure to equip Cha-Cha with the Fluffy Mask if you haven't already.
You'll also need a Pitfall Trap, at least two Barrel Bomb Ls and at least one Barrel Bomb S. You can make the Pitfall Trap by combining a Spider Web with Ivy to make a Net and then combining the Net with a Trap Tool (buyable at the market) to make the trap. You can purchase the barrel bombs at the market in Moga Village.
 Barioth's attacks are quick and brutal, making him a challenge for even seasoned hunters. |
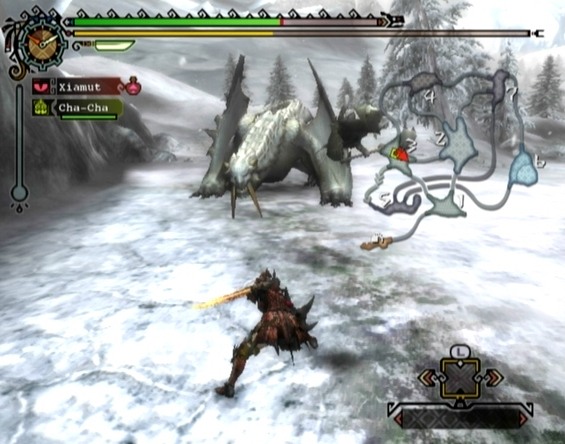
If you haven't made use of traps in previous quests, you'll certainly want to for this one. Reason being, you can use the Pitfall Trap and Barrel Bombs to wound one of Barioth's wings right at the start of the quest, completing both Subquest A and Subquest B in the process. Even if you don't care about completing these subquests, breaking one of Barioth's wings early will make this fight considerably easier. When Barioth's wing is wounded, there's a chance it will lose balance and stumble, giving you an opening to attack. Wounding both of Barioth's wings is even better, but wounding one with a Pitfall Trap and Barrel Bombs is a start.
Once in the quest, remove the Map, First-aid Meds, Rations, Hot Drinks, Cleansers and Torch from the Supply Box. If this is your first time attempting this quest, Barioth will be waiting in Area 2. If you've already attempted this quest and have seen Barioth's introductory cutscene, Barioth will start in Area 6. Either way, head straight for Area 2 once you have everything you need from the Supply Box.
Remember to use a Hot Drink on your way to Area 2, as heightened cold endurance is necessary on the Tundra map in every area aside from Base Camp. A cold hunter's stamina bar will deteriorate much more rapidly than default.
Upon entering Area 2, kill the two Baggi at the east end of the area. When Barioth starts in Area 6, within three minutes it will fly to either Area 2 or Area 7. Signal Cha-Cha by pressing the Select button to bring up the Hunter menu and then pressing the Start button to mark Barioth's location on your map. Watch where it flies; remain in Area 2 if Barioth is on its way there, otherwise head to Area 7.
Before Barioth touches down, set your Pitfall Trap a few feet away. Once Barioth has spotted your hunter and lets out a deafening roar, start trying to lure Barioth onto the trap. Position yourself so your hunter and Barioth are standing on opposite sides of the trap and with any luck you'll soon make a catch.
As soon as Barioth is caught in the Pitfall Trap, move in and set two Barrel Bomb Ls right below the spikes on the outside of either one of its wings. With the Barrel Bomb Ls in place, quickly set a Barrel Bomb S at the same spot and then sprint away to avoid getting caught in the explosion. If you set the Barrel Bombs correctly and in good time, the explosion will wound the wing. As soon as the bombs go off, leap in with your Sword & Shield and you may be able to strike Barioth once or twice before it escapes.
Wounding Barioth's wing
Complete Subquest B and a Pitfall Trap, along with some First-aid Meds, Rations and Hot Drinks, will appear in the Supply Box back at Base Camp. Be sure to take the Pitfall Trap and other items (including the Sub A supplies if you managed to wound Barioth's wing) if you ever make a trip back to camp (voluntarily or otherwise).
Move in and start attacking once Barioth has broken free. Attacking Barioth's head will deal the most damage, but putting yourself in front of Barioth is not the best idea. As such, focus most of your attacks on Barioth's stomach and tail. These areas are quite easy to get at with a Sword & Shield and you'll still deal decent damage. Of course, if you see an opportunity to get a few hits on Barioth's head, go for it, but quickly roll or sprint away to avoid retaliation. Try your best to wound its intact wing as well, as doing so will make Barioth more likely to stumble.
Barioth's move set includes several fast, damaging attacks that can be difficult to evade. If you're using a weapon other than a Sword & Shield, you may find yourself having to block strings of Barioth's attacks before you can get in an attack of your own. This is why the Sword & Shield shines in this fight, as you can jump in, pull off a quick combo and then roll or sprint around Barioth to avoid its attacks rather than playing overly defensive. Do use your shield if necessary, but blocking excessively can really drag out this fight.
It's best to stick close to Barioth and attack it from behind or the side. This way you can avoid most of Barioth's lunge attacks, which are among its most damaging. Avoid standing in front of Barioth's wings in this regard.
Keep an eye on Barioth as it jumps around the area, as it will often attack with a lunge immediately after. Barioth's lunges can be difficult to evade, so block with your shield if necessary. Keep your distance from Barioth while it's hovering too, as it can drop onto your hunter and inflict heavy damage.
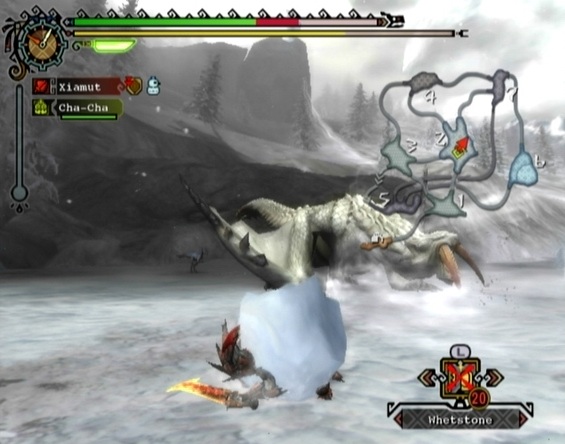 A hunter who takes damage from the whirlwind created by Barioth's projectile attack will suffer from the Snowman status ailment. |
Watch out for Barioth's projectile attack. Barioth can use this attack while hovering or on the ground, but luckily both attacks are easy to anticipate and subsequently avoid. In both cases, Barioth rears its head back and then spits out an icy whirlwind a few feet in front of it. You can block these projectiles, so use your shield if you don't think you'll be able to get out of the way. If your hunter takes damage from this attack, he or she will be afflicted with the Snowman status ailment.
The Snowman status effect is similar to the Muddy status effect caused by Barroth's area attacks, but a hunter afflicted with Snowman becomes encased in a ball of snow rather than hardened mud. To be rid of this ailment, either rapidly rotate the Left Stick to break free or use a Cleanser. Snowman will disappear normally over time, but rotating the Left Stick speeds up the process and Cleanser will dissipate the snow immediately. Be careful when using Cleanser because your hunter will perform a brief animation afterwards; ensure Barioth isn't staring you down before using it.
Once you've suffered through the Snowman status effect your hunter will take on Severe Iceblight, which is arguably the most irritating status ailment in the game. While suffering from Iceblight, a hunter's stamina will deplete more rapidly and will refill more slowly. This status ailment is particularly dangerous against the lighting-fast Barrioth, as you may find yourself out of stamina and unable to sprint or block. Like every status ailment, Iceblight will disappear by itself over time; however you can cure it instantly with an Icethaw Pellet.
The best opportunities to deal damage to Barioth occur while it's low on stamina, indicated by its sluggish movement and drooling mouth. Barioth will fail when using its whirlwind projectile attack while its stamina is low, giving you a chance to move in and damage its head. Be careful though, as Barioth can still use its projectile attack if it enters rage mode while low on stamina.
Barioth will attempt to restore its stamina by feeding on the Popos in Area 2 or 3. If Barioth is low on stamina and it's flying to a new area, get after it quickly and you might be able to catch it feeding. Move in quickly and you may be able to pull off one or two combos before it's finished.
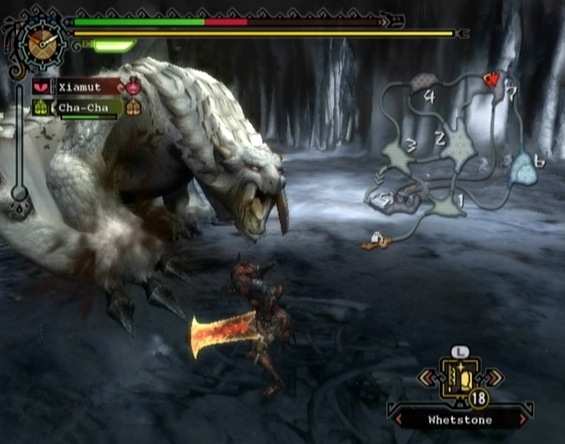 Break Barioth's tusks and you'll receive an Amber Tusk on the reward screen at the end of the quest. |
As with most monsters, you can cut Barioth's tail for an extra carve and to lessen the effectiveness of its tail whip attack. Barioth will often pause for a moment between attacks, allowing you to easily reach and damage its tail. You can also break Barioth's tusks by attacking its head. Break Barioth's tusks and you'll receive Amber Tusks on the reward screen at the end of the quest.
If Barioth ventures into Area 4, use the Torch provided in the Supply Box to light the torch posted at the north or south end of the cave. To light one of these torches, with the Torch in your inventory unequipped, approach the torch and press the A button when the item icon appears above your hunter's head. Alternatively, you can hold R with your Torch equipped and press the A button.
When Barioth is close to death, it will begin to limp and eventually make its way to Area 6 to sleep. It may stop in another area on its way to Area 6, but you won't have to fight it there for long. If Barioth manages to reach Area 6, wait a bit before entering the area so it can go to sleep. Give Cha-Cha the signal (assuming he's wearing the Fluffy Mask) to mark Barioth on the map. Wait until the icon turns teal, indicating that Barioth is resting, before entering Area 6.
Barioth will be resting on the high ground in Area 6. You can climb up to Barioth using the ledges on the side of the platform. If you have a Pitfall Trap in your inventory, you may as well use it here, but it won't be nearly as effective as the first trap you used.
 Barioth will retreat to the high ground in Area 6 to rest when it's low on health. |
Finish off Barioth to complete the quest.
More Monster Hunter Tri Stuff
I like to use the Switch Axe and I have Rathalos Cap, Lagiacrus Mail, Gobul Vambraces, Baggi Coil, and Lagiacrus Greaves (Because I like to mix my armor). I know I have to use the barrel bombs now, but do you have any tips for using a Switch Axe?
I was able to kill it on my second try with a Valkyrie Blade, and a Jaggi set for armor. I completed both subquests and also cut off the tail.
Here's a couple tips when it comes to using the great sword against the Barioth.
- Cut the tail off first. Once the tail is gone, you can pretty much wail on the monster.
- Spin to the right.
- I blocked much more than I am used to or comfortable with against this monster. Usually I don't block at all but I blocked 3 or 4 times this round. The quick block is especially useful.
- You can pretty easily set off some level 3 charge attacks after the tail is gone, after a few tries you should be able to get the timing for it so that you can hit his head just as he rotates toward you.
Good luck guys!
Look up Social Dissonance on Youtube. He has a perfect video on how to defeat the Barioth. You need Large Barrel Bombs and a few small ones. A Hunting Horn. Rathalos Armor is best and a Red Wing Greatsword or any fire blade e.g. Wyvern Fire. Once you look at the video by Social Dissonance, his tactics on how to evade him would make it seem like a piece of cake.
http://www.youtube.com/watch?v=r707-Rz1EEg
aw come on! seriously?? this quest is "coming soon" since the past year!
Dear Idiots.
why cant you write a bloody guide for these kind of hard quests!?!