Trophies (S)
Thank you for printing this page from www.SuperCheats.com.
Remember to come back to check for updates to this guide and much more content for Batman: Arkham Knight
Follow this guide to hear about updates
Added:
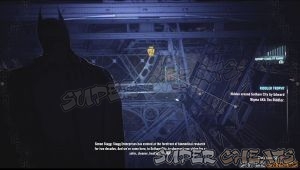
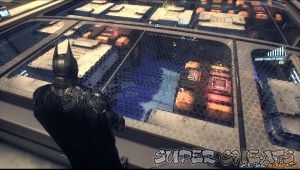
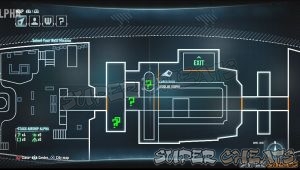
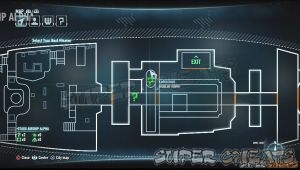
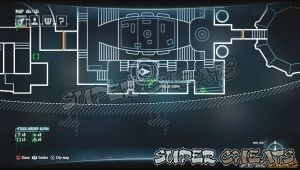
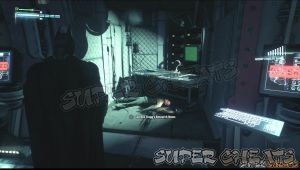
- In Airship Alpha's Foyer, this should be the first trophy you can get in the airships since you'll come across it during the main story mission. In the ship's Foyer area, after climbing down the emergency hatch, the riddler trophy will be immediately visible. Use your RHD to hack the nearby console and open the gate to grab the trophy.

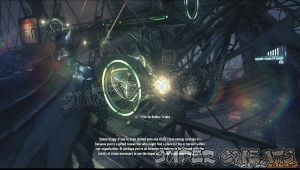
- In Airship Alpha's lower Foyer area, you'll find this trophy inside a ball within a tube. Hack the Riddler Terminal nearby to release the ball containing the trophy. Now you ahve to access the stability controls again and guide the ball through the series of tubes and openings below.
- In Airship Alpha's lower Foyer area, look up and find a small compartment with green LED. If it's blocked, tilt the airship again to remove the obstacle. Now use your Remote Electrical Charge device to open the gate. This will allow you to grapple on the ledge and get the trophy.

- In Airship Alpha's lower Foyer area, deactivate the magnet from the magnetic crate in the bottom, tilt the ship to the right. Disconnect from the stability controls so you can remove the grate to the left of the doorway containing yet another Riddler Trophy.

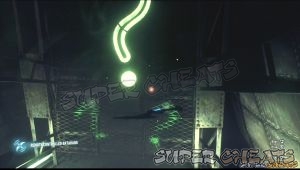
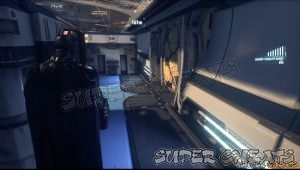
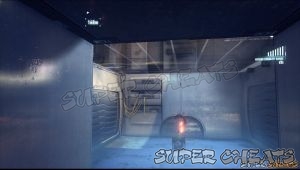
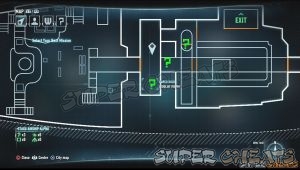
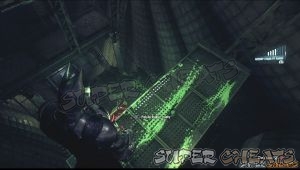
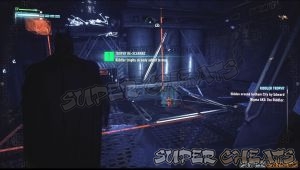
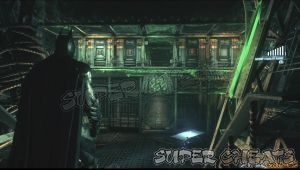
- In Airship Alpha's lower Cargo Hold connecting to the lower Foyer area, there's a small space where you have to grapple to an overhead hatch to proceed. Stand on the pressure plate to light up the green question mark then throw your remote batarang. Go through the opening in the metal mesh and hit the dot on the question mark so you can get the trophy.
- In Airship Alpha's Cargo Hold, you'll need to use the stability controls and RHD to engage/disengage the magnetic locks on the crates below. First get near the grate beside the stability control pedestal. Activate the first crate to the left then tilt the ship so the grate to the right clears the way. Activate its magnetic lock afterward. Enter the grate then continue along the path. Now deactivate the lock of the next crate blocking your way then tilt the ship to the left. Next, place some explosive gel on the wall to the right and blast it.
Now tilt the ship again to the right so the crates will go through the space behind the newly opened doorway. Turn to the left then enter the grate there. Follow it to reach a Riddler Trophy.
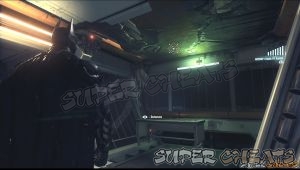
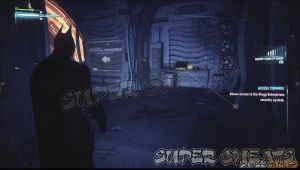
- In Airship Alpha's Cargo Hold, you'll need to have Stagg's voice imprint. This is acquired through normal story progression. Open the voice-locked door and continue along the corridor. There's a sentry gun in the end of the corridor right after the turn so blind it using your RHD and destroy it. The trophy is right behind it.

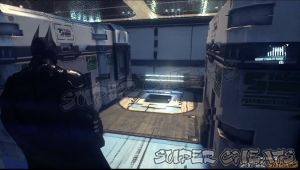
- In Airship Alpha's Cargo Hold, inside the voice-locked room, there's an overhead hatch. Enter it and you'll find a floor layout of several pressure pads. The trophy is right past that open hatch on the ceiling. However, stepping on the pressure pads will close it. Use your Line Launcher then hold L2 and press R1 to Wire Walk. While perched above the wire, grapple to the open hatch and collect the trophy.
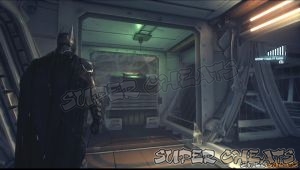
- In Airship Alpha's Cargo Hold, inside the voice-locked room, stand on the table to the right, under the cracked ceiling. Apply explosive gel there and blow it up. Now tilt the ship to the right to make the crate fall down. Now tilt the ship to the left to destroy the glass wall. It may take 2-3 hits before glass gives away. Once done, collect the trophy with your Bat Claw.

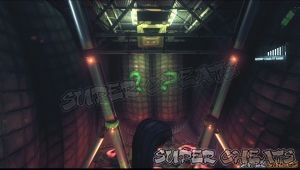
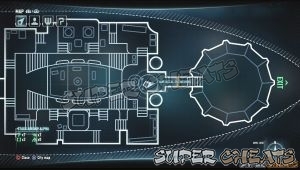
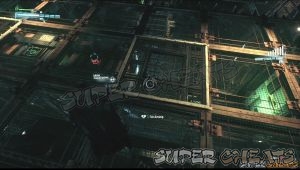
- In Airship Alpha's connecting corridor leading to the Research Lab from the Cargo Hold, there's a ledge overhead where you can grapple to. Turn around to find another Riddler Trophy. You need the three Batarang skill before you can target all three question marks and hit them at the same time.

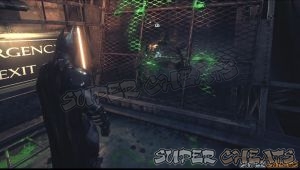
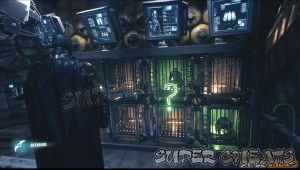
- In Airship Alpha's Research Laboratory, One of cages holding a monkey in the far side of the research lab has a riddler mark. Hack the console with your RHD to remove the cover and reveal the monkey. Take note that the monkey will go towards your direction so stand near the pressure pad, hit the dot to remove the barricade and let the monkey go to the pressure pad on the other side of the cage. This will remove the cover of the Riddler Trophy on the ceiling. Use the Bat Claw to get it.

- You can find another Riddler Trophy under the deck where you accessed Stagg's computer. Hack the console with your RHD to remove the cover. Like the other monkey, you have to guide the monkey on the two pressure pads within 5 seconds of each other. Keep hitting the question mark's dot to raise the grates and clear the path to the pressure pads. After making the monkey step on the pressure pads quickly, the trophy is yours.

- In Airship Beta's Biological Engineering Bay, to the NE corner. You need to use the voice synthesizer to open the gate. Take note that you need to go far in the main story where you'll manually calibrate the synthesizer to match Stagg's voice.
- In Airship Beta's Biological Engineering Bay, under the stairs of the northern observation platform to the left. You need to use the Freeze Blast to get it.
- In Airship Beta's Biological Engineering Bay, find the monkey cages in the SW corner. Hack the console with your RHD to reveal the monkey cages inside. Take note that these monkeys will follow your movement. Now hit the dot on the question mark again with your batarang to operate the cage locks and guide the monkeys there to get the trophy.

- This is located in the lower deck to the middle-south of Airship Beta's Biological Engineering Bay. Use your REC to power up all three generators to get the trophy.
- This is located in the lower deck under the cage where Stagg was kept. Like before, you have to guide the chimps to the pressure pads and use the batarang to operate the cage locks. Use the Bat Claw to retrieve the trophy once done.

- In Airship Beta's Subject Testing area, you'll find this trophy inside one of the cells. In the end of the corridor, you'll find an access terminal. Use Stagg's handprint to gain access and open the cell containing the Riddler Trophy. Backtrack and collect it.
- In Airship Beta's Subject Testing area, head to the left where you can blast another wall. You'll find yet another Riddler Puzzle you need to solve to get the trophy. First, move all crates to the left. Get inside one of the open cages then grapple through the grate above. Now move all the crates to the left and lock the rightmost crate. Tilt the ship to the right this time to remove the crate obstructing the way. Enter the grate and collect the trophy in the bottom.


- In Airship Beta's Subject Testing area's NE corner corridor, you'll find a locked crate with a trophy inside. Open the lock using the voice synthesizer, then access the Airship's Stability Controls. Tilt the ship to let the crate crash to the waiting turrets in the next corridor. Let the container crash through the airlock and out of the airship. Fly down and you'll find the crushed container near the water's edge. Collect the trophy


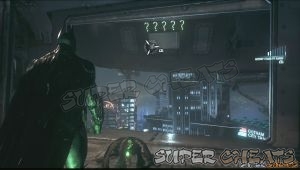
- In Airship Beta's Subject Testing area, there's a lone pressure pad to the south, by the airlock. Open the airlock and step on the path. Look at the next airship to find five question marks. You have to hit the last dot on the rightmost side to unlock the trophy. Use the remote-controlled batarang to time your projectile's path.

Anything missing from this guide?
ASK A QUESTION for Batman: Arkham Knight
Comments for Trophies (S)
Add a comment
Please log in above or sign up for free to post commentsNo comments yet. Tell us what you think to be the first.
Table of ContentsClose
- Basics
- Story Mode
- Most Wanted Missions
- AR Challenges
- Wayne Tech Upgrades
- Bleake Island Collectibles
- Miagani Island Collectibles
- Founders Island Collectibles
- Panessa Studios Collectibles
- Stagg Airships Collectibles
- Arkham Knight HQ Collectibles
- Trophies
Guide Updates
Get notified of updates to this guide
Many of our guides get updated with additional information. To get an email when this guide is updated click below.
 Join us on Discord
Click to close