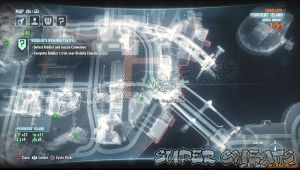
Riddler's Revenge
Thank you for printing this page from www.SuperCheats.com.
Remember to come back to check for updates to this guide and much more content for Batman: Arkham Knight
Follow this guide to hear about updates
Last Updated:
This is probably the longest and most tedious missions in the game. This involves several mini-missions where you complete various challenges and puzzles by the Riddler in order to win the keys to disarm Catwoman's explosive necklace.
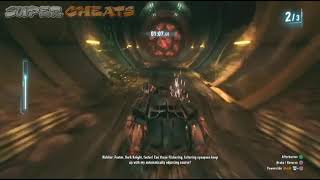
- Head to the Cauldron to track Riddler's last known location. You have to enter the garage with the Batmobile. Remove the blockade and you'll be in Riddler's racetrack. You have to complete three laps before the timer expires.

In addition to the time attack mode, you also have to press Circle to deactivate/reactivate Riddler's blockades. Since you have to manually activate/deactivate them, you may take a few tries to remember all the moving blockades to avoid getting caught if you close it or forgot to bring reactivate the floor.
Also, the obstacles will change after every lap, making it quite difficult to remember them all. The timer resets after you reach the lap so concentrate on not making too many mistakes and you'll be able to clear this course in no time.

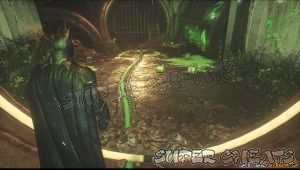
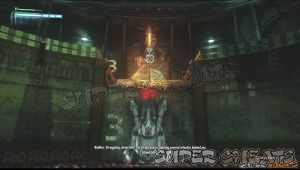
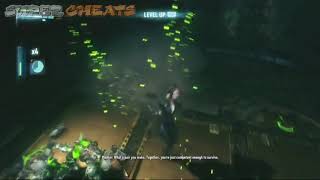
- Once you've reached Magani Island during the story mission where you have to find the access point used by the militia to lock down Mercy Bridge, wait until Riddler calls out for you. Head to the abandoned orphanage to meet with the Riddler. Continue inside and you'll find Catwoman tied up on a seat. Rescue her and you'll have to team up against Riddler's army of robots. You can execute tandem combos and takedowns and you can also switch characters.

Riddler will reveal that you have to clear his tasks in order to remove the explosive necklace Riddler placed on her. After finishing up the robots, leave the orphanage.
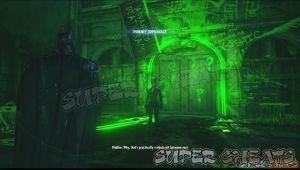
- After leaving the orphanage, continue to the Riddler's designated trial location in Blake Island. The Batmobile is still required for this challenge.

Once inside, drive to the wooden ramp with the small green pressure pad. Disembark, have Batman stand on that pad then remote control the Batmobile. Place the vehicle in the back of the tilting wooden plank, then press circle to activate the small green bar to block it underneath.
Make the Batmobile go up the ramp, activate the green floor, move to the center platform, then activate the green floor. Fall down in the next ramp, and tilt it so you can use it as ramp. Press circle use to lodge the red bar under the ramp then floor it while using afterburners. Now while the Batmobile is in mid-air, press circle again to activate the green floor. After successfully landing on the next ledge, move around and find a spot where you can use the power winch.
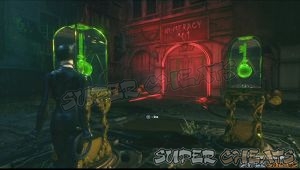
Switch control to Batman and have him stand on the green pressure pad in front of the bulbs. From here, you can switch to Catwoman and have her open the cabinet containing the correct key. The lighted bulbs in front of Batman represents the layout of the cabinets in the orphanage. The correct cabinet is the one in front of the Numeracy 101 door, in the corner. After selecting the correct key, the door will turn green.
- Now you have to head back to the orphanage. As soon as you get in, the Riddler will have another puzzle for you. You need to use your batarang to arrange the floor pieces to a question mark. Notice the mirror outer ring? Step back a bit until the green light above can be seen as the “dot” and complete the question mark, as seen in the image below.

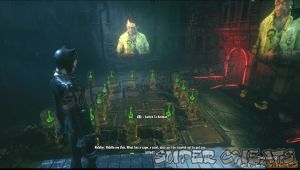
- Meet up with Catwoman and head to the green door. (Numeracy 101) Have Batman and Catwoman step on the pressure plates. There will be flashing numbers and you have to hit the lit question marks in the correct order to complete the puzzle. While using Batman, use your Batarang to hit the question marks in this sequence: 31452. Switch to Catwoman and have her hit the question marks in this order: 13524. After solving the puzzle, you have to defeat the Riddler bots. Do so and you'll get another collar key.

- The next trial is located under the Elliott Memorial Hospital. You need the Batmobile for this so you'll only be able to do this once you lowered the bridge to this island. This is another race where cornering and drifting is the key to win. Don't worry about getting crushed once in the while during the course; as long as you drive carefully and drift, you'll be able to earn bonus time as well.

After completing the three laps, step on the pressure pad at the start of the course to reveal the next key. Take note of the location and switch to Catwoman to open the correct cabinet. The Crushinator AR Challenge will be also unlocked after completing this objective.

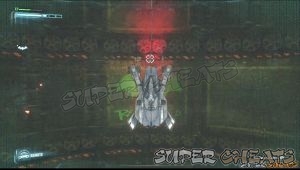
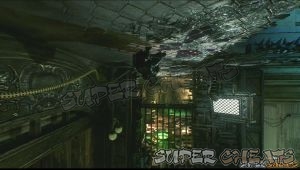
- Head to Kingston with the Batmobile again. Enter the garage and wait for the elevator to take you to yet another underground cavern. Once you see the large green pressure pad on the wall, back the Batmobile a bit, floor it, then eject yourself so you can glide towards the green button. This will open yet another one across the sewer. Like before, you also need to reach it by gliding.

After tapping the button, you can go back to the Batmobile and eject-glide yourself again. This time, you have to go through the tube with spinning blades. It's okay to touch the walls then glide again until you reach the last pressure pad on the wall. Now step on the pressure pad near the elevator to reveal the next key. Switch to Catwoman and select the correct cabinet.

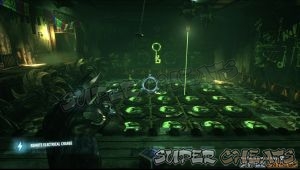
- Go back to the Orphanage and join with Catwoman. Now head to the Intro to Physics door. Climb up the ledge and have Batman stand on the first pad to the left. Switch to Catwoman and place her on the second pad. Now hit the dot on the question mark on the wall to release the charge and let it travel on the tube. Once the charge travels, you have to quickly change positions to modify the positions of the tubes so the charge can pass through.

Take note that even if the camera view changes, you're free to move around and switch between your characters. To make it easier, you can follow the instructions below:
1. After charge travels past the lower first tube, move Batman to (pad) 3. (Be careful not to step on Pad 2)
2. After charge travels past the lower second, move Catwoman to 3
3. After charge travels past the upper third tube, move Batman to 2
4. After charge travels past the lower third tube, move Catwoman to 1
5. After charge travels past the upper second tube, move Batman to 1
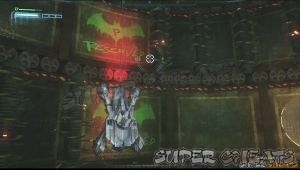
After completing this, the cabinet will be unlocked. Have anyone step on the green pad and battle the Riddler bots. Only Catwoman can damage red bots while Batman can take care of the blue ones. Defeat them all and collect the key.
- Head to the next trial location. The entrance is located on the lower road. To start off, fire the winch on the overhead bar then have the Batmobile go on reverse towards the hole. The winch will hold the Batmobile on the wall. Move the Batmobile to the right so that the metal ring inside the hole moves and until the spot that says “reserved” is placed underneath the car.


Now eject-glide yourself to reach the opened hole with the pressure switch. Step on it then return to the Batmobile. Pull it up and head to the second overhead winch. Attach your power winch there and lower the Batmobile again to the second ring this time. Move again to the left to reach the “reserved” spot.
Eject-glide to the next hole and blast it open with an explosive gel. Run through the electrified floor and step on the pressure switch. Blue riddler bots will appear. Take them all out then return to the Batmobile.


Pull it up then lower the car again using the #1 ledge. Go down the second ring and move it to the right until the “reserved” spot in the second is rested underneath the car. This will make a clear path when you lower the car later from ledge #3 all the way to the third ring.
Pull up then lower the Batmobile in the third and last ledge. Go down to the bottom ring and move it to the right until you park in the third “reserved” spot. Eject-glide to the next hole and step on the pressure pad. On your way out, two sentry guns will be deployed. Remote control the Batmobile and pull it up. Use it to snipe the sentry guns and clear your path.

Now jump on the central platform in the middle of the well where the last pressure pad is located. The key's location is displayed overhead. Switch to Catwoman and select the correct cabinet to get the key. Now switch to Batman and head back to the orphanage to regroup with Catwoman.

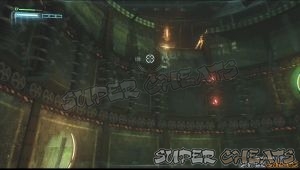
- After regrouping with Catwoman, head to the Advanced Deathtraps door. Have Batman stand on the pressure plate in the corner of the room then switch to Catwoman. Press R1 for her to claw her way on the ceiling and make her way to the next room. Have her step on the pressure plate in that room too.
Now the floors will be electrified. Now take a lot ahead, in the large question mark symbol. The bulb lighting up in the sign designates which floor is not electrified. The solution in Batman's side of the room is found in the symbol in Catwoman's room and vice versa. You have to switch controls between characters whenever they step in the safe floor panels so that the other bulbs lights up.

After the two of them reaches the floor pressure pads, they'll have to fight red and blue riddler bots. Like before, only Catwoman can damage red bots while Batman can take care of blue ones. Get the key afterward.

- Riddler's next trial is located under the Ranelagh Ferry Station. This is the hardest track so far. The first lap is easy, the second lap is a bit harder and finally, the last lap is hell since you can't control any of the obstacles. Each lap, a smaller time limit will be given to you so you can't afford to make anything more than one or two mistakes in the last lap. There's no quick way to win this aside from practice and repeat as much as you needed to memorize the deathtraps. Upon clearing the track, step on the pressure pad to reveal the correct key. Switch to Catwoman and select the correct key.

- One important note in Riddler's final exam is that you need the Remote Electrical Charge device that you'll get automatically in the story. Head back to the Orphanage for the final Riddler test once you have it.

Once you have the REC, enter the final exam door. Switch to Catwoman and have her crawl on the ceiling. Let her drop down the puzzle area next. See that beam of light? You need to manipulate the blocks so that the block underneath it is removed. Take a look at the surrounding generator. Using your REC will make them go forward or back.

Have Catwoman stand on the block that you don't want to move and continue manipulating the blocks with your REC to get the necessary block out of the way. There are several ways to approach this and this phase of the test is quite easy enough. After solving the first phase, giant sawblades will start spinning. Just have Catwoman evade between the gaps.

The second phase will start, now with the two beams of light on different locations. After solving it, the sawblades will move again. You have to mind the gaps since the sawblades will change their positions for every movement.

In the third phase, you have to deal with two more lights. This should be a bit easier now since you should be able to get hang of how the puzzle works in the first two attempts. After solving the puzzle, there's no need to dodge the sawblades. Head back to the side of the room where you dropped off so you can crawl on the ceiling. Once done, return to the entrance and get the keys.

Attempt to leave the Orphanage with Catwoman and the Riddler himself will appear. You have to defeat him and his robots next. Like before, you have to switch with the red and blue riddlerbots depending on the character you're controlling. Riddler will also change the color of the robots from time to time so deal with them accordingly. After destroying all riddlerbots, Riddler will escape and will only battle you once and for all after solving all of his puzzles in the city. Once done, leave the orphanage.


After a long, exhausting task of solving all riddles, collecting trophies, stopping riot bombers, and finding all destructible objects, now it's time to face Riddler once and for all. Return to the Orphanage and operate the pedestal to check your completion rate. The Riddler himself will appear. Like before, you have to beat down all his robots which he will reassemble in a different color.
Catwoman will arrive to help and like before, you have to perform Dual Team Takedowns and switch as you target the colored bots that you can damage. (Blue for Batman, Red for Catwoman) After taking out the first batch, Riddler will lower his shields. Using Catwoman or Batman, get near him and press the attack button to beat him. Do this three more times to completely beat him in battle.


Once done, drive to GCPD and deliver the annoying criminal to his new home. Once done, this case is now closed.

Anything missing from this guide?
ASK A QUESTION for Batman: Arkham Knight
Comments for Riddler's Revenge
Add a comment
Please log in above or sign up for free to post commentsNo comments yet. Tell us what you think to be the first.
Table of ContentsClose
- Basics
- Story Mode
- Most Wanted Missions
- AR Challenges
- Wayne Tech Upgrades
- Bleake Island Collectibles
- Miagani Island Collectibles
- Founders Island Collectibles
- Panessa Studios Collectibles
- Stagg Airships Collectibles
- Arkham Knight HQ Collectibles
- Trophies
Guide Updates
Get notified of updates to this guide
Many of our guides get updated with additional information. To get an email when this guide is updated click below.
 Join us on Discord
Click to close