Chapter 7: The Handler
Thank you for printing this page from www.SuperCheats.com.
Remember to come back to check for updates to this guide and much more content for Killzone Shadowfall
Follow this guide to hear about updates
Last Updated:

Killzone Shadowfall Guide Video 7-1
Well, convincing Sinclair isn't so easy, huh? And on top of that we have a new mission: infiltrate "The Spire" and find Messar.
Once you get control you'll be out in space again. Follow the droid in front of you. The controls are just like the previous space sections. Follow it off to the right and up a bit then use it to carve a ring into the station.
Killzone Shadowfall Guide Video 7-2
Once you land, (that ring must be some sort of localized decompression technology... amazing!) head to the left and jump down the pipes to the walkway. Now from here either use the zipline on your OWL or follow the pipes to get to a walkway on your left.
There is a console here but *before* using it look to the left. See the shiny thing on the platform? Zipline over there for:
AUDIO LOG #01
¯¯¯¯¯¯¯¯¯¯¯¯¯
Right before you hack your very first console in this chapter, look to the left to see this audio log. Zipline over there and get it.
To get back climb the ladder and then jump down to the pipes from the upper walkway. Head back to the console and hack it. Now head forward and you'll have a chat with Sinclair.
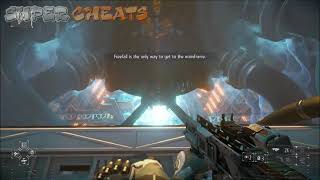
This next section is... interesting. You have to freefall down the shaft to reach your objective. Yes, it is the only way. But they have to make it a challenge of course, so along the way you'll have to pass a ton of moving spoked rings. The idea is that you have to fall through them all without getting hit.
This actually isn't too hard, but we can see how it may give someone trouble. Keep these tips in mind:
o Try *not* to move if you don't have to. Keep a "centered" aspect to your fall and move in controlled states.
o For wide gap rings, aim for the center of the gap.
o For narrow gap rings that are moving clockwise, act like you want to collide with the right edge of a spoke, and then aim to pass just to the right of it (which ensures you hit the gap).
o For narrow gap rings that are moving counter-clockwise do the oppositeas above: act like you want to hit the left edge of a spoke, then aim to pass just to the left of it.
o You know you are done when you approach a non-moving platform. Aim for the center of that walkway and Lucas will shoot a inflatable device here to break his fall. Safe!

Killzone Shadowfall Guide Video 7-3
Well, that was fun. Now, to a collectable! This platform leads to a ring. Take the right path and go search down the right dead-end walkway. On the left side is:
COMIC BOOK #01
¯¯¯¯¯¯¯¯¯¯¯¯¯¯
After the first freefall section, go search the walkway to the right to find this comic book laying on the ground at the end.
Head to the center area now. First let me warn you: there are boxes here that spit out spider bots - the kind designed to explode when you are near. It is honestly best to ignore them. There is a camera down below, so take it out and then *set your OWL to STUN mode*.
Enter the next room and have your OWL stun the enemy here. He is (was) wearing a shielded suit, but your stun overcomes this. He will also be stunned, so you can go melee him easily. Head into the next room.
Here you will hear enemies down below talking, but before we wipe them out head to the left corner to find:
COMIC BOOK #02
¯¯¯¯¯¯¯¯¯¯¯¯¯¯
After the first freefall, drop down the center section and you will have to proceed through two doors. After the second door, go search the corner to the upper left to find this comic book.
Head down now and wipe out the two soldiers (it may be best to let them come to you so you can stun them - or send your OWL down one way and you go down the other). The next room (besides being white and orange) has a hole in the floor - there is a soldier down below so drop down and auto-kill him.
Now there's quite a few guards in this area. The room below you has some weapons, but this upper room is the best to fight from. The walkways to the left and right also have those boxes that spit out spider mines. We have to go to a room on the left soon, so take out those spider boxes (theres two of them - one is further down the walkway) and fight the guards from the upper walkway. Send out your OWL in attack mode to get two angles on the guards and drop their shields fast.
Once you have the area cleared out go to the left walkway and check your objectives. You'll see objective "E" is in the room on the left, however both doors into the room are locked. Shoot out the windows and jump in from the walkway. Here you will find EMP grenades, some guns, ammo, the console to objective "E" (hack it) and finally:
DOSSIER #01
¯¯¯¯¯¯¯¯¯¯¯
This dossier can be found on a desk directly across from objective "E". Very hard to miss, just remember objective "E" is optional. Additionally, the room it is in is locked, so you must shoot out the windows and jump in from a walkway.
Be sure to read the dossier, it is quite interesting. After hacking the security mainframe the doors will all open. Interestingly you can now go back to the first room and access the room on the right for more EMP grenades and a minigun if you wish.
Now let's head for our main objective in the room at the end of the walkway (be sure to shoot out the camera). In the room *right next* to the console objective is:
COMIC BOOK #03
¯¯¯¯¯¯¯¯¯¯¯¯¯¯
This comic book is *right next* to the objective "D" console (which you must use in order to proceed with the game. You cannot miss this. Seriously. It's in the bag.
Killzone Shadowfall Guide Video 7-4
Use the console and the central shaft will open up. Head over there and Lucas will automatically rappel down and then talk to Sinclair (have to get that extraction team ready).Be ready for an attack drone to show up and destroy it.
Now, *before* you hack the console, drop down and search the corners of this lower level for:
AUDIO LOG #02
¯¯¯¯¯¯¯¯¯¯¯¯¯
After descending down into the maintenance shaft (the shaft you auto-rappel down), jump down to the lower level under the walkway and search the corners to find this audio log.
Use the ladder nearby to get back up and hack the console. You will reach a circular area. Here find another console that extends a bridge to continue onward (there's only one console out here). You will have to fight three soldiers past the bridge though, so be ready.
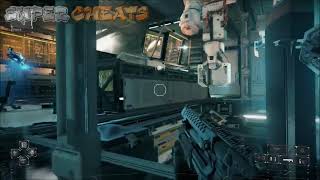
Past them you'll enter a laboratory. From where you start you are shielded from the left and front. Head down the stairs on the right (slightly) and take out the enemies and turret below. Send your OWL down in attack mode to be a distraction. The enemies are easy to pick off from this vantage point.
Now explore the room to restock and now we must make a decision. There are two doors exiting this room: one on the lower level one on the higher level. Both lead do another lab room, and both are full of soldiers. Take one of them to the next lab room, just be ready to mow down half a dozen soldiers on the way.
Once you reach the next lab room you'll have to clear it out as well. Personally we think it is easier to attack the next lab room from above, but it is your call.
Now that you are in the next lab room and have it cleared out, look for a door on the bottom level leading inward (and not the one leading to a hallway where you may or may not have cleared. Hack the console here and head forward to find Messar.
While she talks, go check out the right desks in here for:
DOSSIER #02
¯¯¯¯¯¯¯¯¯¯¯
Once you find Messar, go check the desks to the right of her to find this dossier.
Once she's near the end of her talk get ready: a team of soldiers (half a dozen at least) will show up on the upper walkway and fire down at you. Messar will flee: nothing you can do about that. It is recommended to get under the walkway (their sheer numbers will overpower you) and fight from there. Clear the right side by sending up your OWN and popping out, then walk backwards aiming up at the walkway to clear the rest.
Once you are done, head for the far window and use the button prompt to place C4. Blow it and head out into space.

Killzone Shadowfall Guide Video 7-5
Messar has taken a box and is fleeing in it. It will proceed down the rails. It is your job to protect her. Out here in space, keep up with here and fire at any enemies that show up. You will see swarms of attack bots that you can destroy. Three to four shots will kill them all though. You will also have to destroy carts that are coming at Messar on the same rail, so always look on ahead and identify them when they show up so you can shoot them down before the two collide.
Near the end her cart will stop and you will be told to go hit a console on the left side of the area (on a walkway). Before you do that though, note what is laying just to the right of that console:
NEWSPAPER #01
¯¯¯¯¯¯¯¯¯¯¯¯¯
During the Messar escort part of the chapter, you will have to hit a console to continue escorting her box through space. The newspaper is just to the right of that console, on the ground. You can't miss it!
Hit the console and follow Messar.

Killzone Shadowfall Guide Video 7-6
You will soon get to a HUGE open area (we are about to have a lot of fun in here, trust me). You will head down a ladder (or just jump down) and the objective will be in front of you.
*But First!* Do not go to the objective yet. From the ladder follow the right wall as it turns around and heads the other way. Now down this way you want to thoroughly check all the desks and objects along the right wall, for one of them has:
COMIC BOOK #04
¯¯¯¯¯¯¯¯¯¯¯¯¯¯
Once you get to the huge room while escorting Messar, head down the ladder and follow it to the right. Now search all the desks and crates down here and you will find this comic book on one of them.
That is the last collectable for the chapter!
Head to the objective now to meet up with your extraction team. Their ship is damaged and they are working on a getting another one up and running. However, we are going to need to hold our position until it is ready.
This part is *hard*, especially if you don't know what you are doing. Up above your ship is a walkway with a ton of weapons and adrenaline. Go load up and grab one of the voltage guns. However, I don't recommend you start fighting here. Instead to your left is another walkway. On top of it it a minigun. Go over there with your voltage gun and get ready.
We are about to face dozens of troopers. Shields, miniguns, riot shields, officers... you name it, they are coming in scores. They will also set up shields on their way. We have to hold off their advance with our teammates.
If you are having trouble, set up like we mentioned before and from that left walkway you can get close and send out your OWL. While he is keeping them busy, blast away with your voltage gun. You will run out of ammo sooner or later, so grab the nearby minigun and keep up the pressure. Be sure to fire the minigun in short, controlled bursts.
If you MUST (although you shouldn't have to), you can go back to the upper starting walkway and chuck grenades and find another voltage gun.
Soon you will get a notification that the dropship is ready. You can reach it from the first upper walkway. Head to it and enter the gunners seat. Your first target should be the attack drones that have been released, so clear the skies then focus on taking personnel out. This part is pretty fun given your superior firepower.
Keep it up and soon the enemies will fall back. Too many loses. Good job! Enjoy the following scenes leading into the next chapter.
Anything missing from this guide?
ASK A QUESTION for Killzone Shadowfall
Comments for Chapter 7: The Handler
Add a comment
Please log in above or sign up for free to post commentsTable of ContentsClose
Guide Updates
Get notified of updates to this guide
Many of our guides get updated with additional information. To get an email when this guide is updated click below.
 Join us on Discord
Click to close
Already play 6 times and still dead
Having issues with the end of level 7. Need help
This was extremely frustrating for me. Dodging those rotating fans was one thing, but the hard part was following the landing pad rocket. You hardly have any time once that thing fires, to follow it. Miss the dead center of the plattform by a foot or two and that's it.