Chapter Twenty-One
Chapter Twenty-One
Continue under the small ladder and drop down to the two small crates.
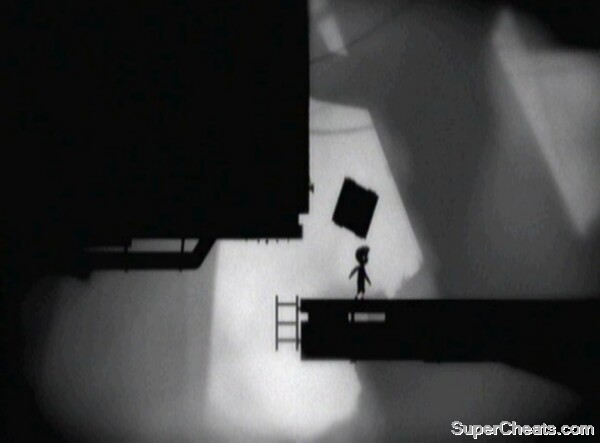
Secret Egg #8: Switch the positions of the left and right crates (the best way to do this is to activate the gravity, and move the right hand box to the left, so that when the original box comes back down, it lands past the second crate). With the new right hand crate, push it up the slope to the far right of the lower level. Let the crate slide and run to the left, climbing up the left hand crate to get back up to the first area. The crate that should now have gone over your head needs to land with two nodules on the top edge. If not, you need to try to manoeuvre it so that this is the way it lands by repeating the previous step when you first switched the crates. With the nodules in the right place, push the box to back to the end of chapter twenty so that it is underneath the gun facing down. Get the turret to fire into the box, making a hole. You can then push it back to the area where you first found the crate and the secret egg will spill out on the way.
With the secret egg in hand, push the right-hand crate as far to the right as possible once again. The switch that you pass activates an anti-gravity force in the area, but you can feel free to step on it for now as you push the crate. Keep pushing up against the wall. Immediately turn back to the left, jump over the switch, and push the first crate as far left as possible.
Climb onto it as quickly as possible and up onto the ledge above. Wait for the sliding second crate to activate the anti-grav and send the left-hand crate up to your level. Push the crate to the left once the anti-grav wears off until it comes underneath the small ladder, allowing you to jump/climb up to the next section. Make sure it is not underneath the ledge itself – you need it to be able to pass to the ceiling freely when the anti-grav is next switched on.
Head to the right and climb onto the ladder at the far end. It will lower, so climb back down to the bottom area. Push the crate to the right, where you did before, and immediately run left and climb back up the hanging ladder. Run to the left once you get to the top and remember that time is of the utmost importance here. Keep going until you get to the small ladder and you should find the crate from before has been lifted up to you with the anti-gravitational forces. Pull it so that it flies up above you before the effects of the anti-gravity wears off (watch out for when it falls back down to ensure that you are not crushed!).
 Use the anti-gravity to your advantage |
Push the crate to the right until it is just to the left of the gate marking the next section up. Again, you need it to be able to pass freely to the ceiling, so make sure it is not underneath the overhang.
With that in place, head back down the long ladder, push the usual crate to the right once again, and head back left and up the ladder. Climb onto the crate and once the anti-grav kicks in, jump off to go through the open gate and onto the next level. Note that you need to stand in the middle of the crate to avoid it tipping you off. It also rises quickly, so be prepared to jump off suddenly.
Manipulate the crates to get to the next section
Head to the right until you get to the switch box. Here you need to get right to the edge and push down on the control stick. This should get your character to hang onto the ledge, at which point you can jump to the right and climb down a rope. Collect the achievement egg at the bottom.
Achievement: Under Ground (10G)
Climb back up the rope to get out of this chasm. Activate the switch box to call the lift down. Send it back up but climb in as it begins its ascent. Once at the top and on solid ground, send the lift back to the bottom. Call it up again, but climb onto the roof. Once you pass the laser of the weapon to the left, jump down to the right. It should take out the rope holding the crate in midair.
 Cut the rope on the crate |
Again, send the lift back down. Push the new crate onto the roof of the lift, and send the lift back up. Climb onto the top as it rises. The crate will protect you from the gun if you stand on the right-hand side. Climb onto the top of the crate once the gun has finished firing. Jump to the left to access the territory directly above the weapon (make sure the crate is far enough to the left of the lift to make the jump).
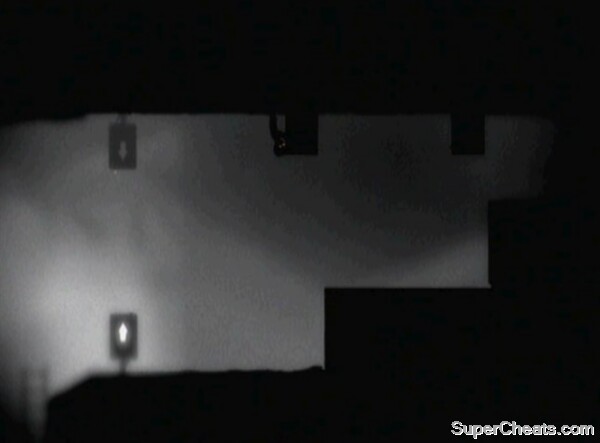
Head to the left. This is a tricky section but there is no risk of dying, so it is just a matter of time. The idea is to use the anti-grav switch box to get the crate out of the nook that it is in to your left. To do this, you need to activate the anti-grav and send the crate to the roof of the cave. From there it will go to the top left corner. You then need to deactivate the anti-grav, sending the crate down and sliding along the ground. Once it is near enough to the opening, reactivate the anti-grav so that the crate rises diagonally due to its sideways momentum, and deactivate it soon after (so it doesn't hit the ceiling), so that it comes out of the cave and into the open allowing you to access it. For specific timings and techniques, see the video below.
Practice makes perfect with this one
Push the crate as far right as possible. Jump down to the right, landing behind the crate on top of the lift. You should then drop to the right and send the lift down. Push the crate from the top of the lift to the right. Soon it will be in a position to block off another weapon to the far right of the level. Position the crate so that you can climb the ladder. Climb up, keeping a quick pace so that you bypass a gun to your left before it can shoot you.
Once at the top, activate the anti-gravity switch up here. This will bring the crate up. Climb over it and head left. You will come to another crate – this is the one we rescued from the cave. Push it to the right until it gets to the position of the second crate.
Secret Egg #9: With the two crates next to each other, you now need to get one on top of the other for this egg. The best way to do this is to have one crate inside the elevator in its raised position, and the other on the ground floor to the left of it. Push the crate from the elevator on top of the first crate. You then need to load the crates, still stacked, into the elevator (now on the ground floor) and raise it up. Push the crates to the far right and turn on the gravity – hopefully the crates will still be in a stack on the ceiling. Push them to the far left now, before using them to climb up (you may need to pull the bottom one out a little to create steps) and reach the previously inaccessible area where the crate was trapped. Locate the egg to the left.
Return to the main room and head right along the ceiling with anti-grav on. You now need to push the right hand crate so that it is lined up with the left edge of the topmost row of blocks below. The left crate needs to be lined up with the left edge of the bottom block (that is the left edge of the block once it has moved as far left as possible).
 These are the positions the two crates should be in |
You should then head left to the anti-grav switch box on the ceiling. Once the bottom block is halfway along its path from right to left, push the switch. Immediately run to the first crate and climb up onto the bottom block. The second crate should be on the middle block, so use this to climb to the top block. You can then move down the ladder to the right.
More Limbo stuff on SuperCheats
u the lift on which you climb to activate the fun that shoots down the first box... Yeah that way there's another big. So once you get the first box, call the lift down, put the box on top, call the lift up and quickly jump on it. You should be safe behind it as the gun will activate. Jump on the box then long jump over the gun. Continue and you'll find a gravity switch. Practice put out that box and you're done.
the second box is on top of the ceiling ,turn off the anti-grav switch... u will see......
If you don't see the second box, try to go ahead of this stage by getting yourself into the load saved games... This will directly load to next level without crossing this level.
As if it wasn't hard enough getting the crates stacked in the first place, pushing or dragging them without them toppling apart seems impossible. Getting them to stay stacked once you switch gravity (if you can even get them that far) I would imagine would be harder still. Too frustrating for me.
Take the crate you already have and put it on top of the elevator and put the elevator up and jump up there with the crate. Then push the crate to the far left of the top of the elevator and jump to the other side above the machine gun to the left. Continue to follow the instructions of the last video.
Same here!!! No second crate on the left, right or anywhere else!!
I can't find the secon box!!!