TRAINING
Training is broken up into five unique scenarios, each with three “Stars” - the Stars are completion requirements - which basically makes for three different adventures to be had for each of the five mission / scenarios.
The scenarios can be played either in Solo Play, in Partner (online Co-Op) or in local Splitscreen.
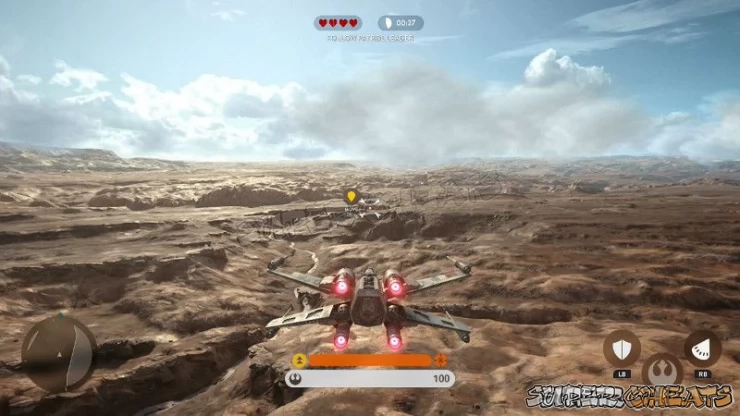
Beggar's Canyon
Learn to fly an X-Wing over the canyons of Tatooine while searching for Imperial activity.
Star 1: Job Done -- Complete the Mission (50 Credits Reward)
Star 2: 6 Min -- Complete within 6 Minutes (150 Credits Reward)
Star 3: No Proton -- Complete within 6 minutes without using Proton Torpedoes (250 Credits Reward)
You do not actually have to play through the mission more than once if you want to unlock all three stars in one go - you just have to play within the confines of the required actions.
For example if you decide to play through Beggar's Canyon your first go through without using the Proton Torpedoes, and you manage to eliminate all of the enemy in under 6 minutes, you will unlock all three Stars.
In addition to that you will also unlock the Achievement: New Recruit (15g) Complete any mission.
The challenge here is to get used to flying - and fighting - the X-Wing quickly.
A brief rundown of the controls for this beast:
- Left Trigger - Target / Boost
- Right Trigger - Fire
- Right Stick - Steer
- Left Stick - Throttle Control
- LB - Shields
- RB - Torpedoes
- DPad Down - First/Third Person
- DPad Left/Right - Fast Jink
- DPad Up - Immelman Maneuver
You start the mission with a number of lives in case you get killed - but there is also a marker down by the facility over which you are fighting and flying that will repair your X-Wing instantly if you get too badly damaged.
When the mission ends you get a display showing how many lives you used, and how many enemies you managed to personally dispatch.
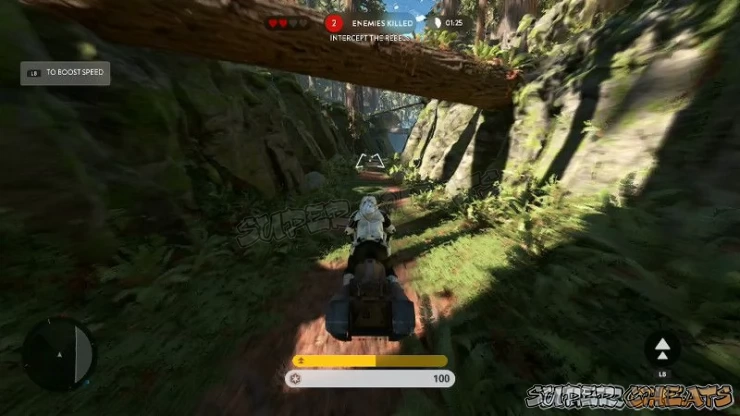
Endor Chase
Chase down fleeing Rebels on your speeder bike. Rebel forces are reported to be moving to an extraction point in your patrol's vicinity. They must not be allowed to escape.
Star 1: Job Done -- Complete the Mission (50 Credits Reward)
Star 2: 2.5 Min -- Complete within 2 Minutes 30 Seconds (150 Credits Reward)
Star 3: Defeat Them -- Defeat 5 Rebels and race to the finish (250 Credits Reward)
The trick for this mission is not killing yourself. No, seriously! Bearing in mind that you only have to keep up with the Rebel Speeders AND kill ONLY five of them to complete the basic mission, the trick is going to be completing it inside the 2.5m time limit!
You see killing yourself by, oh, slamming into a rock or a tree, well, that is very easy to do! And it costs you time. So um, don't do that!
- Left Trigger - Target
- Right Trigger - Fire
- Right Stick - Steer
- Left Stick - Throttle Control
- LB - Boost
- DPad Down - First/Third Person
Don't just hold down the trigger as your Speeder's blasters will overheat and stop working until they cool down.
The most effective method to avoid killing yourself is to pay attention to the warnings of your wingman - if there is a hard turn ahead, slow down for it, then boost when you hit a straight section to make up for slowing down.
Try very hard NOT to hit the legs of the walkers you encounter towards the end and you should get all three Stars pretty easily! If you do end up dying chances are very slim you will get the second Star. Just saying.
If you are having trouble with the timer Star what works very well is to put the view into first-person and focus solely upon completing the course itself without crashing. Shoot if you can but don't worry about the Rebels, just focus on your driving.
One of the benefits of splitting up the Stars to focus solely upon driving for the timer Star is that if you do it that way - and you have a good perfect run and take no damage, you not only will unlock the second Star, but the Achievement: Safety ain't the point of a joyride (15g) Take no damage in the Endor Chase Mission.
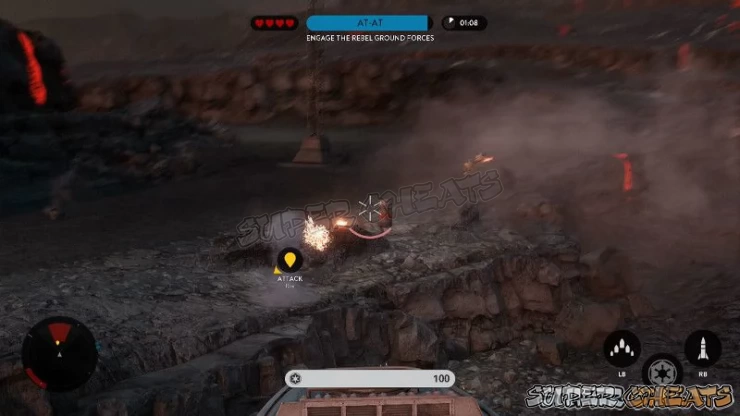
Overpower
Take command of a powerful AT-ST walker to eliminate the entrenched Rebel scum. Lord Vader is on approach to Sullust and expects the Imperial base to be cleared of Rebels before his arrival. Escort the mighty AT-AT walker and wipe them out.
Star 1: Job Done -- Complete the Mission (50 Credits Reward)
Star 2: 6 Min -- Complete within 6 Minutes (150 Credits Reward)
Star 3: A-Wings -- Complete and take out 8 A-Wings (250 Credits Reward)
- Left Trigger - Target
- Right Trigger - Fire
- Right Stick - Aim your Weapons
- Left Stick - Steer
- LB - Grenade Cluster
- RB - Anti-Air Missile
You take on the role of an AT-ST escorting an AT-AT -- the idea being with your smaller size and faster speed you should be able to get into position to help defend the larger armored unit better. That said, you face a range of targets both on the ground and in the air - from assault troops to A-Wings and X-Wings.
Earning the first pair of Stars will not present all that great a challenge to you - in fact you should get them in the first go - but the third? Ah now, there is a more difficult challenge to be sure!
You see you need to shoot down all 8 A-Wings yourself, before they can be shot down by something else OR leave the battle area. This is really really difficult mostly because you have to be paying attention in order to see the second flight of four A-Wings arrive.
The good news though is that IF you see the waves early enough, you can easily shoot down all eight, and thus unlock the third Star.
The reason that matters of course is that when you get all three Stars for each of the Training Challenges that adds up to 450 Credits. In case you have not yet figured this out, the Credits you are earning as you work your way through the Training Missions are the currency you use for buying kit.
Now granted for the really useful stuff you cannot USE those Credits until you gain some MP Rank - but hey, wouldn't it be nice to arrive at that MP Rank with some Credits already banked? Of course it would! Enough said.
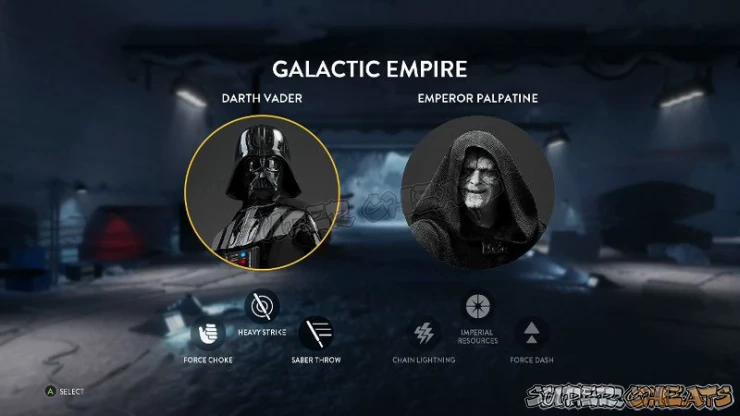
The Dark Side
Emperor Palpatine and his apprentice Lord Vader are spearheading the attack on a Rebel base located in the Hoth System. The Rebel forces are scrambling to maintain their control of their base as Dark Lords of the Sith invade. Embrace the dark side and wipe them out.
Star 1: Job Done -- Complete the Mission (50 Credits Reward)
Star 2: 3 Min -- Complete within 3 Minutes (150 Credits Reward)
Star 3: Efficient -- Complete with 75% or more health left (250 Credits Reward)
Your goals are simple:
1. Fight for Control of the Rebel Base
2. Eliminate the Rebels to Gain Control
3. Keep Stormtroopers Alive to Retain Control
You get to choose your character - Darth Vader or Emperor Palpatine.
Darth Vader has Force Choke, Heavy Strike, and Saber Throw.
Emperor Palpatine has Chain Lightning, Imperial Resources, and Force Dash.
It is your call which you choose - but choose you must!
If you did not recognize it, this level is a variation of the loading game that we played while the game was making its very lengthy installation - though this time around we can actually take damage. And of course we want to limit that as much as possible since that is one of the goals for the Stars.
The greatest difficulty here is going to be found in trying to unlock the Stars all at the same time - so do not try it. Because getting this done in 3 minutes WITH 75% or better health? Yeah, that is NOT likely to happen.
So you should split up the goals for this one - first try to speed run it, then try to do it with as little injury as you can manage. Doing it that way makes obtaining the Credit Rewards a lot easier.
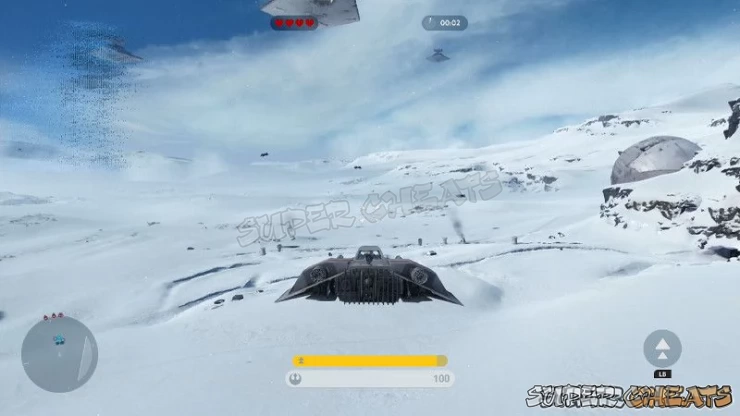
Invasion
Fly a T-47 Airspeeder to halt the oncoming Imperial walkers. The Empire has discovered a Rebel base and it must be defended until all transports are away. Protect the power generators at all costs!
Star 1: Job Done -- Complete the Mission (50 Credits Reward)
Star 2: 8 Min -- Complete within 8 Minutes (150 Credits Reward)
Star 3: Takedown -- Complete without failing a tow cable takedown (250 Credits Reward)
- Left Trigger - Target
- Right Trigger - Fire
- Right Stick - Steer
- Left Stick - Throttle Control
- LB - Boost
- Y - Tow Cable Deploy
- DPad Down - First/Third Person
- DPad Left/Right - Fast Jink
- DPad Up - Avoidance Maneuver
This may be the most challenging of all of the Missions you've done so far - not just because you are piloting a Snowspeeder mind you - but because you are dealing with waves of destructive walkers and you MUST protect the power generators until all of the transports are away. There are three main transports - and three waves of enemy walkers.
The first wave is just AT-ST's - which you target and shoot with your blasters.
The second wave is AT-AT's which you need to use the tow cables to take down. Using the tow cables means flying close to the AT-AT and deploying the cable with 'Y' and then circling the AT-AT while you use the right joystick to keep your speeder inside the marked zone. Do that for long enough and you will take down the AT-AT.
The third wave is the most difficult because it consists of a mix of AT-ST and AT-AT -- the latter being escorted by the former - and all of them will be attacking the power generators.
Basically for the third wave you have to attack fast and you have to try not to make any mistakes. Sounds easy but it is not. In fact it is so easy to fail the tow cable takedowns that unlocking the final Star for this one will be down to a combo of luck and just doing the mission over and over again until you get THAT good!
This is another one of the Missions whose Stars are easier accomplished individually. That is to say you should focus on trying to do a speed-run first, and then taking your time to clear away the escorts and get the tow cable takedowns without the risk of being shot by the escorts.
The reason that is key is taking ANY damage with the tow cable deployed will break the cable and thus fail the attempt.
When you at least complete the mission and unlock the first Star you will also unlock the Achievement: All Right I'll Give it a Try (15g) Earn a Star on all Training Missions.
Anything missing from this guide?
ASK A QUESTION for Star Wars Battlefront (2015)
 Join us on Discord
