Some Odds and Ends Part V
Right so this is actually a major Odds and Ends Section, and you have probably started to notice the pattern here, with a Sequence and then Odds and Ends and then if required some other type of section -- the reason that we are doing the guide this way is that while in theory you should be able to complete these missions no matter when you try in practice there are some bugs in the game that can (and will) prevent that.
One example is a bug that can cause the Homestead Upgrade Missions to disappear from the map and make it seem like you missed one. In practical terms that does not necessarily mean that the mission will not reappear the next time you load the game, but it can be missing until then. And since the special items like expanded kit bags are completely dependent upon the upgraded state of the resident crafters on the Homestead, that is the main reason why we do each mission as soon as it is available -- so that you have the chance to obtain the upgrades as quickly as you can.
Another bug that can (and often will) appear in the game relates to the side-quest Encyclopedia of the Common Man -- what can happen is one or more of the residents you are supposed to scan will turn gold for one of the three tasks you need to scan, but then never turn gold again, even though they are doing tasks that you know you should be scanning! The thing is this is not a permanent bug -- to fix it all you need to do is quit to the dashboard then load the game again and you will be able to scan those tasks then. But it is this sort of thing we are trying to avoid and deal with as we incrementally complete each of the quests and side-missions as soon as we can.
You should bear in mind that any opportunities that you have to make money should be taken full advantage of - if you can kill a high value animal do so. If you wipe out an entire enemy patrol, loot them. If there is a treasure Chest (including those that are part of the collection and those that are not) loot it! It takes a lot of grease to get all of the upgrades you will need, and you are going to be replacing the items you use up in the Consumables section constantly. Also bear in mind that you need to buy one of every weapon and craft one of every special weapon before this is all said and done, and that takes money as well as some special resources.
Now to get this Odds and Ends Section started -- as we have loads to do -- first thing first, as we end up on the Frontier we may as well hit the village and do the Interactive Chat that is marker there – we end up talking to the Elder Woman, and then your brother, talking to each one several times to remove the markers.
As there are no other markers here and we are ignoring the Main Mission Marker for the time being, head back to the Homestead and you will notice a mission there. Note that under ideal circumstances we would prefer to do the missions here in any season other than Winter since some of them may not show up during the Winter, but as this one is here, we may as well do it.
Homestead Mission: The Proper Tools
When you arrive at the marker you see Norris and Big Dave talking and you learn from Dave that he needs his old tools – asking if you could retrieve them for him from New York City? Of course you can!

– New York City –
Using the Harbormaster fast-travel to New York and take a deep breath because you have a lot of self-directed stuff to do! So, with that said, and knowing you know the drill, do the following (I will wait for you to get these done, don't worry!):
- View Points
- Almanack Pages
- Treasure Chests
- Trinkets Collection
- Assassination Contract
- Courier Mission
- Boston Brawler Mission
- Liberation Missions
Basically what you have here is a lot of running around, climbing, jumping, and a fair bit of having to fight Redcoats when you either flag a battle in front of them or run into a restricted area. For the Liberation missions you will also do a fair bit of wandering around because often the last bit of the make-do part it not included on the map, so pay attention when you begin each of those as to where the markers are on the map for them so that when the last one disappears you have a general idea for where to look to find it, right?
The collection items are a bit more annoying for New York but only because unlike Boston, you are doing them all in one-go instead of a few here and there. Still there is immense satisfaction in getting them done, and especially with the Trinkets as that will open up some new adventures for us soon enough! As you can see we have a fair bit to do here, and getting it done makes for a nice something else to do from the main story...
After you get all of those done, head over to the marker for the nearest General Store and purchase the Hammer Parts from the Citizens Mission Section in order to fulfill the conditions of Big Dave's Homestead Mission – nearing in mind that we have another Homestead Mission to do here as well!
The New York Homestead Mission: Cutting Ties
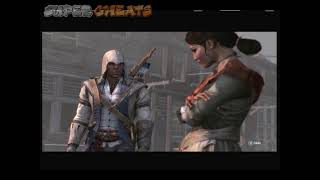
Note that there is another Homestead Mission on the map. Head to that to flag it. When you do a little girl asks you to help her mother, and when you follow her to the scene of the event you find a man tuning up on a woman. Stepping in you pound the guy good, and then invite the woman to move to the Homestead. Well done you!
This is not the end of the New York Missions and activities, we actually need to do some traveling, but before we get into that, there is one last strictly New York City thing we need to do, and that is map out the Underground here!
The New York Underground
All you need do is find one entrance and you are good to get started – if you look at the map at the very south (bottom) you will easily find an entrance (bulkhead) that is directly across from the market there. This is the South Market Entrance.
From here heading along the path if you go left at the intersection that will eventually lead to a dead-end – assuming that like me you want to map the whole network out, go ahead and to that or not, your call – and then backtrack and continue along the right-hand branch, lighting the odd torch as you go, until you encounter a Mason's Symbol that points left. To the right is another dead-end if you like.
Following the marked left path you will encounter a pair of soldiers that you must defeat, and then shortly after another Masonic Symbol, which tells you to continue straight. To the right is another to-be-expected dead-end, and as you continue straight you reach a junction chamber with exits leading back to the South Market (the one you entered from), to Bowling Green, Brewery, and Old Dutch Church. To keep this simple we work to the right in a large wheel pattern, so the one we want now is the Brewery.

Brewery
This path continues north, and as you move along it you will see it turns left and goes straight but if you watch the rats, they head left. The rats always head in the right direction, so straight leads to a dead-end. After you take the left and light the torch you come to another junction and have to choose straight or right – if you use Eagle Vision you will see an arrow indicating that you should go straight. To the right is a figure-eight looping dead-end.
You now emerge into another junction, this one labeled Old Dutch Church (the one you came out of), North Dutch Church (the left choice), and Brewery (the right choice). We are heading to the Brewery so go that way. Shortly you find yourself at a seeming dead-end but it is actually not. This is one of the swinging/jumping/climbing puzzles you need to do - so jump straight out on the wrecked wall and then make your way all the way around to the other side, and pick up the lantern there, and continue along the path to end and move the door locks until they all align to enable this exit/entrance and hey, well done mates!
Go out, come in, then retrace your steps to the previous juncture and take the North Dutch Church exit.

North Dutch Church
When you reach the first intersection use Eagle Vision to see the arrow pointing left - the straight path leads to the expected dead-end - or in this case dead-ends as there are two down that path. Taking the left turn you light a torch and then head down a sharp path down to light another torch, before you encounter a trio of soldiers to fight. Once they are defeated continue along the path to the next main intersection chamber.
Here you will emerge from the path labeled Brewery and find three other exits, labeled St. Paul's Chapel, Presbyterian Church, and North Dutch Church. We want the one labeled North Dutch Church.
Only a short distance down that path is the puzzle room - when you enter the first thing you should do is to read the book in the corner and then access the Animus Database to read VI. Of Behaviour, Viz. Which is another purported Masonic document. Note the emphasized phrases:
- NOR BEHAVE YOURSELF LUDICROUSLY AS A LOW JESTER WHILE THE LODGE IS ENAGAGED IN WHAT IS SERIOUS AND SOLEMN
- OF THE CATHOLIC RELIGION TO THE LEFT OF ALL NATIONS
- THE FOUNDATION AND THE ETERNAL CROWING CAP-STONE
- PREVENT YOUR GOING TO LAW RIGHT - OR WRONG - WITH STRANGERS
Those four clues should tell you what you need to know, which is:
- Place the Jester Symbol on the bottom
- Place the Capstone Symbol on the top
- Place the Cross on the left
- Place the Scales of Justice on the right
The door then unlocks and you can exit - then re-enter - having unlocked the North Dutch Church Exit/Entrance! Good on ya!
Now make your way back to the previous junction and we want the Presbyterian Church exit this time.
Presbyterian Church
Follow the path here to to a junction and use Eagle Vision to spot the arrows indicating that the route you want is straight - to the right is a loop and a dead-end. Straight on you will go deeper underground and then find a locked gate. To get to the other side you need to climb the wall on the left (the one with water washing down it) and then go over the top and down to the other side, where you can open the gate.
Grab the lantern and continue along the path to the next juncture in the tunnels - you emerge from the one that is marked North Dutch Church, and there are two others - East Countryside and Presbyterian Church. We want the one for Presbyterian Church obviously.
Shortly in to this tunnel there is a left-turn path and a straight one - the straight one is a dead-end, so turn left and then you will reach a right-hand turn and straight with the right-hand one being another dead end. Continue straight and you will reach the exit which is a simple lock-pick to open!
Now pay attention here as this is the bit that causes a lot of grief for a lot of gamers! The unmarked door leads to another exit, but as it is unmarked most players totally miss it!

West Countryside
To the right in the room (to the left if you are re-entering from outside) with the exit is another path that leads to a Masonic Symbol on the floor that indicates you should turn left at the split. To the right would be a dead-end loop, and continuing left you end up in a large chamber where you battle three soldiers.
The stairs up in the chamber lead nowhere, but the opposite tunnel leads to a split marked with a Masonic Symbol indicating that you should go straight. The right-hand path is a dead-end.
Continue along and you will reach another of the combination doors - line up the locks and voila! Another exit/entrance!
The lack of markings and the easy-to-miss passage leading off of the exit goes a long way towards explaining why this one gets missed by a lot of players and why I have talked to so many who say that they have fully explored the Underground in New York and it is “bugged” for the last entrance/exit - the reality is that it is not bugged, they just missed this one!
Now double back to the Presbyterian exit (you have to re-battle the trio of soldiers) and then double back from there to the junction chamber, and take the previous junction chamber where you will find the as yet unexplored East Countryside!
East Countryside
Just inside the tunnel the path splits left and right - the left-hand side is a dead-end so head right - and you will encounter a Masonic Symbol that points left at the next split. If you head right or straight it is just an elaborate series of paths that lead right back to the Symbol. If you want to map that out go ahead, I will wait for you. Right, now head left and you will encounter another Masonic Symbol that indicates you should continue straight – the path to the right is just a big loop that brings you back to the Symbol.
Just ahead the path splits again, and Eagle Vision shows you the arrow pointing to the left turn - straight is a dead-end - and shortly down the left branch you reach the door that is a simple Lock Pick to open, and adds exit/entrance 6/11 to your accomplishments.
Be aware that there is one bug that really does exist in the game - you need to exit and enter these in order for them to be recorded.
Now double back to the junction and follow the North Dutch Church path back to the junction chamber where the path marked St. Paul's Chapel is, as we have not done that one yet!

St. Paul's Chapel
Following the path marked St. Paul's Chapel, you go through the tunnel and you reach a natural cavern area that is sealed off by a locked gate. Basically you need to climb and jump your way around to the other side and then open the gate, retrieve the lantern and then head to the next junction chamber, which splits off into North Dutch Church (the path you entered from), City Hall, and St. Paul's Chapel - we want St. Paul's Chapel!
Here is the thing – when you head that way you will quickly reach ANOTHER junction chamber that splits between City Hall (the entrance we came in from), Trinity Church, and St. Paul's Chapel - we want to continue to follow the St. Paul's path.
Shortly along you reach a locked gate you cannot open - well it seems that way, and if you climb around on the ledges it still seems that way... But here is the thing - climb on the right-hand ledge (the one that does NOT have the barrels on it) then shoot the barrel of gunpowder on the opposite ledge to open the path (be sure to reload your pistol, right?) and then jump across and down to unlock the gate.
Say, do you suppose the Masons have some guy who goes down here every now and then and replaces the blockages and gunpowder just to keep this interesting?
Grab the lantern and follow the path to... Another locked gate. But hey, do the same thing by climbing on the far ledge and shooting another barrel of gunpowder and you can unlock that one too!
From here you reach a branch - straight is a dead-end so turn right and you reach the exit with the Magic Lantern Device. In the corner is another Masonic document for you to read (V. Of The Management of the Craft in Working) and the following clues:
- ALL MASONS SHALL WORK HONESTLY UNDER THE SUN
- MASONS RECEIVING THEIR LAWFUL AND JUST WAGES RIGHTLY
- FOR NO MAN CAN BE LEFT TO FINISH ANOTHER'S
- NOR SHALL THEY TEACH LABORORS AND UNACCEPTED MASONS AS THEY CHOULD SEE OVER AND TEACH A BROTHER OR FELLOW MASON
With those clues you know to place the following:
- The Sun Symbol goes on top
- The Man Symbol on the left
- The Masonic Symbol on the right
- The Scales on the bottom
That unlocks the door so head through and out then back inside! Now double back to the previous junction chamber and head to the tunnel marked Trinity Chruch.
Trinity Church
Basically when you get inside the tunnel you will find a pair of locked gates and wheels you have to turn to lower the platforms you need to have in place to unlock them. So lower the first one, then climb over and past that to the second opening and through, lower the second one, then unlock both gates and grab the lantern, then follow the path to where it splits and you will see that the rats are headed to the left-hand side not the right (which is a dead-end).
At the end of the path is another Magic Lantern and Masonic Document. Read the document to learn:
- BUT FOR HIS MERIT AS SEEN FROM ABOVE BY THE ALL-SEEING EYE
- WAY PECULIAR TO HIS FRATERNITY AS DECREED BY THE DOUBLE-HEADED EAGLE OF THE EAST
- MORAL STANDARDS AND RIGHTS OF KINGS
- WITH ALL MASONS UNDER THE VISION ON THE BROTHERHOOD
Those clues indicate that you should place the symbols as follows:
- The eagle on the left
- The Eye on top
- The Mason Symbol on the bottom
- The crown on the right
That unlocks the door - so head out and then back in to add this one to your list, unlocking exit/entrance 8/11. Well done mates!
This can get buggy at this point, because when you try to backtrack from here the platforms will be up and the wheels will not work. To avoid that, leave the Underground again and fast-travel to the location directly north and a little east of you and go in - that is the St. Paul's Chapel entrance.
From here double back to the junction and follow the path marked City Hall to the previous junction where the actual path to City Hall is.
City Hall
Following the path along the tunnel you come to a Masonic Symbol that you light the torch to reveal the path (straight) which means the left-hand branch is a dead-end. Ahead is another intersection but Eagle Vision shows an arrow indicating that the straight path is the way with the right then being a dead-end... Ahead as you follow the correct path you find another Masonic Symbol and torch that says go straight (the right-hand path being another dead-end).
The door is in a chamber just ahead, and it is a simple Lock Pick to open - so do that then exit and enter to log it! Well done! That is entrance/exit 9/11 already!
Now things get tricky - you need to backtrack all the way to the junction for Dutch Church. An easier way to do that is to go ahead and exit the Underground and then fast-travel to the South Market entrance (the one all the way at the bottom of the map) and re-enter the Underground there.
From this entrance you simply retrace your previous path to the Dutch Church junction chamber, and you will find that we have not explored the tunnels for Old Dutch Church and Bowling Green! Bit that is OK because we are going to do that now.
Old Dutch Church
The Old Dutch Church exit has no puzzles or maze connected to it, just run down a short passage and you are there. You do a simple Lock Pick and that gets you entrance/exit 10/11 easey-peasy!
Now exit and re-enter, then head back to the junction and go down the Bowling Green tunnel!
Bowling Green
At the first split the rats are headed left so the straight route is a dead-end. Turn left and follow the path to the next split – Eagle Vision indicates an arrow on the wall that says go straight from here so the left path is a dead-end. Around the corner is a large chamber with a soldier you will need to deal with, and then the path continues to an unmarked junction - the path to the right is the one you want, as the straight path and the left path lead to dead-ends.
The door at the end is the standard combination lock you need to line the locks up on, and once you do that be sure you exit and re-enter to register 11/11 entrances and thus complete the New York Underground – Well done you!
A Quick Trip Back to Homestead
Using a Harbor Master fast-travel back to Homestead and you will see that there are quite a few markers on the map. The first one you should hit is Peg Leg as he is right there at the docks, and when you talk to him he happily hands over the last of the documents in exchange for all of the Trinkets, which unlocks a new destination on the sea map! Excellent!
Homestead Mission: The Proper Tools
Now check the map and you will see the mission marker next to Big Dave's Smithy Shop. Head there now and talk to Dave and he will thank you for the tools and announce that he will get right to work on Norris' knife. That completes his mission and well done!
Homestead Mission: Silk Errand
Now check the map for the mission next to Ellen's Tailoring Shop and head there, and she asks you to retrieve the Silk from her old house. Sure you can! No worries mate!
Right then, now check the map and you will see a mission marker near the Miles End - head there now.
Homestead Mission: Finding His Flock
Inside the Inn you will meet up with Father Timothy a newly arrived minister. You need to give him $1000 to build a church – so hey, do that! The Church is build, that completes the mission, and you also unlock the Achievement “A Complete Set” (20G) See all of the optional characters settled at the Homestead.
Well done mates! Nice one! The next marker is by Lance's Woodshop, so head there now!
Homestead Mission: Tools of the Trade
When you talk to Lance he tells you that he lost most of his tools when his cart was burned, and he has spares in his Boston Shop. Could you help him get them? He asks you to meet him at the old shop and watch his back while he gathers the tools - so head to Boston and you will find the marker on the map.
He asks you to follow him to his shop, and you discover that his Apprentice has sold the shop! You head over to talk to the Apprentice and the boy basically tells you tough luck buddy! All gone! But Lance is not convinced so you follow the Apprentice and he leads you to a Chest with all the tools in it! Excellent! Looting the chest completes the mission and makes one happy Lance!
Back at the Homestead you will note that there is a mission marker near the Manor House - fast-travel to the Manor House and you hear someone yelling for help!

Homestead Mission: Get Me a Doctor!
When you reach the marker it is Prudence and she is in labor and needs the Doctor. She tells you to take her horse, and once you do you have three minutes to get the Doc and get back to her. Ride quickly to the Doctor and then you will both ride to Warren at the farm, which is not where Prudence is. You then need to ride to where she is, but you cannot get too far ahead of the Doc or her husband or the mission will stop progressing. Stay close to them but do not waste too much time and you should easily get there for the joyful CS. That completes the mission and 100% completes he second of the Doctor's missions so well done!
There is a conversation marker on the map - head to that and you will talk to the proud parents and the Doctor, and it seems that some time has passed as they are discussing the day that little Hunter was born. Nice convo...
Near Myriam's camp is another mission marker so head there next!
Homestead Mission: Fool Me Once
Norris is waiting for you and he has the knife, but he is reluctant to go and give it to her. You escort Norris to her camp but she has a task that she needs to do. Norris gives her the knife and she kisses him – then you go off tro help her hunt a wolf.
After you kill a trio of wolves you meet her at her hunting blind and see her being attacked by a soldier! You chase him down and kill him, and get a nice CS in which it turns out that Norris' gift actually saves her life!
Homestead Mission: Silk Errand
You will recall the errand that we need to run for the Tailor? Hit the Harbor Master and sail back to New York City now, and when you get there check the map and you will see the mission marker - tag it and head there to find the worthless husband. You need to analyze clues and then take the bolt of silk off the ground and return to Homestead to deliver it to Ellen.
You chat with Ellen and give her the bolt - and she thanks you. You relate the circumstances of the trip and then get 100% on the mission! Well done!
Now check your map for a new mission marker near the Wood Shop - tag it and head there next!
Homestead Mission: The Final Straw
When you arrive at the scene you see a bunch of the Homesteader's forming a gang to protect Ellen, whose husband has shown up with a gang and is trying to break into her house! You need to run after the gang and then help them defeat the bad guys!
Once you do that, Ellen is grateful and what is more, can make some new items for you! You have attained 100% and well done again!
A new Homestead Mission now appears on the map to the north - so head there next!

Homestead Mission: The Wedding
When you arrive you find Myriam and Norris are about to get married! Norris tells you the great news - and then you must accompany Father Timothy to make the wedding arrangements. Of course you also need to hold Norris's hand as he cannot find Myriam. You go in search of her and start by looking at some clues upstairs, then you find her in one of her hunting blinds and must chase her through the trees to learn what the real issue is...
But in the end you capture her and take her to be married, and all is well... At least I think it is. Is that really how it was done back in the day? Barbaric!
After the wedding there is the party, and then you chat with the guests and then the speech is made, and Connor gets a gift from Ellen: a flag! How nice. If you check the map you will note that there is now a mission marker next to Lyle's (the Doctor's) Clinic. Head there now.
Homestead Mission: Slander
When you arrive you at the Clinic you find the Doc outside pacing in the snow. It seems that a Courier from Boston brought him one of the broadsides that accuse him of all sorts of bad doctor things, which is part of a campaign to smear him organized by the British in retribution for his refusal to stop treating the rebels.
After talking to him you agree to help deal with the situation, which means heading to Boston to find the Courier... When you arrive in Boston head for the Homestead Mission marker and the Courier tells you about the newspaper vendors who are being used to spread the rumors – you need to find each one and bribe them to stop.
After you bribe the fourth newsboy you learn about the man who is paying for their ill work – the Overseer – and you are instructed to find him. Using Eagle Vision and searching the area you will find the golden glow of him, at which point he is marked and you are instructed to either beat him up or pickpocket him. If you have yet to complete the Thieves Club pickpocket challenge that will do it!
After you complete that task you get 100% Synchronization for this mission, and the Doctor's reputation is saved! Well done you!
Boston Brawlers: The Smuggler
Your next task for the Brawlers is in Boston, where you need to find the Smuggler at the mission marker, so tag that and head there to challenge him to a fight!
When you arrive there are quite a few men present and all of them will get into the fight. Your goal is to defeat the two Smugglers and with any luck you will not end up suffering the same bug that is common for this battle - which is that the last Smuggler that you fight cannot be directly attacked (when you try your character just makes a posturing motion) so it ends up being a long and drawn out affair of blocking and breaking defense until you get a lucky shot in that KO's him.
Either way once you defeat them you are prompted to battle the Stinger in the Frontier and, hey, that can be on the way back to the Homestead so why not head there now?

Boston Brawler: The Stinger
When you reach the Frontier you will see the Mission Marker on the map - tag that and head there to have a quick battle with him and his four friends, after which you are then instructed to head back to Boston (sheesh!) and fight the Ropebeater!
Boston Brawlers: The Ropebeater
When you arrive as usual you will find this guy with three mates – you need to take them out first, so once the mission starts, attack THEM. Once you have all three of them out of the way, you need to remember that the main guy is NOT able to be beaten the usual way. In fact the ONLY way you can do him damage is to throw him into objects – so forget direct attacks as they do not work and you only fail the mission that way.
Instead after you take out his three friends, you need to lure him over by the workbench and just use Counter to bang him into it. Easy-peasy Lemon-squeezy!
At this point we have done what we can do here in Boston, so head back to the Homestead now and tag the mission marker that is next to the Miles End.
Homestead Mission: An Eye for Trouble
When you arrive you find that Big Dave has captured a British soldier who was sent to look for him. The soldier claims to be alone, but as that conversation plays out you see a second soldier who runs for it and you give chase.
The second soldier is heading for a horse so your best tactic is to shoot him off of it as quickly as you can so that he does not get too far away - if that fails to kill him, run close enough and shoot him again to finish the job.
Unfortunately when you return to Big Dave you learn that while you were dealing with the second one the first managed to escape. No worries, you completed your bit and are given 100% Synchronization, but as Connor says, you can expect visitors soon...
There is a conversation marker over by the Inn so head there and have a chat with the women to learn some of the gossip. This was a long road mates, but we are finally down to the last Homestead Mission marker for this Sequence - and that one is located at the Manor House, so head there now.
Homestead Mission: Manor Mysteries
This one is for Achilles Davenport himself, who explains that he found a painting he wants to hang over the mantlepiece in the Manor. The painting is in New York, and he would like you to go there anr retrieve it for him.
Head to the harbor and sail to New York, and then check the map to find the marker and head there to trigger the second phase of the mission. Climb into the burned building to find the stashed package, and then return to Homestead and the Manor House and give the package to Achilles. That completes the quest and gives you 100% Synchronization! Good on ya mates!
This completes all of the Homestead Missions that we can do for now, and it completes this Odds and Ends Section - which turned out to be a lot longer than I was expecting! Well done though, well done indeed!
Anything missing from this guide?
ASK A QUESTION for Assassin's Creed III
 Join us on Discord

Your 'guide' sucks monkey balls. just sayin.