Sequence 03
Thank you for printing this page from www.SuperCheats.com.
Remember to come back to check for updates to this guide and much more content for Assassin's Creed III
Follow this guide to hear about updates
By CMBF

Last Updated:
As the game resumes you appear outside of the Green Dragon Tavern – instead of going inside though, we have some minor tasks to complete first, starting with synching all of the View Points that dot the map. Doing that will reveal the icons for other activities as well as treasure, and as it would also be nice to upgrade our kit, having money would be nice, right?
When you clear all of the View Points that you presently have access to (there are actually more that you cannot see right now – this city is a lot larger than you think it is) you will also reveal the icons for the General Store, Treasure Locations, Taverns, Almanac Pages, Vigilantes, Interactive Conversations, and Courier Missions, all of which we will be addressing shortly.

Synchronizing a View Point to Clear the Fog of War
Starting with the Treasures that you have revealed, head to the one to the far north end of town and you find it behind a fence next to a house and, naturally, you will need to pick the lock in order to gain access to its contents, which turn out to be a whopping $1,250! Excellent! There can be other items in the chests, specifically crafting recipes and the like, so in addition to the money there is another good reason to seek them out in the future.
The next Chest to the far south is situated in the bottom area of one of the small forts which is guarded so you have to approach it quickly and get below without being seen. Once you are there, pick the lock open and you score another $1,250 and take care of 1 of the 2 chests in this area for that collection... Bearing in mind that the other chests are not actually revealed just now, you will not be completing those Collections yet, but it is good to have started them and pocketed some money.

Claiming one of the area chests for its collection and profit
Six Men's Morris
Next on our list of things to do is to head to the Tavern to the north, inside of which we can find a gamer who wants to play Six Men's Morris with us. Six Men's Morris is an old game in which the objective is to form Mills of three pieces in a row, and each time you form one you can take one of the opponents pieces off of the board as long as that piece is not part of a Mill. There is an Achievement for winning one of each of the three types of games you can play that you can unlock once you reach the Homestead and play the games there, so why not spend a few minutes learning this game and winning one just to get the skill down?
This game is a little like Tic-Tac-Toe in a way, since there are certain starting moves that are more or less obvious – taking the middle markers on the board is a given both to create the strategy you need to win, and to keep your opponent from placing a Mill before all of the pieces are on the board. On the other hand if YOU can place a Mill before all of the other pieces are on the board, that is a good thing too.
In the Tavern by the docks (in the middle area to the right) you can play Nine Man's Morris which is a variation on this game, being the Intermediate Level, and the Tavern all the way to the north naturally enough offers the game Twelve Men's Morris, which is a lot harder being the Expert level of the game.
Oh, and if you find that the game allows your opponent to make moves that it simply will not permit YOU to make, the reason for that is that you have taken them down to three pieces, at which point they are allowed to make “Fly Moves” (jumping over the lines) at which point you will likely end up in a draw...
You can have fun with these games but bear in mind that they were designed and intended to suck away time, being one of the ways that the devs built time wasting into the game to make it last longer. I also warn you that playing these games can be incredibly frustrating – do not say I did not warn you!
Almanac Pages
Now why don't we tackle the two Almanac Pages that we know about (that are on our map)? Note that the easiest way to do them is to place your marker on them on the map so that you know where they are and whether they are above or below you, and then to approach them already on the rooftops, since they are going to head in that direction anyway! Basically if you are already up there you have a chance to grab the page in just a few steps, just saying...
Chances are when you go up on the roof to get it you will be spotted by a sentry – the easy way to get away from them is either break line of sight or duck into the nearby Tavern, as that will do it too.
If you have bad luck and the man interferes, or you lose sight of the page and it disappears, do not worry, you can return later and it will have reset. There is an Achievement for collecting all of the pages for one of the Almanacs, just so you know.
Courier Mission
Head to the marker on the map and accept the mission, and four delivery markers will appear on your radar and the map – simply run to each of those markers and interact with the person there (hit B) to deliver the papers to each. When you deliver the last paper you are given the $500 and complete the mission.
A Note About Missions: While this is not an issue right now, in future Sequences when there are optional missions and you fail to do them BEFORE you complete the Sequence, you can lose the ability to do them at all as they disappear – this happens further ahead in the game, true, but if you get into the habit of doing all of the side-missions now, when you reach the point where it is an issue it will no longer matter, since you are good about completing the optional missions already.

Having a conversation with Benjamin Franklin
Interactive Conversations
Another marker you will see on the map is the one for Interactive Conversations... Benjamin Franklin is waiting there for you, and he has a conversation with you that is actually based off of some of his own writings! These are gems and not to be missed, so head there and have a chat now!
After the chat the icon remains but time needs to pass before you can have another conversation with him...
The Main Mission
Once you tire of playing the game head to the Inn and talk to Charles to learn that your mystery woman is in a town called Lexington... Open your map and fast travel to the Frontier (which is where the next marker is at anyway) and then head through the gate and confirm you want to travel through the Frontier. Just follow the roads and trails to the marker where you meet with Lee – do not bother hunting or shooting game, as you cannot do anything with it for now.
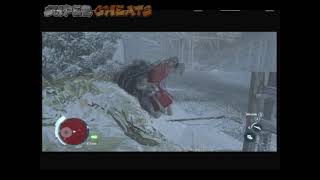
Lee has a horse for you, so mount it and follow him to the first CS location – along the way he tells you about his trouble with Braddock and how he has to go back into uniform. Basically when you arrive at the camp you find tracks leading away into the snow – so follow those to the point where you get a CS of the Native American woman setting a trap for small game – but as you approach some wolves appear and Lee shoots one, causing her to run off. You reach a campsite and are then attacked by wolves which initiates your first button-sequence challenge. Just hit the bloody buttons in the right order and you will get through it fine!
Alternatively you can just shoot them – that is what I did – then look for her in the trees above where you will find her in a perch, then chase her until you finally get a CS and chat with her!
You show her the locket and she tells you that she does recognize the symbols but cannot show you the place as it is forbidden. She tells you to meet her on the nearby hill to see if you speak the truth. Meeting her triggers another CS and you are now on a hill overlooking the town – she tells you about how Braddock is destroying her people – and you propose to kill Braddock.
Head down to the Trading Post and use the action button to enter, getting a brief CS, then go inside and eavesdrop on the two groups of soldiers there, to gather some information about Braddock's plans. Once you have the information you try to leave and are stopped by soldiers and a battle ensues...
You have two basic goals here – do not go down below 50% health, kill four of the bastards, and use two breakable objects in the fight. Watch the video for an example of meeting those goals...

Having a Barney in the Tavern for full Synchronization
– Checking Up on the Real World –
You have been in the Animus for a while now, so why not duck out and read your email, have a chat, you know, do real life things?
Talk to your mates to pick up some information and then go over to the PC you can interact with and read your email – there is actually quite a bit – and while much of it is just silly chatter the email on the Amulet is an interesting read, and the email that discusses the upgrades to the Animus is also a fascinating read in that it blends the story with the game improvements since the last title.
As far as talking to your mates basically you keep doing it until they no longer reply with new information. Once you have done all you can chat-wise it is back in the Animus for you!
Once you are back in head towards the marker to meet up with your Native American woman, and you will find yourself overlooking the camp and about to start the next mission in the Sequence.
Mission: Execution is Everything
She tells you to use the storm to approach the camp – the objectives here are to sabotage the two cannon without killing any guards – and you need to eavesdrop on your targets. Sounds easy enough, right? And there is a wagon you can stow away on to get inside the fort, so that simplifies things, but it is not quite that easy because of a few minor bugs...
You should be able to hide in the brush and tall grass but sometimes it does not work, which causes a guard to come investigate having spotted you – and that can really screw things up if you need to move and the guard is right there – you should expect to fail this a few times is what I am saying, but then again if you manage to get it in one go, well, good on you!
From the wagon you can move to the brush and then the brush by the house and if you are lucky remain undetected. This will trigger the eavesdropping portion of the mission, but you will need to trail along behind the pair you are listening to through the brush, hay, and etc. Alternatively you can wait for the nearby guard to move then climb the ladder to the tall roof nearby and listen to the whole conversation from up there.
Sabotaging the two cannon without being caught
Successfully hearing the conversation adds the requirement to find the map – the suck part here is that if you blow it you have to start from the beginning of needing to hear the conversation. There is no checkpoint until well after that.
What I ended up doing was making sure that my weapon was set to hand and then knocking out the guards that could have seen me and getting through the conversation eavesdropping, after which I stole the map from the nearby tent, then knocked out the two guards that were patrolling the area of the two cannon and sabotaged them. Rather than try to make my way out of the fort through the front, I jumped over the rampart where the second cannon is and dove into the water, swam all the way around to the right and then met up with the Native American woman. Watch the video and you will see how I was able to do this without messing it up...
Did you notice the soldier in the blue coat who was standing guard with a Redcoat? That was George Washington! Seems he was a soldier before he joined the rebellion – but make sure you don't attack him! That will fail the mission.
After you show the map to your friend she tells you that it will be better to attack Braddock at the river crossing, and tells you she will gather her forces and you should do the same.
With any luck that was not too frustrating a mission for you, and good on ya for getting it done with 100% Synchronization! Really since you can replay the memories almost whenever you like, you can always come back later if you are having trouble but getting them 100% during primary play is a bit more satisfying...
Mission: The Braddock Expedition
After the mission ends head for the marker for the Wright Tavern, and you are told that time has zoomed forward five months... You are contacted and told that it is time – so you take your crew and head for the meeting place, and have a chat with the Natives... She introduces you to the different tribes that have come to battle Braddock – then you get a CS of Braddock and his troops.
Bearing in mind that among the optional objectives on this one is to kill two militia without triggering open conflict, and destroy the powder carts, you have your work cut out for you.
The quick way to deal with this challenge is to work your way to the hay pile and take out two of the guards by stealth kills, then work your way back around and hit the marked soldier, which will cause your allies to attack – then just finish off the rest and you end up in uniform!
You are now mounted on horseback and your goal is to ride to Braddock's position – after that you get a CS and your old mate Charles Lee is there – Braddock bolts and you need to catch him AND you need to destroy the three powder carts! Actually this is a lot easier than you might think, and the process is just packed with surprises!
After the CS resolves and Braddock is fleeing, you need to immediately go forward and left on the path, keeping your horse moving the entire time. DO NOT let it stop or pause in its run. As you approach the first wagon shoot it with 'Y' BEFORE you reach it. Do the same with the second wagon, and then stay to the right a bit for the third wagon and you will be able to shoot it without it blowing up in your face and killing you and your horse. That fulfills the second optional objective – now keep riding mind you, do not stop, and chase down Braddock.

Chasing down Braddock and destroying three powder wagons
As you reach the far stream Braddock falls off of his horse and you catch up – but just as you are about to deliver a great speech and execute him, George Bloody Washington shoots your horse out from under you!
As you are laying there trapped under your horse, Washington is about to execute you when your Native American friend appears out of nowhere and tackles him, putting her knife to his throat. She does not kill him mind you, that would screw up history, rather she knocks him out. You chase down Braddock and assassinate him, triggering a CS that is very familiar to anyone who played the previous games – the whole white-world CS in which key information is obtained from a primary target before they are put to death. Well done mates! Well done indeed!
You now trigger a CS in which you realize that the ending you were hoping for – the locket opening some secret lock – is not to be. What you find is the entrance to the Temple, but as you lack an Apple you cannot open it... What comes next was, well, expected. After all it had to be the way this turned out, since we know what we know, and the bulk of the game doesn't take place for at least another 19 or 20 years... Just saying. You were not surprised, were you?
When the game resumes you are back in town, it is a few days later, and and you have 100% Synchronization for that last mission, and again, good on ya! That was a tough one! Move forward and enter the Green Dragon for a CS with Lee, resolving the quest as you report to your mates and try to explain the disaster... You tell them that it is time to establish a permanent Assassin Base here, and you induct Charles Lee into the fold as the first new member.
You swear him into the Order, and he takes the oath, and WHAAAAATTTTT?! WHAAAAATTT?! He is a what?! Oh man... Damn.
You unlock the Achievement “How D'ya Like Them Apples (20G) Complete Sequence 3.
Next is the resolution phase in the real world, and as Desmond's noggin is a bit twisted, not to mention his nickers, things get heated. The fact that he was one of your ancestors – that he was equipped with Assassin kit and used Assassin techniques – and that he was on our quest, and yet... Well some of it starts to make sense. But the melt down in the real world is what really grabbed my attention. Desmond has it out with his father, has the confrontation that we all knew was coming, and then things start to level out because some of your tech kit is messed up and you need replacement parts to fix it.
The only one here that you can have a chat with – and you should – is Sean, who confirms your suspicions about your ancestor, and adds some more details for you. Now is a good time to get back into the Animus...
Anything missing from this guide?
ASK A QUESTION for Assassin's Creed III
Comments for Sequence 03
Add a comment
Please log in above or sign up for free to post commentsNo comments yet. Tell us what you think to be the first.
Table of ContentsClose
Guide Updates
Get notified of updates to this guide
Many of our guides get updated with additional information. To get an email when this guide is updated click below.
 Join us on Discord
Click to close