19: Solarii Fortress
Thank you for printing this page from www.SuperCheats.com.
Remember to come back to check for updates to this guide and much more content for Tomb Raider
Follow this guide to hear about updates
Last Updated:
Move through the hall and crawl underneath the burning planks, then continue until you reach a larger hall with some enemies. Wait for them to finish their conversation, loot all the bodies, then continue over the roof where you'll reach a climbable wall at the end. Climb to the top and leap from beam to beam to meet mister "Aaaaaaahhhhh". After that short but pleasant encounter, continue over the walkway until a cutscene plays. Continue over the roofs and slide down the rope; you'll encounter two enemies on across the street here, so take cover and take them both out. You can find [ARROWS x2] in the corner, should you need some.
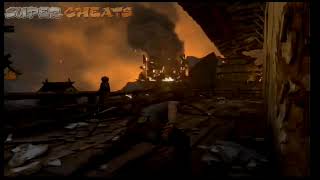
Getting through the Solarii Fortress.
You'll have to jump over to the other side, which is quite a jump, so time it carefully and prepare to get a good grip on the other side if required. Move up the wall and make your way to the end of the ceremonial hall to trigger a scene. Lara retrieves her weapons, which must be celebrated with a big firefight.
Start off with dispatching enemies by using your assault rifle, firing short bursts as usual, and only switch to your pistol when you run out of ammo. You can find [RIFLE AMMO] and [ARROWS] on the right side of the area, and [RIFLE AMMO] behind a pillar in the lower left corner should you run out. In the second phase of the battle, two armored Solarii enemies emerge. Take shelter and grab out your shotgun; a few well-aimed blasts from up close will do the trick, [140 XP]. With all enemies taken care of, proceed through the hall in the upper right corner. [100 XP].
Continue and you'll soon run into more Solarii members. Take them out and look for [RIFLE AMMO] and [SHOTGUN SHELLS] near the flames downstairs. More enemies are located further down, including one with a riot shield. Dodge his sword attack and blast him with the shotgun as his body is unshielded to finish him off effectively. You can find [ARROWS x2] against the wall across the flames. Head outside to view a short scene.
You can't directly take out the gunner, so proceed to the right side of the area taking cover (and rest) behind concrete walls and blocks. From the far right side you can continue to the upper left building and climb the wall there. Jump in the direction of the gunner and Lara leaps onto a rope, triggering a short scene. You'll have to fire the grenade launcher with RB/R1 at the end; afterward you'll have access to the [GRENADE LAUNCHER] as alternate fire on your assault rifle. Collect the [RIFLE AMMO x2] and [GRENADES] next to the heavily barricaded double doors (a new removable obstacle; can be destroyed with grenades) and blast them open.
You can find more [RIFLE AMMO] and [GRENADES] near the doorway, and [RIFLE AMMO] plus [GRENADES] and [RIFLE AMMO] in the area beyond. Since Lara can only hold seven grenades, and since the game gives them away like candy (there are more [GRENADES x2] down below), don't hesitate to take out some or most of the enemies with your newly acquired weapon add-on to save some of your regular ammunition.
Down below you gain access to the Solarii Fortress day camp, where you can most likely upgrade your shotgun into a Pump-Action Shotgun by now. After upgrading whatever you wish, continue by climbing the wall of the burning building. Go through, look for [RIFLE AMMO] at the corner of the walkway, then make your way to the end. There's some [GRENADES] next to the metal barricade at the end; blast your way through then proceed over the roofs by sliding down the rope.
You can find [GRENADES x2] and [RIFLE AMMO] here; blast out the metal barricade and take out the enemies down below. There's even more [GRENADES] and [RIFLE AMMO] behind the fence. The next wave of enemies apprears as you move down the stairs, so step back and take cover again for a decent vantage point. Various enemies spawn in the smoke-laden alley up ahead, so toss a few grenades in their direction and finish any stragglers with your assault rifle. Some of them are hiding behind armored fences that can be destroyed with grenades.
A lot of ammunition can be found in this area:
[RIFLE AMMO] lies inside the first building, [GRENADES] next to one of the entrances, [RIFLE AMMO x2] near the crate in the middle of the street nearby a burning barrel, [RIFLE AMMO x2] plus [GRENADES] to the left of here (up the small steps) and [GRENADES] in the middle of the street. There are also [GRENADES] on the steps to the right, and if you climb this structure you can find [RIFLE AMMO] and [GRENADES] inside. There are still more [GRENADES] next to the building on the right, further down the street, and if you climb up to this platform to the right you'll find more [RIFLE AMMO]. From the street, the building to your immediate left at this point you can find yet more [RIFLE AMMO]. Surely the game doesn't want you to run out of ammunition!
You can find [RIFLE AMMO] and [GRENADES] behind the shrine; head around the corner and you'll have to face another gunman behind a turret. Move from barrel to barrel until you can reach the building to the left. Climb up and hide behind the boxes, then kill the enemies on the other side of the street (either after or before sliding down the rope, though preferably before this). Move through this building, in which you can find some [GRENADES], then blast the turret with a grenade by aiming out of the window up ahead. [100 XP]. Slide down the rope to reach Sam. [100 XP].
There's [RIFLE AMMO x2] near the doors. Proceed by climbing up the structure to your right; at the top are some [GRENADES] and a rope you need to slide down. Climb the wall to enter the building. Immediately start with climbing to the platform left of Lara's starting position, as the place quickly caches fire. Leap over to the beams and jump to the climbable wall to the right from here to exit the building. [400 XP].
A chase scene starts playing: Move Lara across the bridge until she leaps to a next segment; wiggle the left analog stick to the left and right, then press Y or Triangle. Lastly, jump from bridge segment to bridge segment until you safely reach the end. [100 XP].
Start climbing the planks in this area, leap over the gap, use the pole to get across - you know the drill. As you reach the top of the climbable wall, give Lara a good grip, then jump on the wooden rail and climb it so Lara balances on top of it. Walk over and leap to the crate, get a good grip, and jump to the last beam of this building to make it outside.
Quickly climb the climbable wall, make your way over the beam on the right and climb another wall with jump-climbing moves to accellerate Lara's movement (also get a good grip around this point once again). [100 XP]. At the top, jump for the helicopter to trigger several scenes.
Anything missing from this guide?
ASK A QUESTION for Tomb Raider
Comments for 19: Solarii Fortress
Add a comment
Please log in above or sign up for free to post commentsTable of ContentsClose
Guide Updates
Get notified of updates to this guide
Many of our guides get updated with additional information. To get an email when this guide is updated click below.
 Join us on Discord
Click to close
So i jump to a banister collapsed stairs, at the top is a box on a roap i am assuming i need to jump too, the stupid Lara, always turns around and wants to stay at the bottom of the banister and not move up. Either this is a glitch that nothing is explaining, or i went the wrong way.
This is no help getting across the bridge. There is a cut scene in which you need to jump from platform to platform while everything is getting blown up. You reach a dead end. Still don't know what to do. The walk thru above is too vague.