World Map Exploration - The Southern Isles
Thank you for printing this page from www.SuperCheats.com.
Remember to come back to check for updates to this guide and much more content for Ni No Kuni: Wrath of the White Witch
Follow this guide to hear about updates
Last Updated:
Items: ![[ ]](/images/smilies/square.gif "[ ]") Phoenix Feather x3, Pointy Hat, Sacred Dagger, Fishburger x2, Fine Frock, Sturdy Shinbone x2, Cappucino x2, Game Pie, Sage's Secret, Angula x2, See-through Pie x2, Fishburger x2, Dumbflounder x5, Glowshrimp x5
Phoenix Feather x3, Pointy Hat, Sacred Dagger, Fishburger x2, Fine Frock, Sturdy Shinbone x2, Cappucino x2, Game Pie, Sage's Secret, Angula x2, See-through Pie x2, Fishburger x2, Dumbflounder x5, Glowshrimp x5
*Items: Gnomebeard, Angula, Slumbernot Leaves x2, Gnomebeard, Angula
Enemies: Sparkee (073), Airhead (197), Hooray (069), Splisher (065), Baabarian (034), Hippeafowl (090), Lagoon Naiad (193), Potty (209), Kipper (237), Tadolescent (062), Tu-Whoo (102)
*Only the enemies you can handle at this point are listed above.
You can now explore the worldmap, although many enemies are way too strong for you to currently handle. There are, nonetheless, several areas you might want to check out already before going straight to Autumnia.
• Visit the previously inaccessible beach that is barely to the northwest of Castaway Cove and search the rock wall in the middle for a [POINTY HAT], which is an excellent piece of defensive equipment for Hurly, Swaine's familiar.
* (South)east of Castaway Cove lies Robinson Island, a series of small isles. Disembark at the first small (westernmost) island to find a forage point that contains a [GNOMEBEARD].
* A second forage point can be found on Robinson Island itself, in the middle of the western area, near some bush. It contains an [ANGULA], which is used in some useful alchemy formulas as seen above.
• The far south tip of Robinson Island contains a [SACRED DAGGER], which is a pretty good weapon at this point in the game. It has a small chance (3%) to inflict Nix on enemies whenever it strikes.
• For the last treasure on Robinson Island, you can find [FISHBURGER x2] at the base of the (north)easternmost palm tree.
(The crab from errand #050 can also be found on the nearby sandbank.)
• East from Robinson Island lies a small sandbank with a large shell on its south side. Inspect it to find a [FINE FROCK], which is an excellent piece of equipment for the time being.
* To the northeast of Robinson Island (as well as the small sandbank) lies Friday Island. There's a forage point next to the lone palmtree that gives you [SLUMBERNOT LEAVES x2].
• Head to the far north tip of Friday Island and inspect the palm trees to find [STURDY SHINBONE x2].
Now's also an excellent time to do the three bounties from Castaway Cove (#093, #094 & #095).
Bounty 93
Bounty #093 - A Greedy Pirate Gang
Description: A gang of thieving creatures have been attacking cargo ships. Their crime spree cannot be allowed to continue!
Last Seen: On Robinson Island (Southeastern Summerlands)
Stamps: 3
Rewards: Poison Pinch Gem, 600 G
Enemies: Purrloiner (005), Cutpurrse (006), Puss in Bouts (007)
Spoils: 193 EXP, 149 G
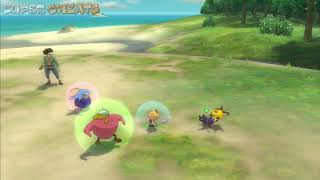
These catbandits can be found on the small island south of Robinson Island. Be sure to defeat the Purrloiner first, then heal your party and solely focus on the Cutpurrse, only going for the Puss in Bouts after its comrades have fallen. It helps to have water spells/tricks, but they're not really necessary either in order to win the battle.
Bounty #094 - A Starving Sea Monster
Description: An enormous sea monster has been attacking fishing vessels of late. It must be stopped before it causes more destruction!
Last Seen: Near Robinson Island (Southeastern Summerlands).
Stamps: 5
Rewards: Whalefish Tusk, 800 G
Enemies: Hubber Blubber (305)
Spoils: 137 EXP, 152 G
This creature can be found swimming around Robinson Island. Disembark the Sea Cow and check your local map to get an idea where it's current position is. It's wise to equip weapons that inflict the Storm element since the creature is weak against it. Abilities such as Thunderspark are particularly effective in this battle, so be sure to command your Drongo manually and have a full MP bar at the start of the fight.

Bounty 95
Bounty #095 - Researchers' Ruin
Description: A team of researchers have been attacked by a huge monster while exploring some ancient ruins. They must be rescued!
Last Seen: On the Shipwreck Shore (Summerlands).
Stamps: 5
Rewards: Sacred Dagger, 800 G
Enemies: Collum (317)
Spoils: 153 EXP, 136 G
To the northeast of Castaway Cove is a piece lies a piece of unexplored land of which one entrance is blocked by a big Collum. Defeating it is best done by keeping your distance (with the possible exception of Swaine's Hurly) and casting Storm-elemental attacks with your Drongo. Equip other Familiars such as the Mite with Storm-based equipment to give you a small advantage.
You can now head back and claim the bounties. If you have any full Merit Cards left you can now purchase a new Merit Award; Jolly Jack-Tar. This allows your ship to move faster, also making it easier to avoid any unwanted encounters with enemies. If you've been doing all errands and bounties so far, it's the last award currently available. If your party members are exhausted from all the fights, head over to the Cat's Cradle as well to heal up.
NOTE: By completing all Bounty Hunts up until now, you should receive the 'New Sheriff in Town' trophy for completing 10 Bounties.
When you're ready, head back to your ship and set sail to Shipwreck Shore!
The Shipwreck Shore
WARNING: You're about to explore an area with very powerful enemies. Save your game beforehand and keep multiple files so you can even save during your exploration without possibly getting stuck somewhere.
Head to the piece of unexplored land to the northeast of Castaway Cove (where you fought the Collum), which is properly called 'Shipwreck Shore'. The enemies here are BRUTAL, so it's best to save your game and try to avoid them while searching for the following treasures. You have been WARNED. Remember that you can also run from enemies; it's wise to do so around here.
• Enter the area through the arch on the south. Directly left/west of the arch (on the northern side) you can find [CAPPUCCINO x2] next to the curved rock wand.
• There's a hidden Forest Glade on the top of the eastern plateau next to the arch. To get here, travel along the west side to reach the top of the hill, then move east over the arch and enter the forest. There are many enemies around this area, so be sure to save your game beforehand. Inside the forest glade you can grab a [GAME PIE] from the regular chest, note down the existence of the purple chest, and stand next to the tree across these two chests, looking up to the pillar to the north to notice a green chest with a [SAGE'S SECRET] inside.
* The forage point just south of the hidden Forest Glade contains a [GNOMEBEARD], but it's heavily guarded by enemies and might not be worth it at this point.
• It's a little tricky to navigate towards it without getting into any fights, but the grassy ridge to the far southwest has [ANGULA x2].
• Approach the ruins to the north. While the building is inaccessible, the pillar directly south (on the right) marks [SEE-THROUGH PIE x2].
• Taking the arch near the beach as starting point, head all the way north to the second set of ruins near the mountains and inspect the big, partly buried rectangular stone to find [FISHBURGER x2].
• Head back to your ship and disembark at the shipwreck just on the eastern side of the beach, to the south. Search between the rocks on the southwest side of it to find [DUMBFLOUNDER x5].
• Disembark at the second shipwreck (just to the north of the first) and inspect the bottom side of its front to find [GLOWSHRIMP x5].
* There's also a forage point up the mountain north of the second shipwreck that contains an [ANGULA], but the area is roaming with monsters, so it's best to harvest it later.
While you can technically explore other areas of the world map at this point, doing so is very dangerous as the creatures will slaughter you with the blink of an eye. It's better to sail to your destination, Hamelin.
NOTE: Now is also your last chance to backtrack all the way to Old Father Oak, telling him about your progress. Your reward will be [PIXIE DEW x3].
Next Page
Sailing to Autumnia (and Teeheeti)Previous Page
Permission to Sail, Your Moojesty?
Sailing to Autumnia (and Teeheeti)Previous Page
Permission to Sail, Your Moojesty?
Guide Menu
Anything missing from this guide?
ASK A QUESTION for Ni No Kuni: Wrath of the White Witch
Comments for World Map Exploration - The Southern Isles
Add a comment
Please log in above or sign up for free to post commentsTable of ContentsClose
- S1: Entering Another World
- S2: The Southern Summerlands
- S3: The Sparkling Seas
- S4: Southern Autumnia
- S5: Search for the Magicstones
- S6: The Dark Djinn
- S7: Wrath of the White Witch
- Post Completion
- Items and Equipment
- Characters and Familiars
- Errands and Bounties
Guide Updates
Get notified of updates to this guide
Many of our guides get updated with additional information. To get an email when this guide is updated click below.
 Join us on Discord
Click to close
did you copy this straight from gamefaqs?