5. Kaiser Wilhelm: Imperial Railroad
Level Medal 1: Kill 50 units with barrages.
Level Medal 2: Finish the level without upgrading.
Right so the Dark Lord's Introduction happens to be on a train set - how cool is that? Ah but this time around it is also peopled with two interesting and even challenging -- umm - challenges. The Barrage one will not be all that difficult really, but completing the level without upgrading? That might be a challenge to be mastered.
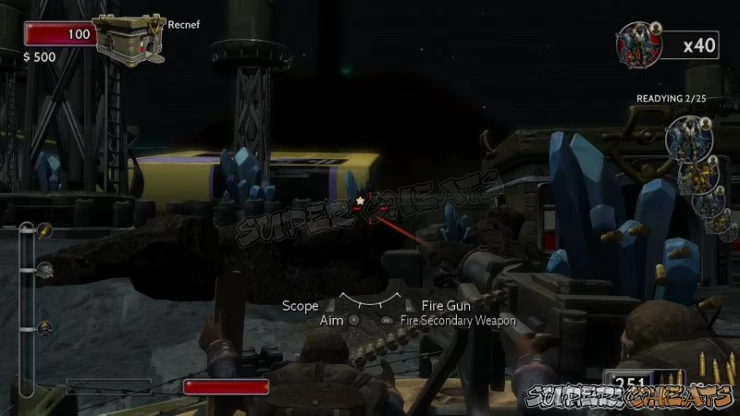
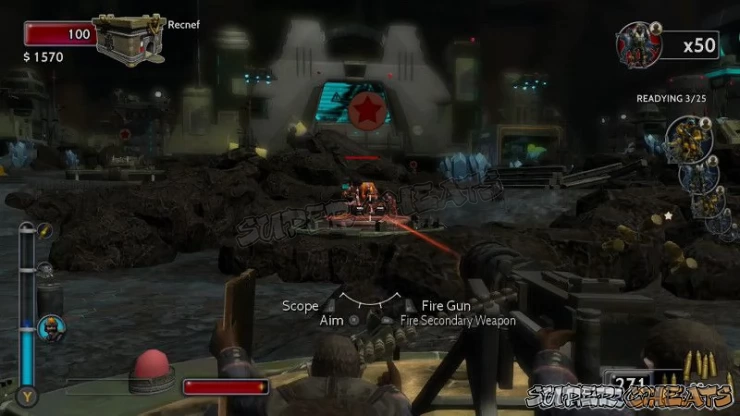
You should note after the opening graphics complete and you insert into the battlefield that we start in a tank! Now you first inclination may be to seek out the wave that just spawned - but you would be better off immediately targeting and killing the enemy turrets nearby!
In fact you should make eliminating them a priority.

Once you have eliminated them all that does NOT mean you should build in all of them. This is actually a tricky level because at the end - the last wave - is a combination of the boss mob (K-Wagon) and bombers.
Fortunately there is a relatively easy and effective way for dealing with the boss at the end - which we will get to. First though, as is the pattern we have been following, we need to address the challenges.
As usual we begin our play in this by attempting the challenges in order to unlock the Medals - but this level is unique in that we are facing a boss mob for the first time, and that mates makes meeting the requirements for the second challenge a LOT harder!
For the first challenge Medal you are being judged by barrages. Those are the special attack of your Hero - in this case, The Kaiser. That introduces several catches. For example to USE the barrage means spawning your Hero. To do THAT means building up the required Action Points.
So yeah, the first challenge? Not as straight forward as you might think!
On the plus side though, the basic strategy we use for completing the Level happens to play nicely into the required strategies for completing the challenges! We know that looking at this from the start makes it seem pretty big in terms of the challenge, but if you think outside of the box, it is not.
First challenge: Kill 50 Enemy with Barrages.
This one is the sort of challenge that you can easily make yourself miserable trying to do again and again, and failing. The reason for that is that completing the challenge basically requires you to play in a counter-intuitive manner. That said, here is how WE did it in one go...
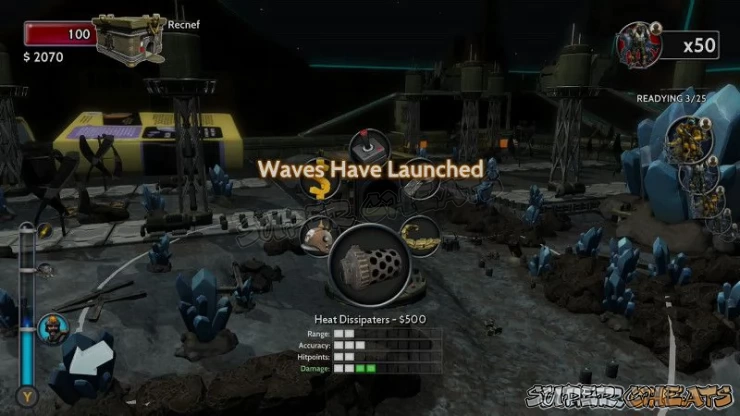
Place a single MG turret in the spot right next to the Toybox. Now fully upgrade the MG turret all the way. Use THAT turret to do all the killing - troops and tanks.
Place two Flak Guns. Upgrade them all the way for range and damage. Use the upgrade HP trick for repairing them later. Same for the MG turret - you repair it by upgrading its HP.
Now what you will find is that by the time you get to the level BEFORE the last level, you will have capped the Action Points. So you can call the Barrage whenever you like up to that point.
The level BEFORE the last level is a mixture of Infantry and Tanks. Something like 75 Infantry. You just need to wait for the middle group and the right-hand-side group to get close to each other, then drop the Barrage on them and you will instantly and easily get your 50 kills!
It really is as simple as that.
Now there is the issue of actually winning / surviving the level so that this Medal gets recorded.
Remember we said to think outside of the box? Well the answer to the K-Wagon is your Flak Guns. Seriously! They will very rapidly chew that puppy up! That is why we told you to place them and fully upgrade them.
So starting early - as soon as the K-Wagon spawns, using the right-hand Flak Gun, and take it down as far as you can without having to repair the turret. If it gets low switch to the other Flak Gun - do NOT wait for it to repair or for the HP to upgrade.
Your goal here is to take out the K-Wagon BEFORE it summons its allies!
If you are too slow about it, eventually the K-Wagon will move to the center area - and summon allies -- which is when we switch to the left-hand Flak Gun anyway to finish it off.
When you destroy the K-Wagon ALL of its summoned allies die, and the level completes. If you do it fast enough - the thing will never get to summon a single ally.
So there you go - you have now unlocked the first Medal AND completed the Level.
Challenge Two: Complete the level with no upgrades.

The second challenge is a little trickier. For that we can do no upgrades at all.
One thing you need to understand from the start - it is not enough to simply build a bunch of turrets and then keep them repaired because that will not get you past killing the K-Wagon. In fact that is the toughest part of this whole challenge - because without the damage upgrades, the trick with the Flak Guns does not really work as well here!
The important thing is unlocking the Medal / completing the Challenge, not scoring high here. Remember that.
That said though, you have to find a way to deal good damage to the K-Wagon, and from our experiences with the level, that means you MUST cap off your Action Points in order to get the Walking Artillery available for use when the K-Wagon arrives.
If you build a single MG Turret for the early levels you can easily max-out the Action Points. Once you have, then you do not use them until the final wave.
To complete this final wave - and take out the K-Wagon - is NOT impossible - though it may feel like it is. In fact you should expect to fail more than a few times, because the trick to this one is all TIMING.
First point, the most effective time to use the Walking Artillery is when you have just completed the second layer of its defenses, as the Walking Artillery will take out almost a full layer of defenses for the K-Wagon all on its own.
So if you time it right, you will take out the Orange Layer just as the K-Wagon begins its final turn in the back of the battlefield as it prepares to really lay into your turrets there. once it does that, you use the Walking Arty to take out that layer, and you are down to the Red Layer.
Now all you need to do is keep firing the Flak Gun at the K-Wagon, and while it is reloading, repair or replace the Anti-Armor Turrets on the field. The combined effect of their fire and your fire from the Flak Gun is sufficient to take down the final Red Layer well before the K-Wagon makes its dash for your Toybox.
We are not just saying that - we DID it. More than once. This WILL work. Just be patient, and work on your timing.
Now once you have those both done, you can replay for score - since that allows for a more score focused approach since you are not trying to satisfy any other requirements.
When you complete the level for the first time you will unlock the Achievement: Beast Master (100g) Completed Dark Lord's Intro Campaign Mission.
So yeah, well done you!
Hero: Phantom
Some initial observations - this level CAN work as well with Phantom as with The Kaiser, but pretty much not for the second Challenge - which is to finish the level without upgrading any units. The reason for that in simple terms? Damage. Or specifically your ability to deal it.
The problem is that the Flak Gun trick does not work as well with Phantom as it does with The Kaiser. The reason for that has to do with the fact that the Flak Gun for Phantom has target tracking, and it will lock onto the rockets that the Boss Mob fires, which reduces your ability to do any damage to the Boss.
That said, the first Challenge is as easy as with The Kaiser or easier.
To manage the second Challenge though, requires you to do two things. Keep your Turrets repaired, and move from Anti-Armor Turret to Anti-Armor Turret firing each shot with pretty much perfect timing. IF you can do that though, you will find that using your Barrage Attack during the Orange Phase pretty much guarantees you killing the Boss Mob.
Once you have the two challenges out of the way you can rack pretty good scores for this level just using a few turrets - 2 Anti-Armor and 1 MG with 1 Flak is what we found to be the best setup.

Hero: Star Bright
Despite the fact that all of the levels up to now required at least some thought and care - and the application of specific strategies - it was this level that finally presented something of a challenge for most players.
While the strategy for the previous Heroes was largely to rely on the Flak Guns to take out the boss mob at the end of this level, for Star Bright with her very effective Anti-Armor beam weapons, it is far easier - and faster - to rely on a combination of the Anti-Armor turrets and the hero weapon to take out this massive tank then to utilize the Flak Guns - though you can still do that if you like.
Hero: Darklord
You will be using the same strategy that we used for The Kaiser for this hero.
His weapons are not as robust in terms of dishing damage overall as that of Star Bright, but they are as strong and maybe - at least in the case of the Anti-Armor - a little bit stronger.
You may find that this hero is particularly challenged for doing the challenges / medals - which is why we don't recommend it. This one, specifically, is what you might call an acquired taste.
Hero: GI Joe Duke
This hero is basically a new and improved version of The Kaiser - which means you can follow the strategy from The Kaiser run-thru pretty much to the letter, though Duke will be a bit more effective both in damage dealing and defense.
Hero: GI Joe Cobra Enemy
The Cobra Hero uses the same strategy that you used for The Kaiser, having similar weapon platforms (though more modern).
If you are looking for the perfect hero to do the medal challenges, this is very likely the one. It certainly has an edge over all of the other Heroes, that is for sure. Particularly in terms of its anti-armor, which is Stinger Missile based.
Simply follow the strategy from The Kaiser section to complete the level.
Hero: He-Man
This hero is basically an energy-based version of The Kaiser - which means you can follow the strategy from The Kaiser run-thru pretty much to the letter, though He-Man will be a bit less effective both in damage dealing and defense.
Of course if you just want to play He-Man - you know, you have He-Man fantasies and such - well nobody is stopping you! Go for it!
Hero: Ezio
For the Ezio Hero you follow the standard strategy that is used by The Kaiser. Bear in mind though that the weaker attack and damage powers of Ezio's turrets means you will need to begin your attacks earlier and pay closer attention to how close you allow the enemy to get to your toybox.
6. Kaiser Wilhelm: Tycho BasePrevious Page
4. Kaiser Wilhelm: Ancient Battlefield
Anything missing from this guide?
ASK A QUESTION for Toy Soldiers: War Chest
 Join us on Discord
