11. Kaiser Wilhelm: Stonehenge
Level Medal 1: Repair 40 Times
Level Medal 2: Finish the Level without taking control of a turret.
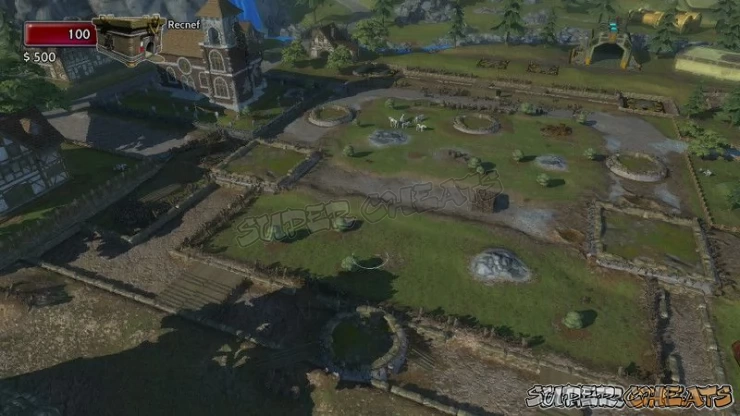
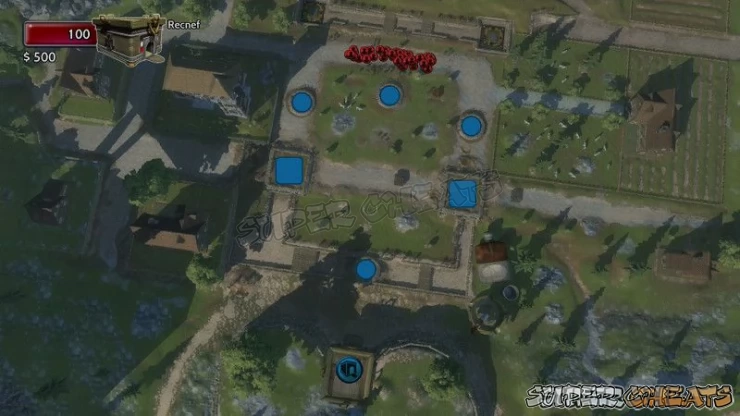
As you can see the battlefield is a sort of stylized Stonehenge, and we are facing off against the Dark Lord. While this is a battle-in-the-round, there is only one opening to our Toybox, which means that some of the waves will circle around the back before making a run at the entrance.
That noted, while that may work out well for the challenges, since placing around will make it easier to complete both, it does not work out so well for the Score Run, which we would need to spend less money, not more.
The final wave of the level features a new Boss Mob called the Rune Golem - and killing it using the regular turrets takes a fair bit of work even with a barrage ready. That said, while you may in fact have trouble with it doing the second challenge, if you split the challenges up using turrets for the first challenge and Score Run you can easily kill it with Flak Guns.

Of course to do that you have to be able to PLACE the Flak Guns, and to do THAT you have to man a turret and take out the enemy Turrets that are occupying the square placements at the start of the game. Just saying.
Level Medal 1: Repair 40 Times
This one is really the easier of the two - assuming you can strike the correct balance between weak HP and strong damage, since you know, you have to be DOING damage to get the money to repair the turrets that get damaged.
That said, it really is not hard to do, but in this case due to the large waves you will want to have turrets with max range and damage, than you would if you were manning them yourself. This assumes you are going for both challenges at the same time of course.
The reason for that is that the turrets that you are not controlling? Well they do not always pick the best targets or use the most strategic aim on their own.
In any case you will find that once you have the right number and mix - for us that was between three and four turrets, alternating MG and Anti-Armor, unlocking this was a snap - and more if you are actually doing these separately since you will NEED to man turrets to take out the enemy artillery if you want to use more than just the placements in front.
Level Medal 2: Finish the Level without taking control of a turret.
This one was a bit more difficult and required constant supervision to make it work smoothly.
We basically used up all of the placements that we could without them coming under attack for this eventually, but even then we had a little trouble with keeping them all repaired since the more you upgrade them, the more expensive they are to repair, so we ended up compromising.
That compromise was to only upgrade the damage and range once for each of the MG Turrets, and varying degrees for the Anti-Armor depending on how close to the sides they were. That tactic seemed to work the best for us.
Score Run
For this (likely) third run through you will want to man turrets pretty much constantly, ducking out only for strategic changes and repairs. The best tactic for us was to let the Anti-Armor do its thing while we mostly manned MG and Flak Turrets.
For the Score Run we cannot emphasize enough the difference it makes to man the turrets during your kills at least score wise.

Hero: Phantom
Despite this being a very simple and basic battlefield, the battle-in-the-round that we have here is exacerbated by two factors. The first is the presence of enemy turrets that restricts our access to the rest of the round. The second is the rapidity with which the attacks come, and the size and mix of the waves.
That being so, and while you can easily unlock the Medals for this if you apply yourself, the fact that there were several previous Challenges that Phantom did not do so well with (and though we have previously said so) do not commit until you have experienced all of the Heroes.
The facts are that there is a Hero whose style you will mesh better with than the others. Whether it is the Hero or their weapons, either way, you are best off (and less frustrated) going with your strengths!
For Phantom, her strengths are down to the Anti-Armor Turret, which is far more effective and powerful than The Kaisers. Unfortunately her Artillery, and her MG Turrets are actually weaker. The MG because of how fast it cycles through its rounds, and the Artillery because of its limited attack aim. At least that was our take on it.
Hero: Star Bright
Right so, this level is not one of the best liked it seems, at least that is the case based on the conversations that I have had with the folks on my friend list who are playing the game. It is a battle in the round, but access to the side and rear build spots is restricted by enemy turrets.
That being the case, despite the better weapon impact for Star Bright the basic strategy remains what we did with The Kaiser - with the exception that with the more efficient and powerful Anti-Armor you will not have to man them as much. Assuming you get range and damage upgraded on them of course.
The only significant difference between using Star and the previous Heroes is in the final boss battle for this level - which you use the Anti-Armor for rather than the Flak Turret simply because the Anti-Armor is way more effective.
Hero: Darklord
You will be using the same strategy that we used for The Kaiser for this hero.
His weapons are not as robust in terms of dishing damage overall as that of Star Bright, but they are as strong and maybe - at least in the case of the Anti-Armor - a little bit stronger.
You may find that this hero is particularly challenged for doing the challenges / medals - which is why we don't recommend it. This one, specifically, is what you might call an acquired taste.

Hero: GI Joe Duke
This hero is basically a new and improved version of The Kaiser - which means you can follow the strategy from The Kaiser run-thru pretty much to the letter, though Duke will be a bit more effective both in damage dealing and defense.
Hero: GI Joe Cobra Enemy
The Cobra Hero uses the same strategy that you used for The Kaiser, having similar weapon platforms (though more modern).
If you are looking for the perfect hero to do the medal challenges, this is very likely the one. It certainly has an edge over all of the other Heroes, that is for sure. Particularly in terms of its anti-armor, which is Stinger Missile based.
Simply follow the strategy from The Kaiser section to complete the level.
Hero: He-Man
This hero is basically an energy-based version of The Kaiser - which means you can follow the strategy from The Kaiser run-thru pretty much to the letter, though He-Man will be a bit less effective both in damage dealing and defense.
Of course if you just want to play He-Man - you know, you have He-Man fantasies and such - well nobody is stopping you! Go for it!
Hero: Ezio
For the Ezio Hero you follow the standard strategy that is used by The Kaiser. Bear in mind though that the weaker attack and damage powers of Ezio's turrets means you will need to begin your attacks earlier and pay closer attention to how close you allow the enemy to get to your toybox.
Anything missing from this guide?
ASK A QUESTION for Toy Soldiers: War Chest
 Join us on Discord
