Boss Guide
Kingdom Hearts Walkthrough and Guide
by SPV999
Kingdom Hearts Guide - Appendix
Boss Guide
 Boss Guide |
Every hero needs a villain, and every villain must have a more powerful villain controlling him. These are the Bosses.
Here we'll take a look at all the bosses in the game as you face them.
*NOTE: This is for actual game bosses. Anyone you fight in the Coliseum, including Hercules, Hades, Cloud and the like, are in the Coliseum section! Sephiroth, Phantom, Kurt Zisa, and Ice Titan are in the Optional Boss section!*
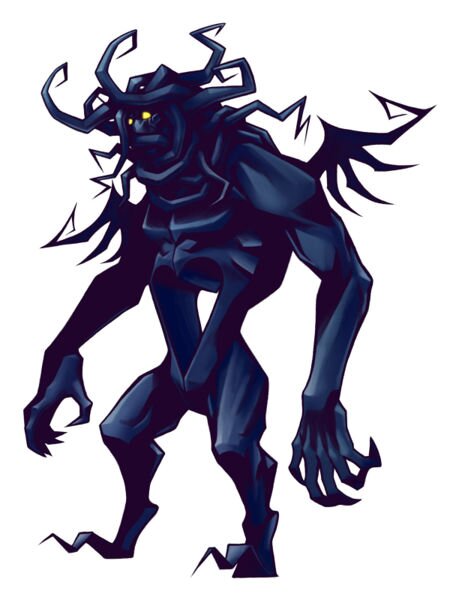
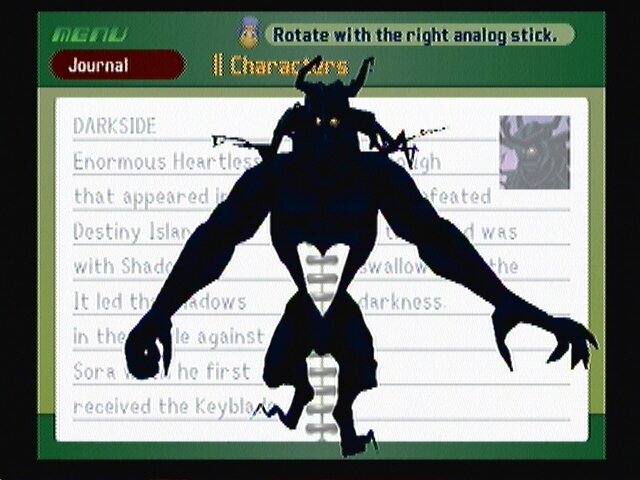 --== Darkside ==-- |
Awakening:
HP    ATK   DEF   MPr   EXP
240   2     2     0     18
Item Drops: None
Resistance:
Weapon  Fire   Blizzard   Thunder   Gravity   Stop   Finish
* 1     * .5   * .5       * 1       * .04     * 0    * .5
Destiny Island:
HP    ATK   DEF   MPr   EXP
300   6     6     0     60
Item Drops: None
Resistance:
Weapon  Fire   Blizzard   Thunder   Gravity   Stop   Finish
* 1     * .5   * .5       * 1       * .04     * 0    * .5
End of the World:
HP    ATK   DEF   MPr   EXP
900   40    30    58    8000
Item Drops: None
Resistance:
Weapon  Fire   Blizzard   Thunder   Gravity   Stop   Finish
* 1     * .49 * .5       * 1       * .04     * 0    * .5
You fight Darkside twice in the game, both happen very early on.
Attacks:
1) Dark Portal. Fist starts to glow, leans back, and slams it forward into the ground. This creates a portal that spawns Shadows.
2) Black Laser. Takes a “Why?!” pose, and his chest starts to glow. He'll then fire 2-6 homing lasers.
How to Dodge:
1) The initial attack wont hit you, as it's not aimed at you. More so the Shadows spawned from it are meant to hurt you, not that they will.
2) Just stay close to Darkside and the attack wont hone in properly. If it comes close enough, you can swing you weapon to deflect it and earn a tech point.
Strategy:
Darksides only weakness is his hands. His right hand in particular, as it's easier to hit. Stay locked on to it and hammer away.
 --== Guard Armor ==-- |
Head:
HP    ATK   DEF   MPr   EXP
700   8     8     12    110
Arms:
HP    ATK   DEF   MPr   EXP
84*2  11    10    13    0
Legs:
HP    ATK   DEF   MPr   EXP
196*2 11    10    13    0
Item Drops: Brave Warrior
Resistance:
Weapon  Fire   Blizzard   Thunder   Gravity   Stop   Finish
* 1     * .5   * .5       * 1       * .04     * 0    * .5
Guard Armor is separated into 5 different parts: 2 feet, 2 arms, and body and head as 1 part. Destroying any part will eliminate any attack that he used to perform with said part.
Attacks:
1) Stomp. Jumps up and slams down with his feet, creates a small shockwave.
2) Hurricane Hands. Spins his hands like a mixer around his body.
3) Twister. This whole body spins around.
How to Dodge:
1) Can be parried if attacked at the right time.
2) Can be parried, but I normally seem to be at a distance whenever he does it, thus dodging it.
3) He'll only do this after his body is the only thing left. It can be parried, but it's not worth looking out for, and he uses it constantly, so trying to dodge is just a pain.
Strategy:
Lock onto the legs first and take them out, as that is his most powerful attack. Hands next. The body will always be the last thing to go, as you actually cant destroy it before everything else. I wouldn't even bother dodging his attacks. I just lock on and smash away.
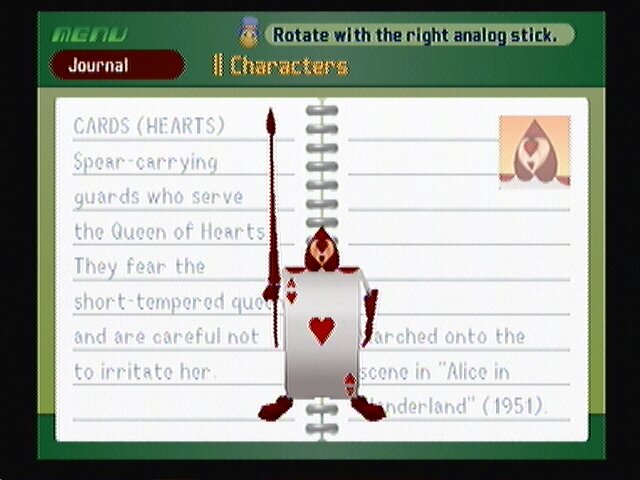 --== Cards & Tower ==-- |
Cards:
HP    ATK   DEF   MPr   EXP
60    9     9     11    0
Item Drops: None
Resistance:
Weapon  Fire   Blizzard   Thunder   Gravity   Stop   Finish
* 1     * .5   * .5       * 1       * .04     * 0    * .5
(Tower Unknown Stats)
Strategy:
This battle is easy if you have Donald and Goofy to distract the Cards for you. If you don't, I hope you have some potions on hand. The Cards are irrelevant to this fight, they are just meant to distract you. You don't even get EXP from them. Focus on the tower and hammer on the three cranks. If the Cards swarm you, run away and lure them with you, then run back, they're pretty slow so it will take them some time to get back to you.
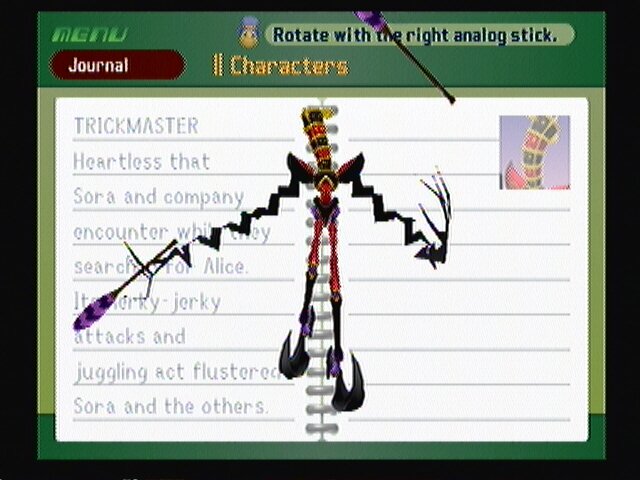 --== Trickmaster ==-- |
HP    ATK   DEF   MPr   EXP
600   9     9     15    150
Item Drops: Ifrit's Horn
Resistance:
Weapon  Fire   Blizzard   Thunder   Gravity   Stop   Finish
* 1     * .5   * .5       * 1       * .04     * .3   * .5
Strategy:
It's only attack really consists of swinging his maracas at you. It can shoot fire out of them IF they are lit, but he'll only light them if 1) he can get away from you long enough to reach the stove or 2) you shoot Fire magic at him. If you just stay locked on and have Goofy's Rocket ability equipped, you'll be fine. Jump up and hold the jump button, attacking at the very apex of the jump, will get you enough height to reach his body and score a hit. After a couple hits, he will bend down and be dazed for a moment, allowing you to get a couple combos in.
If you cant seem to reach him by jumping, you'll have to use the chair to reach the table and jump off of that. The only problem here is that it gives him time to move around and either light is maracas or destroy the table. The later of which will take time to fix itself leaving you out to dry.
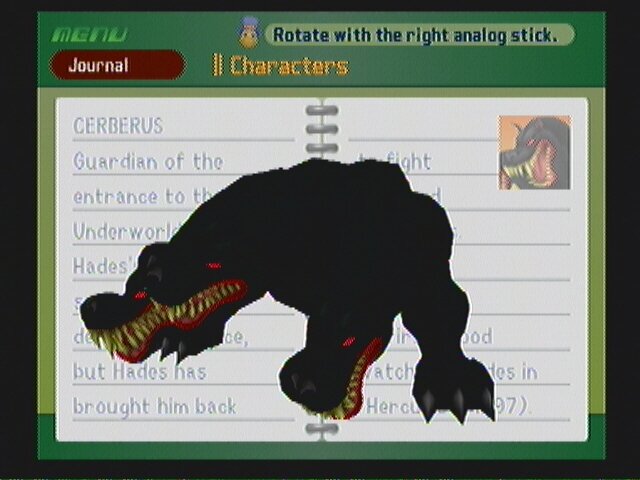 --== Cerberus ==-- |
HP    ATK   DEF   MPr   EXP
600   11    10    17    200
Item Drops: Inferno Band
Resistance:
Weapon  Fire   Blizzard   Thunder   Gravity   Stop   Finish
* 1     * .5   * .5       * 1       * .04     * .3   * .5
Hades Dog of War. Guardian of the underworld.
Attacks:
1) Darkness Surge. Tilts his heads up, dark fog starts foaming from his mouth, and spits this fog into the ground. Small dark vortexes will appear on the ground near you and surge up.
2) Fireballs. Shoots fireballs from his mouth.
3) Bite. This is a two part attack. He'll lower all three heads low enough for you to reach them. He'll snap individually with each head for a second, then all three will raise and chomp at the same time.
4) Shockwave. Usually used after Bite. Raises up his front legs and stomps the ground, creating a shockwave.
How to Dodge:
1) Keep moving, particularly while dodge rolling periodically.
2) At start, these can be blocked and sent back at him. However, later he uses this in tandem with Darkness Surge, making it impossible to send back. Stay behind him to avoid the balls.
3) This is your chance to do some damage. Lock on to one of the outer heads and attack. You can usually get one aerial combo in before is does the tandem bite. Make sure you're out of the way for that one.
4) When you see him start to come down, jump into the air.
Strategy:
Darkness Surge -> Fireballs -> Bite -> Shockwave -> Repeat. That is the flow of this battle. Get used to this flow and the flow of the Bite attack and victory is yours. Also note that if you have the magic power, when he lowers his head to bite Blizzard will do a fair amount of damage. Thunder does more, but is actually harder to hit with.
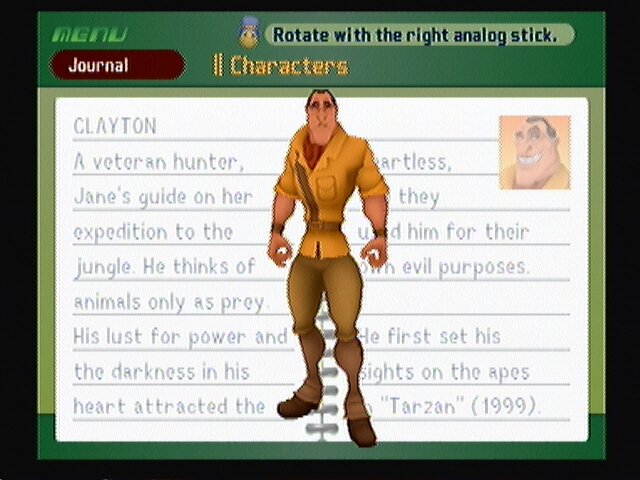 --== Clayton ==-- | 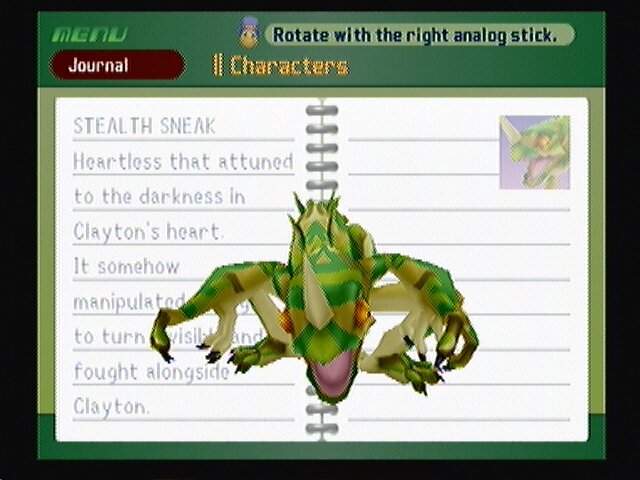 --== Stealth Sneak ==-- |
Clayton:
HP    ATK   DEF   MPr   EXP
250   12    11    20    240
Item Drops: None
Resistance:
Weapon  Fire   Blizzard   Thunder   Gravity   Stop   Finish
* 1     * .5   * .5       * 1       * .04     * 0    * .5
Stealth Sneak:
HP    ATK   DEF   MPr   EXP
750   12    11    20    30
Item Drops: Mega-Potion
Resistance:
Weapon  Fire   Blizzard   Thunder   Gravity   Stop   Finish
* 1     * 5    * 5        * 1       * .04     * 0    * .5
Stage 1: Clayton
Strategy:
Clayton only has one attack: Shotgun. The only real thing he has going for him is the fact that he can heal himself endlessly. For now, take out the Powerwilds so you can focus on Clayton. Keep hammering Clayton till the next part of the battle starts.
Stage 2: Clayton Stealth Sneak
Strategy:
It's still the same fight as before, only it's one large Powerwild, more or less. Focus on the Stealth Sneak. It's main attack is to kick with it's hind legs, which isn't that effective.
Once it takes some damage, it'll shake Clayton off it's back and start using an energy type attack. This attack is easily dodged and slow moving, so just keep pounding him.
After he's down, beat on Clayton some more till it's finally over.
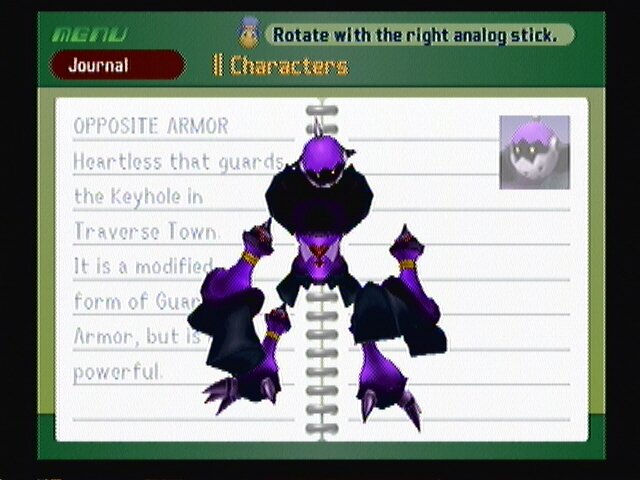 --== Opposite Armor ==-- |
Body:
HP    ATK   DEF   MPr   EXP
900   15    12    23    390
Arms:
HP    ATK   DEF   MPr   EXP
135*2 15    12    23    0
Legs:
HP    ATK   DEF   MPr   EXP
135*2 15    12    23    0
Item Drops: None
Resistance:
Weapon  Fire   Blizzard   Thunder   Gravity   Stop   Finish
* 1     * .5   * .5       * 1       * .04     * 0    * .5
Strategy:
This is where the real battle starts. For some reason, flipping around makes him far more powerful. His attacks are still basically the same, but there is slightly more variation, like his swooping attack. He can also detach all of his limbs and attack independently, which doesn't really change the fight that much. He does have one attack he likes to spam, and that's his Shadow Ball, which is really easy to see coming and really easy to dodge in time. It cant be deflected though, so don't bother. His feet (well, I guess they're arms now) should still be your primary focus, followed by his arms, and finally his chest.
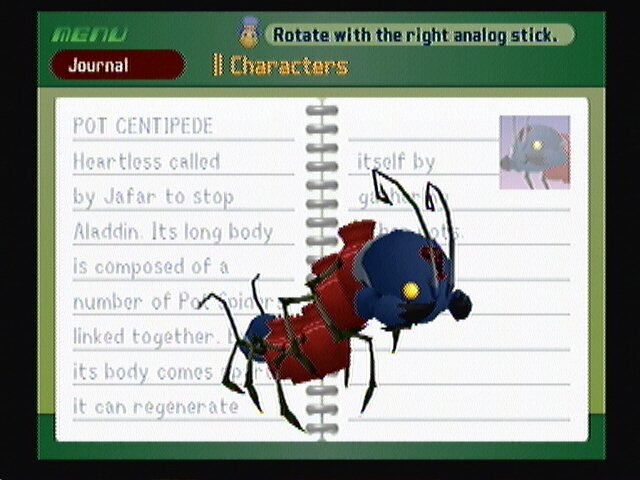 --== Pot Centipede ==-- |
HP    ATK   DEF   MPr   EXP
600   18    15    25    250
Item Drops: Ray of Light
Resistance:
Weapon  Fire   Blizzard   Thunder   Gravity   Stop   Finish
* 1     * .5   * .5       * 1       * .04     * 0    * .5
This fight takes place in the streets of Agrabah. There is no loading between any of the areas from Palace Gates to Plaza and even the Ally.
Strategy:
This fight would be easy if it wasn't for it being annoying. The Centipede itself only has two main attacks: wiggle it's electrified antenna or wiggle it's darkness-infused tails. Neither of which are very powerful. However, all the other Pot Spiders roaming around randomly running into you is a pain! The entire fight, lock onto only the Centipede's head and bash it. Don't bother trying to come up from behind, it's tail's defense is pretty tight. Follow it into an area and wait for the path to be clear.
 --== Jafar ==-- |
HP    ATK   DEF   MPr   EXP
500   18    15    27    600
Item Drops: None
Resistance:
Weapon  Fire   Blizzard   Thunder   Gravity   Stop   Finish
* 1     * .5   * .5       * 1       * .04     * 0    * .5
Strategy:
Don't bother with Genie, he is pretty much invincible and doesn't do anything anyway. Focus only on Jafar. He has one attack that he uses continuously, and that's shooting a giant laser from his staff. It's very painful IF it hits and IF he's even able to fire it. It takes a while to charge up and any interruption (like, getting bashed with a giant key) will cause it to not fire.
His main defense is his ability to levitate. You can take that away as you can jump to pretty much anywhere in the room from the platforms around the area. Watch for when he vaporizes and turns into an orb. Follow him and try to predict what platform he'll appear over, so you can be waiting.
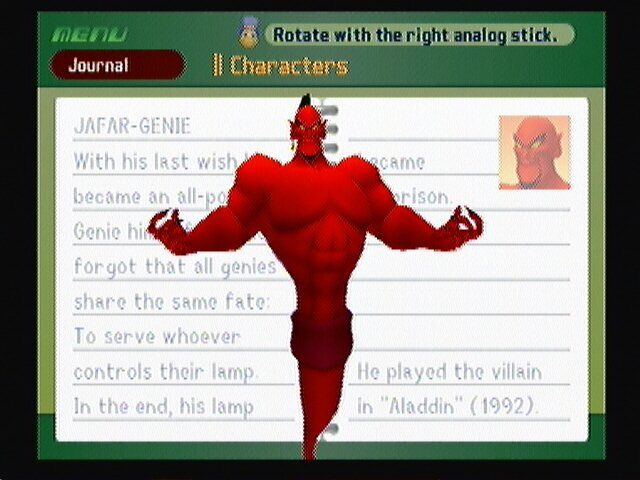 --== Genie Jafar ==-- |
HP    ATK   DEF   MPr   EXP
750   18    15    29    730
Item Drops: Ansem's Report 1
Resistance:
Weapon  Fire   Blizzard   Thunder   Gravity   Stop   Finish
* 1     * 0    * .5       * 0       * .04     * .3   * .5
Strategy:
This fight is WAY easier, and that's saying something. Iago has the lamp, his one weakness. Chase him around and bash the lamp. Don't worry about falling off, cus you cant. Jafar's only two attacks is throwing large flaming rocks and appearing near you and swatting. The giant rocks are easy to see coming, and you can even deflect them with a block. The swats are few and far between, further he normally misses.
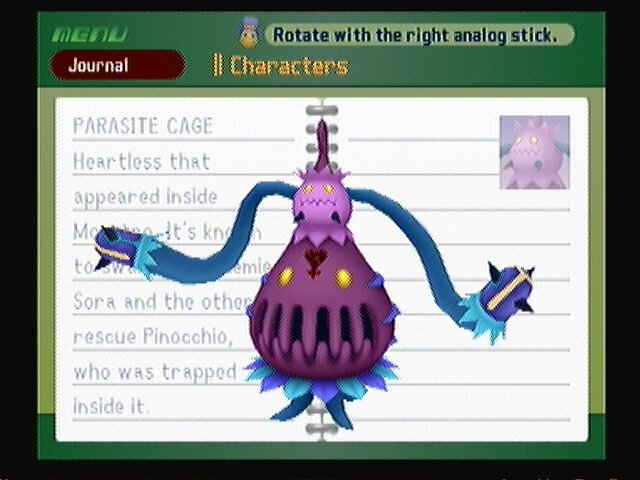 --== Parasite Cage ==-- |
HP    ATK   DEF   MPr   EXP
450   21    17    30    500
Item Drops: None
Resistance:
Weapon  Fire   Blizzard   Thunder   Gravity   Stop   Finish
* 1     * .5   * .5       * 1       * .04     * .3   * .5
First Fight:
Strategy:
The Parasite Cage is a very simple heartless. It has one attack, with a couple needless variations, that being swinging his arms in front of him. If you're bashing away, odds are your clash and null the attack. Lock on and don't worry about anything else.
HP    ATK   DEF   MPr   EXP
900   21    17    32    1000
Item Drops: None
Resistance:
Weapon  Fire   Blizzard   Thunder   Gravity   Stop   Finish
* 1     * .5   * .5       * 1       * .04     * .3   * .5
Second Fight:
Strategy:
Back for more. This time, he adds one new attack: a forward lunge attack meant to knock you into the acid on the floor. Null it's effects by standing even with the path to the Cage, so when he knocks you back you land on the ground. Other then that, this fight is exactly the same as last time, just stay on dry land as the green acid will eat your health away.
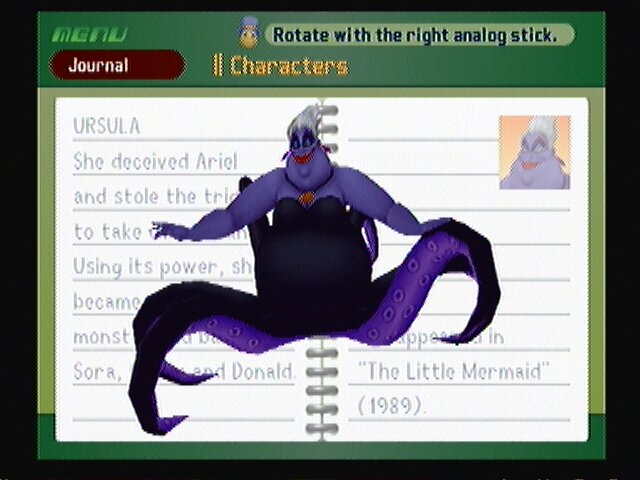 --== Ursula ==-- | 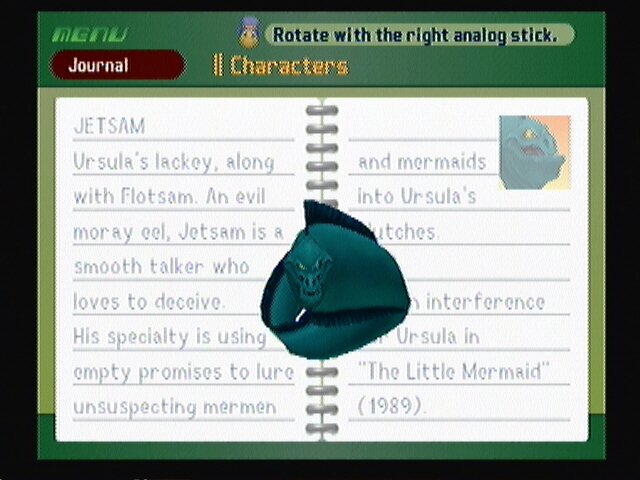 --== Flotsam & Jetsam ==-- |
Ursula:
HP    ATK   DEF   MPr   EXP
450   22    19    1     1000
Item Drops: None
Resistance:
Weapon  Fire   Blizzard   Thunder   Gravity   Stop   Finish
* 1     * 0    * 0        * 0       * 0       * 0    * .5
Flotsam & Jetsam:
HP    ATK   DEF   MPr   EXP
60    22    19    100   150
Item Drops: None
Resistance:
Weapon  Fire   Blizzard   Thunder   Gravity   Stop   Finish
* 1     * 1    * 1        * 1       * 1       * 1    * 1
Attacks:
1) Spin attack. Ursula spins around the room randomly with her sharp tentacles. Call sign: Hahahahaha
2) Dash. Flotsam and Jetsam randomly run into you.
3) Caldron: Red Magic. Caldron glows bright red, and releases a volcanic eruption. Ursula must throw in two potions for this to happen.
4) Caldron: Blue Magic. Caldron glows bright blue, and releases a vortex. Ursula must throw in two potions for this to happen.
How to dodge:
1) She'll do this constantly. If you just kind of keep moving around the caldron you should be fine.
2) It's more a matter of luck. They'll sneak up on you, with everything else going on, they're hard to spot. They don't do much damage so it's not a big deal.
3) Stand back and away.
4) Stand back and away.
Strategy:
No one is a real threat during this fight, just an annoyance. You need to focus on the caldron with magic to make it backfire. When she tosses something into it, counter with two spells of your own. Fire and Thunder seem to work best (not necessarily in combo or damage wise, just the hit % is better). You normally have to cast them back to back. The thing is, even if you get the timing right, sometimes it still wont backfire. I guess that's the very nature of something backfiring is that it's not constant, but still, it's irritating. If you start running low on MP, attack the two eels. Their MPr is insanely high.
When it does finally backfire, Ursula will have very low defense and be stunned for a minute, long enough for you to take her down half a bar or more. Keep it up till she goes down.
--== Part 2: Giant Ursula ==--
HP    ATK   DEF   MPr   EXP
900   22    19    36    1500
Item Drops: None
Resistance:
Weapon  Fire   Blizzard   Thunder   Gravity   Stop   Finish
* 1     * .5   * .5       * 1       * .04     * 0    * .5
Attacks:
1) Random Thunder. Throughout the battle, thunder magic will rain down continuously. It will get more fierce as the battle rages on.
2) Windbag. She will inhale, creating a vortex that sucks you in. If you get to close to her face, she'll then bite you.
3) Bubblebeam. Spits out a stream of slow moving bubbles. Call sign: Get ready for this!
4) Royal Thunder. Late in the battle, she'll call down an almost undodgeable wall of thunder magic around her. Call sign: This wont be pretty!
How to Dodge:
1) Keep moving just a little. It gets more accurate as the battle progresses, but overall it's not too much to worry about.
2) When she starts to inhale, mermaid kick away. After she stops, she'll be out of breath for a second, long enough to get some good attacks in... if you weren't currently at the farthest possible point from here. Generally, her recovery time is just enough time for you to get back to the battle.
3) Don't be in front of her after the call sign.
4) If you're anywhere near her, it's pretty much a sure thing you're going to be hit.
Strategy:
For the most part, you'll want to just rush in and attack. The back of her head isn't as strong, and your attacks will do more damage, but it's rare that you're able to get back there. Of all your magic, Thunder has the biggest effect, so use that if you want (her MPr is high, so don't worry about wasting it).
 --== Lock ==-- | 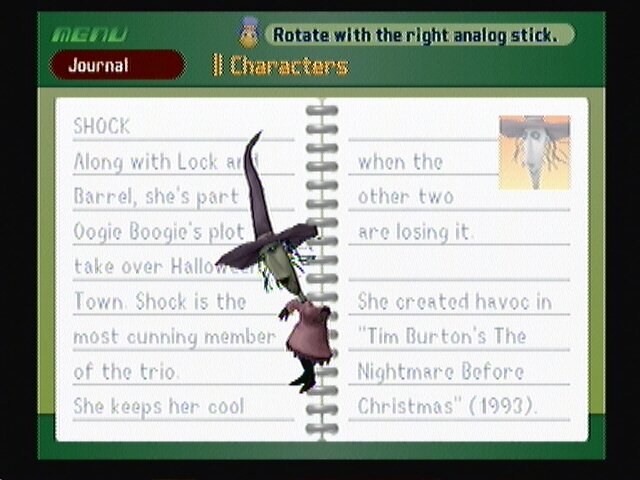 --== Shock ==-- |
 --== Barrel ==-- |
Lock:
HP    ATK   DEF   MPr   EXP
150   24    20    36    180 (1/10 if defeated first)
Item Drops: None
Resistance:
Weapon  Fire   Blizzard   Thunder   Gravity   Stop   Finish
* 1     * .5   * .5       * 1       * .04     * 0    * .5
Shock:
HP    ATK   DEF   MPr   EXP
120   24    20    36    120 (1/10 if defeated first)
Item Drops: None
Resistance:
Weapon  Fire   Blizzard   Thunder   Gravity   Stop   Finish
* 1     * .5   * .5       * 1       * .04     * 0    * .5
Barrel:
HP    ATK   DEF   MPr   EXP
180   24    20    36    240
Item Drops: None
Resistance:
Weapon  Fire   Blizzard   Thunder   Gravity   Stop   Finish
* 1     * .5   * .5       * 1       * .04     * 0    * .5
Strategy:
It's more like fighting a bunch of Shadows on Speed then a sub-boss, but whatever. Pick any one of the them and stay on him till he goes down, then focus on the next. Keep this up till you get all three.
 --== Oogie Boogie ==-- |
HP    ATK   DEF   MPr   EXP
450   24    20    38    2500
Item Drops: Holy Circlet, Ansem's Report 7
Resistance:
Weapon  Fire   Blizzard   Thunder   Gravity   Stop   Finish
* 1     * .5   * .5       * 1       * .04     * 0    * .5
*For the second part of this fight (Oogie's Manor) you'll have to see the walkthrough*
Attacks:
1) Dice Toss. Throws exploding dice onto the table. Call sign: Huu!
2) Buzz Saw. If the dice throw is right, a buzz saw will float around the area.
3) Summon Heartless. If the dice throw is right, a couple Heartless will appear.
4) Scythes. If the dice throw is right, Scythes come down from the ceiling and bob up and down while circling the platform.
5) Firing Squad. After the platform lowers from you raising it, you'll normally be taken to the Firing Squad.
6) Sixes. If the dice land on all sixes, Oogie heals himself.
How to Dodge:
1) Don't be near Oogie when he throws the dice.
2) It travels slow, so just watch out for it.
3) Nothing to dodge, you have to defeat them.
4) Time the scythes with dodge rolls and jumps.
5) Be up near the squad, but off to the side slightly.
Strategy:
You take turns. Oogie uses dice to determine his attack. None of the attacks are particularly hard to dodge or do much damage. When it's your turn, the tiles near the center will light up. Target Oogie and step on the one he's lined up with to cage him in and raise the platform to his level. Jump off and start beating on him. After a bit, he'll knock you off and send you back down. Repeat till he goes down.
You can also hit him with magic attacks, Thunder is particularly effective.
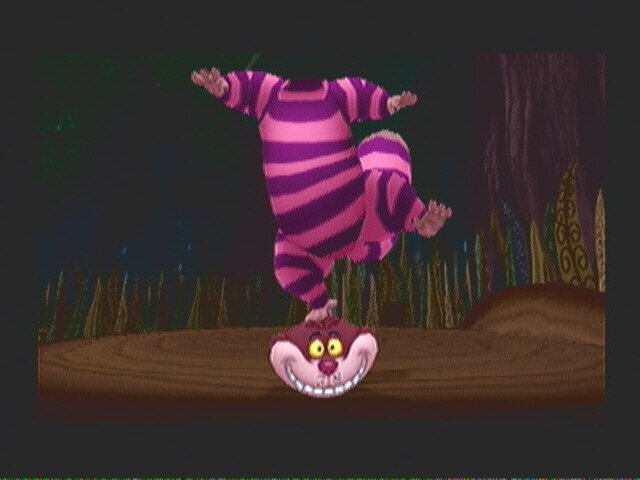 --== Anti-Sora ==-- |
HP    ATK   DEF   MPr   EXP
750   27    21    40    2000
Item Drops: Raven's Claw
Resistance:
Weapon  Fire   Blizzard   Thunder   Gravity   Stop   Finish
* 1     * .5   * .5       * 1       * .04     * 0    * .5
Anti-Sora possesses some of the same abilities as a Shadow Heartless, including the annoying ability to meld into the floor at random.
Attacks:
1) Swing. A basic swing, just like Sora's first swing.
2) Backstab. Comes up from the floor behind you and attacks.
3) Kage Bunshin no Jutsu. Creates several clones of himself, all of which are real and very deadly, but they can also be taken down in just a hit or two.
4) Shadow Rush. Appears out of nowhere and rushes past, striking you, then disappearing.
5) Log'D. After hitting him a couple times, he disintegrates and instantly reappears behind you.
How to Dodge:
1) Close range combat, this is going to be pretty difficult. More often then not you'll unwittingly counter during one of your own combos.
2) Keep an eye on him once he melds into the floor and keep moving.
3) This is a diversion, meant to keep you busy fighting the clone and kind of preserves the main one's health. And it works. They don't disappear till you kill them, and fighting one Shadow Sora is hard enough. Focus on the clones till their numbers go down.
4) Keep moving, especially when you loose sight of him.
5) Late in the fight, just as with Rikku early in the game, don't finish your combos. Strike once or twice, then run.
Strategy:
I know, you think you've fought Anti-Sora several times before, but you haven't. Anti-Sora's attacks are very powerful, much more so then the Heartless you've faced during the level so far, so if you had problems with them, I'd run now. The most important thing in this battle is to simply keep moving. We've learned so far that the A.I in this game doesn't have the best targeting systems, and most of his attacks are homing. If you simply keep on the move you can escape most of them and find a nice time to counter.
 --== Captain Hook ==-- |
HP    ATK   DEF   MPr   EXP
900   27    21    42    3400
Item Drops: Ansem's Report 9
Resistance:
Weapon  Fire   Blizzard   Thunder   Gravity   Stop   Finish
* 1     * .5   * .5       * 0       * .04     * 0    * .25
The Captain cannot fly, but he does summon Battleships pretty consistently. If you find the constant barrages a nuisance, fly up and take out the Battleship, Hook wont be able to follow you and wont be a threat. This is also a good way to heal.
Attacks:
1) Bomb. Throws an exploding lantern at you. Call sign: Fire!
2) Stab. Rushes forward and stabs with his Rapier. Call sign: Come and get it!
3) Ars Arcanum. A flurry of sword swings right around himself.
How to Dodge:
All of his attacks are really fast and can break your combos instantly. Dodging isn't really an option. Except for Bomb that is. That's pretty easy.
Strategy:
Stay on him as long as possible. If you get low on health, fly up and heal. There's really nothing to this battle. That is, DON'T use Fire magic. He'll run around like a mad man with his pants on fire and hurt you in the meantime.
 --== Rikku ==-- |
HP    ATK   DEF   MPr   EXP
500   31    24    45    2000
Item Drops: None
Resistance:
Weapon  Fire   Blizzard   Thunder   Gravity   Stop   Finish
* 1     * 0    * 0        * 0       * 0       * 0    * .5
First Fight:
Strategy:
Here we go. Rikku is surprisingly easy during this fight. His main and pretty much only attack consist of rushing you and slashing several times. Counter by jamming down the X button. It's really that simple.
HP    ATK   DEF   MPr   EXP
900   31    24    49    8500
Item Drops: None
Resistance:
Weapon  Fire   Blizzard   Thunder   Gravity   Stop   Finish
* 1     * 0    * 0        * 0       * 0       * 0    * .5
Second Fight (Ansem-possessed):
Strategy:
Most of this fight is very reminiscent of previous encounters with Rikku, only more powerful. The only trick is to stay on him. Once you get him to his green health bar, the real new fight starts. He'll start using dark based attacks, including one where he hurls the Keyblade at you (easily deflected), one that resembles Sonic Blade that uses the Corridors of Darkness (just keep dodge rolling), and a final one where he pounds the ground a huge geysers of darkness spring up across the field (not sure you can dodge it). Still though, the basic strategy doesn't change, keep on him the whole time. If you do, he usually doesn't get a chance to use his more powerful attacks.
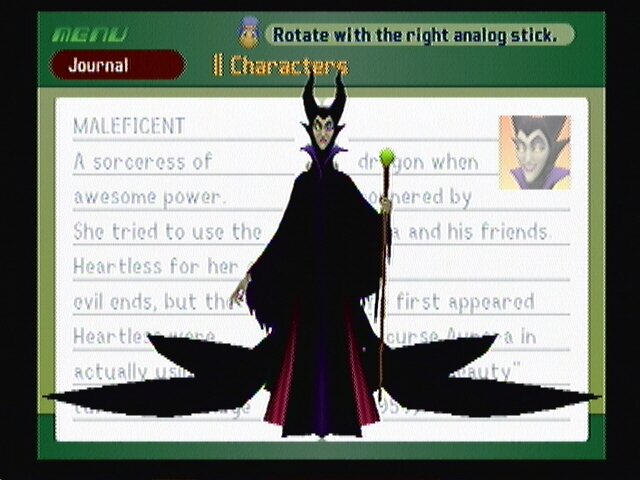 --== Maleficent ==-- |
HP    ATK   DEF   MPr   EXP
900   31    24    47    6000
Item Drops: Ansem's Report 5
Resistance:
Weapon  Fire   Blizzard   Thunder   Gravity   Stop   Finish
* 1     * .5   * .5       * 1       * .04     * 0    * .5
Strategy:
There isn't much to do here. When she floats up on the platform, target the platform and beat on it to bring it crashing down. On the ground, hop up and beat on her. She can summon Defenders and shoot various large magic balls at you, but they're nothing to worry about.
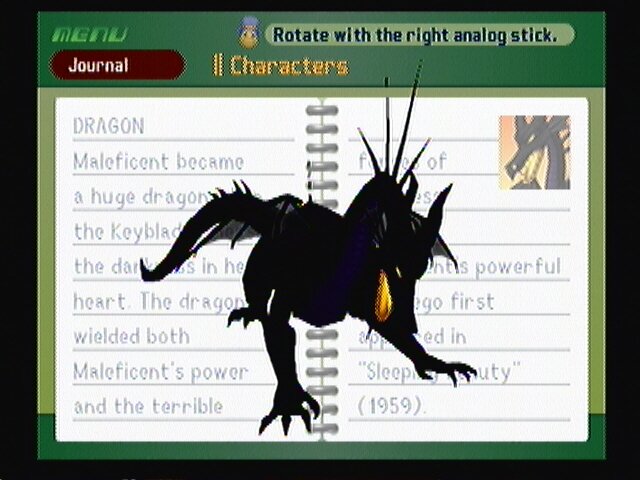 --== Dragon Maleficent ==-- |
HP    ATK   DEF   MPr   EXP
1200  31    24    48    6000
Item Drops: Fireglow
Resistance:
Weapon  Fire   Blizzard   Thunder   Gravity   Stop   Finish
* 1     * .5   * .5       * 1       * .04     * 0    * .5
Strategy:
Her only weak point is her head, which is also the most dangerous part. Don't step in the green fire, or get breathed on, as it is painful. She can also use a sort of homing fire magic, where around the field little fire balls appear and hone in one by one. These can be deflected or easily dodged. Her only other attacks consists of stomping the ground and swinging her tail, both of which can be dodged by jumping. This fight is harder then I make it out to be, especially if you are under leveled. There just isn't much to it, but her attacks are all real threats.
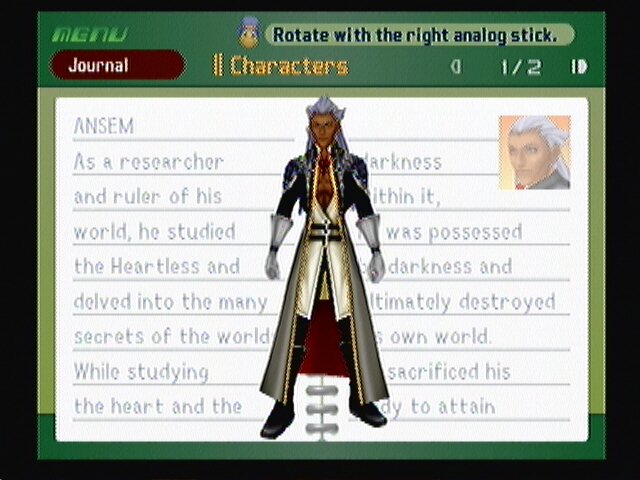 --== Ansem ==-- |
This fight takes on many forms. Stay with it and identify the weak point of each one.
Stage 1: Ansem
Ansem fights with his Heartless guardian. His main attacks are more or less just the guardian punching you. He does have one attack where he creates a large magic orb around himself in an instant, damaging anyone that touches it. He'll also sick the guardian on one of your party members. If it attaches to you, it will periodically do damage, in addition to replacing your Attack command with Freeze, where he holds you and sucks out even more HP. Finally, he has an attack similar to Rikku's where he throws spinning blades of energy everywhere. They can be deflected back at him for tech points.
The only thing you have to do here is lock on and attack. Assuming you have the Ultima Weapon, this battle should be over fast.
After the fight, he retreats to the center of the island.
Stage 2: Darkside
In the center, our old friend Darkside appears again. He is a lot stronger, but so are you. The strategy here hasn't changed much, lock on to his hand and pretty much ignore anything he's doing.
Stage 3: Ansem II
Ansem comes back out after Darkside falls. This time, both Donald and Goofy are barred from the fight. His basic attacks haven't changed much, nor has the strategy. He is faster now, which makes it harder to get close to him despite the smaller area.
He does add two more attacks this time: Dark Rocket and Power Surge.
Dark Rocket, he turns himself into a projectile by ramming you, similar to Rikku's attack using the darkness portals. All you have to do here is either block it or cast Aero and let him hit you. Either way will knock him out of it. Power Surge is your generic shockwave attack. The guardian will go underground and bust out using a darkness portal. This creates a rather large shockwave, especially since he does it repeatedly. Dodge roll in circles around Ansem to dodge it.
 Stage 4: World of Darkness |
This fight takes place in stages as well. The first is with just you and this battleship. It's weak point is the giant Ansem at the top of it. His only attacks are him flailing that huge Soul Eater about and calling in a laser squad. Soul Eater is easily blocked during your combos, and the lasers can be fooled by flying around a bit.
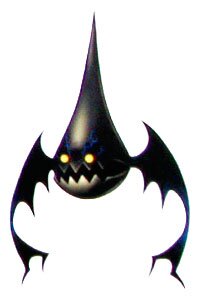 Bit Sniper |
- Note that throughout this entire fight, there will be little bat things that, when killed, release some HP balls. These are called Bit Snipers, and are the only non-boss enemy not to have a journal entry. I think these are the things that create the lasers during the battle, but I'm unsure.
Stage 4.2: Room Core 1
Ansem will retreat into the heart of the ship, and a portal will open. Sora flies in. You'll face a few waves of Shadows, then this punching bag thing appears. Hit it a few times and this stage will be over and the ship weakened.
Stage 4.3: Artillery
You now have to “disable” the artillery at the top of the ship. It shouldn't take but a few hits each, and the defenses are weak, usually just a couple stray shots from the artillery itself. Once they are all destroyed, a new portal will open. You'll have to fly through this one manually.
Stage 4.5: Room Core 2
You'll run into Goofy here, in addition to a bunch of Darkballs. You have to clear the room again to make the orb appear, and destroy it to further weaken the ship.
Stage 4.6: Face
Way at the head of the ship (literally), the entire face is the weak point. There is some artillery down below that might hit you occasionally, but beyond that the only attack is an omni lightning attack like Ursula's. Stay locked on and beat on it, retreating only to heal if you need. Once it goes down, a portal appears in its mouth.
Stage 4.7: Room Core 3
The final set of Pure Heartless, Invisibles. Clear the room to save Donald and beat on the punching bag to explode the head (how come nothing this drastic happened for the other rooms?)
Stage 4.8: Main Core
Finally, the shield at the center of the ship goes down. Rush in and slash the pumpkin-looking purple thing. You can take out the artillery around the room, but it shouldn't bother you that much.
Stage 4.9: Ansem 2
The captain goes down with the ship. He comes out again to try to save the sinking ship. His attacks haven't changed from earlier. Hack and slash till this ship finally goes down.
PS2 Index
at the beginning it says that you battle darkside 2 times and at the vary beginning of the game, you battle him 3 times yes 2 times at the beginning but once at the end. it even has the states for him. but good guide
p.s.
i only did this for people to stay informed
You need more heartless.😎
Please
Genie Jafar can be attacked, but as he is hidden behind an invisible barrier most of the battle, it's probably not worth the attempt. Definitely a good idea to repel his giant meteoric rock so that it doesn't do any damage (even if it doesn't bounce back)
with darkside if you climb up its arm you can hit its head for which gives you 2 tech points at the end of every combo
Please fix anti sora.
were still trying to beat the 2 boss fight.Can you guys give us some tips on how to defeat him/her.
Please add chernabog! I beat him last night and forgot to save!
is maleficent a final boss?can you put where to find each boss?this is still a very good guide!
is maleficent a final boss?and can you put where to find each boss?
You might want to edit the picture on "Anti-Sora." The picture you have up is Cheshire Cat. Still a very good guide!