Radio Station
Crackdown 2 Walkthrough and Guide
Radio Station
Things get tough here. Before getting started on this one, you'd do well to level your Agent's Firearm and Agility skills each to at least level four and Explosives to level three. The Ultra Assault Rifle and Harpoon weapons you unlock for attaining Firearms level four and the Flocket Launcher at level three will serve you well here. As well, an Agility skill level of four may be required to reach the final Absorption Unit (or, at the very least, make reaching it much easier).
Absorption Unit 1
Look for this unit on top of a blue and red building at the northwest end of southern Green Bay. Use the windows on the west side of the building to reach the top. Once on top of the building, toss a Grenade onto the Absorption Unit platform to take out the Cell soldiers there. Gun down any remaining enemies near the unit and then stand on one of the configuration platforms to start the activation process.
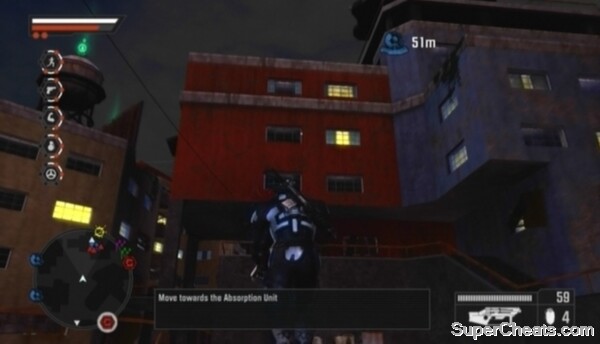 Absorption Unit 1 |
Enemies dot the rooftops surrounding this Absorption Unit, so stand on the configuration panels at the back of the platform so the unit can shield you from enemy gunfire.
Absorption Unit 2
This unit on the island villa west of northern Green Bay. This villa happens to be a Cell Stronghold, so expect plenty of resistance.
Ensure your Agent is equipped with an Ultra Assault Rifle, a Flocket Launcher and Grenades before setting out to activate this unit. You can switch your Agent's weapons at an Agency Landing Zone or by selecting the “Extraction” option in the System section of the Intel Screen and redeploying him.
This Cell Stronghold is made up of two Tactical Locations: one on the mainland and the other within the island villa walls. You can secure these two Tactical Locations before getting to the Absorption Unit if you wish. Alternatively, you can drop down to the beach, swim out to the island, climb up to the villa and hop over the wall to avoid the mess of enemies at the front gate.
 Swim out to the villa to avoid the Cell soldiers on the mainland. |
The island villa is not as heavily-guarded as the mainland gate. There is an armoured, Rocket Launcher-wielding enemy on the tower at the back of the villa to watch out for. Take him down with your Flocket Launcher and then turn to the remaining enemies.
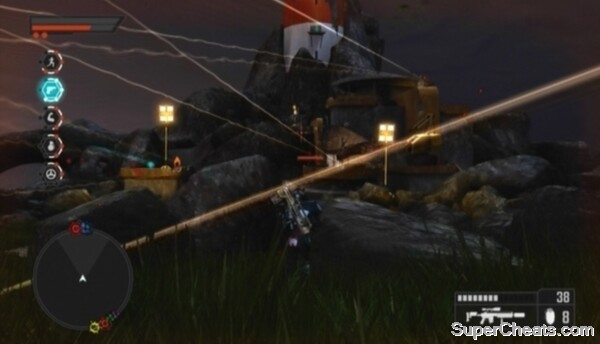
When the area is clear, step onto one of the platforms surrounding the Absorption Unit to start the configuration process. Once the unit is online, you'll come to learn that the power beam emitting from the unit is being blocked by a makeshift barrier. You must follow the power beam and demolish the barrier blocking it. One rocket will do it. The power beam trajectory is visible on the Intel Screen map as well.
Absorption Unit 3
The final unit in this network is on top of the lighthouse at the north end of northern Green Bay. Like the last one, this unit is within another a Cell-held Tactical Location and thus heavily guarded. You can secure the Tactical Location before going for the Absorption Unit if you wish, though you can just as well fight your way to the unit.
Ensure your Agent is equipped with an Ultra Assault Rifle, a Sniper Rifle and Grenades before setting out to activate this unit. You can switch your Agent's weapons at an Agency Landing Zone or by selecting the “Extraction” option in the System section of the Intel Screen and redeploying him.
 The final Absorption Unit is within a Cell Stronghold, which is heavily guarded. |
Approach the lighthouse from the south. Use your Sniper Rifle as you approach to pick off the snipers and Rocket Launcher-wielding enemies at the front. Jump around and move from side to side in an attempt to dodge enemy gunfire as you clear the area around the lighthouse. If you're taking a lot of damage, fallback and take cover somewhere out of range until your Agent's shield and health are back up.
When the surrounding area is clear, head up the stairs to the right of the lighthouse, climb up the rocks and jump onto the platform attached to the lighthouse (the one with the Agility Orb on it). From here, jump up to grab hold of the bar in front of the window above. Continue jumping upward until you reach the window with the green curtain at the top.
Hug the side of the lighthouse and walk along the ledge to the platform to the left. Jump onto the platform and then over to the higher platform to the east. From here, face west and jump up to the platform higher up. Jump up to the next platform to reach the top of the lighthouse and then gun down the enemies there with your Ultra Assault Rifle. Activate the Absorption Unit when the area is clear.
Reaching the final Absorption Unit
Radio Station Beacon
Before setting out, ensure your Agent is equipped with an Ultra Assault Rifle, Harpoon and UV Grenades. You can switch your Agent's weapons at an Agency Landing Zone or by selecting the “Extraction” option in the System section of the Intel Screen and redeploying him.
This Freak Lair is underneath the radio station at the north end of northern Green Bay. Make your way to the station and drop down the chasm to enter the lair. Stand on the Beacon Drop Point marker once inside and call the helicopter to start.
The best place to position yourself here is on the flat rock east of the Beacon Drop Point, as common and brute Freaks won't be able to reach you here. As well, this spot will afford you a good view of the lair and each entry point.
As per usual, Freaks attacking the Beacon will appear on your tracker as red blips. A single, well-aimed shot from a Harpoon gun will kill these Freaks. Just keep an eye on your tracker and when a red blip appears, turn to it, lock on to the marked Freak and hit him with a harpoon to take him down.
 The Harpoon gun makes short work of the attacking Freaks in this lair. |
Since your ammo is limited, don't waste any harpoons on common Freaks. Common Freaks will swarm the charging Beacon and deal modest damage overtime, so periodically throw a UV Grenade at the Beacon to clear them away.
Occasionally, three attackers will come in through the southeast entry point at once. Try to take two or three of them out with a well-thrown UV Grenade to conserve your Harpoon ammo. When you do run out of harpoons, switch to your Ultra Assault Rifle. This weapon boasts impressive range and accuracy, so remain on the rock formation and continue picking off attackers as they appear.
You may encounter brute Freaks in this lair. These guys are larger and stronger than your average Freak and can pick up and throw objects. Keep an eye out for these guys and be ready to dodge when one picks up an object. The distinct, hulking growls they make give them away.
Remain in position and continue harpooning highlighted Freaks as they appear. Keep this up until the blue meter in the top-right corner of the screen is completely full and the Beacon detonates.
Defending the Radio Station Beacon
More Crackdown 2 stuff on SuperCheats
No comments yet. Tell us what you think to be the first.