Chapter Three:
The End of Chaos
Castlevania: Harmony of Despair Walkthrough and Guide
by vhayste
Chapter Three: The End of Chaos
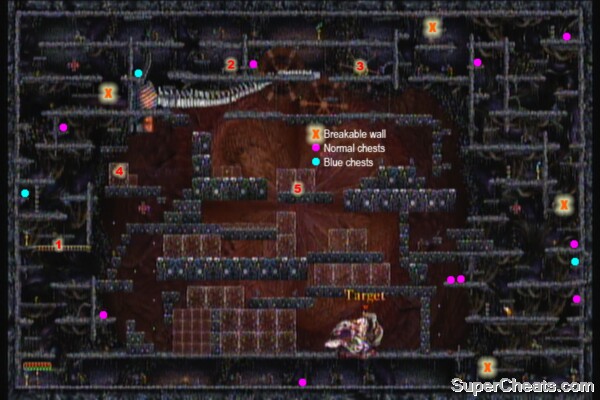 |
Refer to the map for points of interest and more details regarding them. The book near the starting point will open up the menu for you to equip the armors and weapons you have acquired. There are similar points like this scattered in the area so make sure to visit them if you ever acquired better gears to keep your equipment updated.
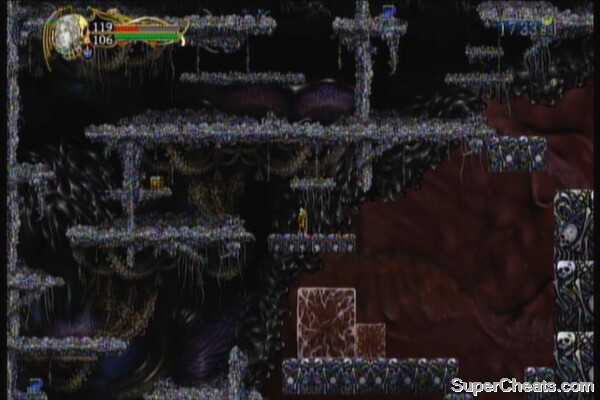
You need to move to the right side of the map, then jump up, proceed left then down again to reach the switch and the platform. The transparent jelly cubes here can be destroyed. Some of them contain enemies which you need to get rid off so you don't have to contend against them when you fight the boss.
1.Your main objective is to reach the lever here and move the platform. This boss is huge and has only select body parts as its weakness. This indestructible platform is essential to fight the boss and hit its weak spots.
2.The lever here will release the hammer though I would suggest skipping it if you're fighting the boss solo. The reason is that the boss needs to be standing in a correct spot for the hammer to hit it and deal massive damage and the mechanism needed to reposition it (#3) is a spawn point of infinite annoying imps.
3.You need to keep attacking the wheel to reposition the hammer and hit the lever again (#2) to swing it. This is a very tedious and time-consuming job for a solo run but it can be a very effective tool for a multiplayer session. A couple of imps will constantly spawn here to annoy the player.
4.This pair of jelly cubes are necessary for you to reach the chest on the top of the ledge, directly above them. If you happened to slash them accidentally, you won't have other ways of reaching it instead of Soma's Yorick Skull jump.
 |
5.(Hidden Item) This is a pretty tricky one to get and if you made a mistake, you won't be able to get the hidden item at all. You need to kick the black hole in the background. However, the only way to reveal that is to wake up the boss and have it destroy the platforms. This can only be done during a multiplayer session so one person can stand on the platform where the black hole is while the other wakes the boss up. You need to jump kick over the boss' head while staying in the center of the stage for better chances to hit it.
Boss: Menace
This boss should be a lot easier compared to the last one. This is because you have access to two book locations where you can easily replenish your supply of healing items if you needed. Upon reaching the boss, just attack it to wake it up. It will slowly stand and destroy the platforms in the middle of the stage, releasing the enemies trapped in the jelly cubes. If you managed to destroy all the trapped enemies, then you won't need to divert your attention fighting them while avoiding getting trampled over by the boss.
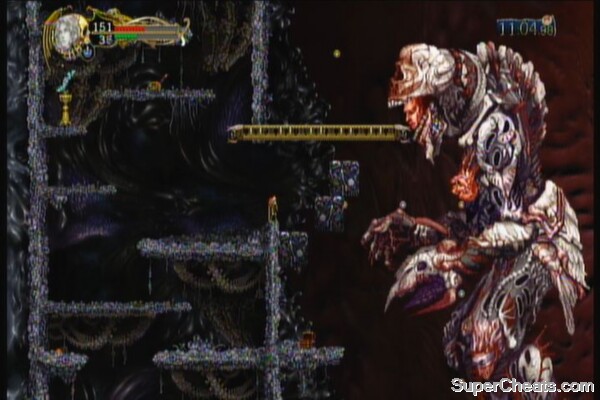 |
Carefully make your way to the left. The boss will slowly walk backwards; carefully move in the middle of its legs while its stepping back to avoid getting damaged. To reach the metal platform, you need to climb up again. The boss will occassionally release 1-3 flying mouths which can easily dispatched since they have really low HP. While on the platform, the easiest part to hit would be the face. Just attack it when its near; just be careful not to get in contact to avoid unnecessary damage. Next, the boss will punch you with its claws. You can easily avoid this by ducking in the midle of the platform. The face will be the first part to get destroyed if you've dealt severe damage to it so the next one to destroy would be the heart or the knee. The boss's heart is only exposed after it kicks you (double jump at the right timing to avoid this) but if you have a projectile hunter skill, then you should use it to damage it from mid-range. (e.g. Alucard's Hellfire skill)
Boss Battle: Menace
More for this game on SuperCheats.com
No comments yet. Tell us what you think to be the first.