Mission 9: Lazarus Labs
Thank you for printing this page from www.SuperCheats.com.
Remember to come back to check for updates to this guide and much more content for Doom (2016)
Follow this guide to hear about updates
Last Updated:
Heal up at the Health Station and continue to activate a Hologram of Olivia. Grab the Data Log from the counter to the left and head through the door. In the next room, collect the new piece of equipment, the Siphon Grenade. This hurts enemies and siphons their lifepower to you. Use it on groups of (weaker) enemies to heal yourself.
Drop down the elevator shaft and kill the Possessed (including two Soldiers). Continue down the hall but watch out for the Pinky. Dodge it's attack and shoot it several times from the back with the Super Shotgun, then continue into the next room. Ignore the body blocking the elevator and hit the munitions crate on the side to stock up on ammo. Move behind the crates and go inside the shaft for a secret, collecting the Mega Health at the end. In this area you'll be attacked by a Revenant and some Imps. Waste them, then kill the Possessed on the ground floor and get your bearings.
There's a Gore Nest here, and several containers that will open up in the upcoming battle. There's also a Haste Powerup in the top-middle of the area. You're up against a Revenant, some Possessed Soldiers and a crapload of Imps (literally like 15 to 20). The Super Shotgun makes short work of all of them. When the Mancubus shows up at the end, switch to your Rocket Launcher and lock-on a few times to do it in. Search the area for pickups after the battle, including a rare BFG ammo cell in one of the opened containers.
Continue through the next hall, kill an Imp and climb up. Before going through the door, turn around and spot a small opening on the other side. Jump to it and pull the metal grid out of the way at the end to reveal an Elite Guard plus some pickups.

Mission 9 - Elite Guard #1
Head back, go through the door, move to the end of the walkway and open the maintenance door, leading to a room with a Field Drone. To proceed, look up and double jump through the hole in the ceiling. (Once up, look behind you to spot a few more armor pickups.) Continue through the door down below.
In this room, instead of going through the obvious door to the left, check out the hole in the upper right (dark) corner of the room and hop through. This leads to a large chamber down below with an AutoMap machine and a destroyed cyrostasis pod. Could a Cyberdemon have escaped from this...? Head through the hole behind it and go up to reach the adjacent hall of the room with the hole. Defeat a few Possessed here and grab the Data Log from the desks.
Continue into the next room and destroy the Possessed Security (and Soldier) with the Rocket Launcher. Pull out your Super Shotgun to eliminate the Hell Knight that comes through the next door.
Go up the small steps and look to your left to spot a Rune Trial (Rich Get Richer) behind a closed door. Look at the floor directly below you to spot a white hatch; you can kick it out to reach the lower area and reach the Rune Trial this way. You must take out 14 demons, and you only have the Rocket Launcher. The largest threat are Possessed Soldiers and Hell Knights, so take those out ASAP. Stay on the move and keep trying. Definitely be careful with the Rocket Launcher and don't hurt yourself with its blasts. Aim at walls and floors to hit demons with splash damage. The reward for this trial is sweet: The Rich Get Richer reward grants you infinite ammo for all standard weapons (everything but the chainsaw and the BFG) whenever you have 100 armor or more. So essentially whenever you find a Mega Health (or when you're high on armor) you have infinite ammo.
Continue through the hallway and defeat the Possessed Securities and Soldiers inside. Use the Health Station if necessary at the adjacent room and drop down the hole at the end of the walkway. Prepare for a huge fight, facing various Possessed Soldiers, Revenants, Hell Razors/Knights and Mancubi. Start with the Super Shotgun and finish the Mancubi with rockets. There's a Quad Damage powerup that helps in the last part of the battle.
After defeating all demons, move to the back of the room and inspect the panel in the middle of the hall, between the two doors. It opens up the large gate, revealing an Elite Guard and some pickups behind it.

Mission 9 - Elite Guard #2
After collecting it, continue through either one of the doors on the side. Grab the ammo from the ammo crate on the right and pull open the gate. Various Possessed Soldiers and quite some Pinkies spawn, so take out your Super Shotgun and start wasting them.
Search behind the first or last artefact on the left wall to find a small opening leading to the Eliteguy Collectible. Go back to the main room and search behind the second artefact on the left to find a Megahealth. Equip the Rich Get Richer rune trial reward to get infinite ammo.

Mission 9 - Eliteguy Collectible
Proceed through the next door to reach the Helix Artefact. In the large circular chamber, look to the right and double jump up at the red panel. Search the wall for a deviant red light and press the right stick to reveal the Toxicguy Collectible.

Mission 9 - Toxicguy Collectible
Continue into Olivia's lab/room and search it for goodies and a minigame on one of the screens. Play it to unlock a trophy/achievement. Press the main console's button and then head to the Helix Stone and interact with the panel to continue. A lot of demons will spawn, naturally. Equip the Plasma Rifle and start wasting Imps, Hell Knights, and even some Mancubi and a Cacodemon. As long as you keep your armor above 100 you should have infinite ammo (with Rich Get Richer).
After defeating the demons, go down the central stairs and through the 'chapel'. Into the circular room, hop down the pit to find an Elite Guard.
Go back out of the pit and search around the candles in one of the nooks next to the small steps to find a Classic Map lever. The map itself can be unlocked by going into the pit and inside the unlocked classic room.

Mission 9 - Classic Map
Back up, hit the panel and ride the lift up, then drop down at the other end of the hall and open the door. Immediately defeat the Possessed Security and lesser demons and wait for a Pinky to show up, then defeat it. Continue through the adjacent bloody hall and defeat a few more Possessed. Close the portal in the next room, heal up at the Health Station and move into the next room. Defeat the Possessed (Soldiers) and Imps here, then move to the room on the upper right side and search for a hole in the side. Note that this is the upper right room, not the lower right room. From the hole you can reach a room with a Rune Trial and an Elite Guard.

Mission 9 - Elite Guard and Rune Trial
The Rune Trial (Saving Throw) is arguably the hardest in the game. You have the Gauss Cannon and only 1 health, while you're up against a big variety of demons. It took me over 20 tries myself; you'll need to be extra careful of Possessed Soldiers, since literally the smallest blast can kill you.
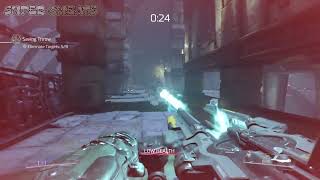
Mission 9 - Rune Trial
In any case, after completing the trial, back in 'reality', head through the small passageway in the main hall and drop down at the end. Go through the portal to initiate a battle with a load of Imps, Possessed Soldiers, Hell Knights/Razors, a Revenant, Cacodemon and Cybermancubus. Use the Haste Powerup to quickly down the Imps and other lesser demons with the (Super) Shotgun and Assault Rifle, then switch to the Rocket Launcher for the larger demons. After defeating all demons and grabbing all collectibles, jump over the railing near the big green light to continue. Heal up at the Health Station, grab the munition from the box and prepare yourself for a Boss Fight with the Cyberdemon. See the next page for details.

Mission 9 - Cyberdemon
Anything missing from this guide?
ASK A QUESTION for Doom (2016)
Comments for Mission 9: Lazarus Labs
Add a comment
Please log in above or sign up for free to post commentsTable of ContentsClose
Guide Updates
Get notified of updates to this guide
Many of our guides get updated with additional information. To get an email when this guide is updated click below.
 Join us on Discord
Click to close
Cyberdemon Tip:
The Cyberdemon is actually EXTREMELY easy to beat. All you need is the assault rifle mod that shoots mini-rockets maxed out (so you can shoot them without reloading). You also need the "Rich get Richer" rune equipped (infinite ammo if over 75 or 100 armor).
As soon as the fight starts just unleash the mini-rockets. The quick hitting explosions will keep the Cyberdemon stunned so he can't start any of his attack animations.
I beat the boss in about 2 minutes on my first try this way. He got maybe 2 hits on me from his laser but my armor still stayed between 75 and 100 (I had the rune upgraded so I only needed 75 armor for it to work and my armor level increased to 100 from argent cells).
In the Argent cell room there's a soul cube sitting on the desk to the left as you face the back wall with the Argent cell container,just a fun little Easter egg
You missed the Argent cell in Olivia's lab