Mission 11: The Necropolis
Thank you for printing this page from www.SuperCheats.com.
Remember to come back to check for updates to this guide and much more content for Doom (2016)
Follow this guide to hear about updates
Last Updated:
Collect the Data Log, then head downstairs and defeat the demons. Watch out as a Mancubus comes down the stairs once you're below. Continue around the corner to collect an Argent Cell and use an Artifact.
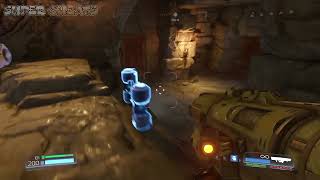
Mission 11 - Argent Cell
Go back upstairs, waste the Spectre and Unwilling and hit the Skull. Two Hell Knights spawn in the red room, so kill them and be on your way downstairs, where a Cyber-Mancubus has spawned. In the next room a big fight takes place. It helps if you use the Rich Get Richer Rune granting infinite ammo to defeat various Pinkies and Cacodemons. Stay on the move. When the area has been cleared, grab the Yellow Skull and activate the AutoMap in the corner. Also check out, in the far right corner near some fire, the Classic Map Lever. Head back the way towards the Argent Cell to find the map on the right side of the area. When all is said and done, go through the portal.

Mission 11 - Classic Map
Inject the Yellow Skull in the door and turn the switch behind it. Snoop some of the supplies in this chamber if you want to, then be on your way through the next portal. In this area you'll face several Mancubi, several Cacodemons plus some Imps, several Revenants and Hell Knights and then several Mancubi again, pretty much in that order. The Quad Damage Powerup can help halfway through the fight. After clearing the room and collecting all pickups, collect the Blue Skull and go back through the portal. Insert the skull in the slot, turn the switch and defeat all demons in the area, including various Pinkies and at the end two Barons of Hell. There's no shame in using a BFG round on one of them.
Continue down the hole and drop down far below and use the Artifact. Drop even further down afterwards. Grab out your Gauss Cannon to defeat the three Cacodemons in the far distance. Continue over to the far end and waste the Mancubus coming out of the tunnel. Before proceeding, turn around and check out the smaller floating platform, slightly to the right. It contains the Tealguy Collectible.

Mission 11 - Tealguy Collectible
You can also find an Elite Guard at the start of the tunnel.

Mission 11 - Elite Guard #1
Continue through the tunnel and jump over to the Field Drone up ahead. Continue upstairs and move around the corner to spot demons fighting against eachother. You'll need to jump in eventually, but you might get a couple of sneaky Gauss Cannon snipe shots in against Mancubi or Cacodemons. After a while, several Revenants spawn. Defeat all enemies, grab all loot and head up. The gate closes and as you continue you'll be up against Spectres and two Barons of Hell. Use the Gauss Cannon to take them all out ASAP. There's another Elite Guard at the end.
Mission 11 - Elite Guard #2
Proceed to reach a large open area. A few Cacodemons float in the distance so snipe them with the Gauss Cannon. There's also a large skull above the exit up ahead. If you've played Doom II you'll know what to do, namely to fire a rocket at the center of it's forehead, into the red glowing glyph. This releases the Hazmatguy Collectible.

Mission 11 - Hazmatguy Collectible
Continue, defeat the Mancubi and Baron of Hell, then proceed through the hall, collecting all pickups. It's time for another boss... or two.
Anything missing from this guide?
ASK A QUESTION for Doom (2016)
Comments for Mission 11: The Necropolis
Add a comment
Please log in above or sign up for free to post commentsNo comments yet. Tell us what you think to be the first.
Table of ContentsClose
Guide Updates
Get notified of updates to this guide
Many of our guides get updated with additional information. To get an email when this guide is updated click below.
 Join us on Discord
Click to close