Collectibles Mission 8
Thank you for printing this page from www.SuperCheats.com.
Remember to come back to check for updates to this guide and much more content for Doom (2016)
Follow this guide to hear about updates
Last Updated:
Elite Guard #1: At the beginning of the mission, enter the second (female) restroom and hop through the ventilation shaft in the ceiling (stand on the sink to reach it and double jump forward). Go to the end of the shaft to find this Elite Guard (and an AutoMap).

Mission 8 - Elite Guard #1
Elite Guard #2: After meeting Samuel Hayden, go down the elevator. At the intersection up ahead, check out the room to the left to find this Elite Guard.

Mission 8 - Elite Guard #2
Elite Guard #3: Just after exiting the last ventilation shaft, when you've reached the main entrance to the BFG labs, check out the room to your immediate left (so immediately after you exit the ventilation shaft) to find this Elite Guard.

Mission 8 - Elite Guard #3
Argent Cell #1: Easily found in the first control room near the beginning of the mission.
Argent Cell #2: Outside, at the rocky platform area, before dropping down the hatch, check out the area to the low left side. Walk over the pipe to reach this Argent Cell. Watch out for Lost Souls that spawn in the distance.

Mission 8 - Argent Cell #2
Classic Map: Reach the rock platforms area (before dropping down the hatch, but after deactivating the force field by defeating a large demon horde first). From the central rock platform, jump to the green walkway with a well-timed double jump. Before collecting the Megahealth, quickly turn around and waste the Cacodemon that spawns. Grab the Megahealth afterwards. From here, looking over the ravine, turn left. Now here comes the tricky part: The rocks to the left aren't exactly steady ground, so once you move onto them, you'll pretty much start sliding down. You need to jump to them anyway, then perform a double jump to the next rocks and then double jump one last time to make it over the pillars to the far end, allowing you to reach the Classic Map lever. It's not an easy jump trajectory so try it several times. Once you've pulled the lever, head back to the area with the Gore Nest to find the Classic Map.

Mission 8 - Classic Map
Phobosguy Collectible: Again, start from the rock platforms area. From the central rock formation, simply (double) jump down to the pipes and head right. You'll spot a cave to the left. Enter it to find the Phobosguy collectible.

Mission 8 - Phobosguy Collectible
Pinkguy Collectible: Inside the BFG labs, enter the Prototype Lab 01 and defeat the Possessed inside. Jump onto the equipment in the middle of the room and spot a ventilation shaft to the side; jump to it and go to the end to find a dead body and the Pinkguy collectible.
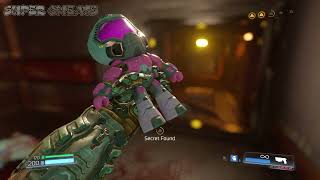
Mission 8 - Pinkguy Collectible
Field Drone: From the rock platforms, head through the opening/closing hatch and drop down. Here, look for the green lights to jump onto the small metal beam above and from here climb up to a hatch. Move through the hall, defeat a few Imps and reach the second ventilation shaft area (marked, conveniently, by the number 2). Look for a switch and hit it to stop the ventilation system. Go inside and make your way to the end of an adjacent small ventilation shaft to reach a Field Drone.

Mission 8 - Field Drone
Anything missing from this guide?
ASK A QUESTION for Doom (2016)
Comments for Collectibles Mission 8
Add a comment
Please log in above or sign up for free to post commentsNo comments yet. Tell us what you think to be the first.
Table of ContentsClose
Guide Updates
Get notified of updates to this guide
Many of our guides get updated with additional information. To get an email when this guide is updated click below.
 Join us on Discord
Click to close