Imperial City Quests
The Elder Scrolls IV: Oblivion Walkthrough and Guide
The Elder Scrolls IV: Oblivion Guide - Side Quests
Imperial City Quests
This side quest contains the following sections, just scroll down to read, or use the anchor links in the list below to jump straight to the section you are interested in.
An Unexpected Voyage
Imperial Corruption
Unfriendly Competition
Order of the Virtuous Blood
The Collector
Nothing You Can Possess
Secrets of the Ayleids
The Arena
Origin of the Grey Prince
Buying a House in the Imperial City
An Unexpected Voyage
To start, travel to the Imperial City Waterfront and enter the Bloated Float Inn, using the local area map to locate it if need be. Inside, speak to Ormil and select the 'Bed' dialogue option. Once Ormil has the coins, he will point you to your room. Sleep in the bed in your room for at least one hour. When your character awakens, an in-game pop up will notify you that the Bloated Float Inn has been put to sea.
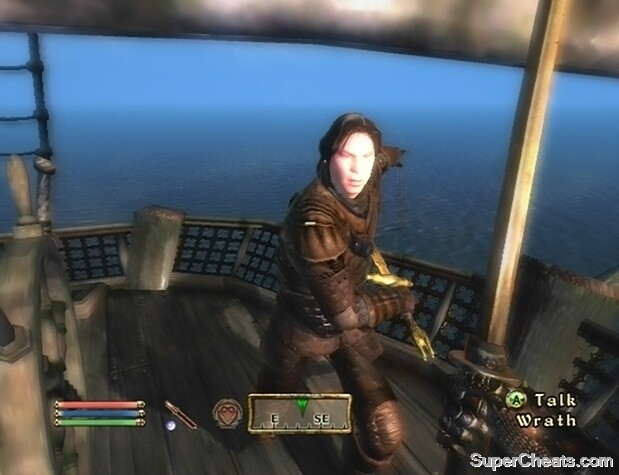
Exit the room to encounter a man named Lynch. Lynch will end up attacking you, no matter how you go about talking to him. Kill him, then search his corpse and remove the Storage Room Key. Locate the Storage Room by following the arrow on your compass and use the key to unlock the door, freeing Graman gro-Marad. When ready, return to the Tavern Deck to encounter Minx, another thief. You'll have to kill her too, since she won't believe that you are a member of the gang.
 Fight the bandits onboard the Bloated Float. |
After killing Minx on the Tavern Deck, search her corpse and remove the Top Deck Key. Proceed to the Top Deck area to encounter Wrath, yet another thief. Cut him down too, and search his corpse for Ormil's Cabin Key. With the key in hand, return to the previous area and inform Graman gro-Marad that the Top Deck is clear. Then, follow the arrow on your compass to the door into Ormil's Cabin, and use the key to unlock it.
In Ormil's Cabin, you'll encounter Selene, who is the leader of the gang. If you took Lynch's Orders from his corpse, you can actually get Selene to surrender here. To do so, select the following dialogue options:
'I took the key from Wraith.'
'I'm here to join the gang.'
'...three months ago?'
'To find the Golden Galleon.'
'You mean in Bravil?'
'I've killed them all.'
 Select the right dialogue choices to make Selene surrender. |
If you select the correct dialogue options, Selene will surrender and hand over her Blackwater Blade. If you answer incorrectly, Selene will attack. Ormil will try to help you take her down, so be careful not strike him. When Salene is dead, pick up the Blackwater Blade that she drops and speak to Ormil. After speaking to Ormil, return to the Inn Deck area and sleep in your bed. When your character awakens, the Bloated Float Inn will once again be docked in the Imperial City. Before leaving the Bloated Float Inn, speak to Ormil to receive the gold reward for the capture of Selene.
Imperial Corruption
To begin this quest, travel to the Imperial City's Temple District and ask either Ruslan or Luronk gro-Gluzrog about a 'Corrupt Imperial Watchman.' To find Ruslan or Luronk gro-Gluzrog, use the local area map to locate either one of their homes while in the Temple District. If the first house you visit is vacant, check the other's, as the both of them may be there. Ask about the Watchman to learn that both Ruslan and Luronk gro-Gluzrog were unfairly fined for something they did not do. This event occurred at Jensine's 'Good as New' Merchandise in the Imperial City Market District, so make your way over there.
Jensine won't tell you anything about the corrupt watchman her disposition is at least 70. Use persuasion or bribery to Raise her disposition if need be, and then ask her again. When she's willing to talk to you, Jensine will tell you all about Audens Avidius and his unfair fines. Audens must be brought to justice, but only another watch captain can arrest him.
Ask an Imperial Watch Captain to arrest the corrupt Audens Avidius. |
An Imperial Watch Captain can most likely be found along the Imperial City Waterfront, so start your search there. If you're having trouble finding one, select the 'Corrupt Imperial Watchman' dialogue option while speaking to any Imperial Watch and an arrow pointing to the captain will appear on your map and compass.
When you've located another Imperial Watch Captain, speak to him and select the 'Corrupt Imperial Watchman' dialogue option to be pointed to Hayn, another Imperial Watch. With 'Imperial Corruption' set as your active quest, follow the arrow on your compass to find Hayn. Hayn needs two witnesses before he can do anything about Audens Avidius' unlawful fines. Luronk gro-Gluzrog and Ruslan fit the bill, so follow the arrow on your compass to each of their locations, and select the 'Testify against Audens Avidius' dialogue option while speaking to them. If they refuse, raise their disposition to at least 70 through persuasion or bribery and try asking again.
 Convince Ruslan and Luronk gro-Glurzrog to testify against Audens Avidius. |
Once you have convinced both Luronk gro-Gluzrog and Ruslan to testify against Audens Avidius, an in-game pop up should appear at around 10:00AM the next day, informing you that the corrupt watchman has been arrested.
Unfriendly Competition
To begin this quest, visit Jensine's 'Good as New' Merchandise in the Imperial City's Market District while it is open. Inside, speak to the proprietor and ask about Thoronir. The Society of Concerned Merchants is convinced that Thoronir is obtaining his merchandise through foul means, since he is able to charge such low prices and still turn a profit. Jenine tasks you with finding out exactly where Thoronir gets his merchandise, with the promise of a gold reward if he is brought to justice.
Thoronir owns the Copious Coinpurse, which is located in the Imperial City's Market District. Enter the Copious Coinpurse while it is open and speak to Thoronir. Asking him about his Inventory won't get you anywhere, since he is unwilling to talk specifics. You have no choice but to wait until the shop closes and then follow Thoronir out to see if he is up to anything.
 Thoronir closes shop at 9:00PM. Wait for him outside of the Copious Coinpurse and follow him when he leaves. |
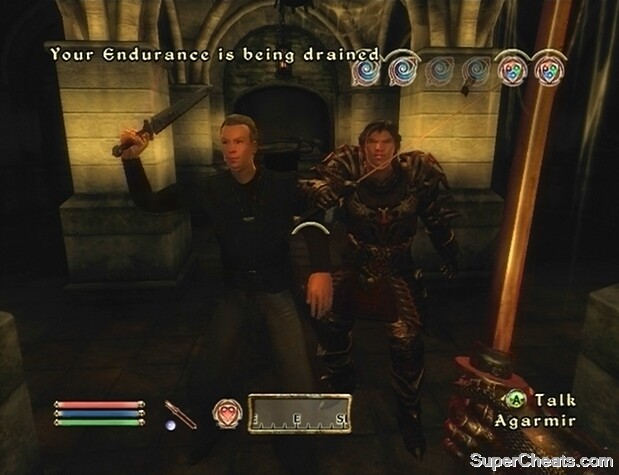
The Copious Coinpurse closes at 9:00PM, so find a good spot outside and wait. When you spot Thoronir leavening the store, toggle Sneak Mode and follow him. Be sure to keep a fair distance from him, as you don't want to make him suspicious. It may take a while for Thoronir to reach his destination, but just continue to follow him. Eventually, Thoronir will meet with a Nord named Agarmir at a rendezvous spot in the Imperial City Market District.
When Thoronir and Agarmir finish conversing, set your sights on the Nord instead. Begin following Agarmir, and you will soon come to his house. Once you know the location of his house, you can then return there the following evening to investigate. Visit Agarmir's House the next day after 5:00PM. Ensure that Sneak Mode is toggled and that the sneak icon is faded before breaking into Agarmir's House. Once inside, locate the door to the basement and pick the lock to enter. In Agarmir's basement are some clothes, an assortment of human remains, as well as a shovel and a pair of mud-caked boots. Take the Macabre Manifest that is on the table and exit Agarmir's House.
 Defend yourself from Agarmir and his accomplice in the Trentius Family Mausoleum. |
With Agarmir's Macabre Manifest, visit the Copious Coinpurse while it is open and select the 'Taken from the Dead' dialogue option while speaking to Thoronir. After speaking to Thoronir, exit the shop and fast travel to the Imperial City Palace. Follow the arrow on your compass to the Trentius Family Mausoleum and enter. Agarmir and his companion have set a trap for you; kill Agarmir and the other man, and loot their corpses afterward. Then, collect Agarmir's Shovel next to Lord Bellirus' Casket as proof of his crimes.
Before leaving the mausoleum, locate Calliben Trentius' Casket at the north end and look behind it to spot the 'Calliben's Grim Retort' unique mace. With this, leave the mausoleum and return to Thoronir. He will thank you for your help and give you the Weatherward Circlet, which boasts Fire Resistance and Frost Resistance enchantments. After speaking to Thoronir, return to Jensine and show her the Macabre Manifest and Agarmir's Shovel to complete the quest.
Order of the Virtuous Blood
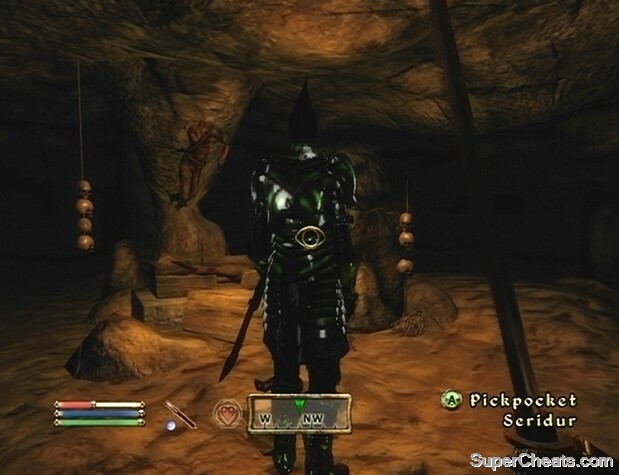
While in the Imperial City's Temple District, you may be approached by a woman named Ralsa Norvalo, who will tell you that her husband needs assistance. Gilen, Ralsa Norvalo's husband, wants you to meet him in Seridur's House in the Temple District. Use the local area map to locate Seridur's House and head inside.
Upon entering Seridur's House, you will be led down to the basement, which acts as the headquarters of the Order of the Virtuous Blood. The members of the Order of the Virtuous Blood serve to protect the citizens of the Imperial City from vampires. Seridur explains that Roland Jenseric, who also resides in the Temple District, is a vampire; the group would like you to dispose of him. Roland Jenseric's whereabouts are currently unknown, so Seridur suggests that you search his home in the Temple District to find out more.
Look for a love letter in Roland Jenseric's House in the Imperial City Temple District to learn of his whereabouts. |
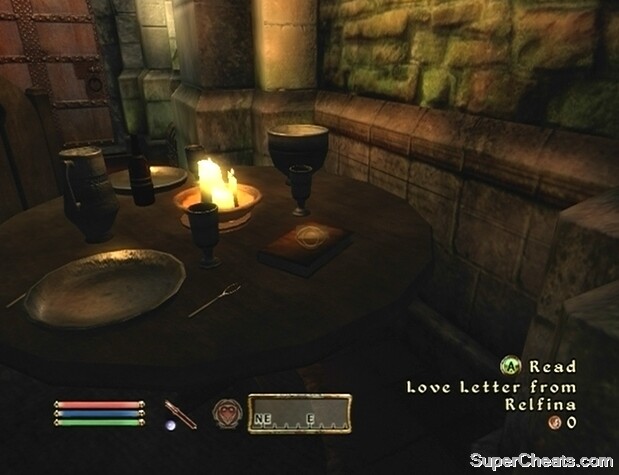
Use the local area map to locate Roland Jenseric's House in the Temple District; ensure that Sneak Mode is toggled, and that the sneak icon is faded, before breaking in. Once inside, approach the table in front of you. Collect the 'Love Letter from Relfina' that's on top of the book on this table. The letter mentions a cabin east of the Imperial City, where Roland and his girlfriend Relfina meet. The location appears on your map as 'Roland Jenseric's Cabin.'
Once you've investigated Roland Jenseric's House and have discovered his whereabouts, leave the Imperial City and make your way to his cabin east of the city. You'll find Roland inside; choose not to kill him, and he'll explain that Seridur is the actual vampire. Seridur has been known to visit the First Edition book store in the Imperial City Market District on occasion, so it would be best to consult the owner to learn more about him.
In the First Edition book store in the Imperial City Market District, ask Phintias about Seridur. He'll tell you of a Memorial Cave, which is apparently a usual hangout spot of Seridur's. Phintias will mark Memorial Cave on your map, so you can easily travel there. The cave is just outside of the Imperial City, so make your way over there and head inside. Provided you have 'Order of the Virtuous Blood' set as your active quest, you can follow the arrow on your compass to reach Seridur. Memorial Cave is a vampire den, so you'll have to be careful. There are various undead type creatures in Memorial Cave as well, so remain cautious as you move through the tunnels. Be sure to pick up all of the Vampire Dust that you come across along the way, as you can sell it after this quest.
 Hunt for Seridur in Memorial Cave. |
If you character happens to contract Porphyric Hemophilia (aka the 'vampire disease') and you aren't partial toward having your character turn into a vampire, there are two ways to impede the transformation: visit a chapel in one of the major cities and pray at the altar there, or down a Potion of Cure Disease. To discern whether or not your character has contracted Porphyric Hemophilia, pull up the Active Effects menu and check each of the effects listed there to determine if they stem from the disease.
Find and kill Seridur in Memorial Cave, and then return to Roland Jenseric at his cabin. After delivering the news to Roland, return to Seridur's House in the Temple District, and head down to the basement to spot Roland. He invites you to join the re-established Order of the Virtuous Blood and gives you the Ring of Sunfire, which boasts levelled Disease Resistance and Spell Reflection enchantments. From now on, if you bring Vampire Dust to Roland, he will trade 250 gold coins per portion.
The Collector
If you've come across an Ayleid Statue while exploring an Ayleid Ruin, you've probably been wondering just what its purpose is. Ayleid Statues are tied to this quest, actually. There are tem Ayleid Statues in all. Though there are many Ayleid Ruins in Cyrodiil, not all of them contain an Ayleid Statue. Finding ten of these artifacts when there are so many dungeons may seem like a daunting task, but fortunately, you've got this walkthrough to help you out. While scouring the dungeons for these statues, be sure that you have a weapon that can damage ghosts—this includes enchanted, silver, and Daedric weapons—and plenty of lockpicks.
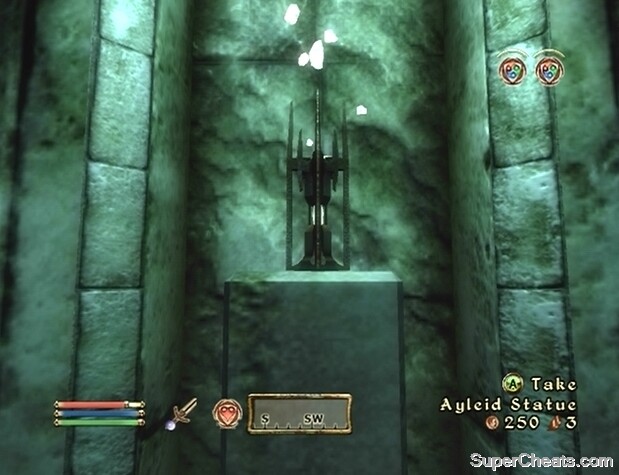 An Ayleid Statue. |
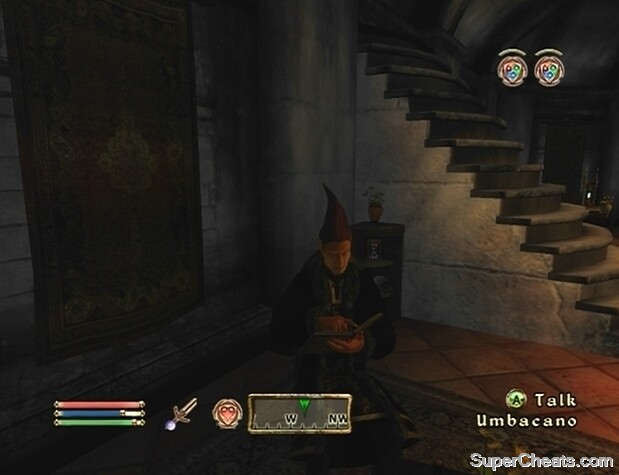
Once you have acquired at least one Ayleid Statue, locate Umbacano Manor in the Imperial City's Talos Plaza District and visit it during the day. Upon entering, you'll be approached by a man named Jollring. Show him the Ayleid Statue, and he'll take you to see his master, Umbacano. Umbacano will offer to buy the statue from you for 500 gold. For each statue you bring to Umbacano, he'll give you 500 gold.
The Ayleid Ruins that contain an Ayleid Statue are: Culotte, Fanacas, Mackamentain, Moranda, Ninendava, Vilverin, Wendelbek, Wendir, Welke, and Wenyanda. To quickly find a walkthrough for a particular dungeon, use your browser's search feature and type the name of the Ayleid Ruin in the box.
Culotte - Southeast of the Imperial City and next to the 'T' in 'The Yellow Road' text on the world map. Down the winding stairs, move forward and drop down to the level below as soon as you can. Travel southwest until you come to another stone bridge, this one overlooking two areas filled with biers. While standing on this bridge, drop down to the area on your left. Turn around, and here through the passageway here. The Ayleid Statue that you are looking for is in between the three pillars in this room.
 Culotte |
Fanacas - This one might take a bit of effort to get to. It is located northeast of Cheydinhal and to the right of the 'e' in the 'Lake Arrius' text on the world map. Start from Lake Arrius. You'll have to climb up a few steep hills, so tread on grass when you can no longer ascend. When you reach Fanacas, locate the entrance and head inside. From the entrance, continue moving straight until you find yourself in an area surrounded by water. Follow the stone walkway that you are first on to its end. Be careful of the falling blade traps, as they deal a fair amount of damage. Once you cannot travel along this walkway any further, turn left and hop into the water. Jump out of the water and onto the next stone walkway. This walkway will lead you out of this room. All you must do now is follow this straightforward path to the Ayleid Statue.
 Fanacas |
Mackamentain - This ruin is located southeast of the Imperial City and just a little bit southwest of the 'B' in 'The Nibenay Basin' text on the world map. Upon entering, go down the stairs and continue straight until you reach a room with four Varla Stone Cages. If you wish, you can locate two Press Blocks on the walls in this room; pressing them will raise the cages, allowing you to retrieve the Varla Stones that they were covering. Locate the exit on the northeast side of this room. You'll come to a seemingly empty room with a door at the opposite end. Do not step on the blood soaked portion of the floor in the middle of this room, as doing so will trigger a nasty trap. Don't try to run it; instead, jump diagonally between the two stone walls where the caskets are. Then, jump diagonally to opposite side of the floor trap. Once you're past the trap, proceed through the door marked Tombs of the Undead.
 Mackamentain |
In the Tombs of the Undead area, move straight head. Continue moving in this direction, while keeping an eye on your right for a treasure chest along the way. When you reach the chest, turn left and cross the stone bridge here. Step on the floor panel in the middle of this room to create a set of stone steps. Head up the steps, and exit to the Necromancer's Asylum area. Upon entering this area, head straight to spot the Ayleid Statue on the bier in the middle of this room, next to an Ayleid Reliquary.
Once you have the statue in your inventory, head to the end of this room and unlock the Iron Gate. The door beyond the gate leads directly back to the main area of Mackamentain. Back in Mackamentain, hit the Press Block in the southern corner to open a passage back to the entrance.
Moranda - Northwest of the Imperial City and north of the 'F' in 'The Great Forest' text on the world map. Upon entering, go down the first set of stairs and turn right at the bottom. Down those stairs, move straight through this room and down another set of stairs, then turn left and go down some more stairs. Proceed through the door to Moranda Abaspania. Down the stairs, you will find yourself in a room filled with green smoke. You'll take damage while down here, but it is minimal. As soon as you enter the smoke-filled room, exit through the door beyond the pedestal at the end of the room to your left. As soon as you are in the next area, turn left and hug the wall. The Ayleid Statue is sitting on a platform in an alcove along this wall.
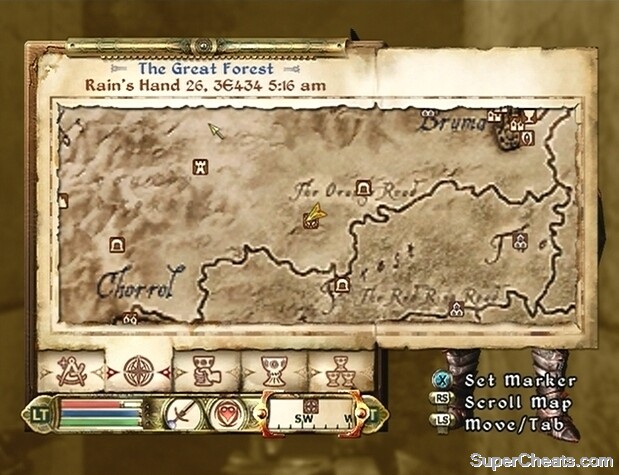 Moranda |
Ninendava - This one is a bit difficult to get to. Ninendava is located far west of Bruma and northeast of Chorrol. Another way of putting it is far, far north of the 'G' in 'The Great Forest' text on the world map and east of the 'd' in 'The Colovian Highlands' text. It's in the mountains and not along a road, which makes it quite hard to get to.
 Ninendava. |
There are vampires inside of Ninendava, so be careful. If you happen to contract Porphyric Hemophilia, don't forget to down a Potion of Cure Disease or pray at a chapel in one of the major cities once you've found the Ayleid Statue, unless you wish for your character to turn into a vampire. From the entrance, head up the stairs and continue moving in this direction until you come to a wall. Then, turn left, head up the stairs, turn left at the top, and head up the stairs here. The Ayleid Statue is at the end of this room, sitting in the alcove along the wall behind the pedestal.
Vilverin - Start by fast travelling to the Imperial Prison Sewer. Go straight ahead (northeast) to the small island to discover Vilverin. Inside, go down the stairs in front of you, follow the winding path, cross the wooden planks, and climb down a few sets of stairs until you reach the bottom. This particular Ayleid Ruins appears to be a bandit hideout of some sort, so remain vigilant. At the bottom of the stairs, turn left and head through the doorway here. Turn left, down the stairs, and go straight through the two doorways ahead. Hop down to the lower level here and exit via the door to Vilverin Canosel.
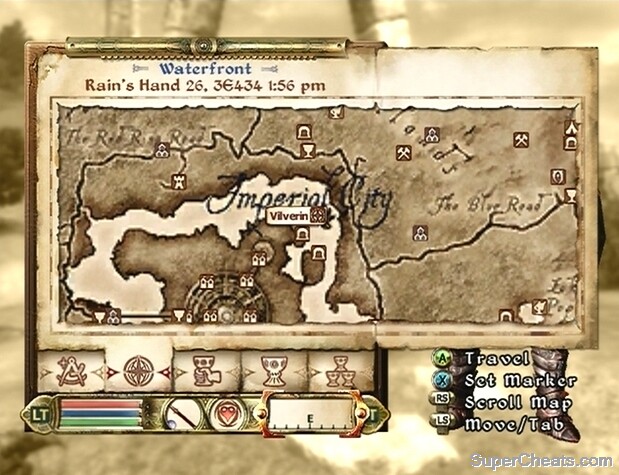 Vilverin. |
You'll come to an area with many different paths. When you reach the pedestal with the Ayleid Casket atop it, go through the doorway to your left. Continue heading in this direction until you come to a room with a stone base in it. Look for a floor panel behind the base, and step on it to reveal a passageway on the north wall of this room. Proceed through the passageway, and then down the sets of stairs that you come to. You will eventually reach some stairs that lead to an underwater area. Dive underwater, swim around until you see some stairs leading up out of the water, and take the stairs out. At the top of the stairs, turn right and proceed through the door marked 'Vilverin Wendesel.'
In Vilverin Wendesel, don't step on the piece of floor that has holes all over it, as doing so will trigger a trap. If you can jump far enough to simply leap over it, do so. If not, try running and jumping across as the piece of floor falls. Once past the trap, head straight until you reach some stairs. At the top of the stairs, turn left and go straight until you reach a large room. There should be two Press Blocks before you. Activating one of these Press Blocks will open one of the a doors along the walls of this room. Most of them contain undead creatures. Activate the upper Press Block on the right (while facing the two blocks). Once you have hit the button, move up to the top part of this room and turn right. Look down for a small Ayleid Chest; open the chest, and remove the Vilverin Chamber Key that's inside.
Once you have the Vilverin Chamber Key, proceed through the door at the top of the room. Turn left and travel down this path until you come to another room. Upon entering this room, turn left. Move straight and you will soon reach a doorway leading to some stairs. Up the stairs, there is a Press Block that will open the Varla Cage below, which will allow you to retrieve the Varla Stone it covers if you wish. At the Press Block, turn left and proceed through the door marked 'Vilverin Sel Sancremathi.'
The Ayleid Statue is at the end of the series of halls in Vilverin Sel Sancremathi. Be careful, however, as the swinging traps along these halls are quite damaging. Once you have the Ayleid Statue, move past the pedestal and follow this path to a large room. Here, you will encounter a necromancer named Jalbert. Kill him and loot his corpse. Then, look for a doorway along the northern wall and head through to come to a door back to Vilverin. Head through the door, then simply hop down, turn right, and head back up the stairs to reach the entrance.
Wendelbek - East of second 'a' in the 'Nibenay Valley' text on the world map (near Bravil) and north of the 'a' in the 'Panther River' text. From the entrance, head straight, unlock the Iron Gate, turn right, and travel along this linear path until you reach the door to Wendelbek Aldmerisel. Upon entering Wendelbek Aldmerisel, move forward into the large, open room. Turn right and follow the walkway, all the while keeping an eye on your right for the door to Wendelbek Mathmedli.
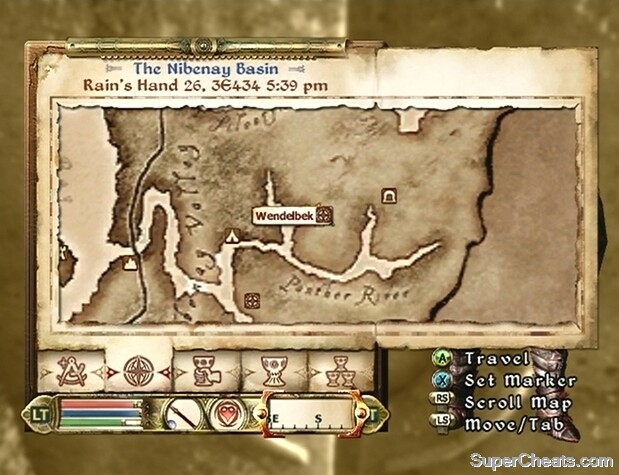 Wendelbek. |
Enter Wendelbek Mathmedli when you come to the door, then turn left and follow this path down some stairs. Now, hug the wall to your right and move along here, hopping over the pieces of stone that you cannot simply walk over. Look to your left at the railed walkway; you should be able to see the Ayleid Statue sitting atop a bier. Hop over, grab the statue, then hop back make your way out of Wendelbek.
Wendir - Start at the North Country Stables outside of Chorrol and travel south from there. Keep an eye on your compass, and eventually you should notice an Ayleid Ruins symbol pointing southwest. At this point, follow the symbol on your compass to Wendir. Upon entering Wendir, head down the stairs, turn right, and unlock the Iron Gate here. Follow the path beyond the gate until you reach the door to Wendir Nagasel.
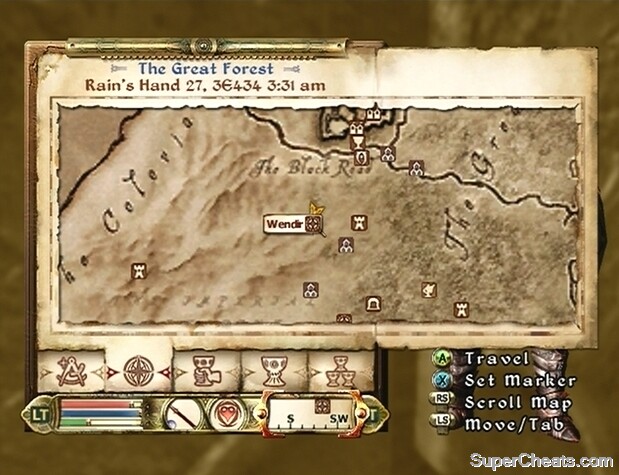 Wendir. |
After entering Wendir Nagasel, avoid the trap floor panel in the middle of the room and exit this via the door in the top left corner. Follow the path beyond the door until you reach an Iron Gate and a Press Block at the bottom of some stairs. Activate the Press Block and follow the walkway beyond it to the Ayleid Statue. On your way back, look for a door along the path that you took to reach the room with the statue for a door leading back to the Wendir area. Go through it to return to Wendir, and then simply hop down to the area below to reach the entrance.
Welke - Southwest of the 'P' in the 'Panther River' text on the world map (east of Bravil). Inside Welke, head down the stairs, turn right, and follow this path into a room. Look for some stairs in this room and exit into the next area. There are some traps down the hall, so be careful. At the end of the hall, exit through the door to Welke Ceyede.
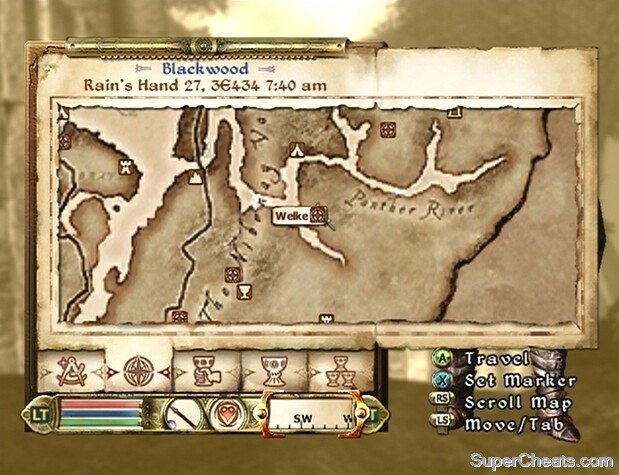 Welke. |
Upon entering Welke Ceyede, head down the stairs, turn right, and continue in this direction until you can turn left. Then, move forward until you can turn right. Swim through the underwater path that you come to until you reach some stairs out of the water. Turn right once you are out of the water and proceed through the door to Welke Edesel. The Ayleid Statue is on the fourth stone bier in this room.
Wenyandawik - South of the Imperial City and under the 'R' in 'The Green Road' text on the world map. Upon entering Wenyandawik, head down the stairs, turn right, move straight, and turn left when you can. Continue heading straight until you reach very large area. There are three doors in this room, all which lead to an area to the Wenyandawik Edesel area. You'll want to go through the door along western wall. Once in Wenyandawik Edesel, follow the linear path to an Iron Gate that you cannot open. Go through the door near Iron Gate that leads back to the Wenyandawik area. Once through the door, travel along the wall until you reach the northern door, which leads back to Wenyandawik Edesel.
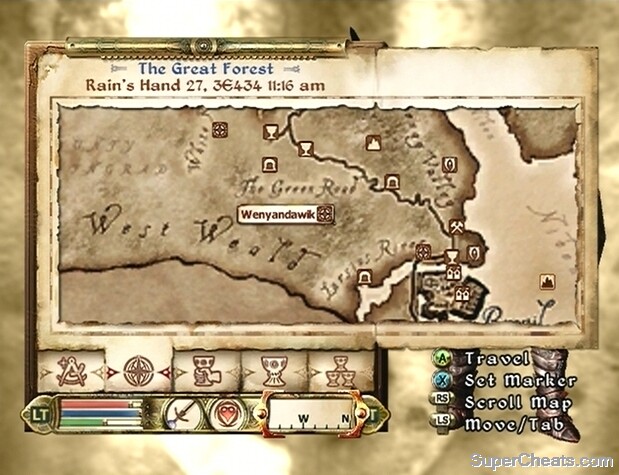 Wenyandawik. |
Proceed through the door to re-enter Wenyandawik Edesel. Then, turn right, continue heading in this direction until come to wall, and then turn right again. Continue heading straight, activating the Press Blocks along the way to open the Iron Gates, until you reach a hall lined with swinging traps. Be careful here, as these traps can deal quite a bit of damage. Once through the trap-pack hall, turn left, down the passageway, and then up the stairs to your left. Run down to the opposite end of this area. Keep an eye on your right, as you will soon pass by a pedestal that holds the Ayleid Statue.
Once you have found all ten of the Ayleid Statues, return to Umbacano in the Imperial City's Talos Plaza District and sell them to him. That's 4500 more gold—5000 total—for selling the entire set to Umbacano. All of the statues will be placed in the display case in Umbacano's room. If you're up to it, you can sneak into his room at night, or open the display case while he's not looking, and steal all of the Ayleid Statues back. Though they have no value if you steal them back, they make for cool decorations.
Nothing You Can Possess
When you have found and sold three Ayleid Statues to Umbacano during the 'The Collector' quest, a new dialogue option, 'Another task,' will become available. Select this dialogue option while speaking to Umbacano, and he will tell you of an Ayleid Ruin known as 'The High Fane.' He mentions that it is more than likely now known by a different name. Umbacano wants you to retrieve a carved panel from this ruin, and provides you with a stone that will allow you to gain access to this carved panel.
The High Fane is now known as Malada, which you may already be aware if you have read the book entitled 'Cleansing of the Fane.' Either way, upon leaving Umbacano Manor, you will be approached by a man named Claude Maric. Follow him to the Tiber Septim Hotel nearby and speak to him once he sits down. Raise his disposition to at least 70 through persuasion or bribery, and then select 'The High Fane' dialogue option to have Malada marked on your map.
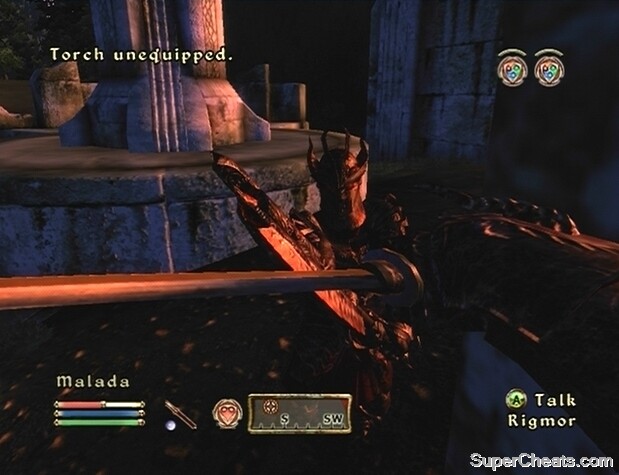
 The treasure that Umbacano seeks is in Malada. |
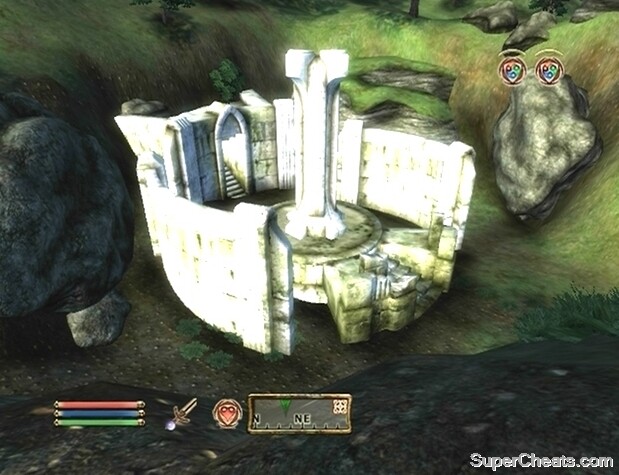
Malada is located far, far east of Bravil, and just above Lake Canulus. On the hill overlooking Malada is a Khajiit archer named S'razirr. He works for Claude Maric, and believes he is being misled by him. Speak to him and if his disposition is at least 70, he'll offer to help you out if anything goes down, in return for half of the reward earned for bringing the carved panel to Umbacano. It's your choice. After making your decision, hop down and enter Malada. Inside, you are looking for the stone door that must be opened with the carved stone that Umbacano provided. The door won't be marked on your compass, so you'll have to locate it on your own. Finding the door isn't too difficult; refer to the local area map if you're having trouble finding the way.
When you reach the stone door, use the carved stone to open it, and then proceed through. The stone panel is in the wall here, so collect it and then step back out. You can explore Malada a bit more by proceeding through the door to the Malada Aldmerisel area, or you can turn back and exit the ruins, as you now have what you came in for.
Once you've exited Malada, Claude Maric will approach you; he wants you to hand over the carving. Refuse to give it to him, and you will be attacked by Claude and his accomplices. If your character's Personality attribute or fame is high enough, you can yield to the attackers to end the fight. To yield, press the A/X button while blocking. If they refuse, you'll just have to fight them. If you took S'razirr's offer before entering Malada, he will help you out here, but will most likely be killed. If he is killed, at least you won't have to split the reward with him.
 Claude Maric and his goons will be waiting for you outside of Malada. |
After dealing with attackers, return to Umbacano in the Imperial City's Talos Plaza District and give him the carving to receive a large amount of gold as reward.
Secrets of the Ayleids
After completing 'Nothing You Can Possess,' Umbacano will have another task for you. Select the 'Another task' dialogue option while speaking to Umbacano for a full briefing. This time, Umbacano wants you to obtain an Ayleid Crown. A woman named Herminia Cinna in the Imperial City's Elven Gardens District has one such crown.
With 'Secrets of the Ayleids' set as your active quest, follow the arrow on your compass to locate Herminia Cinna. Select the 'Crown of the Ayleids' dialogue option while speaking to Herminia to learn that Umbacano's intention for the Ayleid Crown is perhaps not as mundane as it appears. She explains that, should Umbacano come to possess the Ayleid Crown that he seeks, he will use it to unlock the magical power of the Ayleids. You must present a crown to Umbacano, but it does not have to be the Crown of Nenalata that Herminia possesses, since he would unable to differentiate between two Ayleid Crowns anyway.
 Steal Herminia Cinna's Ayleid Crown of Nenalata for Umbacano, or bring him the Ayleid Crown from Lindai. |
Herminia will give you a key to an ancient burial chamber located in Lindai. Another Ayleid Crown can be found in these ruins, but not the Crown of Nenalata, which holds the dangerous power that Umbacano wishes to unleash. So, you have with two options here: steal the Crown of Nenalata from Herminia's home, or you travel to Lindai and obtain a mock crown. Of course, the more righteous option is the latter, but you are free to decide for yourself. There are two active quest arrows at this point: one pointing to Herminia's House in the Elven Gardens District, and the other pointing to Lindai.
If you decide to steal the Crown of Nenalata from Herminia, travel to the Elven Gardens District and follow the green arrow on your compass to locate her house. Ensure that Sneak Mode is toggled, and that the sneak icon is faded before breaking in. Once in Herminia's House, head up the stairs to her room. Look for a locked Ayleid Cask on a table. Use a lockpick to open the Ayleid Cask, and remove the Crown of Nenalata.
If you decide to retrieve the Ayleid Crown in Lindai, make your way to the ruins and enter. Lindai is full of traps and undead creatures, so be careful. If you notice any floor panels with blood on them, do not step there, as doing so will trigger a trap, so either jump over or move around. Search around for the door to the Lindai Inner Tombs. There isn't a guiding arrow on your compass to lead you there, but finding the door is quite easy since the path is fairly straightforward; refer to the local area map if are having trouble finding the way. In the Lindai Inner Tombs, look for the stone door that can be opened with Herminia's key. Use the key to open the stone door, and remove the crown from the cask in the middle of this area.
 Give one of the two Ayleid Crowns to Umbacano. |
Once you have the Ayleid Crown of your choosing for Umbacano, return to Umbacano Manor in the Imperial City Talos Plaza District. Speak to Jollring inside, and tell him you wish to speak to Umbacano. When you give the crown to Umbacano, he'll ask that you accompany him to the Ayleid Ruins of Nenalata. There, he will bring the crown to the throne room deep within. The location has been marked on your map; you are to meet him there in three days time.
When three days have passed, meet Umbacano outside of Nenalata. Inside, you'll have to protect Umbacano because the quest will end if he is killed. If you notice his health is getting low, use the wait menu to pass an hour while there aren't any enemies nearby to completely restore his health. He can be a bit reckless at times, so if you are having trouble keeping him alive, consider leaving him outside while you clear out Nenalata. Claude Maric is there protect Umbacano as well. Follow the arrow on your compass to the door to Nenalata Wendesel.
In Nenalata Wendesel, the arrow on your compass will point to the door to Nenalata Sel Aran Arpena. Make your way to this door, and enter Nenalata Sel Aran Arpena. You'll eventually reach an area with indent in the wall. Umbacano will place the carved panel into the indent to gain access to the throne room. Once in the throne room, Umbacano will be seated on the throne while wearing the crown that you provided him.
 Escort Umbacano to the Ayleid King's throne in Nenalata Wendesel. |
Once Umbacano is seated on the throne, the ritual will begin. If you gave Umbacano the Crown of Nenalata, he will be transformed into an Ayleid King and immediately turn hostile. If you gave him the Crown of Lindai, the ritual will go terribly wrong, instantly killing him. Either way, once Umbacano is dead, the quest is over. You'll have to face the undead that are now flowing into the throne room. There are a lot of them, so it may be wise to simply high-tail it out of there. There is an exit nearby through the recently opened passage to the left of the throne. Be sure to loot Umbacano's corpse and Claude's if he was killed too.
The Arena
Are you looking for fame? For glory? Are you looking to test your skills against other battle hardened warriors? Or are you looking to make some quick cash putting life on the line? Whatever your desire, the Imperial City's Arena District awaits. A man named Hundolin is stationed outside of the Arena. Speak to Hundolin, and you can put gold down on an upcoming fight. This activity is rather pointless, however, as gold the amount of gold made for a winning bet is not worth the time.
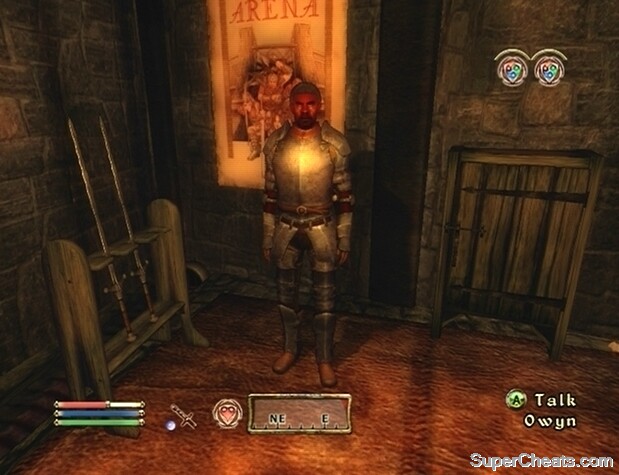 See Blademaster Owyn in the Arena Bloodworks about becoming a combatant. |
The door to the Arena Bloodworks is to the left of Hundolin. If you are looking to become an arena combatant, you will have to see to Blademaster Owyn in the Arena Bloodworks. Speak to Owyn, and tell him that you're looking to become a combatant. He'll eventually give you the choice between a Heavy or Light Raiment, which will be the armour you wear in the Arena. Choose the raiment that will best suit your character build. If you wish to swap raiments after the fact, you can do so by interacting with the Raiment Cabinet next to Owyn. The raiment of your choosing must be worn before you can enter the arena, though you can choose your own weapon, shield, and helmet.
When you're ready to get started, speak to Owyn and select the 'Ready for a Match' dialogue option. The ramp into the arena is at the very end of the Area Bloodworks. Make your way up the ramp, and step through the blood-stained door to enter the arena.
The opponents you face in the arena are likely to be quite a bit stronger and faster than what you're used to facing in the field, but all in all, if you are equipped with a sword and shield, you shouldn't have too difficult a time. Magic users and archers may have some difficulty, but can hopefully move quickly. If you are having a great deal of difficulty making it past a particular match, consider lowering the difficulty level for the time being. Once you have defeated an opponent, you won't be permitted to take their equipment.
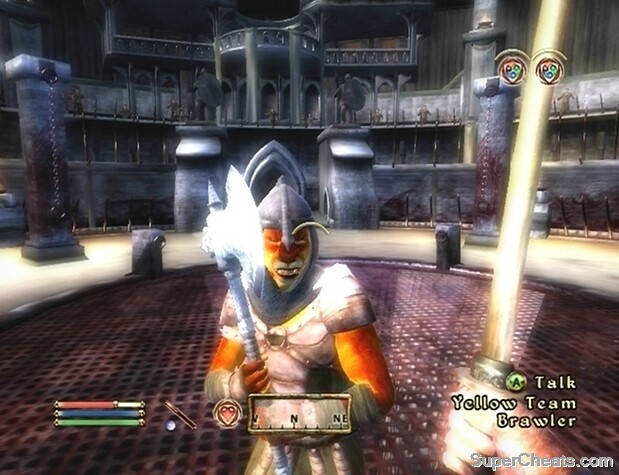 Fight for fame, glory, and your life in the Arena. |
After each battle, when you are ready to proceed to the next, speak to Owyn and select the 'Ready for a Match' dialogue option. Below is a list of what you'll be facing in the arena battles.
Pit Dog
Match #1 - Female Wood Elf. Uses sword and shield.
Match #2 - Male Imperial. Uses sword and shield.
Match #3 - Male Argonian. Uses a bow.
Brawler
Match #4 - Male Nord. Uses an axe.
Match #5 - Two female Wood Elves. One uses a bow, and the other a claymore.
Match #6 - Male Khajiit. Uses a two-handed axe.
Bloodletter
Match #7 - Male Redguard. Uses a sword.
Match #8 - Female Breton. Uses a sword and shield.
Match #9 - Male Dark Elf. Switches between bow and sword and shield combo.
Myrmidon
Match #10 - Male Wood Elf. Uses Shimmerstrike dagger.
Match #11 - Female High Elf. Uses sword and shield.
Match #12 - Male Orc. Uses two-handed axe.
Warrior
Match #13 - Female Nord. Uses sword and shield.
Match #14 - Female High Elf. Casts spells and uses a sword.
Match #15 - Female Orc. Uses two-handed warhammer.
Gladiator
Match #16 - Three Argonians. Only one has a weapon.
Match #17 - Male Khajiit. Uses sword and shield.
Match #18 - Male Breton. Uses a sword.
Hero
Match #19 - Male Imperial. Uses a katana and shield.
Match #20 - Male High Elf. Casts spells, uses sword with the Gray Aegis shield.
Match #21 - Three opponents: an archer, a sword and shield user, and a magic user. You're up against three opponents, but you've got a boar to help you, so this shouldn't be a problem.
Important Note: Before moving on to the Grand Champion match, speak to the Gray Prince in the Arena Bloodworks. Work your way through his dialogue tree to add the 'Origin of the Gray Prince' quest to your journal. Complete this quest, and you can then effortlessly defeat the Grey Prince in the Grand Champion match, as he won't attack you. If you don't complete the Origin of the Gray Prince quest, he will fight normally. He is definitely worthy of the title of Grand Champion, so consider completing this quest before proceeding.
 Complete 'The Origin of the Gray Prince' for an easy Grand Champion match. |
When ready to face the Grand Champion, speak to Ysabel Andronicus, who is across from Owyn. After speaking to her, speak to Agronak gro-Malof and challenge him. Then, speak to Ysabel once more and tell her that you are ready for the match. Select your arena moniker from the list of painfully generic titles, then proceed up the ramp and enter the arena.
If you completed the 'Origin of the Grey Prince' quest, Agronak gro-Malof will just stand in the middle of the arena and allow you to cut him down. As cruel as this might sound, now would be a good time to level up some of the more time-consuming skills, such as the Hand to Hand skill. Press the Start button, enter the Options section, select Gameplay, and raise the Difficulty bar as far to the right as you can. After killing the Gray Prince, you will be permitted to loot his corpse.
After the Grand Champion Match, return to Ysabel and choose between a Heavy or Light Raiment of Valor. She'll then tell you to get some rest and return to her to discuss your future as an arena combatant. As the Grand Champion, each week you can return to the Arena, speak to Ysabel, and tell her that you're ready for a match. You'll then be given an option to fight one, two, or three of a monster. The type of monsters that you can face will depend on your character's level. Win the match, and you'll be rewarded with a generous amount of gold.
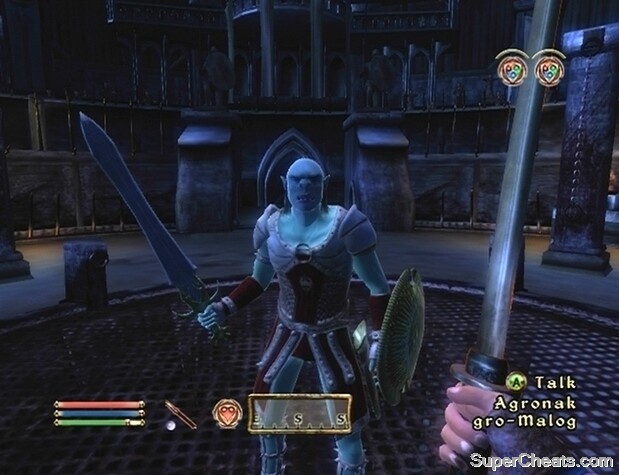 If you complete Agronak gro-Malof's quest, he'll refuse to fight during the Grand Champion match. |
There is one more reward for the Grand Champion of the Arena. Exit the Arena Bloodworks and you will be approached by an unbelievably irritating Adoring Fan! If you kill him, he will respawn. Have fun!
Origin of the Gray Prince
An Orc named Agronak gro-Malog can be found training in the Arena Bloodworks in the Imperial City's Arena District, provided your character is not yet Grand Champion of the Arena. Speak to Argronak gro-Malog, and select the 'The Gray Prince' dialogue option. He'll tell you his story, and ask you to find proof of his noble birthright to determine whether or not he really deserves the title of 'Gray Prince.' Agronak gro-Malog points you to a place called Crowhaven, which is a fort to the west. He provides you with a key, though he doesn't know what it opens.
Completing this quest before facing Agronak gro-Malog in the Grand Champion match has its benefits, as by doing so, he won't attack you during the match. If you don't complete this quest, the Gray Prince will attack you normally.
Crowhaven is guarded by powerful undead. |
With 'Origin of the Gray Prince' set as your active quest, fast travel to the Horse Whisperer Stables outside of Anvil and follow the arrow on your compass to Crowhaven. The fort sits on a rather steep hill, so you may have some difficulty climbing up. Move around and tread on patches of grass where you can no longer ascend. There are likely several undead creatures outside the fort; be sure to kill them before entering Crowhaven, as they will follow you in if you don't.
Follow the arrow on your compass to find your way. If you are having difficulty, refer to the local area map. There are wild animals in Crowhaven, though they are of the weaker variety. Eventually, you will come to a locked door. Use the key that Agronak gro-Malog gave you to open it.
You'll find Lord Lovidicus through the locked door in Crowhaven. Lovidicus is very aggressive and will attack you on site. He won't even speak to you, so you have no choice but to kill him. When Lovidicus has been dealt with, follow the arrow on your compass to a book entitled 'Journal of the Lord Lovidicus.' Read the journal to discover the truth behind Agronak gro-Malog's heritage.
Look for the Journal of Lord Lovidicus in Crowhaven. |
Before leaving Crowhaven, you may want to explore the Crowhaven Burial Halls area and explore a bit. Be warned, though, as there are vampires in this area. When you're ready to leave Crowhaven, do so, and then return to Agronak gro-Malog in the Arena Bloodworks and present Lord Lovidicus' journal to him. For completing the task, the Orc will share some of his combat knowledge with you, permanently fortifying your character's Blade skill by 3 levels.
Buying a House in the Imperial City
If you are looking to buy a house in the Imperial City, visit the Office of Imperial Commerce in the Imperial City Market District. Refer to the local area map to find it. Enter and speak to the Vinicia Melissacia, the woman behind the front desk. She tells you that a house is available on the Imperial City Waterfront for 2000 gold. Purchase the house, and she will hand you the key.
Once you've purchased the house, make your way to the Waterfront, locate it, and step inside. If you wish to purchase some furnishings for your new home, head over to the Three Brothers Trade Goods shop in the Imperial City Market District and speak to Sergius Versus. You can buy the furnishings from him at a reasonable price.
i LEFT UMBUCONO MANOR CLAUD WONT DHOW UP IV SOLD 3 SATUES AND DONE THE
NEW DIOLAUG
I put my difficulty on highest posible and I killed him With ten hits
with my Fine steel longsword
to the first comment you have to get the horse armor dlc with the orc at the stables
Wat Happens if u lose the armor of champion tht the Battle Matron gives u. how do i recover it?????? This is how i lost it i put it in a chest in Cloud Ruler Temple then it disapeared cn anyone help me ??????????
The Gray Prince was Kinda Good if YOu actually Fight him that dude must having put his difficulty on the lowest posible
psshhh. the gray prince was one of the easiest foes on the game. don't let this guide fool you. forgot about his dumb quest too. just get in there and be a grand champion!