Flatbush Rooftops
Thank you for printing this page from www.SuperCheats.com.
Remember to come back to check for updates to this guide and much more content for The LEGO Movie Videogame
Follow this guide to hear about updates
By CMBF

Last Updated:
Possibly the most complicate of levels in the game - certainly the most complicated so far - the Flatbush Rooftops will be a challenge to you in more than one way... And when we say that one aspect that we are specifically noting is the challenge of obtaining all of the Studs that are required for the meter for this zone - which if you are not very serious about, you will fail to accomplish.
-- BEFORE YOU BEGIN THE ROOFTOPS --
As with the other areas once you complete the first level you then have access to the hub area in order to follow the studs to start the next level - the thing is there are some useful items and actions that you want to complete in addition to collecting Studs before beginning the next level...
Follow the Green Studs to the banker who will offer you one of the mini-quests to capture the bank robbers, and then head up the girl climbing block that you need to build to the right of the banker. On the walkway above you can then purchase the Prospector Character, and continue along the path up the rooftop.
On teh roof of the Bank you can then purchase WIley Fusebot, and then make your way along the roofs of the buildings to the water tower, which you destroy to reveal 1 of the 3 Instruction Pages for this area.

Taking care of the hub area bits like Characters and a Red Brick first!
Jump down and lower the ladder for Emmet, who can then come up and repair the mechanism here. Continue to follow the path and girl-jump up to the roof, collecting Studs as you go because you are going to need every Stud you can get!
On top of that roof to the left you will find your first Red Brick! Woot! This is the Gold Instruction Page Detector Red Brick and it will cost you 200K Studs, so you see what I mean by needing all the Studs you can get! After you purchase it be sure to hit the Pause Menu, then Extras, and Red Bricks and turn on the Brick you just bought - as once it is turned on it will detect and direct you to any Gold Instruction Pages that you encounter in a level.
Bear in mind that most of the time it is really only useful to you in FreePlay Mode, since they tend to require you to get into areas in each level and zone you cannot reach in Story Mode...
With that mischief managed, slide down the zipline and purchase the Native, and then head back to the street level. Collect as many Studs as you want / feel comfy doing, then head to the starting section for the next level!
HINT: If you are very low on Studs and want to bank a reasonable amount ahead of the next level the fastest and easiest method to do that is to head back to the Bricksburg Hub and drive a vehicle into things as you collect ALL of the Studs automatically for anything you hit in a vehicle!
-- On to the Flatbush Rooftops Proper Level Area! --
Head up the ladder and have Emmet repair the mechanism that opens the marked door and then head inside for the CS with the Wizard -- after which you begin the journey across the rooftops in earnest.
The hanging skeleton collection here you can get two of but not all three (you can only get the third in FreePlay Mode)... This is also a level where you very likely will not obtain all of the target number of Studs... It can be frustrating but there it is -- later when you have a Stud Multiplier you can replay it and it will be a lot easier...

Navigating the first few roofs and obtaining the two Instruction Pages
The First Ledge
Build the first narrow ledge for the Wizard to cross over -- if you have not noticed this yet, the special power of the Wizard is basically that he is not afraid in situations where the other characters would be mostly because he cannot see to be afraid...
Once you construct the narrow ledge the Wizard will cross and then, once on the other side, he knocks down the water tower and builds the bridge for the others, and they cross.
Emmet then uses his Drill to reveal the girl-climbing area, and Wyld jumps up it to clear ahead and then, using the clock tower, reaches the next level up where she obtains the second Instruction Page and then Emmet uses the Instruction Machine to build the Totem Pole that he then uses his Drill on to topple into a bridge that allows the others to climb up to the roof above!
The Clock Tower
Now that the crew can cross over the upper roof, Emmet can use his Drill on the Clock Tower, which collapses to create a Build Kit for the mechanism that can be pushed into the slot to give access to the next roof!
On the next roof the Wizard uses his Staff to create a climbing point for Wyld, which is required thanks to Bad Cop blowing up the bridge...
Wyld swings off of the Staff to get up to the upper roof, where she pushes down the ladder that allows Emmet to climb up and use his Drill to drop the roof on the right, thus creating the Build Kit for a second bridge. Once that is build the Wizard crosses over and then completes a Master Build in order to construct a bridge that the others can use.
Basically the Master build creates a machine that allows the Wizard to pull down the building on the other side of the gap, turning its wreckage into a Build Kit for a proper bridge. Wyld builds that and they cross over.
Emmet needs to repair the device on the new roof, at which point the crew can then zip-ride down and onto the roof of the next building across the street, where a new attack scheme unfolds.
Constructing the Barrel Launcher and another Master Build!
The Barrel Launcher
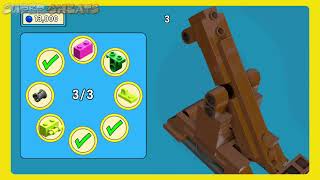
While fighting off bad guys the team needs to obtain the three Instruction Pages that will allow them to build the Barrel Launcher -- a machine that launches explosive barrels at the three entry points on the roof above.
Once the machine is built by Emmet he then rolls three barrels into place and launches them, thus destroying the enemy access to the roof!
Next the Wizard must complete a Master Build in order to gain access to the next roof and continue the quest!
The Next Crossing
Once across, the Wizard uses his Staff to create a swing-point for Wyld and she climbs up above and lowers the ladder for the others, who then climb up. The Wizard crosses the narrow beam and, once on the other side having recovered his Staff, the collapsed bean and sign allow the others to join him.
The Wizard creates a ramp that the others can use to cross over the highly-pitched roof, and another style of enemy attack begins.
This time around Emmet needs to use his Drill on the first two cherry-pickers, and then Wyld needs to assemble the kit that will allow him to Drill the third cherry-picker at which point the team then faces a new threat in the form of a bridge created by Robo-Cops that permits the Sheriff Robo-Cop to ride his horse onto the roof.
A new set of threats in the form of a flying robot and the Sheriff must now be dealt with.

Constructing the Flying Machine Master Build!
This is handled by the Wizard completing a Master Build - after stunning the Flying Robo-Cop with his Staff, which creates the machine that is needed to paralyze the Sheriff Robo-Cop! Well done you!
This results in a new attack via a platform that is cranked up at the edge of the roof -- the team needs to get to the platform after defeating the new Robo-Cops, and the Wizard does a second Master Build that creates a flying machine!
The team gets on board and flies off -- nearly succeeding in getting away but sadly the Bad Cop has a Rocket Launcher...
We Fly Away?
This triggers a rather amazing CS in which we see what happens to our heroes -- and in the process of this major SNAFU we see them end up with a new vehicle that more or less defies description but might be described as a pig-powered chariot?
As the team again attempts to have its escape the process is complicated by significant pursuit -- but as it turns out the new vehicle has a Gatling gun that Emmet can use to take out the bad guys as well as targets of opportunity, so the next segment consists of just that.
In addition to Robo-Cops on horseback, there are also SUVs that he needs to shoot. There are also an assortment of objects that can be shot, including some collection items, but at this point the focus should be just getting through the level - you can worry about the collection items later.

Wrapping up the Level and Having Your Escape!
As you progress through this part of the level the level, once the targets have been shot another unlikely CS plays out in which Emmet has to come up with a creative fix for repairing the Pig-Chariot -- and he does -- saving the day at the very last moment, which ends the level!
You now get the Level Complete notice and the FreePlay Unlocked notice, and unlock the Achievement "Freeze Turkeys!" (20G) Complete Level 4 - Flatbush Rooftops.
In addition you unlock the following Characters: Vitruvius (Old), Tomahawk, Deputron, Sheriff-Not-A-Robot, and Robo SWAT. Remember this just unlocks them - you still need to purchase each Character, which is why you need loads of Studs!
Speaking of Studs, the game now counts up the ones you earned from this level!
Anything missing from this guide?
ASK A QUESTION for The LEGO Movie Videogame
Comments for Flatbush Rooftops
Add a comment
Please log in above or sign up for free to post commentsTable of ContentsClose
Guide Updates
Get notified of updates to this guide
Many of our guides get updated with additional information. To get an email when this guide is updated click below.
 Join us on Discord
Click to close
thanx, but very little about roof pitch multiplier