The Quarantine Zone: The Slums
Thank you for printing this page from www.SuperCheats.com.
Remember to come back to check for updates to this guide and much more content for The Last of Us
Follow this guide to hear about updates
Last Updated:
ITEM CHECKLIST:
![[ ]](/images/smilies/square.gif "[ ]") Drafting Notice (ALL) Wanted Poster (ALL) Warehouse Key (ALL) Health Bar (E/N/H/S) Health Can (E/N/H/S) Health Kit (E/N/H/S) Shiv (E/N/H/S) Shipping Manifest (ALL) Shiv (E/N/H/?) Docks Note (ALL) Wooden Stick (E/N/H/-)
Drafting Notice (ALL) Wanted Poster (ALL) Warehouse Key (ALL) Health Bar (E/N/H/S) Health Can (E/N/H/S) Health Kit (E/N/H/S) Shiv (E/N/H/S) Shipping Manifest (ALL) Shiv (E/N/H/?) Docks Note (ALL) Wooden Stick (E/N/H/-)You can get more Optional Dialogue by going over to the stores to the right. Follow Tess through the market when you want to continue with the story. Move through the bus and you'll reach a small square. Before continuing, look for the [DRAFTING NOTICE] near store in the left corner. You can also find the [WANTED POSTER] next to the fence, featuring Marlene of The Fireflies.

Drafting Notice and Wanted Poster
Follow Tess and you'll bump into a couple of hired goons of Robert. You don't have a lot of ammo, so make every shot count and loot their bodies afterwards. If you run out of ammunition completely, you'll have to take them out with melee attacks, but this could cost you some of your health instead. Follow Tess through the alleys until you have to drop through a hole in a fence. Here, quickly move down the street to sneak up on the patrol outside to strangle him, then move close to the windows of the building.
When the two guards inside are done conversing, sneak up on the one closest to the window and strangle him; Tess will kill the other one. Loot his body for the [WAREHOUSE KEY] and search the other room for a [HEALTH BAR] should you need it. There's also a [HEALTH CAN] next to the trash near the doorway.
In the next area, wait for the guy standing in the doorway to stop looking your direction; he'll actually only do this once, so you can strangle him fairly quickly. Do wait until the other guy heads upstairs. Hide behind the door and follow the guard upstairs so you can strangle him here. Don't touch anything that could make a sound and continue over the walkway, but don't come too close to the railing or the guard downstairs could spot you. Grab the [HEALTH KIT] at the corner and hide behind the wall until one of the two guards comes walking your direction. He'll just turn his face against the wall - the dumbest AI move ever - so you can safely strangle him.

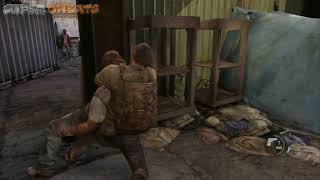
Stealth Approach Shipment Area 1
Head back and go around the other way - again stay away from the opening in the railing - and look for a [SHIV]. Now head back the way you came, go back down and quietly approach the guy below, but beware of the guy on the first floor. You can strangle the guy whenever the guard on the first floor starts moving away so that you're just out of sight. With him gone, go back up, head left and strangle the final guard. Open the garage door on the ground floor by pulling down the chain.
In the shipment area are quite a lot of guards on patrol, so you'll want to take a sneaky route to take out every single one of them without wasting precious ammunition. Head left and move beyond the containers until you reach one of the guards; he'll soon be walking away from you inside a container, so strangle him there. Now move towards the hangar, but make sure you're not spotted. There are two guards on patrol here, and several standing on watch. It's possible to take them all out by stealth, and one such way to do it is the following.
First you'll want to hide behind the small brown container next to a green one. There are to the left of a stacked pile of containers, to the right of a large shipment container you can walk through, and one of the guards will be standing next to it every once in a while. That's the perfect time to strangle him, but only when the second guard on patrol is already about to lean back against the larger stack of crates; at that time, strangle the first guard, immediately sneak to the second and take him out as well. It may require a short wait, but it's definitely a safe and sound method for doing it.
You can now go back outside the way you came and move behind the guard standing on watch there. Search nearby the railing to also find the [SHIPPING MANIFEST]. It's also worthwhile to search between the containers you snuck past at the very beginning to find a [SHIV] between the ones in the middle. If you head back inside and search the right side of the hangar, you can find the [DOCKS NOTE] behind a small container. There's also a [WOODEN STICK] here if you hadn't already gotten one from the guard you strangled.
Move to the other side of the hangar and go sneak through the container to strangle the guard standing on watch nearby. Although the coast *looks* clear, it's actually not. One last guard is standing behind the crates right before the office. If you want to take him out with a melee move, there's no other choice but to hurl a bottle or brick to the left side of the area and approaching him from the back as quickly as you can.
Stealth Approach Shipment Area 2
Anything missing from this guide?
ASK A QUESTION for The Last of Us
Comments for The Quarantine Zone: The Slums
Add a comment
Please log in above or sign up for free to post commentsNo comments yet. Tell us what you think to be the first.
Table of ContentsClose
Guide Updates
Get notified of updates to this guide
Many of our guides get updated with additional information. To get an email when this guide is updated click below.
 Join us on Discord
Click to close