The Safari Zone
Pokemon LeafGreen Walkthrough and Guide
The Safari Zone
Obtaining HM03 Surf
-- Safari Zone Introduction --
The Safari Zone is a theme-park style of destination for Pokemon Trainers that offers the oppotunity to capture types that ordinarily a trainer would not have access to. The system is simple: the trainer pays a set fee and is provided with 30 special balls that work in the Safari Zone only. They may use these balls in the Safari Zone park, and have 30 balls to use with a limit of 500 steps total.
The balls that are used in the Safari Zone -- and for that matter the tactics for catching Pokemon as well -- are very very different than that used in the wilds! First and foremost, you are not allowed to attack and weaken the Safari Zone Pokemon! I mean after all, where would the fun or challenge be if it was the same style of capture as in mundane and real life?
In place of the usual weakening tactics, you are provided with some Nerf Rocks and some Pokie-Chow. The Nerf Rocks are for throwing at the Pokemon to piss them off enough to get them to (A) stay, because they are angry with you, and (B) lose their normally good judgment - because they are angry at you and want to hurt you.
The second tactic is Pokie-Chow, which is delightful little snacking morsels that you toss out in order to lure in your prey and (A) occupy its attention with eating that yummy treat and thus not noticing your approach, ball in hand, and (B) keep it from running because of the smell and taste of those nummy poke-snacks.
You got that? Good!
Now as for the Safari Balls, they are not of the same strength or base stats of the standard balls... For instance they are easier to break and, what is worse, take longer to close and lock, which means that any Pokemon you throw them at has an even better chance of breaking loose than usual.
I know, it sounds like a bum deal, but do not forget that this place is not about going home with Pokemon, or adding more to your Dex, it is about the fun of the chase. The joy of stalking the wild and unique types that are here and that you do not see in the wild in this region normally! Just try to remember that you are having fun here, and everything will be OK!
If you have played the other games and/or are a fan of the series this can be a bit confusing, since there are a actually three Safari Zones in the series in total: Kanto's in Fuchsia City, the Hohen Safari Zone and one in Johto, but those two operate under slightly different rules than the one here, and after all this is the original, right? I mean this is a remake of Red/Green/Blue, which were the first games, so this is the Original Safari Zone!
-- Safari Zone Hints, Tips, and Secrets --
First of all it will help you to know that the Safari Zone is actually divided into four unique areas, and each area has its own special Pokemon with different percentages and methods for pulling, as well as the ones that are common to all of the areas. This guide breaks the zone out by these established and well defined areas, and includes the different relative appearance percentages for each Pokemon, as well as other information you will find useful, so enjoy! We have got you covered!
Hint #1 - Happy Endings: When you run out of Safari Balls or you take all of the steps that you can take, you will be automagically warped back to the Safari Zone Entrance. If you are close to hitting the limit in steps or you only have a few balls left and you want to leave, just chuck them away or run back and forth, and you will be warped rather than having to make your way on your own.
Hint #2 - When they run a lot: If the Pokemon you are trying to catch runs a lot, and you are having trouble getting it to hold still long enough for you to throw a ball at it, try using one or the other of the Safari Zone Kit you were provided. The Nerf Rocks can be used to piss it off, which will either make it run straight away, in which case you should try Poke-Chow next time, or make it get really angry at you and stay, glaring, in which case, bonus! You can now try to catch it!
Hint #3 - Catching of Chansey: This is probably the most frustrating of all the Safari Zone Pokemon, for a couple of reasons. First, it is the rarest of them all, and the one you encounter the least. Second, it is very paranoid and will run away at the least provocation. What that means is that it takes a lot of luck to catch this one... But there are things you can do to increase the odds in your favor.
First, as soon as you see that you have pulled a Chansey, throw a Nerf Rock at it. If it does not run -- and it could -- throw a second Nerf Rock at it. Now that it is good and pissed at you, you may be able to throw more than one Safari Ball at it before it finally realizes what a total wanker you are and bolts!
The other helpful hint is more of an observation -- do not go into the zone looking to capture a Chansey, because if you do, you will fail. You will have epic fail after epic fail. Why? Because the game knows you are trying to get a Chansey. It just KNOWS man. And because it knows, it will do everything that it can to cause you to fail, because that is how Karma works, and you should not have stolen little Susy Smith's apple pie from her lunch box that time in Second Grade, man. Yeah, that's right!
Karma knows what you did, and Karma will punish you. Oh yeah! But Karma can be fooled -- so when you go into the zone, just you know, nonchalantly say to the room, "If I catch a Chansey, cool, but I am not here you know, just to do that... I am here to relax man, this is my vacation from being a Pokemon Trainer and I am here to have fun, not capture a Chansey!" This will lull the game into a false sense of security, because it thinks you are not really there to capture Chansey, so it will not get in the way if you happen to pull one, thus giving you much better odds at actually capturing it. What? You do not believe me? Well, go try it my way and you will see, I am totally right about this!
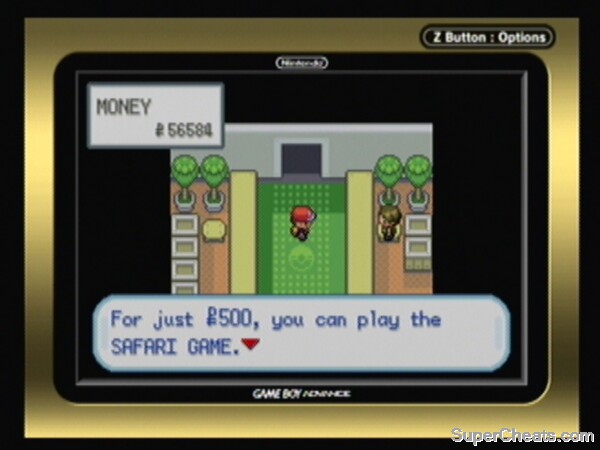 Buying your balls at the Safari Zone |
Hint #4 - Economy of Steps: Even though 500 steps sounds like a lot, this is a big zone and when you are working the far side of it you can (and often will) use up a huge chunk just getting to the area you want to pull from. Life will be a lot easier for you if you (1) follow the guide below with respect to the pre-pulling chores that should be completed, and (2) swap-in your Secondary HM Mule so you can take advantage of Surf now that you have it!
You will notice that a lot of the blockages that force you to use up steps are water hazards blocking the way. But if you know Surf you can, well, Surf right through them! That will save you oodles of steps and, in the long run, make you look like a sexy beast to all the Pokemon Trainer chicks, who will see you surfing and totally want to date you. That is all I am saying...
Tip #1 - Fishing Man Say Fish! Remember that you have a new rod now, the Good Rod, and you should use it if there are any types you have not obtained in the list for the zone section you are in! Bear in mind that you do not have the Super Rod at the moment - and that is the most useful one really as far as the Safari Zone is concerned, so you will be making a return holiday visit here once you have the full set of Rods anyway, in order to complete your Dex.
Tip #2 - Treasure is its own reward: There are a lot of treasure balls in the zone, and you will see them as you walk through, and say to yourself: "Self, it is only a few extra steps!" And yeah, it is only a few extra steps, but they add up!
Your best approach to this is to do only one thing with each trip through the zone. If you came to catch Pokemon, do only that, then come back later with the idea that this trip though is only about treasure, and collect only treasure balls on that run. By setting specific targets and limitations, you increase your effectiveness and obtain better results!
Tip #3 - Do not try to make a Pokemon Something it is Not: Some Pokemon are very well suited to being members of your core teams -- your A-Team and B-Team exist for specific reasons, but not all Pokemon will fit into that or even belong there. Some of the best looking Pokemon are total pants when it comes to battle because, the truth is, well, they suck. So do not force yourself into using one because it looks cool, or it is your favorite, or for any other reason.
Do not tell yourself that when it evolves, it will be totally bitchin' and better and stuff. That is rarely ever true, and in the end you are better served by choosing the more effective Pokemon over the better looking one. A good example of this is Exeggcute -- which is a cool looking Pokemon but, being blunt, totally sucks as a battler!
Rhyhorn is another example of this trend. Rhyhorn is an awesome looking Pokemon, very intimidating, with a huge well of HP, and you would think that it would make an excellent member for one of your teams, right? Wrong! He has no really good natural moves, and while there are a handful of TM's that you can buy or find and teach it, none of them have really good sympathetic or complimentary combinations with each other. Add to that the fact that Rhyhorn is, because of the screwball combination of types it inherited, is weak against Water, Grass, Ice, and Fighting Types, but strong against NONE!
Do not force yourself to use a Pokemon just because you think it is cool -- simply capture it, stick it in its box, and only bring it into your team when you need to evolve it for your Dex.
Tip # 4 - Try not to Burn Out: There is a natural inclination in Pokemon Trainers - especially trainers who are also breeders - to stay at an area if they have not captured all of the Pokemon, before moving on to the next area on the adventure.
This approach actually makes sense on the regular Routes, because some of those areas are hard to reach, and not part of the normal travel paths, which means if you leave without getting the two or three types that are unique to that area you will have to make a special trip back, etc. OK, so in those cases it makes sense to stay until you get all of the types for that place.
That approach does not make sense for the Safari Zone. First of all, very few of the Pokemon you can catch on the normal routes have small pull chances, whereas almost a full quarter of the types you can catch in the Safari Zone have small pull chances. That means that under normal circumstances, staying on one of the out of the way routes to catch the types that are available or even unique to them makes sense, because it is only an extra half-hour or forty-five minutes of effort, whereas in the Safari Zone you could easily take DAYS to get all of them.
Do that and you risk burn-out. There is no point in taking what is arguably a fun game that you should enjoy playing and turning it in to what amounts to a second job! Do your Safari Zone hunting in small blocks of time, and when you have burned through the amount of time you set aside for that session, cheerfully move on! Remember, the Safari Zone is in Fuchsia City, a place you can instantly Fly back to any time you want, with the zone only steps from where you arrive.
Here endeth the free advice -- and it was totally worth what you paid for it!
-- Pre-Safari Chores --
Prior to settling down for a run through the zone to capture those elusive but highly desirable rare Pokemon types, there are a few chores that we should get out of the way first. Call them pre-run missions if you like, but completing the following chores will make your life so much easier, trust me on that!
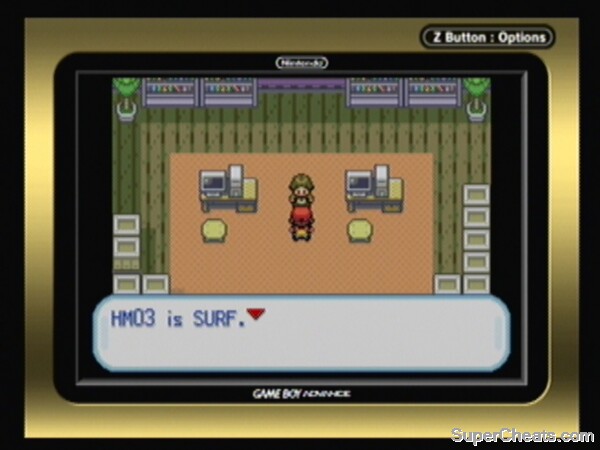 HM03 Surf at the Treasure House |
-- Chore 1: Surf
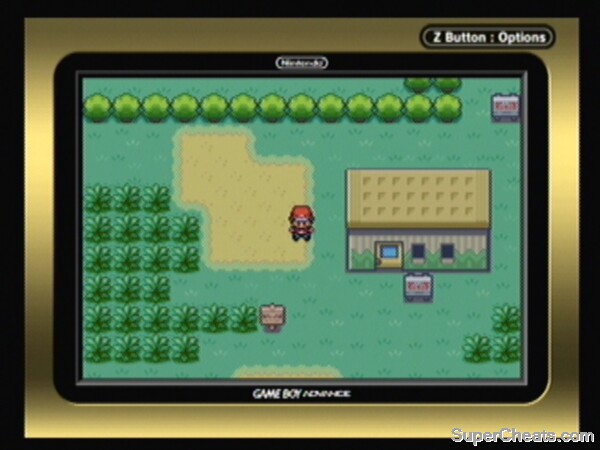
Pay the man to enter the zone, and then ignore everything you encounter and work your way through the entire zone to reach the Safari Zone Treasure House at the back of the Zone.
After you enter the zone head east to area 1, then cross the cliffs and proceed through area 2 and work your way to its western exit. Once you enter area 3 work your way over to the Treasure House, being sure to grab the Golden Teeth.
You only have a narrow margin of grace steps here -- but you should have way more than you need to comfortably do this part even if you allow yourself to get sidetracked several times -- but go to the Treasure House directly anyway, because it sucks to get to where you need to be and then, a few steps from the HM, and end up warped back to the start because you ran out of steps!
If you get lost or have trouble figuring out where you need to go, watch the video for this section, as it covers this in a step-by-step (pun intended) demonstration.
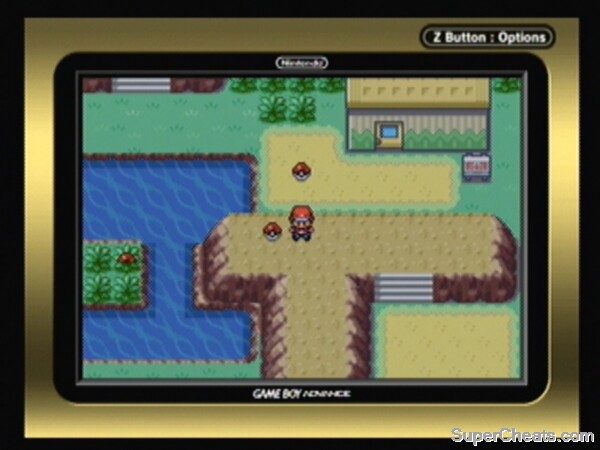
On your way out of after getting Surf you will see a treasure ball with TM32, Double Team, in it. Grab that now, and then check the status of your run by opening the main menu, where you will notice a new box in the upper left corner that shows you how many steps you have taken, how many you have left to take, and how many Safari Balls you have left!
Now head east and then south to the next treasure ball, which contains the missing Golden Teeth! After you grab those, go north and zone back into Area 2. Go as far as you can north, then turn east and walk until you reach the treasure ball you passed on the way in, which has a Protein in it. Grab that now, and then bang a u-turn south and west, and continue west.
The house in the corner is a "Rest House" and while there are trainers in it, there are none that have anything for you, so ignore that and continue along the path until you read a treasure ball containing TM47, Steel Wing, which is by a tree on the path -- you passed this on the way in.
Grab this and continue west to the water, then head south into the tall grass here. This is one of the places where Rhyhorn lives in abundance, and wouldn't it be a nice way to close out this first run into the zone by capturing a Rhyhorn? Yes, I think so too!
You can use up most of your remaining steps by capturing this guy and any other Pokemon in this patch of tall grass that we do not already have -- so do that. Once you have captured your Rhyhorn and any others we need, continue until you either run out of balls, or run out of steps!
Chore 2: Odds and Ends
We have completed our first run into the Safari Zone, and we are now back at the entrance. Some things have changed in our world though -- for one thing we now have a few Pokemon in our storage boxes and in our Dex we did not have before! Good on ya for that!
Another difference is that we have HM03, Surf, and the Golden Teeth! It is time to deal with what is related to those last two items now! First though, head back to the Pokecenter, heal and save, then go over to the PC and sort out the Pokemon in your Incoming Box so that they are put in the Boxes that they properly belong in.
Now that this is out of the way, it is time to address the matter of Surf, and the fact that our designated HM Mule cannot use that HM... In order to make use if it, we need two things -- the 5th Gym Badge, and a Pokemon who can use that particular HM.
At the moment we have every basic Type covered in various combinations in our A-Team save for Water Type, with the caveat that Water Type and our Rock/Ground (which at the moment is Graveler) are the swing-members of our team, and are rotated in and out as needed. Unless you chose the Water Type as your Started, we are in need of a Water Type Pokemon both to fill that position as the swing member of the team, and to fill the duty of providing Surf capability for the team.
To address this open issue (which will also address the final HM, Strength), quickly pop over to Lavender Town, head out onto the Fuchsia Highway and, using the Super Rod, catch a Gyarados. Teach the Gyarados HM03, Surf, and HM04, Strength, eliminating the need to employ a secondary HM Mule. This is a good idea since opening up more than one slot in the party for a mule is generally a bad idea, and with respect to those two HM's, when they are taught to a Gyarados they are not really bad moves for it to have, as it can use them effectively in combat.
All that is left is for you to set aside an hour or so and level the newest member of your A-Team to the target base-level for the team, or at least bring it to parity with the current training level...
Chore 3: Strength
 The Safari Zone Warden's House |
The final HM we do not have yet, Strength, allows us to move heavy objects like Boulders.
Obtaining this is a side-quest of the first Chore in this series -- remember the Golden Teeth that we found inside the Safari Zone after we obtained Surf? Take those to the Safari Zone Warden who is in his house in the City now.
When you arrive simply walk up to the Warden, stand beside him facing him, and hit the A Button to give him the teeth, which he then puts in his mouth! We can now clearly understand what he is saying! As the reward for finding his teeth, the Warden gifts us with HM04, Strength!
Now quickly open your bag, select the Key Items pocket, and open the TM Case. Select HM04 and teach it to your Gyarados. Do not worry about it being an HM on a main party member, because Strength is actually often a useful move in battle, so we do not have any issues with teaching it to one of our team members!
-- Safari Zone Entrance Area --
 The Safari Zone: Entrance Area |
The Safari Zone is divided up logically, and it will not take you long to get the hang of how that is. The Entrance area is the area just after you exit the main building and begin the contest. extending towards the center of the zone, and to the east and west for around 60% of the south side.
We are now ready to embark upon our first "officail" Safari Zone run -- the one we did before was just to get the chores out of the way and obtain the final pait of HM's, so it does not count. Make note of which Pokemon you still need to capture, and then head on in!
- - - - - - - - - - - - - - - - - - - -
- Safari Zone Entrance Area Pokemon -
(Key: Pokedex # - Name / Acquisition Method / Rarity)
113 - Chansey / Normal / 1% Appearance
148 - Dragonair / Fishing (Super Rod) / 1% Appearance
147 - Dratini / Fishing (Super Rod) / 15% Appearance
102 - Exeggcute / Normal / 20% Appearance
118 - Goldeen / Fishing (Good Rod) / 60% Appearance
118 - Goldeen / Fishing (Super Rod) / 40% Appearance
129 - Magikarp / Fishing (Good Rod) / 20% Appearance
129 - Magikarp / Fishing (Old Rod) / 100% Appearance
029 - Nidoran-F / Normal / 20% Appearance
030 - Nidorina / Normal / 10% Appearance
033 - Nidorino / Normal / 5% Appearance
047 - Parasect / Normal / 5% Appearance
127 - Pinsir / Normal / 5% Appearance
060 - Poliwag / Fishing (Good Rod) / 20% Appearance
111 - Rhyhorn / Normal / 30% Appearance
110 - Seaking / Fishing (Super Rod) / 40% Appearance
079 - Slowpoke / Fishing (Super Rod) / 4% Appearance
079 - Slowpoke / Surfing / 100% Appearance
048 - Venonat / Normal / 15% Appearance
- - - - - - - - - - - - - - - - - - - -
-- Safari Zone Area 1 --
Area 1 consists of the east side of the zone, basically around 20% or so of the width from the east border heading to the center of the zone, and consists of a variety of surface types.
- - - - - - - - - - - - - - - - - - - -
- Safari Zone Area 1 Pokemon -
 The Safari Zone: Area 1 |
(Key: Pokedex # - Name / Acquisition Method / Rarity)
084 - Doduo / Normal / 20% Appearance
148 - Dragonair / Fishing (Super Rod) / 1% Appearance
147 - Dratini / Fishing (Super Rod) / 15% Appearance
102 - Exeggcute / Normal / 20% Appearance
118 - Goldeen / Fishing (Good Rod) / 60% Appearance
118 - Goldeen / Fishing (Super Rod) / 40% Appearance
115 - Kangaskhan / Normal / 4% Appearance
129 - Magikarp / Fishing (Good Rod) / 20% Appearance
129 - Magikarp / Fishing (Old Rod) / 100% Appearance
029 - Nidoran-F / Normal / 10% Appearance
032 - Nodoran-M / Normal / 5% Appearance
030 - Nidorina / Normal / 10% Appearance
046 - Paras / Normal / 15% Appearance
047 - Parasect / Normal / 5% Appearance
127 - Pinsir / Normal / 1% Appearance
060 - Poliwag / Fishing (Good Rod) / 20% Appearance
119 - Seaking / Fishing (Super Rod) / 40% Appearance
079 - Slowpoke / Fishing (Super Rod) / 4% Appearance
079 - Slowpoke / Surfing / 100% Appearance
- - - - - - - - - - - - - - - - - - - -
-- Safari Zone Area 2 --
 The Safari Zone: Area 2 |
This is the area opposite of the Entrance Area and is the same size (the Entrance Area and Area 2 are the larger of the two sizes), extending from the northern edge of the zone south to the center, and east and west roughly 60% of the width of the zone.
- - - - - - - - - - - - - - - - - - - -
- Safari Zone Area 2 Pokemon -
(Key: Pokedex # - Name / Acquisition Method / Rarity)
113 - Chansey / Normal / 4% Appearance
148 - Dragonair / Fishing (Super Rod) / 1% Appearance
147 - Dratini / Fishing (Super Rod) / 15% Appearance
102 - Exeggcute / Normal / 20% Appearance
118 - Goldeen / Fishing (Good Rod) / 60% Appearance
118 - Goldeen / Fishing (Super Rod) / 40% Appearance
129 - Magikarp / Fishing (Good Rod) / 20% Appearance
129 - Magikarp / Fishing (Old Rod) / 100% Appearance
029 - Nidoran-F / Normal / 20% Appearance
030 - Nidorina / Normal / 10% Appearance
033 - Nidorino / Normal / 5% Appearance
046 - Paras / Normal / 15% Appearance
060 - Poliwag / Fishing (Good Rod) / 20% Appearance
111 - Rhyhorn / Normal / 20% Appearance
119 - Seaking / Fishing (Super Rod) / 40% Appearance
079 - Slowpoke / Fishing (Super Rod) / 4% Appearance
079 - Slowpoke / Surfing / 100% Appearance
128 - Tauros / Normal / 1% Appearance
049 - Venomoth / Normal / 5% Appearance
- - - - - - - - - - - - - - - - - - - -
-- Safari Zone Area 3 --
 The Safari Zone: Area 3 |
Area 3 consists of the west side of the zone, basically around 20% or so of the width from the west border heading east to the center of the zone, and consists of a variety of surface types.
- - - - - - - - - - - - - - - - - - - -
- Safari Zone Area 3 Pokemon -
(Key: Pokedex # - Name / Acquisition Method / Rarity)
084 - Doduo / Normal / 20% Appearance
148 - Dragonair / Fishing (Super Rod) / 1% Appearance
147 - Dratini / Fishing (Super Rod) / 15% Appearance
102 - Exeggcute / Normal / 20% Appearance
118 - Goldeen / Fishing (Good Rod) / 60% Appearance
118 - Goldeen / Fishing (Super Rod) / 40% Appearance
115 - Kangaskhan / Normal / 1% Appearance
129 - Magikarp / Fishing (Good Rod) / 20% Appearance
129 - Magikarp / Fishing (Old Rod) / 100% Appearance
029 - Nidoran-F / Normal / 20% Appearance
032 - Nodoran-M / Normal / 5% Appearance
030 - Nidorina / Normal / 10% Appearance
060 - Poliwag / Fishing (Good Rod) / 20% Appearance
119 - Seaking / Fishing (Super Rod) / 40% Appearance
079 - Slowpoke / Fishing (Super Rod) / 4% Appearance
079 - Slowpoke / Surfing / 100% Appearance
128 - Tauros / Normal / 4% Appearance
049 - Venomoth / Normal / 5% Appearance
048 - Venonat / Normal / 15% Appearance
- - - - - - - - - - - - - - - - - - - -
After you have captured all of the Pokemon types that you want to from the Safari Zone, it is time to visit the City Gym. Before you can do that however, you need to have leveled your Pokemon to the base-level for the team, which at this point is 45. As I said before, by getting them to this level now, you can easily blow through this Gym, and you are prepared for the next Gym without having to train at all!
If you need to level several of your team and you have used up all of the available trainers already, remember that you have the VS. Seeker in the Key Items Pocket of your pack. Simply select it and then register it so you can macro key trigger it, then head to an area that is outdoors (it will not work indoors) with a lot of trainers. Route 15 or 14 is ideal since it is close to town and thus easy for you to pop back into the Pokecenter to heal and save as needed.
Once you are on the Route, use the VS. Seeker to find a battle, and when you complete the battle, simply run 100 paces to recharge the device and use it again! Remember that it will work on any trainers who are on the screen -- you know you can rematch them because they have double-! over their heads.
You will quickly gain the levels that you need, and a side effect of this is you will also pick up some serious coin in the process. So go do this, rinse and repeat as needed, until your team is at the target level, and then head for the Gym!
More on SuperCheats
Chansy isnt so rare just enter the Safari zone go straight north to the water surf all the way across. Now keep going till you enter next spot. Then go up the steps to the other side. Now keep walking around the pond and it will show up alot. And occasionaly a turos will show up.
You need to sort the order of your guide out. i followed it page for page and keep picking up on the inconsistances of it i.e i jad a super rod when in the safari zone because you told me to go down the harbor road. No problem with that i just think you should sort out the wording. On a lesser note i dont know how i got through pokemon blue 15 years ago without a walkthrough lol. You're a legend!!
i caught all pokemon in safari exept tauros,chansey,dragonair, and dratini
Sweet scent totally works, ironic being my nemesis in the game, damn Oddish.
another pro-tip Get a Grass Pokemon that know the move sweet scent. Just Stand in one spot and catch-em till your balls run out!
if u r using an emulator then just save the game when d pokemon u desire to catch appears and then u got infinite tries to catch it , if it runs then just load again
awesome guide but you dont have to waste a single ball.if you play on a pc just press shift f1 and you will automatically save your progressand if you dont catch it on your first try just f1 to load to load your last saved point.
PS-press shift for any f1,f2,f3,f4,f5,f6,etc
DANG! I had tauros and chansey, but they both fled!
thanks great guide! caught chansey on first try but pinsir is a nightmare and kangaskhan too!
you rock dude im off to my t.a.u.r.o.s.!!!!!!!!!!!!
THE KARMA AND FOOLING THE GAME WORKED :O
I caught all chansy tauros and pnsir in the first try haha
Nice guide.
P.S. You can encounter some Pokemon by staying in one spot while changing the direction the character is facing. For example, if the character is facing east, you can make them face north, south or west while mot moving them from their spot. Repeat this a few times and a Pokemon should appear. No steps would be used while you do this. It doesn't work as well on water though.
thnx men dr@gonair wase a real pain in the ass for me
you rule !!!!!!!!!!!!!
pin sir first try, whats gucci my niggah