Empire City
Overlord 2 Walkthrough and Guide
Overlord 2 Guide - Walkthrough
Empire City
Fay's Salamanders are of the most use here, so return to the Netherworld Tower and set Fay as your First Mistress if she isn't currently.
Task: Get into the City
Approach the Empire City gate to trigger a cutscene. Don't bother fighting the Gargantuans; just move past them and enter the city.
Task: Destroy the four Temples to remove the shield around the Palace
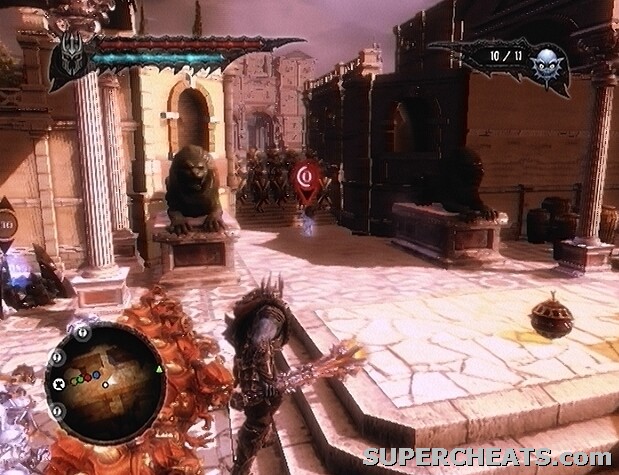
Upon entering the city, turn left and destroy the house there to uncover a Minion mount gate. Head down the steps, past the Minion Gates, and start down the street beyond the doorway. At the top of the stairs, set all of your Minions on a Guard Flag, and call just one Blue Minion to your side. Then, lock onto one of the unlit bombs along the left side of the street and press the RT/R2 button to have the Minion to pick it up. Use the Right Stick to move the bomb behind the legion formation further down the street. If done correctly, the bomb will go off, and the soldiers will fall.
Ignore the bomber on the platform, call your Minions off of the Guard Flag, and sweep them to the other end of the street. Walk down the steps and approach the first temple to trigger a cutscene. After the cutscene, kill the two mutants, and then sweep your Minions to the support columns to flatten the temple.
 Blink a bomb-carrying Blue Minion into the middle of a legion formation to clear away the soldiers. |
Continue east down the street to uncover a Netherworld Gate. Destroy the barrier along the east side of the street, and then order a Blue Minion to pick up one of the bombs in the pile across from the legion formation. Once the Minion is holding the bomb, use the Right Stick to move him to the middle of the formation to devastate the soldiers.
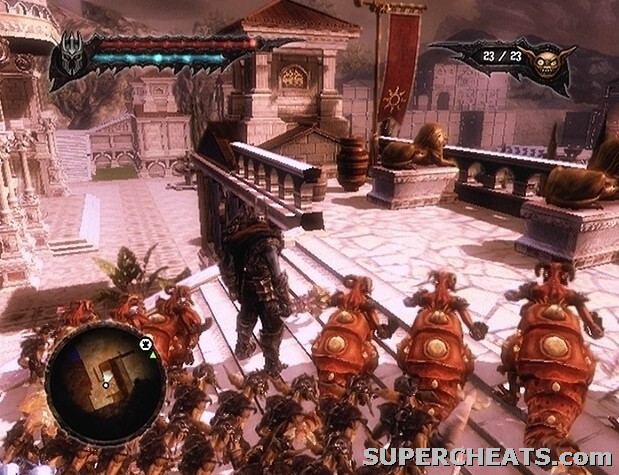
Once the formation has been dealt with, head up the steps to reach the second temple. There are two Gargantuans and three bombers guarding the temple. The bombers are likely the biggest threat and, when coupled with the Gargantuans, can make for a difficult time. Try to use a Minion to lure the Gargantuans away from the temple and back to the previous area where you can more easily deal with them. Just bait the Gargantuan into charging into a wall, and then hack away at him until he falls. You can sweep mounted Reds around the temple and roast the Gargantuans as well as the bombers, but they do have a fair bit of health so this can take awhile.
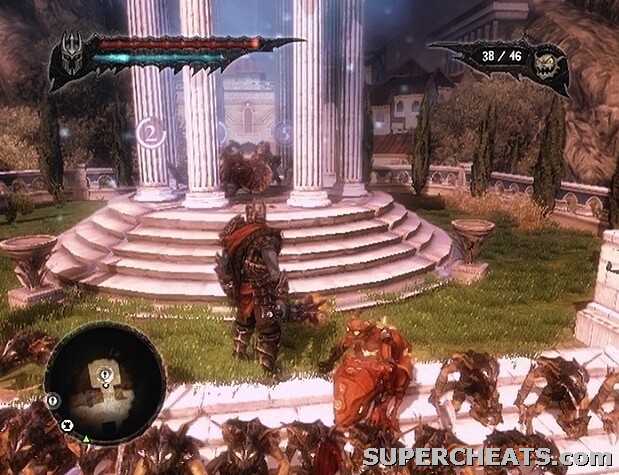
When the area is clear, smash the support columns to bring the temple down. Then, continue east through the archways, and sweep your mounted Reds around to take out the bombers. Further north, there are a couple of bombers on an unreachable platform; just run up the steps past them when the way is clear and sweep your mounted Reds to roast the archers at the top. Smash the barriers in your path and follow the marker on the mini-map to reach the third temple.
 Destroy the four temples to lower the shield that surrounds Solarius' Palace. |
After levelling the third temple, head back down the steps and destroy the house at the west end of the walkway. Proceed down the steps and head to the other end of the walkway. Order a Minion to pick up one of the bombs at the top of the steps, and use the Right Stick to move the bomb over to the rubble in the middle of the stairs to clear the way. Head down the steps, and use one of the bombs behind the lion statue to destroy the rubble at the bottom of the stairs.
When you're ready to move on, kill off the group of mutants when they make a beeline for you, and then move in to destroy the final temple.
Task: Get into the Emperor's Palace
Before entering the palace, head up the steps west of the temple doors to spot a Dark Crystal container. Once you have the Dark Crystal, enter the palace to complete the task.
 Collect this Dark Crystal before entering the palace. |
Task: Find the Magic Containment Room
Follow the marker on the mini-map and take out the soldiers and Legionaries encountered along the way. Eventually, you'll reach the Magic Containment Room, where you'll face the final boss.
Task: Destroy the Devourer
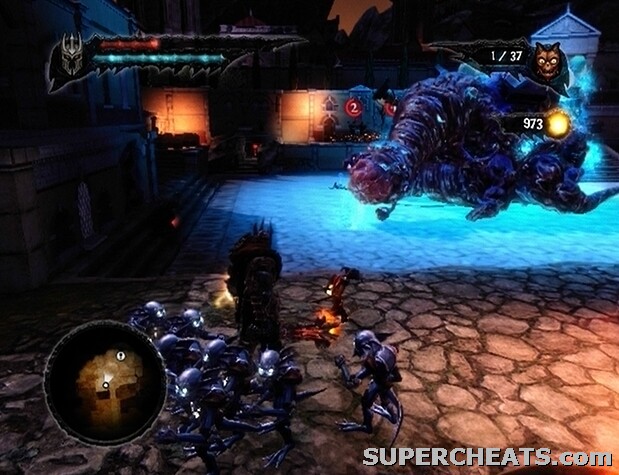
After the cutscene, select your Blues and use them to sweep up the trail of goo left by the Devourer. Follow the creature into the courtyard to trigger another cutscene. You'll only need Red and Blue Minions for the entirety of this battle, so use the Minion Gates around the courtyard to send any Brown or Green Minions in your party back to Netherworld. Keep a small number of Blues (at least 10) and then summon as many Red Minions as you can.
The blue, pulsating bulbs all over the creature's body are the key. Have your Red Minions target these bulbs; pop enough of them, and the creature will flee into the next area. Since goo will constantly ooze out from the Devourer, you'll need to use your Blue Minions to sweep it up. The goo is not only a threat to your Minions, but also the villagers, as those caught in it will turn into mutants. The mutants will most likely make a beeline for you, so quickly take them out to prevent them from attacking your Minions.
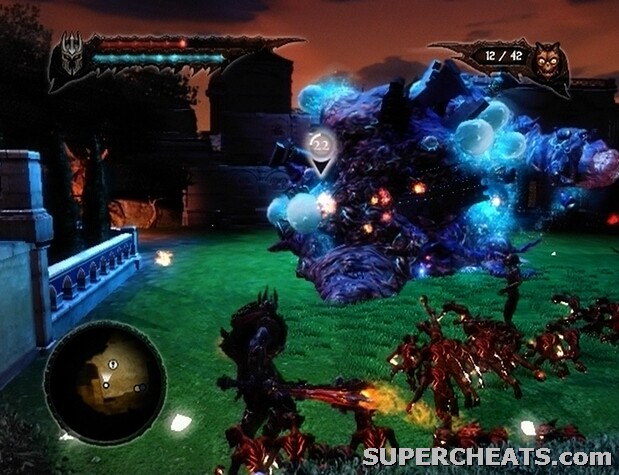 Use your Red Minions to target the blue, pulsating bulbs protruding from the Devourer's body. |
With your Red Minions selected, hold down the LT/L2 button to lock onto one of the bulbs, and then hold down RT/R2 to order your Minions to target it. While locking on, you can switch between targets by flicking the Right Stick. Just keep the LT/L2 button held down, use the Left Stick to circle around the Devourer—holding down the RT/R2 button to set your Reds to attacking the next bulb—and the creature will soon smash through a wall and flee into the next area.
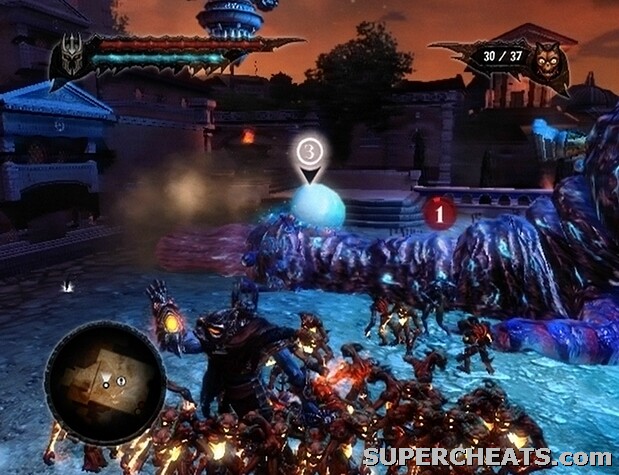
Use your Blue Minions to sweep up the trail of goo left by the Devourer as you follow him into the next area. There are some soldiers by the entrance to this area, so set all of your Minions on a Guard Flag, and head up the steps to face them. When the soldiers have been dealt with, hold down the B/Circle button to call your Minions to you. Head up the steps to the right, and sweep your Reds through the gap to kill the archers. There are also archers along the walkway at the other end of the arena, so sweep some Blues in to clear away some of the goo, and then sweep your Reds over to the stairs in the bottom-left corner of the walkway. Continue to sweep your Reds along the walkway and set them on a Guard Flag once there to roast the archers.
Once the archers have been dealt with, move in with your Reds to continue popping the bulbs on the Devourer's body. Keep up the same routine as in the previous area, and eventually the creature will retreat to the next.
 Sweep your Reds onto the walkway at the far end of the area to roast the archers. |
The third phase is a bit different. The Devourer will remain in place here, but will periodically spit up magic creatures or a group of soldiers. Things can very quickly get out of hand if you don't keep up with the enemies that the Devourer spawns. There should be just two bulbs left on the Devourer's body, and a single bulb on its head. To get to the bulb on its head, you first must destroy the two bulbs on its body.
Position yourself by the Devourer's front end; this way, you can quickly kill the enemies it spits out. Use your Blue Minions to sweep up any goo in the area. Immediately after the Devourer spits out an enemy or group of enemies, kill what was spawned, and then set all of your Red Minions on a Guard Flag. Lock onto the Guard Flag and tap the B/Circle button until you have called back half of the group. Then, lock onto the Guard Flag again and use the Right Stick to move the team around to the Devourer's back side, or by any visible bulb on the creature's body. Set the Red Minions with you on a second Guard Flag, and place sweep them over to the other side of the Devourer's torso.
Red Minions set on a Guard Flag will automatically target bulbs in range. Throughout the entirety of this fight, remain by the creatures head so you can quickly kill the enemies it spits out. Between spawn times, however, lock onto the groups of Red Minions and move them around the Devourer's body to try and position them within range of the bulbs if they haven't managed to hit them. You'll know both of the bulbs have been destroyed when the creature slams its head and neck down, and slowly lifts it back up. At this point, move in and slash the bulb on its head to pop it.
When the bulb on the Devourer's head has been destroyed, it will spit up Solarius. Immediately lock onto Solarius and hold down the X/Square button to begin draining his health. The Devourer will soon retrieve Solarius, after which three new bulbs will pop up on the creature's body.
 Destroy the bulbs on the Devourer's body and the creature will lower its head to the ground. |
Repeat the strategy outlined above as many times as necessary to completely drain Solarius' health. How much you can drain Solarius' health each time he appears depends on how many Spell Catalysts you've used to upgrade the Target spell. If you've upgraded Target to level five, you should be able to kill Solarius in just two sessions. If you haven't upgraded the spell at all, however, you will likely have to go through the process of popping the bulbs on the Devourer's body to force Solarius out four or five times.
Once Solarius' health bar has been completely depleted, he will fall, and the end video and credits will roll. You've just completed Overlord II! Congratulations on a job well done.
I found it easyer to put 5 reds at the back on a marker, 7 on the middle left side, 10 on the front left and the rest on the front right but back a bit, and they automatically took out all the bulbs on its back and sides and the one on its head before it spawned anything and even if it did it would of been killed by the reds on the front any way. It only took me 3 drains on level 4 spell to kill him.
on the final part waypoint a load of reds on the platform before the stairs and they take care of anything he spits out and the bulb on the head - all you need to do is have a few blues and greens and run around taking out the bulbs on its back
I prefer to use about 8 greens for dealing with the Legionaries on the way to the containment room, the small group of archers in the last room beyond the barrier, and the balls on the Devourer's back. Seems like I have better luck with them than with the archers that way
i found that the greens are much faster at taking out the balls on his back.