Sportiz Gym
Crackdown 2 Walkthrough and Guide
Sportiz Gym
Ensure your Agent is equipped with an Assault Rifle, Sniper Rifle (or Flocket Launcher if you've levelled your Agent's Explosives skill to level three) and Grenades before setting out to activate this network.
Absorption Unit 1
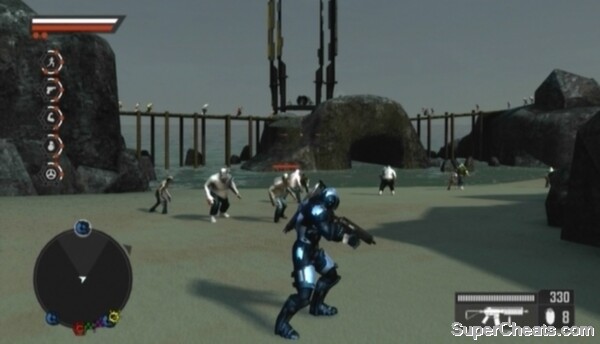
Look for this unit on a platform alongside the beach at the west end of southern Green Bay. Toss a Grenade onto the platform or shoot one of the explosive barrels to kill the Cell soldiers guarding the unit.
 Absorption Unit 1 |
The biggest threat here is the armoured, Rocket Launcher-wielding Cell soldier on the rock formation south of the platform. Use your Sniper Rifle or Flocket Launcher to take him down. He's armoured, so it'll take quite a few hits with a Sniper Rifle to kill him. Aim for his head. Jump or dodge to the side to avoid incoming rockets if necessary.
Absorption Unit 2
This unit is on a suspended platform at the end of the boardwalk along the south coast of southern Green Bay. The start of the boardwalk is just off the street that runs alongside the beach.
A group of Cell soldiers will appear as you near the gazebo; a couple of well-thrown Grenades can clear them out. When the way is clear, move through the gazebo and kill the enemy soldiers standing on the other side. Toss a grenade onto the Absorption Unit platform to kill the two enemies there before jumping over to it. With that, stand on one of the configuration platforms until you've activated the unit.
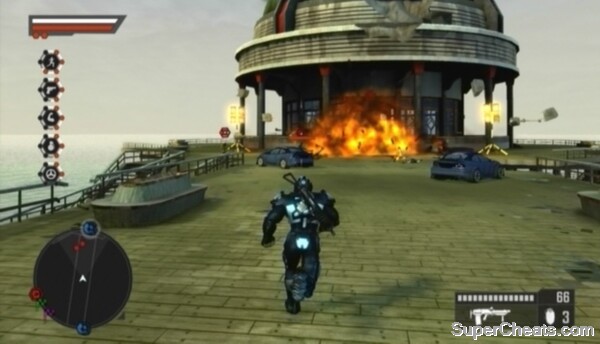 Use Grenades to clear the way to Absorption Unit 2. |
Absorption Unit 3
The last unit in this network is on top of a grey office building at the east end of southern Green Bay. You can scale one of the window columns on the west side of the building to reach the roof. The Cell population in this part of Green Bay is dense, so be sure to clear any soldiers on street level before beginning your ascent.
Once on the roof, gun down the enemies on the platform and then stand on one of the configuration platforms to begin activating the unit. There are snipers and one or two Rocket Launcher-wielding enemies on the rooftops surrounding the Absorption Unit platform, so use your Sniper Rifle to take out these enemies while configuring the unit. Jump or move onto one of the other platforms if you need to dodge an incoming rocket or lock on to a distant enemy for a quick kill.
When the Absorption Unit is online, you'll come to learn that something is blocking the power beam the unit is now emitting. You must destroy the makeshift barrier blocking the power beam so the active unit can power the Beacon.
Use a Flocket Launcher to demolish the barrier. If you've levelled your Agent's Explosives skill to level three, you can select the Flocket Launcher on the Agent redeployment screen. Switch your Agent's weapons at an Agency Landing Zone or by selecting the “Extraction” option in the System section of the Intel Screen and redeploying him.
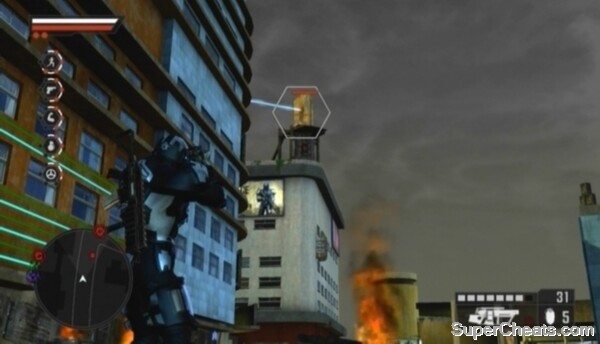 Use a Flocket Launcher to demolish the barrier blocking the power beam. |
Follow the power beam emitting from the unit east to the barrier (the power beam trajectory also appears on the map on the Intel Screen). From street level, look for the barrier on top of a white building. Lock on to the barrier with your Flocket Launcher equipped and fire a rocket to knock the barrier down.
Sportiz Gym Beacon
Ensure your Agent is equipped with UV Grenades before setting out. You can switch your Agent's weapons at an Agency Landing Zone or by selecting the “Extraction” option in the System section of the Intel Screen and redeploying him.
The Beacon deployment area is below the Sportiz Health and Fitness Complex at the west end of southern Green Bay. The entrance to the Freak Lair is along the white wall on the beach behind the complex. Move through the opening in the wall and drop down to the weapon crate on the platform at the end of the tunnel. Swap whatever weapon you have for the Harpoon next to this crate.
After picking up the Harpoon, head east to the Beacon Drop Point. Before calling the helicopter, be sure to pick up the Ultra Assault Rifle by the weapon crate across from the Beacon. Be sure to hold on to the Harpoon when picking up this weapon.
Once your Agent is equipped with the Harpoon and Ultra Assault Rifle, stand on the Beacon Drop Point marker and call the helicopter. With that, jump onto the rock formation east of the drop point (the one with the Online Orb). Remain perched here for the duration of this mission.
 Perch yourself on one of the rock formations surrounding the Beacon and use your weapons to keep the Freaks off. |
The attacking Freaks in this lair are the large, agile, projectile throwers you've likely encountered before. As with the Mason's Quarry Freak Lair, these attackers will jump onto one of the rock formations surrounding the Beacon and throw projectiles at the Beacon from there. The Harpoon can take these Freaks down with one shot, so you can effectively remain perched on one of the rock formations and just pick off attackers as they spawn.
As per usual, attacking Freaks will appear on your tracker as red blips. When one of these Freaks appears, lock on with your Harpoon equipped and fire once to take him down. Unmarked Freaks will swarm the Beacon and deal minor damage to it overtime. Though you can just as well ignore these Freaks, periodically toss a UV Grenade down at the Beacon to clear them away.
Some of the unmarked Freaks in the lair will be hostile towards you. If you're perched on a rock formation, the only Freaks you have to worry about here are unmarked agile ones. These guys will leap onto your perch and take swipes at you. If you're attacked by one of these Freaks, you can either hit him with a Harpoon or melee him off the platform. If you do choose to melee, just be careful not to fall off the platform yourself!
Your Harpoon gun ammo is limited, so don't waste any on garden variety Freaks. Only use harpoons on attackers and those Freaks that would actively attack you. If you do run out of Harpoons, the Ultra Assault Rifle boasts impressive range and accuracy, so remain on the rock formation and continue picking off attackers as they appear.
Keep this up until the Beacon is fully charged.
Defending the Sportiz Gym Beacon
More Crackdown 2 stuff on SuperCheats
No comments yet. Tell us what you think to be the first.