Mason's Quarry
Crackdown 2 Walkthrough and Guide
Mason's Quarry
Absorption Unit 1
This first unit is at the northeast end of northern Hope Springs. This one is easy to reach. Just make your way to the blinking Absorption Unit icon on your tracker and get onto the roof of the building there. Eliminate the Cell soldiers surrounding the unit and then stand on one of the configuration panels until you've activated the unit.
Though you've activated this unit, there's a makeshift barrier blocking the power beam now emitting from it. You must demolish this barrier so the unit can power the Beacon. Follow the power beam emitting from the unit to spot the barrier.
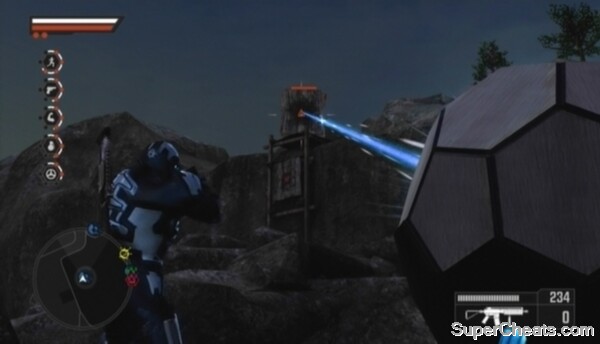 Demolish the barrier blocking the activated unit's power beam. |
There are a few ways you can go about tearing down the barrier. If you've unlocked the Flocket Launcher weapon (by levelling your Agent's Explosives skill to level three), you can simply fire a single rocket at the barrier to knock it down. If you don't have such a weapon, stand on the rocks directly below the barrier and either throw a grenade up there or throw an explosive object and shoot it in mid-air when it reaches the barrier.
Absorption Unit 2
This unit is up on one of the hills surrounding Mason's Quarry. Getting to it is a bit tricky. You'll need climb out of the quarry west of the Absorption Unit icon on your tracker to get onto the hill.
Inside the quarry, get onto the lower ridge and sprint over to the large boulder partway down. Jump onto this boulder and then onto the middle ridge. Then, sprint to the southern end of the middle ridge and jump up the rocks there to reach the hill.
Eliminate the Cell soldiers surrounding the platform and toss a grenade or two onto the platform to detonate the explosive barrels there. When the area is clear, stand on one of the configuration platforms until you've activated the unit.
Reaching Absorption Unit 2
Absorption Unit 3
The final unit of this network is on top of a curved, red-bricked building at the north end of southern Hope Springs. You can scale to the top of the building by climbing the last column of windows in the southeast corner. Make sure you're climbing the correct column, because if your Agent's Agility skill isn't high enough you'll need the tan protrusion above the column to make it to the top.
Take down the Cell soldiers surrounding the Absorption Unit and then get to activating it.
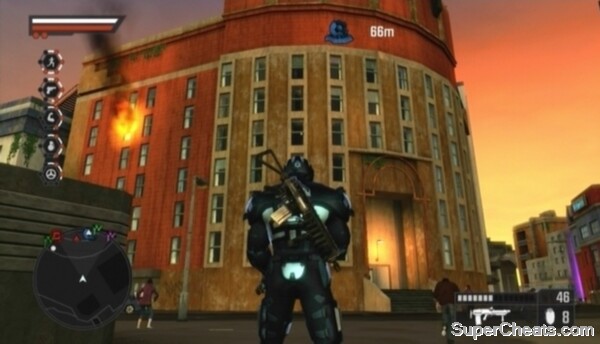 Absorption Unit 3 |
Mason's Quarry Beacon
Before getting started, ensure your Agent is equipped with an Assault Rifle, UV Shotgun and UV Grenades. You can switch your Agent's weapons at an Agency Landing Zone or by selecting the “Extraction” option in the System section of the Intel Screen and redeploying him.
The Beacon deployment area is inside the cavern accessible from the middle ridge in Mason's Quarry. Get onto the lower ridge and sprint over to the large boulder partway down. Jump onto this boulder and then onto the middle ridge. Start south once on the middle ridge and turn left when you reach the cave entrance.
Drop down to the Beacon Drop Point marker in the middle of the cavern and press the Back button to signal to the helicopter.
The attackers in this lair are large, agile Freaks that throw acidic projectiles. These Freaks will jump onto one of the rock columns surrounding the Beacon and throw projectiles at the Beacon from atop the column.
 Use the UV Shotgun to blast attacking Freaks perched on the rock columns. |
As per usual, attacking Freaks will appear as red blips on your tracker. When one of these Freaks appears, follow the red dot to the Freak's perch, then jump up and blast the Freak with your UV Shotgun. All it takes is one well-aimed shot to blow the Freak away. The UV Shotgun has limited range, so make sure you're close enough.
While the Beacon charges, continue sprinting around the area to avoid unmarked Freaks and use your UV Shotgun to knock attackers off of the rock columns as they appear. Although it's best to ignore common Freaks and focus on eliminating attackers, it might be worth throwing a couple of UV Grenades when the Freaks are dense to give yourself more room to move around.
Keep this up until the blue meter in the top-right corner of the screen is completely full to detonate the Beacon.
Defending the Mason's Quarry Beacon
More Crackdown 2 stuff on SuperCheats
No comments yet. Tell us what you think to be the first.