Security Ruins
Crackdown 2 Walkthrough and Guide
Security Ruins
Before attempting this Beacon, your Agent should have Firearms and Explosives skill levels of at least four. An Explosives skill level of five is highly recommended if you're playing solo and on a difficulty higher than Tough.
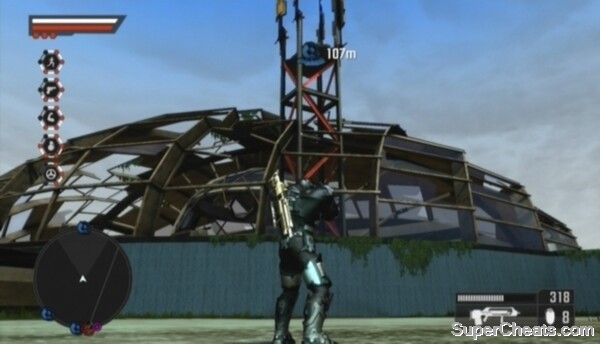
Absorption Unit 1
This unit is on a raised platform inside the domed building in the northeast corner of Unity Heights. There is a sniper on this platform, so be careful. Use your Sniper Rifle or Harpoon to kill the sniper before climbing up.
To reach the platform, start by jumping onto the intact glass window to the right of it. Then, jump across the broken portion of window over to another intact window further up the dome. Continue up to the metal part of the dome and then jump over to the Absorption Unit platform. Stand on one of the configuration panels surrounding the unit and remain there until the unit is online.
 Use the turret to make short work of giants. |
Absorption Unit 2
Ensure your Agent is packing an explosive weapon or grenades before setting out to activate this unit. You can switch your Agent's weapons at an Agency Landing Zone or by selecting the “Extraction” option in the System section of the Intel Screen and redeploying him.
The second unit is in the ruined security centre between northern and southeastern Unity Heights.
Approach this unit from the north. Jump onto the wall above the tunnel opening there and face southeast. Grab hold of the ledge on the gap in the dark grey support column and then jump to the ledge higher up. Hug the wall while walking to the other end of ledge, then jump onto the collapsed bridge and over to the Absorption Unit platform.
There's an armoured, Turret Machine Gun-wielding Cell soldier guarding this Absorption Unit. Take them down with an explosive weapon or grenades. He's tough to beat otherwise.
Absorption Unit 3
Bring the big guns for this one: a Flocket Launcher, Rocket Launcher or Grenade Launcher. You can switch your Agent's weapons at an Agency Landing Zone or by selecting the “Extraction” option in the System section of the Intel Screen and redeploying him.
The final unit is on top of the parking garage at the south end of northern Unity Heights. Ascend to the top of the garage using the open ramps on the west side. There is a sniper on top of the structure north of the platform and two armoured enemies -- one wielding a Turret Machine Gun and the other a Rocket Launcher -- guarding the Absorption Unit. Kill the two armoured soldiers with grenades or another explosive weapon and then take down the sniper before getting to the unit.
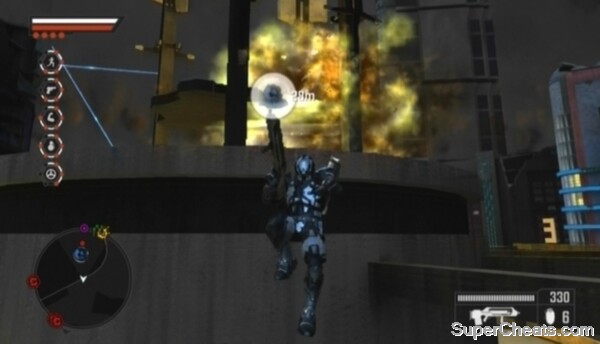 Use explosive weapons to take out the armoured soldiers guarding the Absorption Unit. |
Security Ruins Beacon
Defending this Beacon is tough if you're playing solo on a difficulty level higher than Tough. Enlist the help of another player over Xbox Live if possible. Of course, this objective is still doable if you have no choice but to play solo, although you may be in for a tough time.
It is recommended that you level your Agent's Explosives skill to level five before attempting this. You'll also need the Homing Launcher and Cluster Grenade Cell weapons. To acquire a Cell weapon, you must take it from a dead Cell soldier and then bring the weapon to the marker at an Agency Landing Zone. Once you've done that, you can then request these weapons at a Landing Zone or when redeploying your Agent. Cluster Grenades are quite common, but you can only find a Homing Launcher at Cell-held Tactical Locations in Unity Heights.
When you're ready to get started, equip your Agent with a Flocket Launcher, Homing Launcher and Cluster Grenades. You can switch your Agent's weapons at an Agency Landing Zone or by selecting the “Extraction” option in the System section of the Intel Screen and redeploying him.
The deployment zone is beneath the ruined security centre between northern and southeastern Unity Heights. Jump onto the wall surrounding the centre and then drop down to the Freak Lair entrance. Fall down to the Beacon Drop Point marker and give the signal to the helicopter to start.
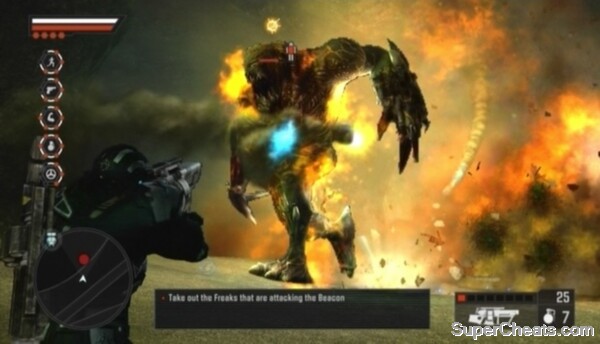 Quickly take down the first giant with your Flocket Launcher. |
As soon as you've given the signal, cross the rock bridge east of the Beacon and face north. A giant Freak will soon appear. Immediately lock on to the giant when he appears and start firing your Flocket Launcher at him.
This giant will jog around the circular path surrounding the Beacon. He will periodically stop to pick up a boulder and then hurl that boulder at the Beacon. He has no interest in attacking you. You can down him quickly with your Flocket Launcher if you keep after him and continuously pelt him with rockets. You can likely kill him before the Beacon even drops.
Once you've downed the first giant Freak, cross back over the rock bridge to the Beacon and throw a Cluster Grenade or two to clear away the Freaks surrounding it . Another giant will soon appear. This one will run up to the Beacon and continuously smash it until you manage to bring him down. Immediately lock on to this giant when he appears and use what ammo you have left in your Flocket Launcher to damage him. Finish him off with your Homing Launcher.
Once you've downed two giants, another will appear on the circular path surrounding the Beacon. As with the first giant you encountered, this one will remain on the path and hurl boulders at the Beacon. Completely ignore this guy. He'll deal a negligible amount of damage to the Beacon and killing him will just spawn another giant, so leave him be.
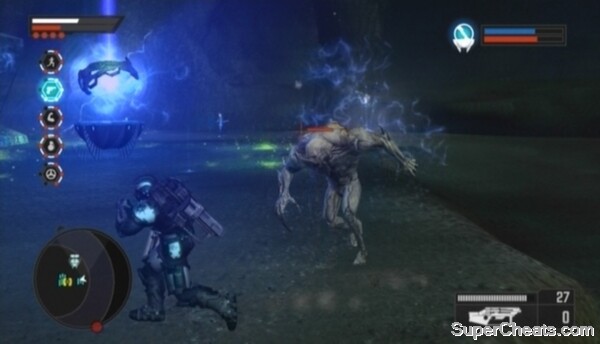 Use the UV Shotgun to keep the Freaks off the Beacon. |
The biggest threats to the Beacon are not giants, but rather unmarked attackers. Agile and projectile-throwing Freaks will still attack the Beacon even if they don't appear on your tracker. Unlike in previous lairs where you could pretty much ignore the unmarked Freaks, these ones Freaks can cause a lot of damage if you ignore them. As such, you must remain near the Beacon to keep these Freaks distracted. Trade one of your weapons for the UV Shotgun next to the weapon crate southwest of the Beacon and use it to eliminate any Freaks that appear near the Beacon.
Continue blasting the Freaks that appear around the Beacon (while completely ignoring the giant Freak marked on your tracker) until the Beacon detonates.
Defending the Security Ruins Beacon
More Crackdown 2 stuff on SuperCheats
No comments yet. Tell us what you think to be the first.