The Gutter (1)
Thank you for printing this page from www.SuperCheats.com.
Remember to come back to check for updates to this guide and much more content for Dark Souls II
Follow this guide to hear about updates
Last Updated:
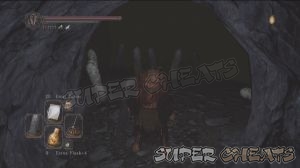
This area is oppressively dark and having a lot of torches to extend your time is almost a necessity. Don’t worry though, there are sconces you can light up to illuminate key areas and allow you to save your torches by having a point where you can light them up again when you need to use your left hand in combat. Beware of the statues as well since they spit poison. Destroy them whenever you have the chance. You'll also need to jump from platform to platform so having Silvercat Ring (buy it from Shalquoir the cat merchant in Majula) will minimize the damage you get from falls. From the starting ledge, drop down to the wooden platform below and drop down again the second time. Look below to find the faint glow of the bonfire. Drop down there and light it up.

Destroy the jar nearby to find a corpse containing Dung Pie x2. Light up your torch if you want, then continue to the next platform. Step on the spot near the bridge to make it collapse, bringing you to a room full of the undead. Kill them all and you can jump to the next platform where there are a couple of enemies, one of them is carrying a torch.


The ladder leads to a locked stone door which you can get the key later on. From there, head to the adjacent platform and drop down to the room below. Head to the next room and defeat the beast and a few undead. Destroy the jar along the ledge to get a Dark Pyromancy Flame and Rotten Pine Resin x3. Climb the ladder and light up the sconce there to light up the area. Continue up the next ladder to get a Soul of a Nameless Soldier. From there, you can return to the bonfire again.


Off-path Loot
From the bonfire, cross the two wooden bridges and defeat the beast in the next platform. Follow the straight path and defeat the undead along the way. You'll find another enemy that has a torch after a series of bridges; drop down to the ledge below and take care of the enemy ambush. Loot the Large Soul of a Nameless Soldier from the corpse.

Look at the edge of that ledge to find a separated scaffolding. Drop down below and light up the sconce climb up the ladder and light the sconce around the shed. Sprint-jump to the next ledge and loot the Ring of Soul Protection from the chest.


From that ledge, a sprint-jump to reach the platform's second floor where another chest is found. Loot it to get Twinkling Titanite and Small and Smooth Silky Stone x3. From there, jump back to the previous rocky area and find the wooden ledge nearby. Follow it to reach some jars. Destroy them to get a Lifegem from the corpse. Drop down from that ledge to return to the bonfire.

On the way to the second bonfire
Now cross the bridge again and go to where you fought the first monster then drop off from the ledge ahead. Be careful since there are poison statues where you land. Carefully cross the bridge and anticipate a pesky shockwave mummy. Take them out and continue along the bridge.

Defeat the beast in that platform then climb up the ladder. You'll find a chest there containing Black Firebomb x3. From that ledge, peek at the edge to find a platform you can drop down below. You'll survive the fall with minimum damage if you have the Silvercat Ring. Light up the sconce there and destroy the jar to get a Titanite Chunk from the corpse.


Backtrack a bit and drop down to the next room. Kill the undead beside the sconce and light it up as well. Destroy the jars nearby to get Tattered Cloth Hood, Tattered Cloth Robe, Tattered Cloth Machettes and Heavy Boots from the corpse.

You can drop off to the next rocky ledge just anticipate the ambush by the undead hanging at the edge. After defeating them, light up another sconce near the edge of the ledge and continue forth to find a chest with two undead nearby. Take them out and loot the chest. You'll get a Ring of the Evil Eye from there.


Climb up to the top of the ladder and defeat all undead. There's also an exploding undead hanging out in the shed; take it out as well. Destroy the jars to get a Soul of a Proud Knight and a Bandit Greataxe.

From there, you can climb up and zipline to the next platform (you can drop off to the bridge below as a shortcut) or you can drop down and destroy the jar between the roofs, to get Flame Butterfly x2. If you chose to drop down, you'll be back where you got the Black Firebombs from the chest. Continue forth and you'll encounter a lot of those poison statues again so destroy them if you can then climb up the ladder.


Defeat the torch-carrying undead here and carefully cross the next bridge. Another shockwave mummy is found at the end of this bridge so be careful not to get caught in its shockwave or you'll get thrown out of the bridge. Continue to the next platform and light up the two sconces by the bridge and the corner. You'll find another bridge here; cross it and defeat the undead. You'll find a chest in a cave with some jars. Loot it to get a Wicked Eye Greatshield.


Return to the previous platform and drop down below. Defeat the beast here and destroy the jar to get Black Firebomb x2. From that platform, go to the outer ledge and find a short gap you can jump across. There are some poison statues on the other side so if you can destroy them using a ranged attack, the better. After crossing to that platform, continue ahead and you'll find another bonfire. Light it up and rest if you want.


Anything missing from this guide?
ASK A QUESTION for Dark Souls II
Comments for The Gutter (1)
Add a comment
Please log in above or sign up for free to post commentsNo comments yet. Tell us what you think to be the first.
Table of ContentsClose
Guide Updates
Get notified of updates to this guide
Many of our guides get updated with additional information. To get an email when this guide is updated click below.
 Join us on Discord
Click to close