Dragon Aerie
Thank you for printing this page from www.SuperCheats.com.
Remember to come back to check for updates to this guide and much more content for Dark Souls II
Follow this guide to hear about updates
Last Updated:
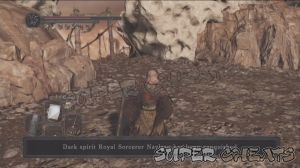
You'll find the Herald standing near the edge of the cliff. Talk to her to receive an Aged Feather. Take the path down and continue along the hanging bridge to reach the area's first bonfire. Follow the path until you reach another hanging bridge. Kill the enemy waiting in the end and head to the next cavern. Destroy the eggs in the tunnel to the left to find a crystal lizard and a lootable corpse. Kill the lizard to get a Large Titanite Shard, Twinkling Titanite and a Palestone. Loot the corpse to get a Radiant Lifegem.

If you took the other tunnel leading outside, you'll find a hanging bridge you can cross. This is actually a shortcut which will take you to the same path. This however, will allow you to bypass the dragon that's lurking above the cavern where you came from. Fighting the dragon is optional; bypassing the dragon will just make you miss some good loot and good souls.
Above that cavern is Guardian Dragon that you can fight and defeat. Be careful of its fireball since its splash damage can reach you even when you're behind cover. After defeating the dragon, you can now loot the corpses and kill the crystal lizards to get their loot. These dragons won't respawn upon defeat as well. The items you can get in this area are the following:
- Titanite Shard
- Large Titanite Shard x3
- Titanite Slab
- Titanite Chunk x3
- Petrified Dragon Bone x2
- Twinkling Titanite
- Darknight Stone
- Old Mundane Stone
- Darknight Stone
- Dragon Tooth
- Boltstone
- Soul of a Brave Warrior

If you look around, you'll find another uphill path with another lizard crystal waiting on top. Kill it to get Large Titanite Shard x2, Petrified Dragon Bone and a Raw Stone.

Cross the bridge and beware of the detonating mummy waiting around the corner. Loot the corpse to get an Old Radiant Lifegem then continue along the bridge and path. There's another detonating mummy waiting after the bridge so don't get caught off guard.
Continue uphill to find yet another wide open area with another dragon. If you're a ranged character, you can circle around to the right (don't forget to loot the corpse behind the eggs to get a Petrified Dragon Bone) and use the ledge there to snipe the dragon safely from a distance. Take note however, that the dragon's fire breath will still reach you behind cover. Melee characters won't have any choice but to get up close and circle around until they get the chance to attack while the dragon is using its fire breath. Fighting this dragon again is optional. You can circle around it using the ledge to the right and enter the nearest cave immediately. (Where an exploding mummy is waiting too)

Once the dragon's taken care of, loot the corpses and the crystal lizards here to get the following:
- Titanite Shard x3
- Twinkling Titanite
- Magic Stone
- Large Titanite Shard
- Petrified Dragon Bone
- Titanite Chunk
- Large Soul of a Brave Warrior
- Soul of a Great Hero
Kill the detonating mummy inside the small cavern. If you enter it, you'll find another dragon waiting below. That dragon should be well within sniping range so you can damage it as much as you can or kill it from that distance without the risk of getting hit by its attacks. Otherwise, you'll have to follow the only path leading to it and face it up close. Like the other dragon areas, there is a crystal lizard and several lootable corpses for the picking. Like the others, you can bypass this dragon by carefully jumping off the ledges and running towards the bridge. Make sure you have full HP and the Silvercat Ring equipped to avoid dying from the fall.

- Soul of a Great Hero
- Ring of the Evil Eye +1
- Firedrake Stone
- Dragon Charm
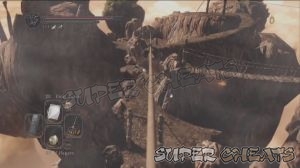
If you freed Navlaan earlier, he will also make an appearance right before you cross the next bridge. Right after the bridge is a zipline you can use. Zip back and upon landing on the other side, look over the cliff to find a ledge that has a lootable corpse. It only contains a Twinkling Titanite so its up to you if its worth getting since you'll be forced to use a Homeward Bone to get back up.
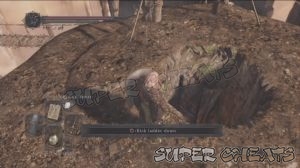
Follow the path uphill after ziplining to find a hole with a ladder. Kick the ladder down and you'll now have a convenient shortcut to the bonfire below. Now prepare to use the other zipline. There's an isolated ledge you can drop off along the way. The corpse contains a Soul of a Great Hero so its still up to you whether you want to bother getting it or not.
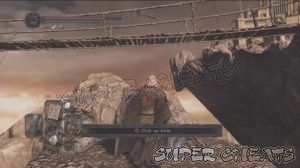
Once done, cross the swaying hanging bridge and enter the building to the left to find the next area's bonfire.
Anything missing from this guide?
ASK A QUESTION for Dark Souls II
Comments for Dragon Aerie
Add a comment
Please log in above or sign up for free to post commentsNo comments yet. Tell us what you think to be the first.
Table of ContentsClose
Guide Updates
Get notified of updates to this guide
Many of our guides get updated with additional information. To get an email when this guide is updated click below.
 Join us on Discord
Click to close