03: United We Stand
Operation Flashpoint: Dragon Rising Walkthrough and Guide
Operation Flashpoint: Dragon Rising Guide - Walkthrough
Mission Three: United We Stand
Summary:
This is one of the most popular missions in the entire campaign of Operation Flashpoint. Back in the feet of Dagger team, you take part in a large USMC assault on the region. Weapons are mid-range, but a smattering of vehicles make things a little more spicy. After the initial move towards the target village, you must hold and defend it from an advancing PLA counter attack.
Walkthrough:
Secondary Objective 1: Eliminate PLA Anti-Tank Teams
You begin on a beach as part of a large force moving forwards. The first objective is to eliminate enemy anti-tank teams, which are taking out your allied AAVPs. Move east into the forest. This is potentially a dangerous confrontation, so order your team into a dispersed formation, or to assault from the centre while you flank left. The first anti-tank team has the advantage of higher terrain blocking your view. Use the tactical map to spot the target, as it is marked on from the very start of the mission. Once you reach the pile of logs in the woods, you should be able to get shots on the targets. Note that there are two soldiers per team. If you plan on completing the bonus objective and getting the achievement, you need to pick up the anti-tank team's RPG, in this case a Queen Bee, to use shortly. Note that there is a Queen Bee in the ammo crate by the farmhouse too, but by the time you have cleared the area and picked it up, it may well be too late to get the achievement.
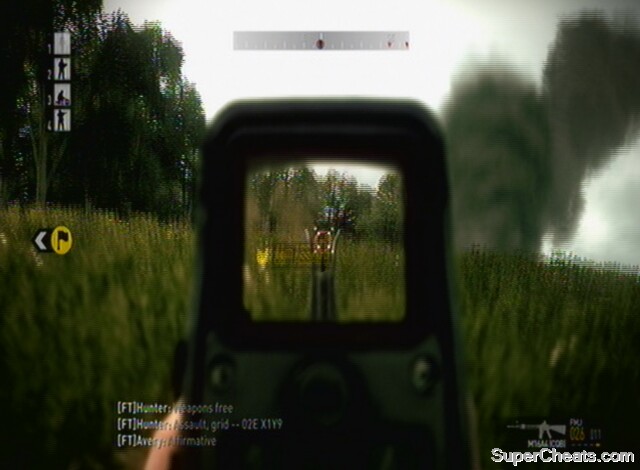 Remember where the body of the AT soldiers are so you can get their Queen Bee |
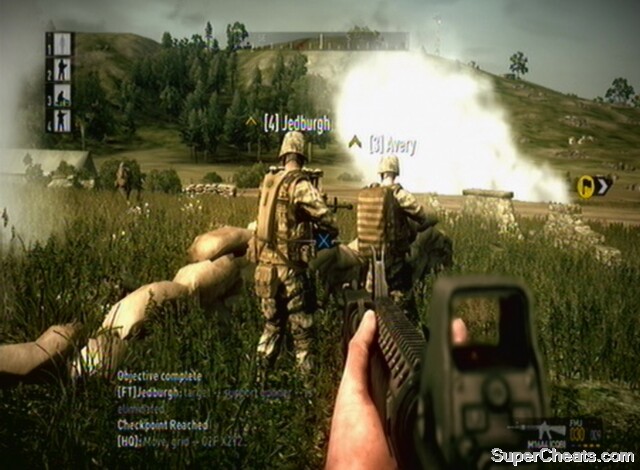
The second anti-tank team is further through the trees, by a flaming vehicle towards the farmhouse. If you want to do the bonus objective, just set your team to assault the anti-tank PLA soldiers and head off to the left/east. If you look at the map, you will see an enemy AAVP marked on in red. Head for it down the hill, staying far enough away from the farmhouse to avoid taking fire. Equip the Queen Bee and take out the AAVP. It should be noted that your friendly troops will take it out themselves if you don't, but clearly you won't get the achievement for that. It also reduces the risk to your own vehicles if you do this nice and quickly.
Regardless of whether you or your team take it out, head for the farmhouse and mop up the remaining forces there.
Achievement/Trophy: Get Creative (Destroy the PLA APC by the farmhouse) Silver/30G
Note: Keeping your AAVPs alive is essential for defending the village at the end of this level. The anti-tank units, enemy AAVP and mortar fire can all really hurt your chances, so speed in dealing with the enemies of the essence. With the anti-tank teams dealt with, you will be ordered to regroup with your allies on the road just outside it. Ignore this, and head up the hill to the south, as enemy mortars will rain down on the road.
 Get up the hill quickly! |
Primary Objective 1: Eliminate PLA Spotter Team
After the first volley, the second will take out one of your allied AAVPs, so time is crucial. Every four minutes after this, another AAVP will be taken out and, once three are down, you will fail. Sprint through the trees, heading to the left of the antenna you can see at the top of the hill. If you flank around this left hand side, you will arrive on the antenna, where the first three enemies are, and can flank them before they even know you are there. Two will be standing unaware of you, while the third is usually hiding behind the wall behind the antenna. If you can't see him, head to the right to the second part of the spotter team. They are covering in a bunker overlooking the road, so move up and deal with them. They will know you are there following your attack on the antenna, so make sure your squad are with you to provide support. Grenades are good for this, but take longer to use, and you cannot afford to lose additional AAVPs. With this done, head back for the third soldier and deal with him if not already done. Order your team in his direction and it should flush him out.
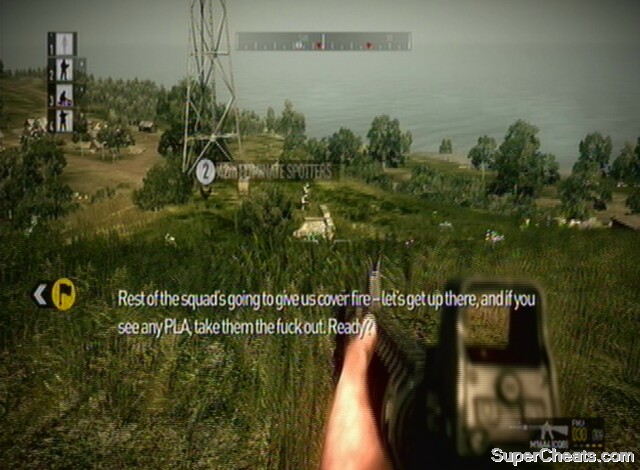 Flank the spotters up on the hill |
I recommend you take the marksman rifle from the third soldier by the antenna, as this is a great help with the next section.
Primary Objective 2: Eliminate PLA Anti-Air Teams
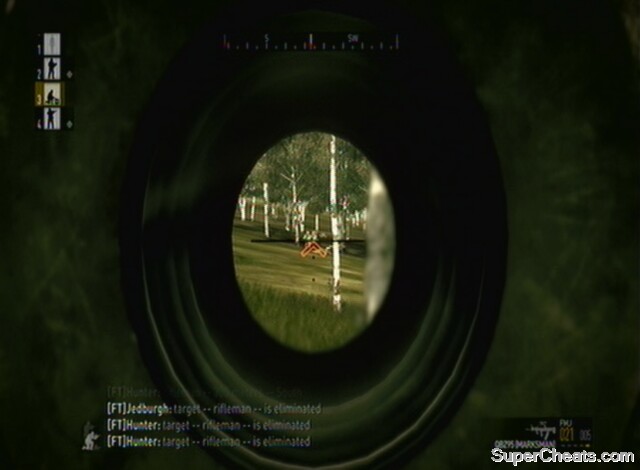
You will be informed that around the village are anti-aircraft teams which are preventing your allied Hydra gunship from entering the area. There are three, in fact, and you are given ten minutes to deal with them. Head down the hill to the south-east. You may take fire from the village, but should be able to reach the bottom and the ditch which provides ample cover for the next stage. Order your team to engage the anti-aircraft team by the building to the east, while you can flank round to the left – through the trees. You should be able to come upon the building completely undetected and pick off all those guarding it with your marksman rifle. Once this is done, or your team has done the job for you, fall back to the ditch. Enemy reinforcements are likely to be moving to engage you, so it is important to get away from where they think you are.
Flank the first AA team
Back at the ditch, head to the south, across the field and towards the village. The first anti-tank team is by a building overlooking the expanse to the east. Get your team to move up and assault the building. Do the same with the final location, at the western end of the village. Your team are very skilled at building-entry, so letting them take charge is not a bad idea. It is worth bearing in mind, if there are lots of PLA still guarding the village, that your AAVPs will move up and deal with them given enough time. Obviously you don't want to leave it too long or the objective to deal with the anti-aircraft teams will fail, but playing this conservatively certainly makes things easier.
Primary Objective 3: Secure Beachhead
With all this done, you will be informed of a counter-attack on the village by lots of PLA forces. Red smoke will mark the area you need to defend, but it's basically right next to the building occupied by the final anti-tank team. There are many ways of doing this, but the key areas to defend are as follows. The barn, if it hasn't been destroyed, has an upstairs which gives you a height advantage over incoming forces from the south. There is the mounted gun just outside this barn, which packs a punch but should be preferred manned by an AI teammate both because they are more accurate, but also because the mobility of a human player is needed to deal with any flanking manoeuvres. There is another gun emplacement to the east, and this can be staffed by another of your team mates. The chances are, however, that the eastern side of the village will be overrun, leaving your squad member surrounded. You can easily cope with three soldiers defending the south, and the extra skilled man to the east may tip the balance and protect your flank, but he will probably be the first of your team to fall once things start to get hectic.
The ideal place for a human player is to the west of the road we are defending, overlooking the forested area by the coast. From here you can see the road, the hills and the forest. The latter area is heavily assaulted during the counter-attack, and your marksman rifle is essential for dealing with these flanking PLA soldiers. Whatever your plan, ensure this area is guarded. You can try and lay some claymores in the area, but frequently these are spotted and blown up beforehand. Order any remaining team mates (this may well be all those except the one on the mounted gun) to defend the road. With any luck, one will take station inside the barn and use its ample cover. Be sure to restock your ammunition at the crate by your position before the enemy arrives.
 Ensure you keep an eye on the trees by the coast |
Your gunship will deal with the first wave pretty well, but frustratingly will soon have to return to base. From this stage you will have to deal with enemies from the hill and through the forest to the west. Depending on how well your allies and AAVPs are faring (it is worth regularly checking your map for this info), HQ will inform you of breaches in the perimeter. If the eastern side falls, you will need to keep a good eye out in case any jeeps or infantrymen get a flanking manoeuvre on you. The top priority should certainly be to keep your sector protected. Hold your ground, falling towards the coast and using the landscape for cover if things go really bad. Eventually (the time depends on how well your allies in the village are doing) HQ will radio in that the enemy are fleeing the area, and the mission is complete.
Note that if you are struggling with this section, consider replaying what is a fairly short mission by Flashpoint's standards to ensure you get a better complement of allies with you for the final showdown. It is also just worth retrying the last section repeatedly, as there is a large degree of randomness involved with how well the allies you do have alive perform.
Defend the beachhead village successfully
Achievement/Trophy: Tide's Out (Successfully defend the beachhead) Bronze/20G
Extras:
There is a lot of potential in this level, mainly because you can get in one of the AAVPs at the start of the mission. You can then joy-ride around the island, but of course, the other AAVPs are unlikely to survive with an entire squad less of soldiers supporting them. It is also risky to attempt to follow the other AAVPs, as you are likely to get hit by anti-tank soldiers. The mortars will rain down and take the others out if you don't deal with the spotters, and eliminating both the spotter teams and the AA teams are primary objectives, so cannot be ignored.
The easiest way is to follow the default structure, but this will be the first (and only) time you can drive an AAVP, so it's not a bad idea to have some fun in them on a repeat playthrough. Also, if you are struggling to get the achievement for taking out the PLA APC, start the level and focus on that goal solely. As soon as you get the Queen Bee from the first AT team, head for the APC and take it out as soon as you have the shot.
So I've completed this mission but it won't let me go onto the fourth, anybody know why?
"Laughing".The most i read comments the most i love this game. I'm stuck at the village too, and i'm sure we can create a whole community here, the third level worshipers or something like lever 3 vétérans. Toooo difficult just perfect, let me play Dark Souls i need to rest.
I think I've tried this level over 50 times , got really close once , put a dude on 1 gun , another dude on the other gun , ordered the other guy to follow me , which he constantly ignores , I've walked , run and crawled about 700 miles , shot over half a million bullets , drove around 600 miles , been blown to bits and shot to pieces , ( especially in the head ) . I shouted MEDIC till my throat was red raw and he keeps running away and never help's ( coward ) but I won't give up and neither will u , cause we just love it , bring it on
Literally hid in a house, assigned a mate to each gun surrounding the village, and shot the 2 enemies that entered the room, then the enemies retreated a few minutes later
Countless tries, kept getting overrun in the village where the assignment is to defend the south road. Here's how I beat it: Early in the mission at the farmhouse my fire team and I take over one of the AAVPs, use it to assault the radio tower from the west. From there, move into the village eliminating resistance during approach. When defending the south road I parked the AAVP in the road next to the gun emplacement and use the vehicle weapons for the fight. Keep the fire team on board to keep them alive. I did all the driving and switched to gunner position for effective use of weapons. That other jerk just wastes ammo. Don't forget the AAVP grenade launcher - very effective for close and medium range targets. Necessary to jockey the vehicle around a bit from time to time for target acquisition.
This mission is one of the hardest ive played. I still haven't beat it...
I hate this mission, I can't beat it in any f*cking way. This game automatically sucks.
First, keep calm, then organize your team, one at 20m north, two at 20m south. You may first eliminate the PLA team that came from east and the AVP, then use the map and keep giving orders to your team-mates to attack the PLA forces the will came. Some times switch off the map to help eliminate with de heavy gun some PLA forces that came from East, then activate again the map. When the PLA forces are very close, then hide inside the the build near the heavy-gun, from here you can shot some PLA trops that are around de house. then keep giving orders by the map, and they start to runaway and it's done.
I know I'm late playing this, but it's awesome. Hated it's one shot realism tostart with but getting into it now.
I put No.2 on the gun next to the barn, No.3 (medic) with him. Told No.4 to follow me, but he didn't as I went upstairs in the barn.
From there, get prone and shoot 'em.
Admittedly I failed a few times trying men here and there, but when I did this there seemes a lot less PLA coming from fewer directions. Couple of minutes and they were retreating!
Now I'll need help on the next bit.
Well this game is the ish well set up the medic guy in the south to prevent enemies flanking nd then set one guy on the east then one on the west
I love this mission. I was the only marine left at on the map 5 commies left, i took shelter in a barn i put full auto on and only killed 1 commie, i now only had my pistol, i wielded the weapon and waited in my barn, the damn commies stormed in there i headshot one and the other i incapacitated the last one did me in. Too epic.
I think I tried the last stage 10 times and couldn't complete it. all I do is place the sqaud members on each of the machineguns and stand by the west road. The first guy to go down it seems is the medic so if i get incapacitated im screwed. And if someone is hit before him I get killed patching him up. So I think next im just gonna drive the aavp around and hope for the best.
This game is damn too hard. I just cant get it right. Call of duty and battlefield as well as medal of honor is better and easier.
How I Defeated These Commies
1. Have one of your soldiers man the East and North mounted guns.
a. I put the medic on the East gun so I could use him to treat those of us stations either North or South if necessary.
b. I put the grenadier on the North gun.
2. Stand near the South mounted gun position and place one of your men approx. 50 meters to the southwest of your position.
a. I kept the machine gunner with me and put him just southwest of my position to catch the fire team rushes that come sporadically from that direction.
Disclaimer : I was defeated on this mission 23 times before getting it right and due to the exhaustion involved in the process I have not attempted to duplicate my success. No guarantees that it will work for you.
Some Details : I will say that I did not man the southern mounted machine gun for the duration of the op. Instead I would use a scoped rifle to get targets as far out as possible mainly from the south, but also to the southeast, assisting my machine gunner and occasionally to the Southwest, aiding my medic who was on the Eastern mounted gun.
In the final moments of battle a few enemies did break through on the Northern perimeter and required my attention.
**It helps to constantly check you map, looking for the red enemy locators. This is how I realized two enemies had breached the Northern perimeter.
This mission is an insult to applesauce everywhere