04: Eagle Offense
Operation Flashpoint: Dragon Rising Walkthrough and Guide
Operation Flashpoint: Dragon Rising Guide - Walkthrough
Mission Four: Eagle Offense
Summary:
This is similar to mission three in its difficulty and epic climax. You play as Dagger One Bravo and are tasked with taking out enemy armour to allow your own vehicles through, removing an infantry threat for the same result, and finally assaulting an airfield and defending it. This is quite a short mission, but gets very tricky towards the end.
Walkthrough:
Primary Objective 1: Destroy or Incapacitate two PLA Type 97 APCs
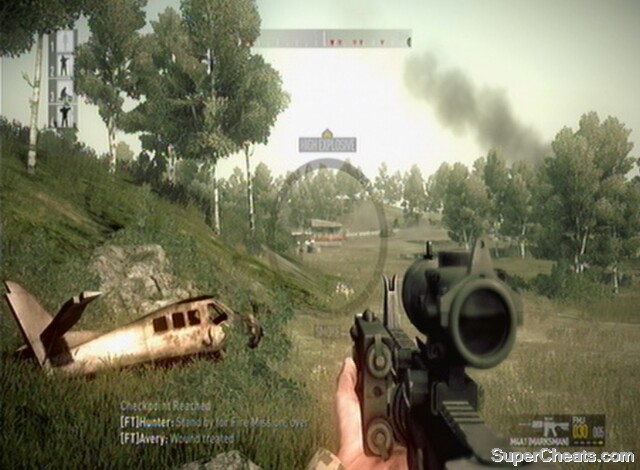
Time is important in this mission, as your convoy of vehicles and men are moving up at the same time as you – if they get too far forward before the area is clear, they will be taken out. To begin, sprint to the right of the concrete bunker ahead of where you spawn. Edge around it and look directly ahead down the scope of your rifle. You will see a single PLA manning a gun emplacement. Take him out from range and then sprint to the next RV marker, to the left of the emplacement and burning vehicle, and through the trees. There are no enemies in this sector. As you get to the burnt out jeep by the RV point, equip your SMAW Rocket Launcher with HEAT rounds. It takes quite some time to set up, and you also need to bear in mind that it takes just as long to reload or swap out for another weapon – so ensure you are in cover when you do it. With the SMAW equipped, edge towards the top of the ridge towards the (1) objective marker. On Normal this moves with the vehicles we need to destroy, so you can get a good idea of their location even while blind behind the hill.
Bear in mind here that you also have an anti-tank soldier with you, and it may be worth setting him to follow you or engage one of the vehicles himself so that you are not forced to reload and cost precious seconds. It is still very possible and indeed easy to take both out on your own, however. Pop your head up and use the infra-red scope of the SMAW to quickly spot and fire at the enemy Type 97s. They are likely to be very close to the ridge at this point, but you should be able to get your shot away and then back off down the hill to reload before they can hit you. Take out both tanks and then select your marksman rifle again. Be aware that sometimes a direct hit won't take them out, but keep plugging away and use your anti-tank team mate should you run out of ammo. As a rule, however, one hit should be enough.
Take out the emplaced gunner and then the enemy vehicles
This will complete the primary objective.
At this stage a helicopter will come flying overhead, and there is an achievement to be had for taking it out.
Achievement/Trophy: Hip Shooter (Destroy the PLA helicopter after taking out the vehicles) Silver/30G
Head for the next RV marker. Before you get to the small ridge just blocking the RV marker, prepare yourself for combat. From just behind the hill scan the buildings in the distance.
Secondary Objective: Fire Mortars on PLA Position in Ruins
You should then be radioed to confirm a mortar strike on the area. If not, move over the hill and down into the gun emplacement (it's probably best to leave your squad behind, as this is an exposed position). Either from here or behind the hill, designate the building call in a strike.
Note: Keep the mortar strike away from the main road, as it is not infrequent for your allies to move up while a barrage is raining down. Not clever.
 Call in the mortar strike |
This will complete the secondary objective.
Primary Objective 2: Take Control of the Control Tower
After this your vehicles will move in and head towards the airfield. You can now join them by following the RV markers. Once you get to the main road, be on the lookout for PLA soldiers. You will be told that we need to take out PLA spotter teams and head for the control tower, as they are calling in mortars on our troops. Once the assault starts you will have around five minutes to reach the tower before you will start losing vehicles. From the main road just north of the airfield (ensure you hit the checkpoint here), head south to a little concrete shack just inside the boundaries of the base. You can use this as limited cover. Shoot the explosive barrels by the long building further south, clear out any infantry who are exposed by this, and then flank west, keeping well clear of the open ground.
Here you should see allied troops moving in too. They are competent but slow, so it's worth ordering your squad in to take the brunt of the fire. Use the tents to the west as cover, and arc round towards the building we just made a hole in. There will be lots of PLA, many who may be prone on the runways or still inside the buildings, so proceed with caution. The wimpy route, if you fancy avoiding the burden of combat, is to head south, almost outside the boundary of the airfield and along a small bump in the ground towards the tower. You won't see many PLA here and your allies will push up rapidly to keep up with you. Continue to check your map to keep an eye on your allies' progress, and for the regular route, head south east towards the tents by the control tower. These provide ample cover for dealing with the PLA by the tower, and allow you to get a sight on it. There will be PLA in the windows and possibly some in the ground floor. Clear as many as you can see from range, and then send your team to assault the building.
Call in the mortar strike
Watch over them from the tents and pick off any PLA who show themselves. AI is not great in close-quarters, so you should have the chance to pick anyone off who surprises your squad. Of course, you may want to do the dirty work yourself, in which case break in the front door with your team in support.
Primary Objective 3: Hold the Control Tower Against Oncoming PLA Reinforcements:
With the tower clear you will be told to defend it from an impending PLA counter-attack. On the ground floor is an ammo stash which you should immediately raid for the Javelin missile launcher. Ensuring you hold onto your scoped M4A1 Marksman, pick up the Javelin and then head up stairs. On the first floor you will have a vantage point out of the windows of the road into the airfield from the north-east. Use your scope to examine the troops moving down the road and HQ will radio you with instructions.
Secondary Objective 2: Fire CAS on Incoming PLA Reinforcement Vehicles:
Make sure you hit the checkpoint in the tower, and order your men to defend it. Potentially six PLA APCs can enter the airfield and drop off troops, so this section is vital for ensuring the balance of forces stays on your side. The first vehicle comes in alone, and you will be told that you have fire missions to use on them. Keep watch on it, and when it stops as it creeps over the hill near the airfield to let its troops out, designate it for a fire mission. Not all of the APCs do this, but it's worth watching them. If they don't stop, do not waste a fire mission on them, as it does not track vehicles, just aims at the location you designate. They will stop later in the mission and we will have a second chance then. There is also an achievement for calling in your first air-strike.
Order a CAS mission on the incoming PLA vehicles
Achievement: Shock and Awe (Call in your first air strike) 20G
Secondary Objective 3: Destroy or Incapacitate PLA Attack Helicopter
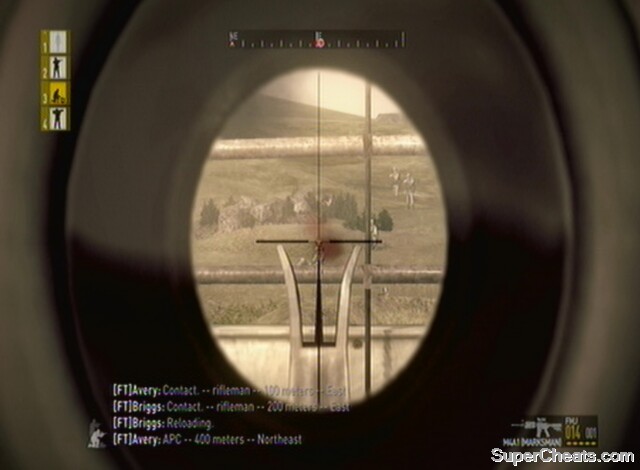
Soon, HQ will radio in that a PLA helicopter is coming to help out its buddies. This presents a very real threat, and the tower can be destroyed by its heavy weapons (in this situation you will usually survive, but your team will die and you will have lost a lot of blood and be surrounded by PLA – not ideal!). It takes a while to come in, but an objective marker will appear on your screen showing its distance. You can target it with the Javelin from extreme range, so get to the top of the tower early on and look north east to see it come in. Use your map if you can't find it. Scope the Javelin and wait for the square to be joined by a diamond around the helicopter, and let her rip.
Take out the PLA Helicopter
Destroying the helicopter will complete this secondary objective. As a secondary objective, you can in theory ignore the helicopter, but if it destroys the tower you will have lost all cover from the PLA. Once too many of the enemy come into the sector, the mission will fail. With the helicopter down, head back to the first floor and continue to pick off incoming infantry (restock your ammunition from the crate on the ground floor if your M4A1 is out of ammo). Also, use your remaining fire missions on any APCs left in the area, as the objective will not end if they are remaining in certain locations. An allied helicopter will join the fray to help out, if you completed the secondary objective of eliminating the enemy helicopter. The PLA will begin to fall back, and the mission will be completed.
If you start to get overrun, fall back to the extremities of the airfield to the south-east. As long as you snipe any PLA entering the tower-area, you should be OK and be able to complete the mission from here. If the Javelin ammo crate gets destroyed, you will have to miss the secondary objective and just stay out of sight of the helicopter.
Achievement/Trophy: Runway Relief (Capture the airfield) Bronze/20G
Extras:
You don't have a lot of freedom on this level until you get to the airfield. If you choose to save the mortars and not to use them on the PLA in the ruins before the airfield, not only will they take out some of your allied troops, but the game takes the fire mission away from you too – so you can't use it on the enemies in the airfield. You don't have to use the fire-missions on the reinforcements once you are in the tower, but clearly there's no point in saving them as there's no one else to attack! You get four fire missions, so use them wisely (there are naturally usually more APCs than fire-missions).
 Defend the tower until the all clear is given |
There are lots of gun emplacements in the base (as you will have noticed when you were assaulting it). These can be used to defend the area, but certainly as the human player you should be in the control tower, not least to trigger the checkpoint and collect the Javelin.
No comments yet. Tell us what you think to be the first.