- Get to Safe House #4
Left 4 Dead 2 Walkthrough and Guide
The Parish - Get to Safe House #4
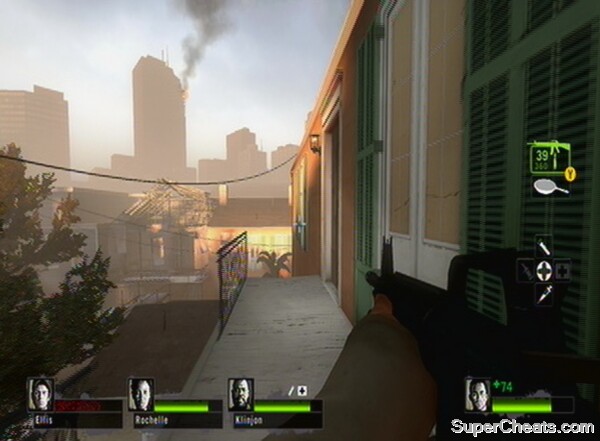
The fourth safe-house is up on the bridge, handily located right next to the final showdown. Collect all the equipment you need and exit the building. The military's attacks are coming in closer now. Exit into the urban environment. Move into the building at the end of the square and go up the stairs.
You will emerge onto a balcony. Drop down onto the van once you reach it, and proceed along the street. Enter the building at the end of the street by the crashed bus. Make your way through, heading upstairs and then dropping down to come out of the other side. Proceed down the alleyway until you locate a maintenance area with a door leading into another house.
Again you need to move upstairs, but this time up two flights of steps to find a way through.
 |
From the balcony drop down onto the small building beneath and clear the area from here. This is the location for the last set-piece of this level. Someone needs to go down the lower floor to activate the float nearby. This will move it into a position allowing us to cross to the next house. Unfortunately, it will also attract the horde in the process. Nominate two people to go and set it up, and the other two can cover them. There is a set of stairs on the other side of the area from the float to find a way back up (see video below).
Once everyone is ready, activate the float and get the first half of your team back up onto the small building for an optimal position.
TIP: The scaffolding next to the small building has explosive canisters on to make this battle a little easier.
It doesn't take long for the float to get where we need it, but you should be wary of any of your team being pulled from the roof. Once it's in the right place, head across in to the upper floor of the house.
Move the float into place and move across when its ready
Go downstairs and out of the back door. Follow the narrow alleyway until you enter another building that leads back out onto a main road. Stock up on weapons and health inside before heading out. Do some more house-clearing until you locate the route down another alleyway (or through a house) to allow passage back towards the highway.
Pass underneath the highway and you will see the bridge looming large above. Pass through the concrete blocks into the final safe-house of the level.
Get to the Military Extraction Point
There are plenty of medkits in this safe-house and the extraction showdown in this level is probably the most difficult in the entire game. Heal your wounds and equip an additional medkit if possible (there are some downstairs and upstairs). Make sure you have a decent weapon and head out.
TIP: This is a frantic, moving extraction, where you are required to plough through the horde until the end. Because of this, a melee weapon (such as the machete) is advisable to help cleave a path.
TIP: It is essential to take the Molotov in the safe-house to deal with the Tank on the bridge, unless you plan on bypassing it.
Interact with the dead soldier's radio to make contact with the military on the other side of the bridge – they will call off their bombing run to allow you to cross. When you are ready, hit the switch to lower the bridge and allow passage. As you move forward, ensure you first turn around and engage the Special Infected that come from behind. With these enemies dealt with, continue on along the bridge.
TIP: This is where you can unlock the Bridge Over Trebled Slaughter Achievement (see Achievement section below) for getting across the bridge in under three minutes.
The horde will attack first as you move between the buses. Stick to the right hand side, avoiding the gap in the bridge. Be sure to avoid these holes, or you will fall down and be left hanging for a team mate to pull your up. Soon you will come to a petrol tanker with a ladder at the back – a height advantage is very valuable on the bridge, and while there is a slight risk of being pushed off the edge, it's worth it. You can see the Special Infected coming from a mile off.
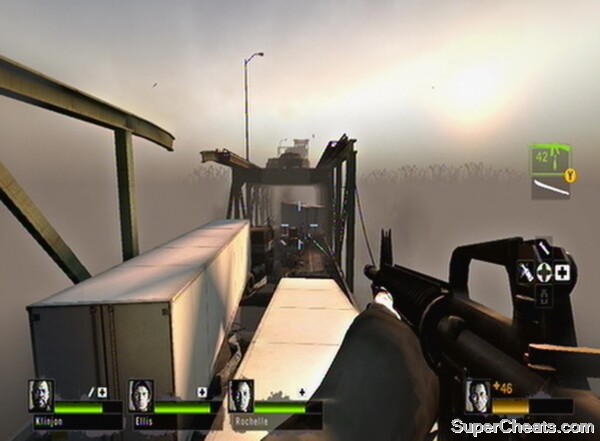 |
Move from vehicle to vehicle going forwards, and switch onto the other truck on the left when you get the opportunity. You will then have to drop down and engage the horde up close, but underneath the lorry just up ahead you should find some more weapons.
TIP: Get more ammunition at every opportunity. If this means changing weapons, do it, as your ammo will not last the duration (or even half the duration) of this extraction.
Bypass the hole in the bridge and flaming military jeep before heading up the ramp to the top of the bridge. Again, height advantage is invaluable. Move down onto the top of the truck once you get there, and then head into the back of the truck nearby. There should be ammunition in here and once you have made use of it, clear the horde, as a Tank will be inbound.
Whoever has the Molotov should go ahead and try to nail the Tank with it. It will be forced into a narrow route, so you should be able to land the Molotov in front of it so it will catch fire as it nears your team. This is the only Tank worth worrying about (you can't do much about the next one!), so concentrate on getting it right. Take note, this Tank will fling cars at you and should you get hit by one, it will knock you down and force your team to help you up – if they've not been hit as well, that is.
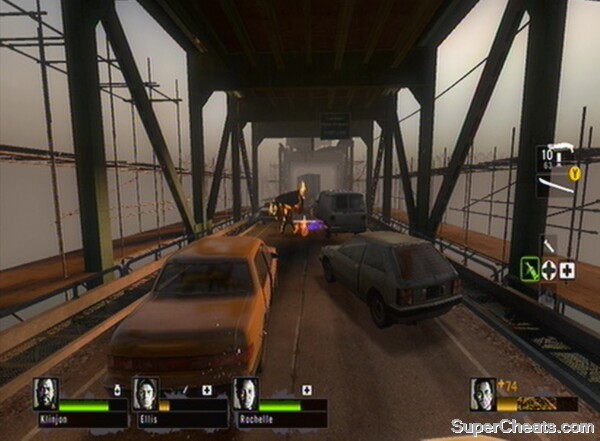 |
TIP: Use the lorry with the ammunition in for cover – the Tank cannot move this and flying cars will not affect it!
With a combination of fire and bullets, down the Tank and proceed (after restocking on ammo). Keep an eye out for the gangways protruding from either side of the bridge. Take the one on the right hand side as the Infected have problems getting onto it – move up using a combination of this and the right hand side of the road. You can shoot the Infected through the bars and clear a path. Again, ensure you do not fall or get knocked off (the horizontal poles on the far edge are not consistent and there are some gaps – watch out for Jockeys in particular), as that will rule you out entirely unless you get lucky.
Rejoin the road when forced to the first time, then get back on the scaffolding again.
TIP: It's a good idea to split your team between the scaffolding gangways and the road as this will create crossfire lethal to Infected.
 |
At the end of the second gangway, get back onto the bridge and scavenge ammunition from the back of the truck. This is a tough section as the quantity of Infected can be overwhelming. When you are able to, climb on top of the petrol tanker using the ladder. You may have to come back down to help other team mates who get pulled off, but this is by far the best way to avoid getting massed by the horde.
TIP: This is a good stage to use a Pipe Bomb or Bile Bomb.
As you move from petrol tanker to lorry, then up to the next section of the bridge at an obscure angle, the end is not far away but takes a slice of luck to get to easily. Note the helicopter on the shore to the right as you move from this slanted section to get on top of a bus. This is our target. Drop down from the bus and you will be notified that rescue has arrived. There are a number of possible outcomes here. Regardless of where the Tank spawns, you need to forge a path through the horde as quickly as possible. I recommend melee weapons only for this final section, unless you have Special Infected or a Tank to deal with directly.
TIP: This is not like most extractions where the rescue vehicle is thirty seconds away through a clear area – this one is more like two minutes filled with Infected, so running and praying may not be enough – you will have to do some fighting. Note also that the horde only stops for the first Tank, so if you try to hold position you will be overwhelmed. Keep moving until you get to the first Tank, stop and then keep moving again until extraction.
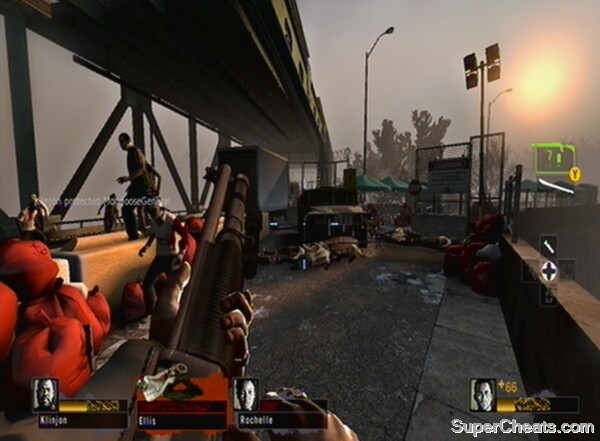 |
Ensure you stick together to help each other with Special Infected traps and head into the area cordoned off by fences and a military humvee (check the bonnet for Pipe Bombs which can be invaluable in clearing a route through). Note that by this point you should be able to resort to running to the helicopter, but only if the Tank is behind you rather than in front (though Adrenaline would help). There is an ammunition pile and a Heavy Machine Gun mounted on the back of a truck not far down this road. If you have stragglers in your team, clear them a path using it. It can also help to deal with the Tank, but that depends on where it has spawned.
TIP: Try to spot the Tank so you are not surprised by it, but if you can’t see it just forge a route ahead and hope it's not too close behind you!
If the Tank has spawned on the bridge, you may be clear of it by now (but time is of the essence so that it doesn't catch up). If, however, it has spawned in the area by the rescue helicopter, you will struggle to get past it without killing it or at the very least sacrificing a member of your team to delay it.
TIP: If you are struggling, make sure you take some adrenaline to run past the first Tank – if you are playing with AI you can leave them behind and speed past the horde to get to the escape helicopter – there is also an achievement for clearing the bridge in under three minutes, so it can be done!
Unless you feel that you have to fight this Tank, ignore the mounted gun and drop down where the road is blocked. Head to the right and through the funnel towards the rescue helicopter. Climb on board using the ramp to the rear and your mission is complete. You have successfully survived the infection! For now.
Successfully extract your team
No comments yet. Tell us what you think to be the first.