Behind the Glass
Prototype Walkthrough and Guide
Prototype Guide - Walkthrough
Behind the Glass
Follow the yellow marker on the mini-map to Dana's Safe House near Times Square. Before you can start this mission, you must purchase the Diveroll manoeuvre via the Upgrades menu. Since you've surely amassed a decent amount of EP by completing the last three missions, now is a good time to purchase some of the more essential upgrades. Start with Diveroll, of course, which is luckily only 100 EP. Once you have Diveroll, consider purchasing Airdash and Glide in the Movement category, the Critical Mass Ability in the Survivability category, and Sprinting Grab in the Combat category. You should have enough EP to purchase all of these.
When you're ready to get started, stand in the yellow marker outside of Dana's Safe House and press the Y/Triangle button to start the mission.
Mission Objective: Rescue Elizabeth Greene
Make your way to the blue marker on top of the building across from the Gentek Facility. To gain entry to the facility perimeter without alerting the military, you must assume a military disguise. If you started this mission coming off the tail-end of the last, you should still have Captain Mac Marshall's form as a disguise; this will suffice.
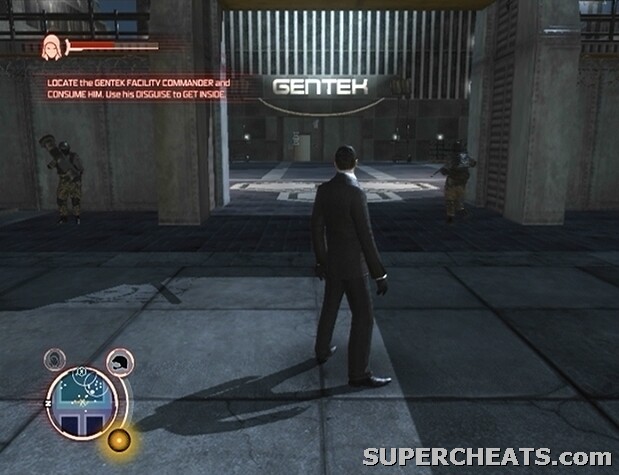 Assume a Military Disguise and use it to enter the perimeter of the Gentek Facility. |
If you've since traded your military disguise for a pedestrian one, you'll have to consume one of the soldiers outside of the facility to acquire a suitable form. Since you don't yet have access to the Stealth Consume ability, you'll have to cause a bit of a scene. Provided you've purchased the Sprinting Grab ability, just grab one of the soldiers as you Sprint by, drag them into an alleyway and consume them. Then, lose the military by switching to the disguise while not being watched (i.e., when the shutter below the disguise meter is closed).
There are a couple of Viral Detectors around the facility. As is explained via an in-game pop-up, Viral Detectors can see through Alex's disguise, and will alert the military to his presence if he remains within the radius of one for a long enough period. The radius of each Viral Detector is outlined on the mini-map. A Viral Detector won't rat you out immediately; it'll take time for the meter below the disguise icon to fill completely. The longer you stand in the radius of a Viral Detector, the more the meter will fill. Once full, the military will be alerted, and you'll be forced to fight or flee. To avoid alerting the military, just Sprint away from the detector and the meter will slowly empty.
While any military disguise is sufficient to gain entry to the perimeter, you'll need to consume the Gentek Facility Commander and use his form as a disguise to actually enter the facility. The Facility Commander is marked by a blue DNA strain icon. Since you do not have access to the Stealth Consume ability yet, your best bet is to Sprint Grab the Commander, consume him, and then evade the military before returning to the facility with your new disguise. The Facility Commander is Todd Chupka, a Web of Intrigue Target.
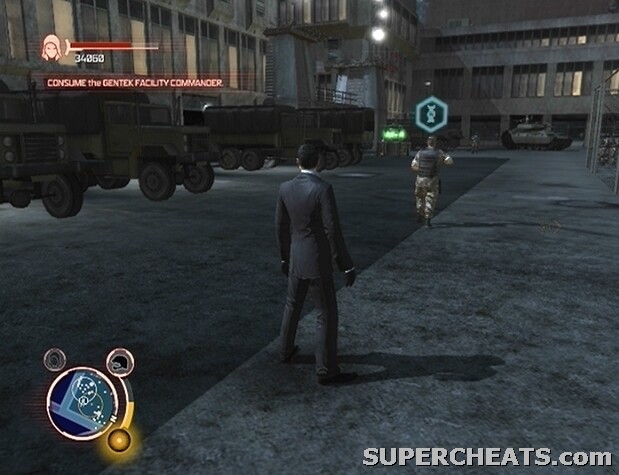 Consume the Gentek Facility Commander and use his form as a disguise to gain entry the facility. |
Once you've managed to evade the military, return to the facility perimeter and stand in the blue marker outside. Press the Y/Triangle button to trigger a cutscene.
Mission Objective: Escape the Hunters
After the cutscene, Sprint away from the Hunters and start toward the Military Base marked on the mini-map. The Hunters are strong, and fast, so use Airdash and Glide as you make your way to the Military Base to keep your distance. Hit the marker on the roof of the Military Base to drop down inside. Attack the soldiers that are firing at you to trigger a cutscene.
Mission Objective: Defeat the Hunters
You have to defeat this Hunter by depleting its health bar, which is visible in the top-right corner of the screen. By far the most effective weapon to use against the Hunter at this point is a Missile Launcher. There are several Missile Launchers scattered around the base from the get-go; two can be found by the door on the platform in the northeast corner of the room. Actually picking up the Missile Launcher can be a challenge, as the Hunter will surely be right on your coattail. Try leading the Hunter to the other end of the area, then Glide to the platform and quickly pick up the Missile Launcher.
Once you have a Missile Launcher, jump into the air, lock-on to the Hunter, and press the X/Square button to fire. The Hunter is quite quick and its attacks damaging, so use Glide to remain out of reach and fire at it while in the air. Hit the Hunter with two or three missiles to weaken it severely. When the Hunter starts staggering about and a red DNA strain icon appears above its head, run up to the creature, grab hold of it using the B/Circle button, and then press Y/Triangle to consume it.
Two more Hunters drop through the skylights. Fantastic. Fortunately, consuming a Hunter grants Alex the Claws Power, which is much more powerful than stand-alone melee attacks. Since you're up against more than one Hunter now, you'll have to work much harder to avoid taking damage. Use the Diveroll manoeuvre to dodge the Hunter's swipes, then move in and slash away. If your health bar is low, Sprint Grab a soldier, hop up onto one of the platforms in the base and consume the target there to regain health. Additionally, if you notice the red DNA strain icon above the head of Hunter, be sure to consume the staggering creature for a sizeable health boost.
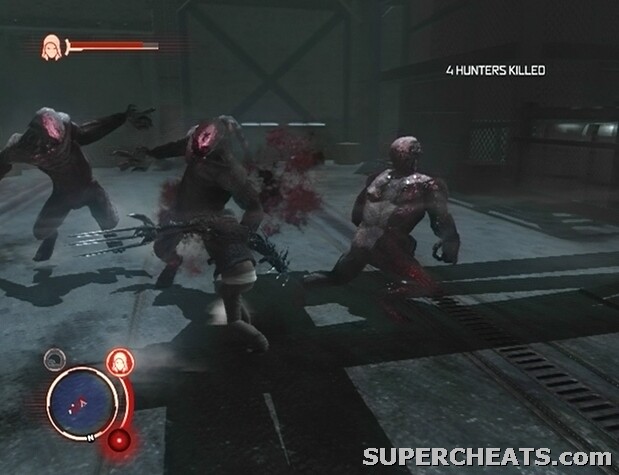 Use the newly acquired Claws Power to rip up the Hunters. |
Even more Hunters will enter the base shortly. You'll likely be facing three to four Hunters at once; at this point, you'll want to rely on using a Missile Launcher more than Alex's Claws Power, as you'll need the range to avoid getting pummelled. The large green containers scattered throughout the base interior are packed with explosives and deal a fair amount of damage when thrown.
As if things weren't bad enough, even more Hunters enter the facility. It's clear that only one option remains, and that is to blow up the Military Base. To accomplish this, you must destroy the six marked fuel tanks in the interior. Soldiers wielding missile launchers will continuously spawn by the gate along the north side of the base interior at this point; Sprint Grab one such soldier, consume him, and pick up the dropped weapon. Now you must fire at the fuel Tanks, while avoiding the Hunters' attacks; just jump and Glide away from the Hunters, lock-on to one of the fuel Tanks, and fire. It will take two or three missiles to destroy one tank. Destroy all six fuel tanks to level the place and complete the mission.
Wow I love playing this it is so exciting
this game is great it has my boyfriend who used to hate games playing it when ever he has time its cool to watch him play myself i dont mind it im a playing by the rules person
wow