Suicide Mission
Mass Effect 2 Walkthrough and Guide
Suicide Mission
There are many facets to the Suicide Mission, but if you have all your squadmates loyal, and the three Normandy updates references above, you should be able to do it with no fatalities. However, you may not want certain team members to survive, and it is still entirely possible to cause the death of much of your squad, and indeed Shepard himself!
Omega 4 Relay
Once you make the decision to go through the Relay, any romantic relationships you may have been pursuing should come to fruition. See the Romance section of this guide for more on this. The Illusive Man will also offer some final words of advice, before a cut-scene showing entry to the Relay plays out.
Oculus Attack:
As Joker skilfully avoids the debris of all the vessels to try and cross through the Omega 4 Relay, a Collector Oculus attacks. Without the Normandy's armour upgrade, Jack will die when the Oculus fires on the ship. After missing the rest of its initial attacks, the Oculus latches onto the Engineering Deck. Shepard must go down to deal with the intruder. The team you pick for this is not as important as later sections of the Suicide Mission, but anyone you bring with you to attack the Oculus will not be killed in a cut-scene elsewhere on the ship. For example, you can save Tali from death when the Normandy enters the debris field by picking her to accompany you against the Oculus (and Legion will take her place as the sacrifice, unless you have upgraded the ship sufficiently).
Note that the possible deaths referenced in this guide are only what has been experienced so far, and there may be other variables involved which are not yet known. To ensure survival, upgrade the Normandy and gain the crew's loyalty.
 Without upgrades, you will lose three crew members as the Normandy takes a beating |
So throughout the cut-scenes as you enter the Omega 4 Relay, three squad members could be lost. In picking your squad to fight the Oculus, bear in mind that it is only armoured, so you are better off taking heavy crew members like Grunt and Garrus. Pick your squad and weapons loadout, with your favourite Heavy Weapon the most important here. With all this done, you will be thrust into gameplay against the Oculus.
Any weaponry will hurt the Oculus, while biotic attacks are ineffective. Use heavy weaponry to take down its armour quickly. You will see it charge its laser, and should get well out of the way before it fires or you will lose your shields and some health. Fortunately it takes a while to charge, so you can probably down it before it gets too many shots away.
It will also move out of the ship and back in, until its health is so low that it retreats and a cut-scene of Joker entering the debris field is shown. This is where you may lose Tali or Legion without sufficient shields. The Oculus returns, repaired, but now you can completely take it down. Pick up more Power Cells to replenish your heavy weaponry and med-kits from around the room, and finish off the Collector Oculus.
Defeat the Collector Oculus
Having cleared the debris field, a Collector Ship launches at you as the last line of defence to the Collector base. If you upgraded the Normandy with the Thanix Cannon, it will take out the Collector Ship. If not, Joker will attempt to get close to the ship to take it out with conventional weaponry, resulting in the death of a crew member (Thane, by default).
Collector Station
Stage One:
Plan:
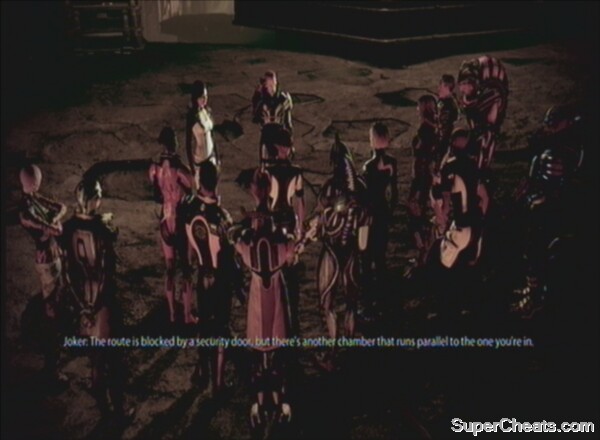
The end result is the Normandy crashing onto the Collector Station. You can give some rousing advice to your crew, or play down your chances. Once the team looks for options to get to the centre of the station, suggest looking for alternatives with the door-dilemma. The idea is to pick a team mate to send through the ventilation shaft, and open the door. Jacob volunteers due to the risky odds, but you should pick a tech specialist, such as Tali or Legion, to perform this task. If you choose someone else, or if Tali or Legion are not loyal to Shepard, they will die during this endeavour.
Next, you have to choose someone to lead the second strike team that will divide the Collector defences. Miranda volunteers, and is a good choice, but Jack is not happy at the idea of taking orders from her. Viable choices for this role are Garrus, Miranda and Jacob – all experienced leaders (again, ensure they are loyal to Shepard). The team leader is not at risk here, but a poor choice will result in the death of your tech expert, regardless of who it is.
With these tough choices made, choose to give an encouraging speech, request vengeance, or say nothing at all, as the team departs.
Personal Team Selection:
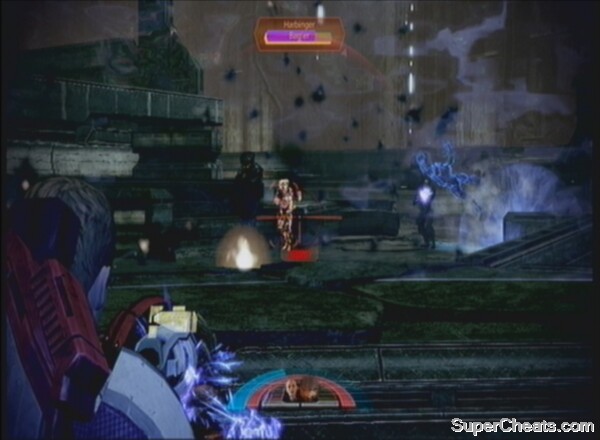
You will probably have Tali/Legion and Miranda/Jacob/Garrus unavailable for selection. You will encounter many Collector Drones, Assassins and Guardians, as well as Harbinger-controlled drones. Ensure you have a heavy character, someone with Warp to deal with Collector barriers, and a biotic to deal with any onrushing drones.
When the cut-scene ends, you will be aboard the station.
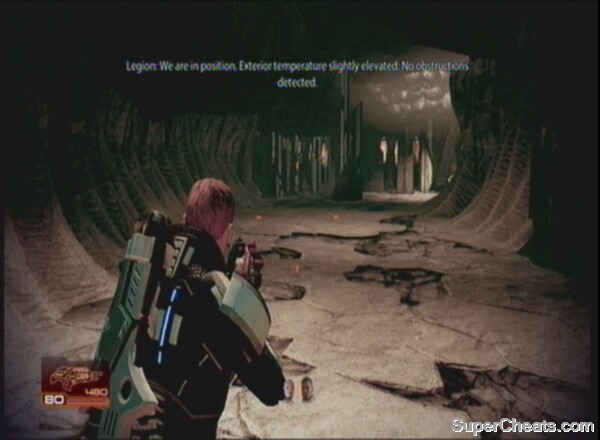 The Collector Station is a foreboding place |
Enter Base:
Move through the corridor and take cover when you reach the open room. Deal with the Collector Drones inside. More will fly in once the first wave is down (note that you can pick them off as they land). Move around to the left once the last batch has been eliminated.
Disable Valves:
Soon, your tech expert will come over the radio stating that they need you to disable some valves to prevent heat from blocking their route through the vents. There are eight valves to unlock, and the first should be right near you, glowing green. Push on through the corridor into the next room, filled with Drones. Keep an eye on the bar in the bottom right hand corner of the screen. If you take too long to open the valves, you will fail the mission and have to try again. The Harbinger will probably intervene at this stage, so concentrate on him and his Barrier.
Once he is down, activate the second valve on the left. As you move up towards the third one, a flying Drone taken over by the Harbinger will drop in on you.
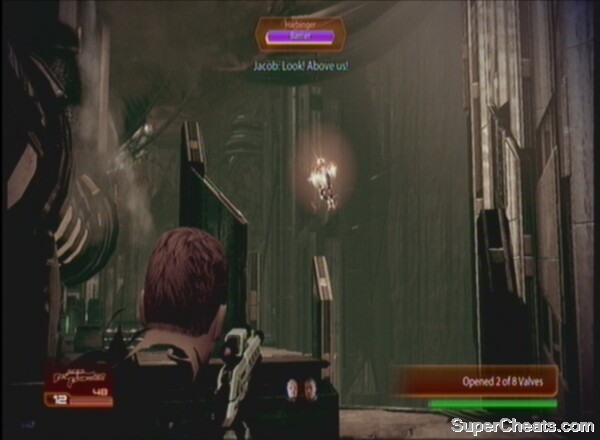 Watch out for this sneaky Harbinger-Drone |
Eliminate the Harbinger and then the drones that accompany it, and you should have access to valve three. Climb up to the fourth valve, where no resistance should be encountered. Through the wall ahead you may see the Harbinger swoop past and indeed, he will attack in the next section. Take cover and pick off the Drones, remembering that time is vital to prevent the failure of the mission.
Once you close about half the gap to the fifth valve, the Harbinger will return with more Drones. Depending on the level of the progress bar for your tech expert, you may want to run to the valve and activate it before dealing with the enemies, but you will put yourself at risk so close to them (and the bar for the next valve will begin to lower, eating into your time as you destroy the Drones in this area). Use a heavy weapon to remove the Harbinger if they start to slow you down. The next valve isn't far, so proceed with the Collectors removed and activate valve six.
In the next corridor, three Drones are waiting for you. Try to take them out quickly. The next room is a tricky one. Collector Assassins with Barriers bar your route.
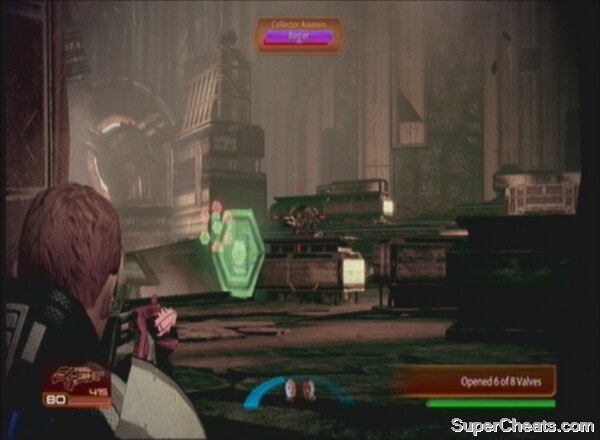 Only two valves left now |
Watch out for the Assassins' penetrating laser and move up to activate the penultimate valve. A wave of enemies will attack as you do this. In theory, you can run to the next valve and activate it to complete this section of the level, regardless of whether any enemies remain. When the Harbinger in this area is down, it is certainly a possibility. Activate the eighth valve to finish this section and meet up with the second team and your tech expert.
Rush to open the valves and allow your tech expert to get to the locked door
If you made a poor choice with regards to your tech expert or team leader, the tech expert will die in the next cut-scene. Hopefully, however, you are able to continue unhindered. In the next room, the Normandy's crew and some of the captured colonists are being stored in pods by the Collectors. Depending on how long you took to get through the Omega 4 Relay following the capture of the crew, you will lose everyone except Dr. Chakwas (two missions or more since the abduction), half the crew including Kelly Chambers, Engineer Daniels and Mess Sergeant Gardner (one mission), or no one except a colonist (if you left for the relay without doing any missions).
Stage Two:
Plan:
Pick a biotic:
The path ahead to where the tubes are leading is covered by seeker swarms. Your biotic crew-members state that they could possibly create a biotic field to prevent the swarm from getting through, and you have to choose someone for this role. Those with biotic abilities are selectable, but the only ones that are actually capable of doing it are Jack and Samara, so pick whoever is loyal. If you make the wrong choice, you will lose a squad member to the horde.
Pick a leader:
In addition, you need to choose another team leader for the second squad, as your biotic can only protect three people at a time. The second team will create a diversion, and again, Miranda, Jacob or Garrus can all perform the task, if loyal (though Miranda cannot die in this situation, regardless of loyalty, so is a good choice).
 The crew (or at least Dr. Chakwas), owes you their lives. Now will you send them to their deaths? |
Pick an escort:
Joker and EDI have sorted the Normandy out, but you still need to get the crew back to the ship. You can choose to send the crew back unescorted for lots of Renegade points, but they will all die along the way. Any loyal squad member will get them back alive, while no one is particularly suited or weak in this role. You cannot use the character that you send for the rest of the mission. Mordin is the best choice, as he is the most likely to die later in the mission, even if loyal, so getting him away from the action is a good idea. Not sending anyone has serious repercussions and is a definite Renegade action.
Escort Biotic Specialist:
You need to remain inside the biotic bubble that keeps the Seeker Swarm back, or your shields and soon health will be rinsed by the Collectors. Your biotic is at no real risk here, so just concentrate on the Collectors threatening you and your main two squad-mates. When your biotic stops the first time, press A (Xbox 360 Controls) to get her to move out. Shortly after this Collector Drones and the Harbinger will land ahead of you. You can fire out and receive fire inside the biotic dome, so take shots at the enemy as soon as they are in range. The biotic will hide behind a pillar and allow you to take out this first wave of Collectors. The Collectors will push up the ramp and try to flank you, so watch out for this.
Once the first wave is down, tell the biotic to move out again. You should see a moving platform in the distance, and some Husks and Abominations will lumber towards you. Use biotics and your choice of weapons to kill them before they reach your bubble, particularly concentrating on the exploding Abominations. After this brief wave, the Harbinger will take station around the next corner with some more Drones. Your biotic takes cover to give you a chance to fight back. Use heavy weapons if you are struggling to break through the Harbinger's repeated possessions, before telling your biotic to move on when ready.
 Use heavy weapons if you struggle to down the Harbinger's units. |
Collect any ammunition lying around as you move up. When your biotic stops again, you will have the Harbinger, Husks and a Scion to contend with. You may well get overrun by the Husks here, but continue to focus on the Scion unless you are in real danger of death. Use biotics to fling the Husks away as you prioritise enemies. There are loads of Husks, so use Concussive Blast, Push-field and Shockwave to take multiple units out together.
Move your biotic on when ready. Around the next corner, Husks emerge to run at you. You should be able to take these few out with ease as you approach the slope for the final descent. Your biotic will be struggling to hold the bubble here. Take out the Abominations and Husks that flank from the sides on the way down. Clear the last blocks of cover and a cut-scene will trigger.
If you picked the right team, everyone will make it safely through the door, and the survivors will get back to the Normandy.
Stage Three:
Shepard plans to take one of the moving platforms to the central chamber to destroy the station. You need one team to stay behind and hold the door, however, to prevent the main team from getting outflanked. You have a choice between 'Someone has to hold this door' and 'We'd better hurry'. It is unclear exactly what difference each choice makes, though it appears that the latter may end up killing some of your team if you take too long on the final boss. The best option is to confirm that you need people to defend the door. You will then be asked to pick your team for the final encounter – everyone else will hold the line.
 Pick your squad to take down the Collector Station. |
You then pick the squad to travel with you to the final boss. Anyone left holds the line. The team to 'hold the line' needs defensive, strong, brutish characters. Good choices are Grunt, Garrus and Zaeed, so try to avoid taking these people in your squad for the final showdown. Jack, Mordin, Tali and Legion are all very poor defensively, so take any of these to accompany you towards the end of the level. On higher difficulties you may feel the need for certain characters against the final boss – it's a risk you will have to consider. You should avoid taking disloyal characters with you, as they won't survive the station explosion. They also reduce the competence of the defensive line, however, if you leave them there. The line has a combined defensive rating. If it is not high enough, you will start to lose team mates. Loyal team mates gain an improved defence rating. Having chosen your team, you can then give a speech before heading out.
You begin on a platform, and another one, filled with Collectors, will dock with yours and unload its inhabitants. Try to take out all three Drones before the Harbinger gets involved. Another platform and another two Drones and a Guardian with a Barrier will dock. They come in waves, so the next platform won't arrive until you have defeated the previous enemies. With the second platform taken care of, move onto it, collecting any ammo, to wait for the next one. The Harbinger will be present on this one, along with a couple of regular Drones. The Harbinger will aggressively use the other Drones once you kill its original host, so it's not a bad idea to take out the others first, to save you having to down the Harbinger more than once.
The next platform (number 4) contains Collector Assassins and a Guardian. The fifth platform has two Scions and some Abominations. Kill the Abominations to cause them to explode and damage the Scions, which won't attack or move closer to you until you are very near them.
 The Scions are slightly glitchy, so take advantage of it and attack them before you trigger their advance up close. |
Once the Scions are down, you have to activate a console to move down to the final area of this level. You do this at your leisure, however, so collect as much ammo as you can beforehand.
The platform moves into a big area with a Reaper inside, constructed in the image of a human. The Collectors are being used as pawns to build the Reaper, while they are using humans as the physical resource to do so. Millions more humans are needed to complete it, so it is imperative that we destroy it and the station to prevent this happening. The tubes pumping the resources into the Reaper are the weak spot, and in the upcoming boss battle we will use those to destroy it.
Destroy the Reaper
First, however, another platform of Collectors arrives, assisted by the Harbinger. The Assassins also pose a threat. With these enemies down, however, the tubes open up, and you are able to target them.
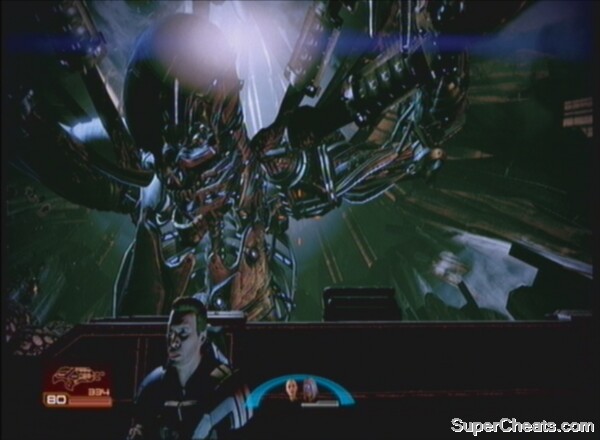 The Reaper won't be easy to kill. |
You should be able to take down one or two of the tubes at this point. Use heavy weaponry or better yet assault rifle ammo to break the tubes off the Reaper. It doesn't take much to destroy them, but once one is down, the armour comes back up to protect them. You can certainly take two down at once, however, if you are quick. As soon as you eliminate the last enemy on a platform, move your weapon up and spray the tubes with bullets. When the armour comes up, another platform will dock. Destroy the Drones to eliminate any host for the Harbinger, then focus on the Guardians. Listen out for your squadmates to inform you when the tubes are open again. Try to take two down as before, using Adrenaline Rush if available to slow down the Reaper's reactions and buy yourself a bit more time.
If tubes remain, another platform arrives. Again, Assassins and Guardians are the order of the day. Take a tube or two down. Repeat this until you have all the tubes out of action.
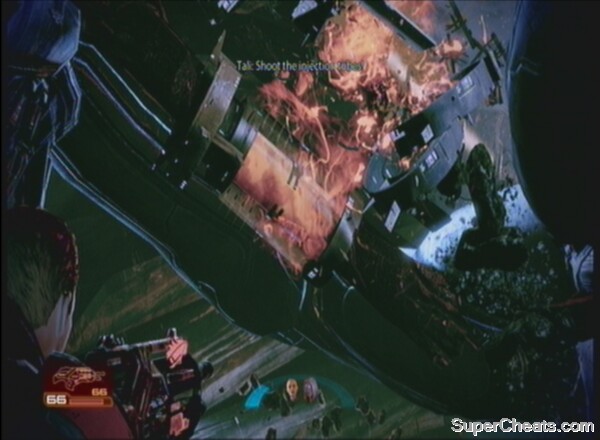 Take out the Reaper tubes. |
Once you have done this, the Illusive Man will contact you. He wants to use an EMP blast to save the Collector Station, keeping the Reaper technology for the Cerberus cause. If you have Miranda with you, she will resign over the Illusive Man's request for her intervention in this decision. Agreeing with this is a definite Renegade action, and the clear Paragon decision is to destroy the station as planned. This is easier said than done, however, as the Reaper comes to life, with a devastating laser beam, and attempts to stop you.
You can shoot the eyes or chest of the Reaper to do great amounts of damage to it. The weapon in its mouth takes a long time to charge, but if you are hit by it you need to get in cover and stay there until your shields are back to full, or you will be killed by the next blast. Use up all your Heavy Weapon ammo early on, trying to hit the Reaper's eyes. You can then switch to a regular weapon and pound away. When the Reaper crouches to the right so all you can see is his eyes, a great tactic is to use Adrenaline Rush and a Sniper Rifle, if both are available, to do massive damage in a short space of time. Make sure that when you are scoped you are aware of what the Reaper's weapon is doing, as it can catch you off guard (listen for the charging sound). Note that you should stay behind the cover in the middle of the platform where you begin, as it is possible to die off the edges and this also offers you some protection from the Reaper's main gun. Bear in mind that you can shoot into its mouth while charging, too.
Meanwhile, Collectors will attack. You should be able to leave most of these to your squad, assisting them with enemies only when the Reaper dives out of shot. In addition, you should not have to get through too many of these waves if you attack the Reaper effectively. As you damage it more and more, its attacks intensify and it dodges more. Eventually, however, you will have done enough to strike the killer-blow.
Defeat the Reaper
With that, you are relying only on the loyalty of your squad as to who comes out alive in the race back to the Normandy, as the Reaper collapses inside the station. The Harbinger struggles to save the station as it begins to crumble, ultimately failing in its efforts as Shepard jumps onto the Normandy. If you didn't have anyone left to help Shepard back onto the Normandy, he will die, meaning this save will not be valid for Mass Effect 3, where you will have to start from scratch! You will have done pretty well (or played through very carelessly) to be in this situation, however, so the likelihood is that you are left to remember the dead in the next few cut-scenes.
The Illusive Man is either very pleased or somewhat pleased but very perturbed that you did not salvage the station. Deal with him as you see fit – you are the boss now.
The Illusive Man had a point, however, as you see a Reaper army massing on the edge of the Milky Way. With all this done, you can choose to begin again, with your levelled up Shepard, with blank morality points, or continue on to complete all your remaining side-quests and exploration of the Mass Effect universe.
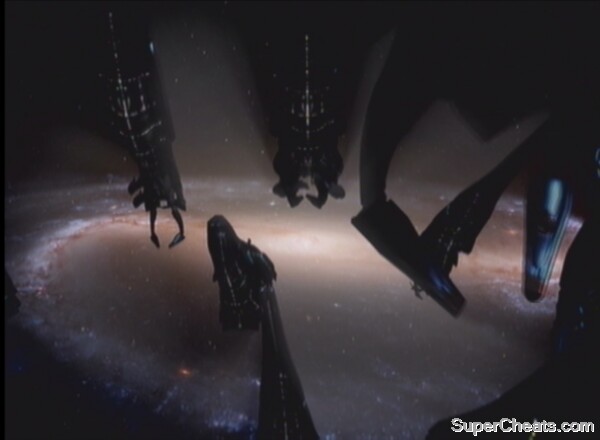 Mass Effect 3, set up perfectly. |
Thanks so much for this guide! It let me keep everyone alive by following it!
Great guide! But does it really matter who you choose in your personal team up until you head to the core (since you have to leave garrus grunt and zaeed to increase the other squadmates defense?
If u romance tali take with u and legion, or Miranda to watch her resign. Leave Harry's in charge and u will be fine hope this helps
Mass effect 3 you have a choice either you kill the IM or he shoots himself M920 CAIN can almost instakill the human proto reaper even on insanity don't waste the power cells on the oculus, plus against the reaper use adrenaline rush to focus on the reader's right eye it's easy to from the forward middle platform, then use CAIN heightened adrenaline rush lasts long enough to charge and use the but I recommend charging the use the adrenaline rush power to focus in on the reaper. Hope this helps. Good luck!
second time lost Jack legion third I was perfect. I suggest holding off Jack or Miranda s loyalty mission until yo have enough paragon to make nice between that's how I got the no one left behind trophy ps3 system. Love the series
I followed everything and Jack died sadly.... But overall pretty good guide. Only 1 died.
The first time I went through this section, I did so without a guide, and all my teammates survived. It wasn't until later that people told me I was supposed to lose people here. I went back and played again recently. I was VERY lucky the first time. Even following the same steps I took first, people died. I had to replay 3 times to keep everyone. I came here to sanity-check my methods, and according to this guide I was spot-on. The part that I didn't know about was at the end when you fight the Reaper, making sure to keep you soldier-types back to defend the door... I played on Insanity -- those were my best guys! I had to fight the Reaper without my bros Zaeed and Grunt, which made it way harder... but still, I had a Nuke Launcher so the Reaper's argument was invalid.
I played with Garrus on the swarms and he died too. Disloyal Jack covered us with the biotic field, I think that's why someone gets to die.
When reaper hit my platform, Grunt sled down. I think it's kinda funny seeing Shepard saving Grunt, he should've been dragged down I suppose. heh
Thanks anyway for this guide. Epic one I must say.
who would be the best people to take with me in the final battle and who would be best to hold the line?
Thanks! Helped a lot! Spot on too
Thanks a lot! This really helped
I sent Tali to do the first thing in those pipes and at the end I think I saw her dead body because there was something purple on the ground and Shepard was looking at something that looked like a coffin at the end. Strange since she was loyal...
Thank you!!!
i managed to only loose grunt. Goodbye ya no user
GREAT JOB WITH ALL THESE DETAILS...FOLLOWED IT TO THE TEETH AND SAVED EVERYONE IN MY TEAM. THANKS!
Great guide. Thank you for putting it together. 1st play through I recieved almost every achievement possible following it. Just missing the Warp achievement ;-) Thank you for the time you put into this.