Chapter 8
Thank you for printing this page from www.SuperCheats.com.
Remember to come back to check for updates to this guide and much more content for Uncharted 4: A Thief's End
Follow this guide to hear about updates
Last Updated:
Jump down and continue ahead, but move a little to the left side of the plains to find treasure #16 [REDWARE AND SILVER JUG FLASH]. Now head to the exact opposite part of the plains, towards a cave near the sea. Inside you can find treasure #17 [BRONZE BOAR].

Treasure 16 17 - Redware And Silver Jug Flash and Bronze Boar
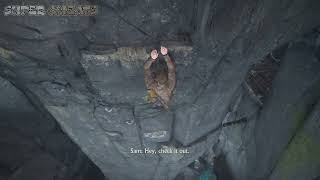
Head down the cliff at the end of the area, but do so carefully. There are slippery slopes here. The one to the far right needs to be crossed; watch Sam do it as you approach and mimic his actions. Quickly hang on to the ledge to make it across. Attach the rope to the tree trunk to go down. A few Shoreline guards show up, so take them out.
Continue and you'll soon enough reach a camp. Move through and look for a big lightblue cargo near the cliffs at the far right side of the area. To the right of it you can find treasure #18 [CARVED WOOD KASHKUL]. Approach the gate on the other side of the area and blow it open with dynamite, which can be found on one of the boxes not too far away from the cliffs. In order to proceed you'll need to find a yellow box/cart. Unfortunately, after you've found it, several enemies show up. Take them out in a firefight to continue.

Treasure 18 - Carved Wood Kashkul
Ride the yellow box through the gate and climb up. Look to the right to spot a small cave that is blocked by a few wooden crates. Take your distance and clear the way by hurling a dynamite at the crates. Inside the can you can find treasure #19 [CARVED NUT BOTTLE]. Go back outside and slide down the path until you reach a cliff; leap onto its climbable ledges.

Treasure 19 - Carved Nut Bottle
Wait for the guards to finish their conversation and drop down on the one who's standing by himself. After this, sneak through the long grass and take out the right guard from behind. Sam will take care of the other one. There are a lot of Shoreline guards up ahead, so it's wise to take out as many as you can by stealth and mark further away enemies. After clearing the area, climb the structure and head further.
When you reach the cliff to the right, use the ledges to continue to the next platform, from where you can use the rope and swing to the left ledges. Climb up and slide down the slope. There are three guards here. Wait for them to finish their conversation and continue to wait until you can take out the one closest to you by stealth. The other ones can now be taken out fairly easily by stealth as well.
You may find it a little confusing as where to go next. The higher ground where the last guard was standing provides a jumping ground to the tiny pillar in the middle of the slippery slope. From that small pillar you can jump-slide to either one of the other two pillars a little further down, which have climbable ledges you can cling onto. From here you can climb the larger half-destroyed arch structure and jump to higher ground from there.
This higher point can be used to jump-slide in a fairly straight line to the opposite side, hanging on to the ledge there. Climb up to reach a grassy platform with a tree and a cross. Agai you'll have to jump-slide to the other side; Sam will follow when you've made it. Climb the stones here and reach for the pole, using it to swing to the pathway up ahead.
Don't immediately continue at this point. Instead, at the corner of this walkway, hang from the side to spot a secret area underneath where you can find treasure #20 [TRAVELING INKWELL WITH SEAL]. Head back up and jump-slide down the slope to reach the destroyed arch structure with the pole hanging from the side - except this time you can climb to the top. Stand on the right side and jump-slide to the pillar in the middle of the slope. Climb it to reach the next arch structure.

Treasure 20 - Traveling Inkwell With Seal
Head through the gate and turn left to stand on a small pillar platform. There are poles here that you can use to reach higher ground. At the end you'll face another long sliding slope (to the left, that is). Take a leap of faith and slide down, but prepare yourself to use the rope at the near end. You'll have reached a gate. Don't go through right away, but inspect the wall to the left of this gate and climb it all the way to the top. This leads to a statue with treasure #21 [CARVED IVORY CANVAS] in front of it. Head back down and go through the gate to continue.

Treasure 21 - Carved Ivory Canvas
After climbing the stairs you've reached the cemetary. Hop down the left side and inspect the open grave for [JOURNAL ENTRY #1]. Henry Avery's grave is marked by crossed swords, a skull and crossbones. It can be found near the edge of the cemetary/cliff and it reveals a crypt. Head downstairs and inspect the far left corner of the first room to find [NOTE #1]. Continue until you reach a large chamber with three crosses (Jesus, Dismas, Gestas). Inspect the crossesand speak with Sam for [OPTIONAL CONVERSATION #6].

Journal Entry #1

Treasure 22 - Scottisch HaPenny & Note 1 & Optional Conversation 6
Now, facing the crosses, turn left and go through the doorway, turning left again to find treasure #22 [SCOTTISH HA'PENNY]. Head back to the large chamber and move beyond the crosses to find a special door. Turn around and flip the handle to let lightbeams shine on the door, except they're not yet ordered correctly. Go back to the crosses and adjust them so that all the dots have light on them (you can rotate the beams as well).
Go back to the door and FIRST talk to Sam for [OPTIONAL CONVERSATION #7 and JOURNAL ENTRY #2]. You can then inspect the door and leave the crypt afterwards. Various Shoreline guards appear, so take them all out in a firefight. After this, climb the stairs in the ruined building and make your way to the highest vantage point. From the wooden beam here you can jump toward the area with the large gate where the guards came out of.
Go through and slide down the trail to the left, then climb the plank and rocks to continue down the trail. Hop from platform to platform to continue. A little further Sullivan will call you. Use the rope to swing to the next walkway and move through the grass to the left, climb the rocks and enter the cave, then turn right inside the cave and then left; you can find treasure #23 [SLIPJOINT CLASP KNIFE] here.

Treasure 23 - Slipjoint Clasp Knife
If you head back the way you came you can throw a guard off the cliffs. Go back inside the cave, but this time don't crawl down the smaller hole but instead scale up the wall left to the hole. Be careful; there's probably a guard patrolling here. When he turns his back on you, quickly take him out.
Continue down the path and jump over the gap to reach a cave that contains treasure #24 [PEWTER SINGING BIRD BOX]. Jump back to the other side of the cliff and look for a destroyed ladder. You can boost Sam up, who then in turn can set up a structure that allows you to use the rope and climb the cliff up ahead. Once up, use the rope on this again, except this time, jump down the other side and swing to the left to reach some far-away ledges.

Treasure 24 - Pewter Singing Bird Box
Use the pole to swing down. While slide down the slope, use the rope in time to swing towards the ledges on the far other side. Climb to the left, use the rope again, and climb up, then swing to the front (only when Nate 'reaches' with his arm) to slide down a slope yet again. Jump to the ledges in time.
From here, continue to the right. When Sam and Nate are done conversing, use the rope on the pole to the right and swing to the wooden structure attached to the cliffs. From here you can climb up; Sam will help with the last bit.
At this point you;ll spot a cross in front of you. Head to the left side of the cliffs and face the sea, then lower yourself down the edge of the cliffs. Carefully climb down the ledges to reach a lower platform that holds treasure #25 [TORTOISE SHELL SNUFF BOX]. Head back up and continue.
Treasure 25 - Tortoise Shell Snuff Box
The ledges up ahead are straightforward; all you need to do is go down and drop yourself when it's safe to do. In the area up ahead are several guards. Mark them and try taking them out by stealth if you can, otherwise a firefight will suffice. In the far upper part of this area you can spot a cave; there are various half-destroyed wooden beams supporting the nearly collapsed hole; climb up and crawl through. Lift the wooden beam with Sam and exit the cave, then slide down the slope and hang on to the ledges.
Use the rope to swing over the next slope and jump down the wooden beams. You'll reach two wooden steps; underneath the second one you can find treasure #26 [PERSIAN TAILORING SCISSORS].

Treasure 26 - Persian Tailoring Scissors
Now all you have to do is follow the linear trail into the cave, concluding this chapter.
Anything missing from this guide?
ASK A QUESTION for Uncharted 4: A Thief's End
Comments for Chapter 8
Add a comment
Please log in above or sign up for free to post commentsNo comments yet. Tell us what you think to be the first.
Table of ContentsClose
- Walkthrough
Guide Updates
Get notified of updates to this guide
Many of our guides get updated with additional information. To get an email when this guide is updated click below.
 Join us on Discord
Click to close