Chapter 12
Thank you for printing this page from www.SuperCheats.com.
Remember to come back to check for updates to this guide and much more content for Uncharted 4: A Thief's End
Follow this guide to hear about updates
Last Updated:
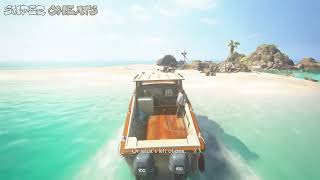
This is another semi-open world chapter. To continue with the story, simply head to the island with the tower. There are various optional treasures to be found on the other islands however.
- Journal Entry #9 and Note #5. Facing the large island, it has two large mountain tops, one very high (left) and one a little lower). From your starting position, sail straight towards the island to the beach in the 'middle' of these two mountain tops. Here you can find a wooden cross for Journal Entry #9 and on the right side, in a cave, Note #5.

Journal Entry #9 and Note #5
- Treasure #53, Combination Lock Tobacco Box. From the location of the previous treasure, hop in the boat and continue around the island, heading right. The next beach you reach is your destination. Continue to the rock wall at the end to find this treasure among some destroyed crates and barrels.

Treasure 53 - Combination Lock Tobacco Box
- Note #6, Journal Entry #10, Treasure #54 Brass Pocket Sundial. From the location of treasure 53, head back to the boat and sail in a straight line to the small beach island in the distance. Inspect the rubble to find Note 6 and inspect the mast of the shipwreck in the distance (a bit to the far left) for Journal Entry 10.
Note 6 - Journal Entry 10 - Treasure 54 Brass Pocket Sundial
- Journal Entry #11, Treasure #55 Silver and Wood Tankard, Treasure #56 Persian Silver Pen Box. Go to the island with the tower and cut through to the other side to find a skeleton on a cross - this unlocks Journal Entry #11. Facing the skeleton, head right and check underneath the rocks to find Treasure #55. Move further inside the cave beyond to collect Treasure #56.

Journal Entry 11 - Treasure 55 & 56 Silver and Wood Tankard & Persian Silver Pen Box
- Treasure #57 Panamanian Pendant. Facing the skeleton, bring the boat to this beach and head left around the island until you reach a tiny beach. You can find Treasure #57 here.

Treasure 57 - Panamanian Pendant
- Treasure #58 Persian Leather Notebook Case. Sail the boat to the large island and near the rock arches. There's a small platform nearby, just before going through these arches. Climb on the boat to reach the ledge. From here, climb up to a higher ledge to find this treasure.

Treasure 58 - Persian Leather Notebook Case
To continue with the main story, enter the tower on the smaller island, climb to the top and press the symbol. Then follow the symbols on land and on sea inside the cave near the rock arches (sail through and enter the cave). Here, park the boat near the pillar in the middle to climb it to the top and reach upper ground.

Treasure 59 - Deccani Bronze Spouted Bowl
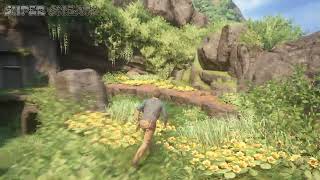
Here, walk down and head into the cave trail to the right side of the area to find Treasure #59, Deccani Bronze Spouted Bowl. Facing the main entrance up ahead (which is blocked), check out the far left rock wall in the entire area (outside) to climb some ledges and continue underneath some rubble. Continue via more ledges on the wall here, then move over the beam to reach an area with a wooden bridge. Boost Sam up and wait for him... Then climb the destroyed bridge and leap over to the next grassy platform. Here, head inside the dark arch/cave to find Treasure #60, Mughal Elephant Carving.
Treasure 60 - Mughal Elephant Carving
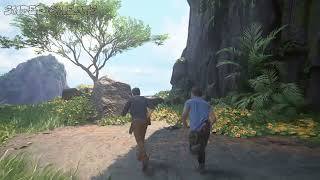
Continue by climbing the wooden planks, leading to a platform. From here you can make it across and meet up with Sam. Follow him to the end of the path, to a beautiful view, for Optional Conversation #12.
Optional Conversation 12
Attach the rope to the tree and swing not to the obvious platform to the lower right, but instead to the pillar on the left. There's a small ledge here that in fact leads up. From here you can swing over to the next platforms up ahead. From here you can climb up even further and swing to the next platform again....except you don't want to swing/climb up there, you want to run/swing to the right instead to find the next ledge.
Climb up and you'll reach a tower. Inside you can find treasure #61, Ottoman Helmet. Climb up the tower, move over the beam and swing straight...NOT down. Nope! Drop down on the grassy platform first, before sliding down the mud. There's a ledge here on the side that you can climb, leading to a grassy platform where you can find treasure #62, Decanni Bronze Vase.

Treasure 61 & 62 - Ottoman Helmet & Decanni Bronze Vase
Slide down and head left. You can climb some ledges up, on the left end of the rock wall here. From this platform, look for a very distant platform with an altar on it. You can reach it by running off the cliff, performing a 'leap of faith' and throwing the rope at the stick to just be able to swing over. Treasure #63, Strange Relic, is found next to the altar.
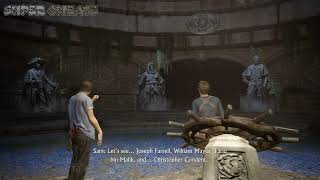
To continue, swing over to Sam (on the main path) and head back to the bottom of the muddy hill. Climb on the platform to the right, then drop several meters down. Inspect the spear that one of the statues is holding for Journal Entry 12. Use the rope to swing to the next spear/statue, but DON'T drop down. Instead, with your rope attached to the second spear, climb UP. You can find Treasure #64, Hamsa Mythical Goose, next to this statue. Drop down and enter the nearby room. Here, inspect seven things (the brownprints, reliefs, round table and golden statue), then swim through the nearby water to another room and inspect the table here. This trigger the opportunity to speak with Sam for Optional Conversation #13. From here, move down the watery trail to the left, go into the water and climb up to the right a few meters further. Look for Treasure #65, Pique Tortoise Shell Box here.
Treasure 64 & 65 - Journal Entry 12 & 13 - Optional Conversation 13
-- Video coming soon --
Continue to the main open area and go underneath the large door to reach a puzzle room. You have to align each stone ball to match the light, so you'll need to rotate the balls separately and correctly first.
Puzzle Chapter 12
Without giving too much away, after solving the puzzle and pulling the lever a scene will play. In any case, head back outside and go back to the boat to sail to the newly appeared statue of Avery. When you approach it, first 'collect' the Journal Entry 14. Climb the statue and look through the looking glass to conclude the chapter.
Anything missing from this guide?
ASK A QUESTION for Uncharted 4: A Thief's End
Comments for Chapter 12
Add a comment
Please log in above or sign up for free to post commentsNo comments yet. Tell us what you think to be the first.
Table of ContentsClose
- Walkthrough
Guide Updates
Get notified of updates to this guide
Many of our guides get updated with additional information. To get an email when this guide is updated click below.
 Join us on Discord
Click to close