06: Hip Shot
Operation Flashpoint: Dragon Rising Walkthrough and Guide
Operation Flashpoint: Dragon Rising Guide - Walkthrough
Mission Six: Hip Shot
Summary:
This is a very tough stealth level that culminates in a smash and grab assault on a fuel depot. As it is a sneaky stealth level, we are playing as Saber Two once more. There is only really one objective, to destroy the generator powering the depot, and then retreat to extraction. You do, however, have to get in position before hand so your allies can create a diversion, allowing you to sneak in undetected. If you don't the level becomes even harder.
Walkthrough:
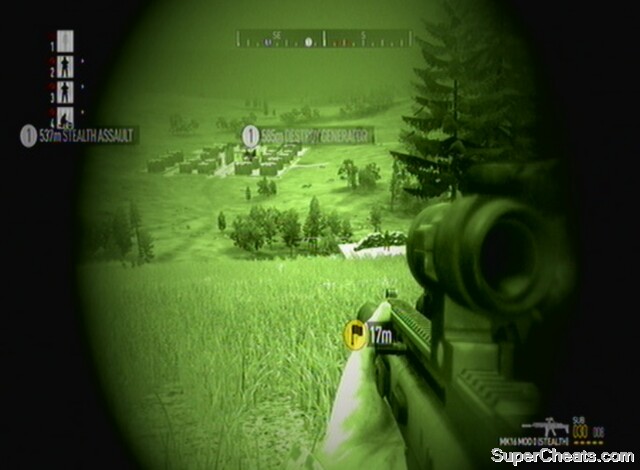
Secondary Objective 1: Get in Position for Diversionary Strike:
The level takes place at midnight, so it's night vision primarily, though once you get to the fuel depot its light sources help out somewhat. From the start, head south-east towards the RV marker down the shallow gulley. As you come to a crest in the hill, crouch and ensure your team are set to Return Fire Only. You will be able to see a jeep's crew and an infantryman sharing a conversation. Once you can see it, the jeep will drive off and the infantryman walk in the other direction. Ignore them for now, but just bear in mind the activity of the enemy. You could take the soldier out once the jeep leaves, but it is imperative that the PLA do not raise the alarm, and firing any shots unnecessarily is a definite no-no. Move into the RV marker for a checkpoint, then head left up the hill towards the next one, remembering that the infantryman is patrolling the road below. Skirt slightly east just to make extra-sure you are not spotted from the west.
 Watch the emplacement, but don’t go too near it! |
You will be able to see an emplacement surrounded by sandbags overlooking the valley to the west as you approach the RV point. You will see a guard at this outpost looking out on the basin below. Ignore him, and continue on (albeit quietly), past the RV point (you don't have to get it if it will risk going too close to the guard, just continue on). If you switch to binoculars you can examine the enemy placements in the depot below. On the way to the next RV point you shouldn't see any enemies. You will, however, receive a note from HQ telling you of the need to destroy the generator before some fuel trucks can leave the depot. About 120 metres away from the RV point, look over at the radio tower to the south-east. Underneath it you will see two PLA soldiers. You can ignore this pair too, as they will be facing the depot. Rather than go for this RV point (unless you really want to engage the pair) head into the hills to the east, through the trees, then across the open ground into the next bunch of trees and finally towards the next RV point, which should now have appeared. As you hit it, you'll come upon a wooden shack. Inside is a single guard facing the depot. He's an easy kill as you can get within about 20 metres of him if crouched, but you may want to set your squad to 'Fire on My Lead' just in case you make a mess of it – just be sure to set them back to 'Return Fire Only' afterwards, as they revert to 'Weapons Free' once you open fire otherwise. With the lookout taken down, HQ will radio in and a checkpoint activated.
Stealth your way to the hut overlooking the depot, and take out the enemy inside
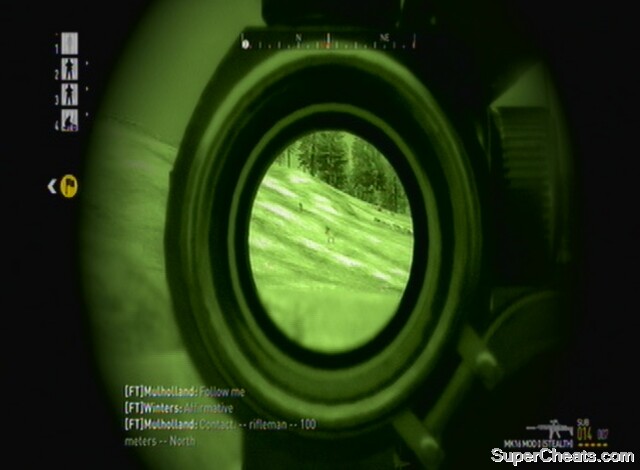
Move just to the left of the building and scan the depot. We'll be going in shortly. As you face the depot, look to the left – that is the route we'll be taking, through the eastern gate. The most important people to take not of are two patrols, one going south, past our gate and then into the field, and the other heading north, round the corner and towards the western gate. It is absolutely imperative that you wait until both are walking away from your position up on the hill before moving. First of all though, Saber Three have to make the diversionary strike. Once Saber Three radios in to say "The enemy is engaged and we're pulling as many away as we can…" the objective, to get into position for the diversionary strike, will be completed, and a checkpoint activated.
Primary Objective 1: Destroy Fuel Depot Generator:
You are now free to enter the fuel depot. Wait for the patrols to go into the distance, about 100 metres is fine in this light if they are facing away from you and you're crouch walking. A jeep to the south will drive off, signalling that you are clear to go.
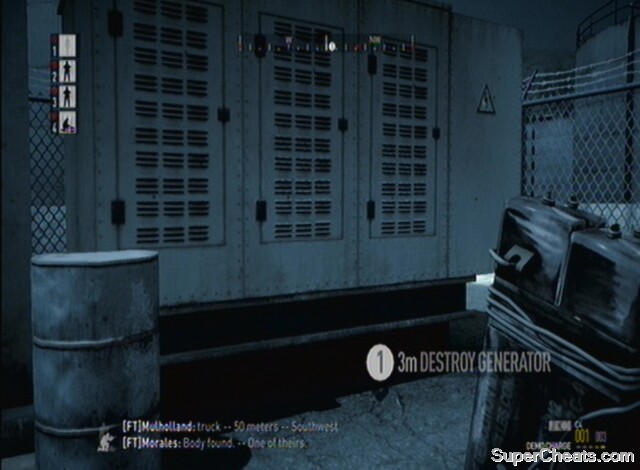
As you enter the eastern gate, stay low and head for the RV marker. Directly ahead (west) will be a guard facing away from you. You need to take him out. Go for a head shot and ensure your men are not on 'Fire on My Lead' (Return Fire Only is ideal), or else they'll shoot everyone in the depot at this point. Once you get to his body, there will be guards to the right (north) but who shouldn't see you if you are crouched. To the left (south) are the fuel trucks. If you plant C4 on the ones marked on the map (they are the active ones, with drivers in, so watch for their exhaust to pick them out), you will activate a bonus achievement. Use LT/L2 after you have planted the first lot of C4 to switch back to the explosive rather than the detonator – allowing you to plant more that will all detonate together. If the alarm has been raised, there will be guards around them, so watch out. If you don't want to bother with this, head for the generator inside the wire fence, just behind the guard we killed.
 Plant C4 on the two fuel trucks that look like this to and detonate (later!) to get the achievement |
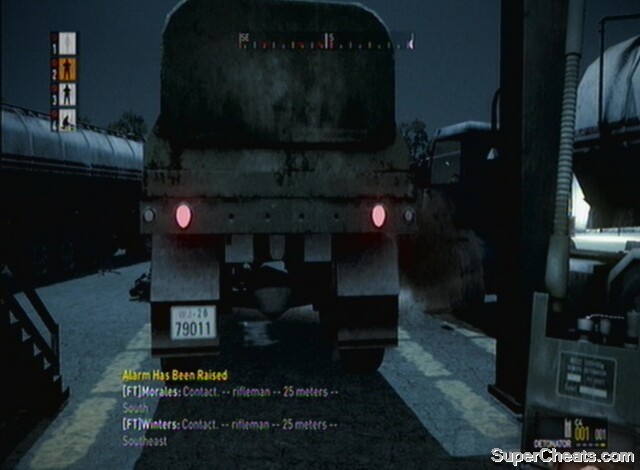
It may be best to plant C4 on the fuel trucks first, as you are less likely to be spotted by the guards to the north doing this, leaving you more time to escape. Otherwise, plant C4 on the generator. At this point, you want your team to be following you. Exit the generator enclosure, turn left, and then left again. After the first left you will be looking straight at the northern guards, but ignore them and, if they haven't spotted you, crouch walk out of the depot. You could try doing this prone for extra security, but in the time it will take you to get out someone is bound to have looked in your direction. If the alarm has been raised, you just need to sprint out of the gate, as the entire PLA army is heading your way. Note, the video for the entry, escape and extraction can be found below.
I personally found it nigh on impossible to avoid raising the alarm (as you'll see in the movie below) but it is certainly doable. It will depend on the positions of the guards at your checkpoint in the diversionary position, so you may want to hang back up there a little for them to change locations if you want a different angle on it. There are patrols, for example, circling the depot, and if one happens to be timed on your exit, things can get hairy. Be aware though, the fuel trucks are on a time limit.
 Plant C4 on the generator and get out of there! |
Once you have made the second left, sprint/crouch walk depending on your alarm status until you are nearly at the edge of the depot. In the field to the right there may be a guard (depending on patrol routes). If the alarm is still silent you may be able to sneak all the way out, but just be aware that you are not home-free just because you've left the depot. Note also that when your team is under fire, they move a lot more slowly. If you want them to hurry you'll have to ask them to move fast, but it will greatly risk their health.
Once out in the field, about 50 metres from the depot (you need to be heading directly north-west), blow the generator and fuel trucks (it will all go at once) if you C4'd them.
Achievement/Trophy: Fuel the Fire (Destroy the Fuel Trucks) Silver/30G
Primary Objective 2: Rendezvous with Team at Extraction Point
Here you get a blissful checkpoint, meaning the depot will forever be behind you (depending on your difficulty setting). Sprint for all your life directly north-west. Be aware though, unlike the last mission, we are not out of the woods yet. If you didn't have the alarm raised before, it certainly is now! As such, it is best to take a circuitous route to the next RV marker, flanking away from the depot. Try to stay out of enemy sight, but ensure you at least crouch-sprint or the extraction chopper will get shot down before we get there. Unfortunately, an enemy Spec-Ops team is now en route to your last know location too. You can avoid them, but in all the aggro of getting out of the depot, they're probably already looking straight at you. Other enemies may come in dribs and drabs (ensure you are moving quickly enough that those in the depot can't get to you) from the extraction point to engage you, or from their original patrol routes around the depot, if you're making too much noise. You will really need to take out anyone in your path, if they've spotted you, and you do have a little time to do so.
 Take out or avoid the Spec-Ops team |
As you approach the hill towards the extraction, deal with enemies at range. Enemies may be coming from both sides of the hill, so use the rocks in the field for cover, and order your men to engage one side while you take the other. Once it seems clear (ignore any enemies behind you as long as they're over 100 metres away – remember unless they're spec-ops they won't have specialist night equipment) head up the hill and a checkpoint will activate. At this point I lay some smoke grenades behind me (use X/Square to change grenade types) to prevent us getting sniped from the soldiers chasing us. If the area ahead looks clear so you have some time, it's not a bad idea. Continue on.
It is worth flanking to the left (west), up the hill and come down onto the extraction from above. In the recorded playthrough below, all the soldiers at the extraction ruins came to engage us on the hill. However, depending on your speed and stealth, the extraction may well have enemies in it, and it would not be a nice place to die (particularly in co-op or Hardcore with no checkpoints!!)
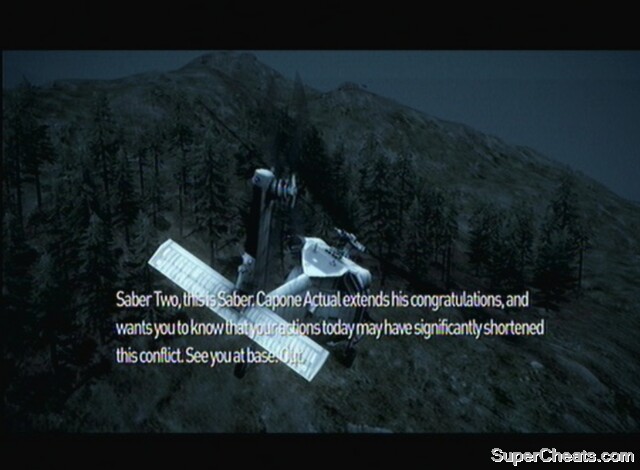
Proceed into the extraction zone with care (consider sending your team in first) and once it says LZ secured in yellow writing at the bottom, you should be fine (though watch for anyone coming from the depot direction [south]). Hit the RV point and once the helicopter lands order your squad on board. Join them to complete the mission.
A complete video walkthrough from the diversionary strike location to the extraction point
Achievement/Trophy: Fly Away Peter, Fly Away Paul (Safely extract from the area) Bronze/20G
Extras:
Despite being a stealth-mission on paper, it is very possible to complete the entire level without sneaking past a single guard. From the start you can engage the jeep and guard, and continue on in this vein. Obviously if you do this you will have all the PLA in the map on you as soon as the alarm is raised, including the Spec-Ops team. An upside of this is that you're not going to get surprised by the alarm suddenly being raised. Indeed, the enemies will thin out before too long. You will have to encounter enemies in vehicles who will attack you from the depot, too.
Another positive of a heavy-assault mentality means you can take the unoccupied vehicle from inside the depot to make your escape (remember to blow the generator though) or find one in the surrounding area and not have to worry about burdensome stealth. You can drive all the way to the extraction, but remember to watch out for the enemies by the ruins. One nifty idea is to raise the alarm early and quickly enter the depot. The sooner you do this and requisition a vehicle, the higher the chances are that the Spec-Ops team, and indeed most of the enemy force, will be caught in the middle as you speed out. The problem with not killing most/all of the PLA is that they may take out your vehicle and kill your entire team.
 Get to extraction, using any means necessary! |
It's also a good idea to follow the RV markers even when using aggressive tactics. This will allow you to hit the checkpoints as normal and provide you with a backup.
To get the copper to fly you must have all your guys with you.If you started at a checkpoint with just 3 men,you need to restart the whole mission.
I lost one guy and I was able to complete the mission.
I found the best way to do this was to leave my squad behind at the hut checkpoint. I then snuck in and planted the charges. I then retracted my steps right back around to where we entered the fuel depot valley, and blew the charges.
From there is was a very simple matter of rushing uphill to the chopper. As we hadn't been detected, we encountered no resistance... UNTIL we reached the LZ, where the enemy (presume the spec-ops team) engaged us (nearly killing me - though I was able to limp onto the chopper).
It's a good mission, but would help massively if your team were stealth conscious in the slightest.
Alright this was glitched for me for about 4 hours. The checkpoint was the last one on your way to the extraction. I then realized one of my team members was not spawning, so I had to do the mission from the beginning. It goes smoothly until saber 3 is needed for a distraction, and in order for me to trigger their distraction, I had to get 100 m or closer to the jeep that leaves. Then I kept it stealth and I entered the fueling depot. Let's face it the only way to keep stealth is to leave your guys behind. So I entered alone, killed the one guy by the trucks refueling, planted the c4 and regrouped with my guys, and then and only then did I blow up the c4 turn around and start running. My guys were retarded almost and started shooting at every insignificant guy, but I didn't care because if they died, at least I would be extracted, hope my experience helps. I encountered a lot of glitches but did resolve them.
Sabre 3 never shows up and I'm left fighting a losing battle with the PLA. Do I need a patch to sort this out?
I had the same problem with Sabre 3 not showing up after I take out guy in the hut. On the map you can see their jeep, which is spinning around in circles maniacally to the SE. Went in without them, and it goes quite well, but the mission runs out of time.
[Could not have got this far without the walk through. Great job as this is a great game. DOUG
By playing on ps3 it seems there are 2 criteria you have to fill to make the helo take off
1. YOUR ENTIRE fire team must be in the helo
2. You must be playing on an xbox
When you get to the helo nothing happens
This was a bass add walkthrough, nice job whoever was the guy that did it
how do you get to the depot without being seen after u take down the lone solider in the hut, when i get to the yellow flag marker im usually spotted so where the hell do i go? id like to obtain the secondry objective so is that possible?
Found a bug at the hut overlooking the depot. It may have been the way I played it, but after taking down the lone soldier there, it autosaves and I get confirmation that we havent been spotted.
But in the objectives, it shows I failed the diversionary strike.
Only way to get the diversionary strike back is to restart the mission.
Unless of course you dont mind going up against a large number of PLAs :-)
Excellent game by the way, really enjoyed it and looking forwad to more from Codemasters.
does anyone know why when i get in the chopper it doesnt take off .all my guys are in it and it just doesnt move !!ive tried 2787868763 times
I also discovered a (somewhat cheesy) way to exfil with minimal effort, mainly by accident. I was leaving the pumping station at high speed
So now I was able to make the woods to the NE before the spec-ops guys caught up with me, and the pumping station guys were delayed by my brave boys...but hey! What's this?!? A magical checkpoint that revives my guys!!! So now we proceed essentially unmolested along the ridge line to the LZ, which is of course clear (except for one or two guys in the treeline that the helo ignored). Voila! And we are OUTTA HERE!!! :-)
A trifle cheesy...but I figured it made up for all those times I was entitled to a checkpoint and didn't get one (yeah, Mission Four Objective One, I'm lookin' right at you!).
teh help never arrives, the Blue team never turm up enven though Im at teh OP and am told they will be there in 1 mike
To everyone whose game does not work:
It's your system that may be low in specs. Mine personally works great.
To destroy the generator you must walk straight up to it and place the C4 on it. Not near it.