01: Dragon Rising
Operation Flashpoint: Dragon Rising Walkthrough and Guide
Operation Flashpoint: Dragon Rising Guide - Walkthrough
Mission One: Dragon Rising
Summary:
As the first mission in the game, this is an easy one to complete – if you are only going for the primary objective that is. You have to climb a hill, destroy a RADAR system and clear out a village, before heading back to extraction. You can complete these objectives with only a few enemy encounters. The secondary objectives include destroying various enemy defence systems around the island. It allows you to explore most of Skirinka (the small island), and even includes a helicopter near the final secondary objective for that all-important achievement/trophy on consoles.
Walkthrough:
Primary Objective 1: Destroy the Early Warning RADAR
After listening to the briefing from HQ take a moment to familiarise yourself with the controls and squad commands before setting off. You should be able to move around the opening valley without drawing enemy fire, but don't stray too far.
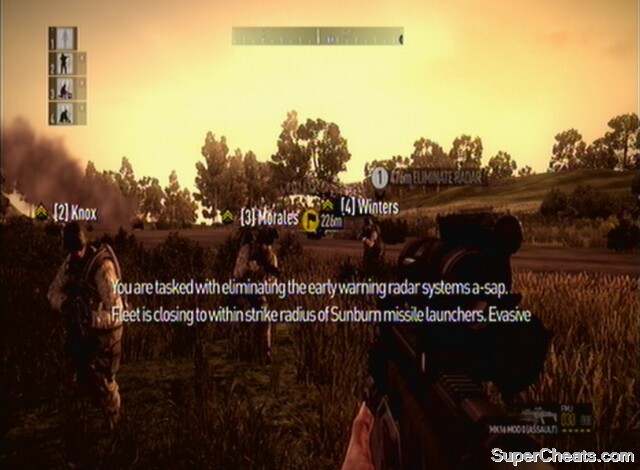 Use this opportunity to get used to the game |
Once you are happy, move up to the sandbag emplacement ahead (southwest). Inside are the first ammunition crates in the game, which you will be seeing plenty more of in the future. It is recommended that you pick up a Marksman weapon at this point, as most of the engagements in this early stage will take place over a good distance. Press the action button when the hand icon is show over the crates, and pick up the QB295 (Marksman). You shouldn't have to drop any other weapons at this stage, as you can carry one special weapon (i.e. this sniper rifle) in addition to a regular one. There is also a checkpoint here, which is relatively pointless at this stage – it is much more useful later on.
With that done, head south-west towards the first RV Marker (see above for more info on these). It is located over a broken wall which provides a good defensive position for the next engagement. As soon as you trigger the marker, turn to the southwest and move your team up to the wall ahead. Ensure you have your marksman weapon out and ready, and aim your sights on the building at the top of the hill. A pair of enemy soldiers will appear and open fire. If you are having trouble getting a shot on them, use your team to draw their fire and suppress them (see Orders section above). You can also move up to the next set of wall, alongside the woods, if you want to try and get closer, but make sure the enemy are pinned down before hand. Ordering your team to Assault the enemies on the hill will also alleviate some of the pressure on you at this early stage in the game – your squad are very accurate with mid-range shooting.
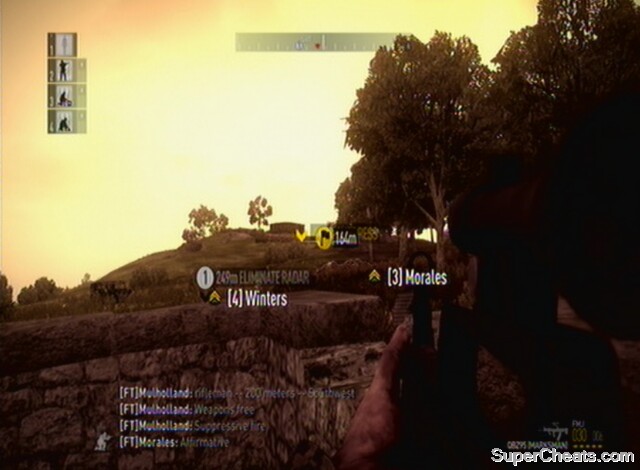 Assault the hill and eliminate the two enemy soldiers |
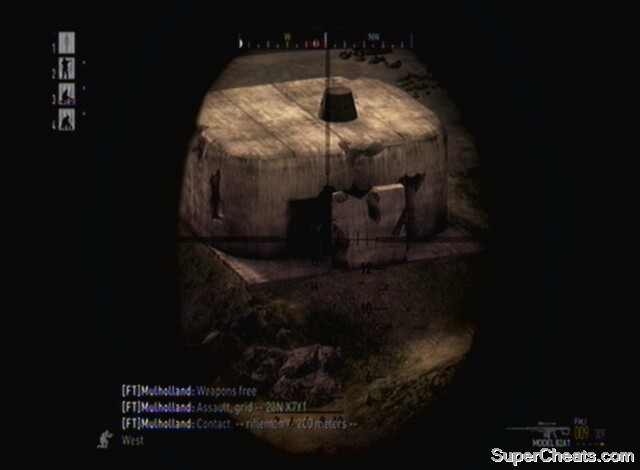
When it has been confirmed that the enemy have been eliminated, move up through the woods to the right (just in case you did miss someone, this will provide you with ample cover). The top of this hill should be clear, but stay away from the edges as you will draw fire from the village to the south and the enemies guarding the RADAR (a stealthy approach is always best!). There is an ammunition crate here if you need to stock up. A marksman weapon and an assault rifle is a good combination for the rest of this mission. You should now have activated a checkpoint up here as well, allowing you to respawn here should the mission go awry. I recommend setting your team to ‘Fire on My Lead’ so that they don’t engage the enemies in the village below and alert them to your presence. Move around the side of the building and skirt the edge of the cliff, arcing round towards the objective. You should come upon it at a decent angle to take out any enemies remaining. There are usually a couple guarding the RADAR, but your team may have dealt with them already. Once you move up to the RADAR, equip the C4 using the equipment menu, and press the usual fire to place some on the structure. Fall back (make sure your team are with you) and press fire again to blow up the RADAR. I suggest getting back so you are on top of the hill, just to avoid any possibility of a suicide here!
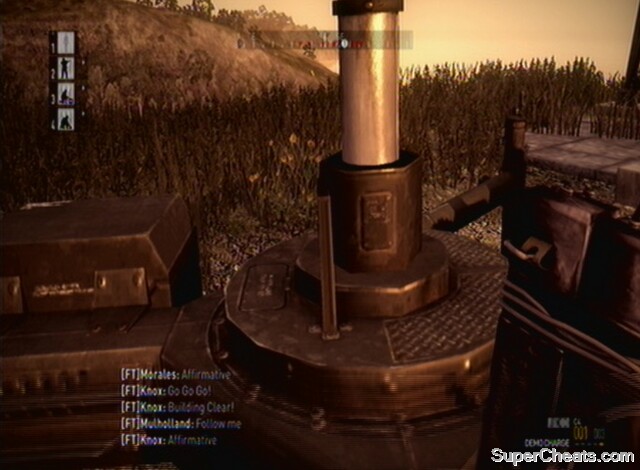 Plant some C4 on the RADAR |
Achievemen/Trophy: Without Warning (Destroy the RADAR installation) Bronze/20G
Primary Objective 2: Secure Landing Zone/Extract:
With this done you will be told to help out some incoming USMC forces that are assaulting the village below. Command has also given you access to an artillery strike. Using it on the village makes short work of this objective, but makes completing the secondary objectives later on in the mission harder. Make a decision about whether you plan to play through the whole level or bail out after completing the primary objectives, and then either use you binoculars or weapon scope to designate a cluster of buildings in the village for an artillery strike, or head back down the hill to the road you began the mission on. Without using the artillery strike, you need to attack the village on foot. Once you have defeated enough of the enemy (20), the objective will be completed. Turn right at the bottom of the hill and set your squad to attack the enemy emplacement guarding the village. You may also encounter enemy jeeps in the area, so make sure your squad don’t get flanked by these. If you go prone on the side of the hill we were just on, you can get a great angle on the enemies on the other side of the valley and in the village itself. Pick as many off as you can with your marksman rifle. You shouldn’t have to go into the village itself, as there are plenty of enemies taking external sentry positions to pick off.
Once you’ve taken out enough PLA, you will be told to secure the extraction zone and get out of there! This is quite a heated encounter. You can either get in the jeep that is in the vicinity of the bottom of our hill, ride it to the extraction zone and take out the enemies in the area, or, preferably, do so on foot. If completing the secondary objectives the jeep is very useful, but you can always backtrack for it and they are pitiful in combat. As you approach the area, use the trees for cover (if on foot) and set your squad to assault or suppress the nearest enemy, allowing you to flank. With your marksman rifle you should be able to snipe any enemies in jeeps (there may be two vehicles to deal with) or just those swarming the extraction point and clear the landing zone for the helicopter. Stay in cover and concealed so that they don’t engage up close. The jeeps should stop when they can’t see you, giving you the chance to pick off their gunners and drivers. With all this done, the helicopter will come in for landing. At this point you can either board it and leave the area, completing the mission, or go for the secondary objectives (which offer achievement points).
Eliminate enough PLA to allow your allies into the area
Secondary Objective 1: Destroy SAM Site #1:
If it is the latter, either head back for the jeep you ignored earlier, or secure one in the vicinity of the landing zone. The first secondary objective to deal with should be to destroy the SAM site located near the lighthouse at the northern end of Skrinka. Once in the driver position of your jeep, take it all the way along the road heading north, ignoring any infantry along the way, until you get to the checkpoint on the coastal bend in the road. You should just come into sight of a large hill with a ruin on top. Disembark as soon as you see it. There are enemies on top of the hill as well as some patrols doing circuits of the area. We need to get to the top to secure a Javelin which makes the next objective a breeze. Leave the road to the right and assault the enemies on top of the hill.
You shouldn’t be flanked by the patrolling soldiers, as they are far more likely to engage you from the hill with their associates. Use your team’s accurate fire to push up the hill and access the ammunition crate nestled in the ruined building. Swap out your marksman for the Javelin, and set your team to Fire on My Lead. Continuing north-east, move down the slope towards the lighthouse base. As soon as it is in sight, order the artillery strike on the marked objective of the SAM launcher. The PLA in the base may open fire on you at this stage, though unless you or your squad open fire you should be in a concealed location. Before the artillery strike hits head back the way you came towards your jeep.
Assault the hill with your squad
Secondary Objective 2: Destroy Sunburn Anti-Ship System:
With the Javelin, you can actually shoot the next objective from the eastern side of this area, near where we disembarked the jeep. Get towards the edge so you can see south along the coast, and equip the Javelin. Looking down its sight, the next target should be brightly illuminated in white. This is the Sunburn missile launcher. With the Javelin locked on (you don’t need a clear trajectory from your position to the target, as it fires up in air), fire it and head back to the jeep. If all went well the next secondary objective should be ticked off. If not, you will need to head south in the jeep and disembark on the road in line with the objective and infiltrate the base yourself. Move into the base, dealing with the PLA inside it, and place some C4 onto Sunburn and blow it up on your way back to the road.
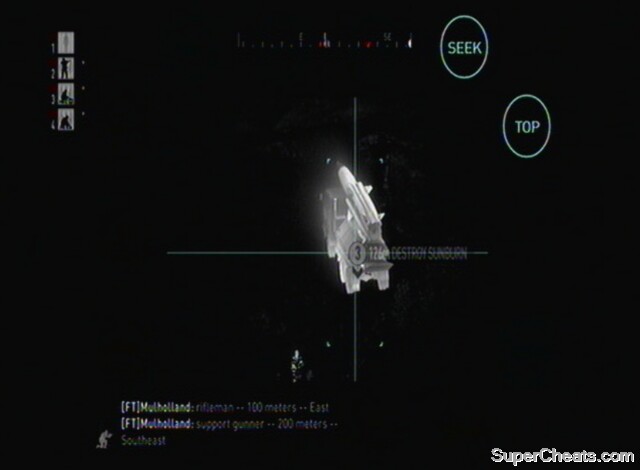 Destroy Sunburn from a distance |
Secondary Objective 3: Destroy SAM Site #2:
If you did this from a distance with the Javelin, get back in the jeep and follow the road south until you are roughly in line with the last objective. If you went in close, then head back to the road and cross the other side into the trees towards the last objective. There is a checkpoint en route, which you should head for (check your map). There are patrols on the ridge which looks down over the last objective. The ridge itself provides a great angle onto the base below, but you should be careful of getting flanked, and position your men appropriately. There is an excellent sniper rifle in the ammunition crate south of the objective, and it is worth picking up. With that done, head along the ridge in a northern direction until you can see the SAM site and base below you. Using your rifle, take out as many enemies as you can, and set your squad to assault the PLA guarding the base. There are not a great amount of enemy personnel here, so move your squad in close once the fighting dies down. With the all clear, you can head down and plant some C4 on the SAM. From here, if this is the first time you have played this level, I recommend you go west and down onto the beach. There is a helicopter here which allows you to get an otherwise obscure achievement. Once on the beach you can blow the C4 and complete the final secondary objective (make sure also that you trigger the objective in the base, as flying a helicopter can be a trial on your first go!). If you want to end the mission as soon as possible, head back to the road, blowing the SAM on the way. Use your jeep to head south to the extraction helicopter, which has kindly waited for the last forty-five minutes for you to finish.
 Assault the base from |
Getting in the pilot seat of the helicopter can be tricky. Look at the door and change your viewing angle up, down, left and right until the Pilot selection is highlighted. Pressing the embark button should then see you take control. To fly around the island and unlock the achievement you need to skirt the coastline, making sure not to cut any corners or go too far out. If you go too far out to sea you are warned about leaving the engagement zone. If you fly all the way round and no achievement comes up, keep going until it does. You don’t need to fly around the southern island off the coast of Skrinka. With the achievement/trophy in the bag, head back to the extraction chopper and land nearby. Order your team aboard to complete the mission. Flying this helicopter is pretty much like any other in videogaming, unlike the one in Mission Eleven!
Achievement/Trophy: Skirinka Island Tour (Complete a circuit of the island) Silver/30G
Extras:
There are a few alternative ways of doing this mission. You have the entire island of Skirinka to explore with no constraints (though you can't go out to sea), and there are a selection of vehicles to the south near where you start. Once you get hold of one of these, you can feel free to explore Skirinka at your leisure. There is only one main road through the island, which is the one we use in the guide above, but that doesn't mean it's not worth exploring the island. Try some of the coastal hills to get a great overview of the island.
The empty helicopter is to the west by one of the secondary SAM objectives. As this is the only level set on Skirinka, the ammo crates tend to be located by the objectives. There are two to the south by the primary objective, one to the west at the helicopter SAM site, one to the east by the Sunburn site, and one north on the hill by the lighthouse – this is where the Javelin is located.
How to find the helicopter
The variables in this are the fire mission, which you can save and use on anything you like, and the Javelin, which you could collect by the lighthouse and then save for another purpose. If you want to prolong the mission, ignore the fire mission and Javelin and go to both the lighthouse and Sunburn to tackle the PLA their up close.
Note also, that by the end of the mission the level will be getting dark. Thankfully we have night vision, but remember that once it's dark you can start to employ some stealth tactics!
I'm still stuck on this level how do I get through
Ok cool
how do you call in the artillery strike? please help me. my option is ghosted when i press right shift
no thats cheatingSpoiler:
no thats cheating
I love your walkthrough...is there a cheat so i can always have my favorite rifle?
I lost it a while back and i dont wan to have to do it all over
thanks.
Waste of time because you're playing on baby and not realistic.
I want applesauce