02: Blinding the Dragon
Operation Flashpoint: Dragon Rising Walkthrough and Guide
Operation Flashpoint: Dragon Rising Guide - Walkthrough
Mission Two: Blinding the Dragon
Summary:
This is the first mission playing as Saber, the Spec Ops variant in Operation Flashpoint. They are focused on stealth and night-time operations, usually as a lone team. In this instance there is another Saber team to help us take out the Sunburn Missile Launcher. Being spotted by the PLA will fail the secondary objective, which runs for the first few stages of the mission. Once the Missile Launcher is destroyed, there is an achievement to be had for taking out the PLA commander, before destroying the anti-aircraft site and allowing friendly air support to arrive.
Walkthrough:
Primary Objective 1: Destroy Sunburn Site :
Secondary Objective 1: Remain Undetected by PLA Forces:
Secondary Objective 2: Reach Flanking Position:
There are a lot of different ways to play this mission, though completing the secondary objectives makes it all easier and is the advised way of doing things. You begin by the beach at night, and need to move up the hill to the east and cross the road ahead. A PLA convoy will drive past early on, but you can safely cross the road, following the RV markers to avoid contact with no additional stealth required. Your team is automatically set to Return Fire Only, and with your superior night-orientated equipment, you shouldn’t be spotted by the enemy at any stage until Sunburn.
Having crossed the road, follow the RV markers. Saber 3 will hold position and take up an ‘overwatch position’. If you look to the right in this field you can see an enemy base, which again can just be ignored.
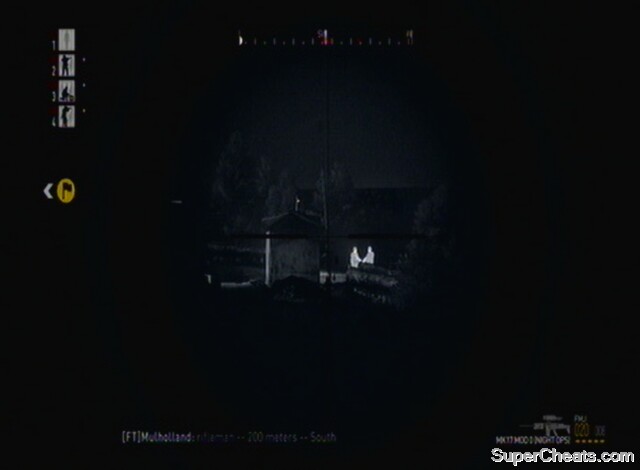 Ignore the soldiers you can see |
Remember that if you open fire you will fail the secondary objective and trigger an enemy search for you. After a short time following the RV markers you will reach a hill and valley. The RV marker is up the left hand side of the valley, but it is best to ignore it and head up the right hand side hill instead. The reason for this is that at the end of the valley is a lookout post manned by a couple of PLA soldiers. With your primary weapon’s scope you will be able to see them clearly. Even if you go to this RV, you can still safely move across the valley to the other side and the next RV marker, just be sure to do it carefully. Saber 3 should radio in about now to tell you where to head for a good flanking spot on Sunburn.
Once on the correct side of the valley, move around, remembering to avoid the lookout post, and continue to follow the RV markers. It is worth checking for enemies in the area using your scope, but there shouldn’t be any as long as you follow the suggested path all the way to Sunburn. You may also be aware of a patrolling enemy helicopter flying overhead.
Avoid the guards at the lookout post
As long as you're not firing it shouldn't really see you at this stage, but go prone if it comes too near just in case. Before too long you will see a two-storey house in the distance, which is just adjacent to Sunburn. If you look down your scope you will see that the launcher is guarded by a squad of PLA infantry. Near the house there is a checkpoint, when Saber 3 should radio you and tell you they are in position and ready to help out.
I had a lot of problems with this house, most notably with enemies spawning inside. Also, if you ask your squad to enter it, they may open fire on any inhabitants (who appear to sometimes be there and other times not) and alert the Sunburn crew. Therefore I recommend ignoring the house and just taking cover outside the farm buildings. When Saber 3 let you know they are ready, they will begin the assault on the site. Once this happens, you can flank them from your southern side and plant the C4 on the launcher. It is important to do this quickly, because as soon as it comes under fire an enemy helicopter will come in to search the area for both Saber teams. As well as packing a lethal punch, if it spots you more reinforcements will also come after you. With that in mind, you can either fall back to the house (at this stage making too much noise isn't so much of an issue, though the spawning enemies is), go prone if the helicopters come overhead, or move on with your next objective quickly, attempting to lose your pursuers on route. It is very possible to take down one of these choppers with your team, but it is equally possible that they will blow you off the ground first.
An example of how you can (luckily) do the Sunburn objective even if you've been detected beforehand
Should you handle the Sunburn situation badly and alert its guards, get your team to keep them busy (hopefully Saber 3 will also be engaging). You can run to the launcher using the dip in terrain as cover, and quickly plant C4 before retreating back to your squad. It is very possible to do so while under fire, as you only need to spend a few seconds on level terrain on the road.
Once the helicopter has lost interest, or if you are expediting to the next objective, blow the C4. Following the RV markers to the east, you will come upon a settlement. This houses the PLA Commander, who acts as a bonus objective and will reward you with an achievement if taken out. Note that if you have already done this once, you will not be notified when the Commander is taken out. The best tactic with this base is to simply engage in long range combat. The Commander should be in quite a prominent position, and either you or your squad should be able to pick him off. There is also an ammunition crate in this base, so ordering your team to assault up close and personal does have its benefits. Be aware that hostile forces from the west may be alerted to your presence after this assault.
 Eliminate the PLA Commander in this base |
Achievement/Trophy: Ghost Ops (Eliminate the PLA Commander) Silver/30G
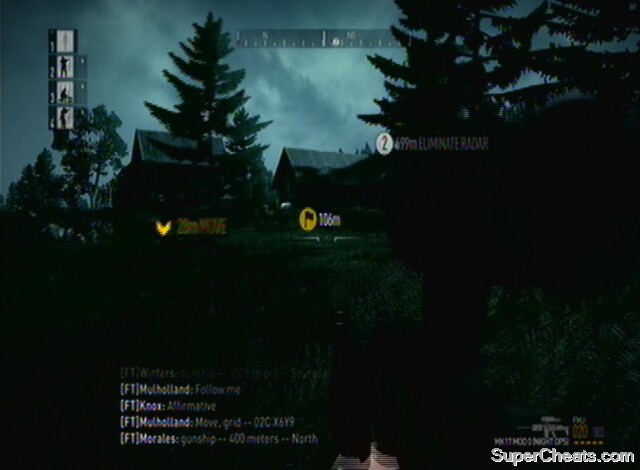
Primary Objective 2: Disable Air Defences:
You will be aware that HQ gave your squad access to an artillery strike after completing the Sunburn objective. This can be used to eliminate the PLA Commander by bombarding the village, but is much better for the second primary objective. This objective is to Disable Air Defences. Continue to the east, and you will notice PLA forces skirting the treeline above you (if you use your scope to spot them). They are equipped with long range weaponry, so it is advisable to take as many out as possible. You can set your team to suppress them or directly assault, but proceed either on your own or with a teammate (unless the PLA forces are not engaging you), and head towards the objective. Use the dip in the terrain to stay out of enemy sight. You will be able to see the target, or at least buildings surrounding it, allowing you to aim an artillery strike at it. Ensure you use a scattered method, allowing for any inaccuracies in targeting.
Use the fire-mission from distance on the air defences
Primary Objective 3: Proceed to Overwatch:
Once the strike hits, call your team to you and proceed to the overwatch position. If all went well, confirmation should be given. If the strike missed, you will be forced to move into the base and manually C4 the target.
With the target burning, be aware of the patrols that engaged from the treeline earlier, but the walk to the overwatch position should be quiet, particularly if you used the artillery strike to decimate the enemy forces. You may take fire from the valley, now a long way below, but any PLA soldiers should be too far away to be accurate.
Move through the mountains and down to the overwatch position.
Achievement/Trophy: Saber Beats SAM (Destroy the Anti-Aircraft Sites [Sunburn and SAM Defence]) Bronze/20G
Extras:
This level allows you to really use two completely different strategies to complete the objectives, but you are more constrained with where you can go and what you can do than in Mission One. From the start, if you fancy trying a quick combat encounter you can take on the convoy which drives past. Remain undetected is only the secondary objective, so you can, in theory, take out the PLA with loud tactics. Once you have a vehicle in the convoy the map is your oyster! Unfortunately Saber Three won't wait for you forever, and you can't afford to dawdle too much if completing the mission is on your mind. If you want a vehicle without talking the convoy, there is a truck up the road to the north (away from the convoy) which, though guarded, can be taken and commandeered.
Taking out a helicopter
The enemies in the valley before Sunburn can be taken out, indeed, even without alerting other PLA. Just remember that when they are searching for you, that means you need to stay out of sight for 25 seconds before you can safely resume. The PLA will remain on the alert, too. Feel free to tackle the Sunburn launcher without Saber Three, you won't fail if you start without them, as Reach Flanking Position is only a secondary objective. From then on it's pretty much straightforward, though you can take your time to get to the overwatch if you desire it (once you've dealt with the SAM site). You can also take out the SAM site manually, if you want to use the fire-mission on the PLA commander or just to blow some of the landscape up. To do this, you'll have to drop C4 on the RADAR in the SAM base. If you're going exploring, the helicopters will pose a problem, but that's all part of the fun of tackling a level from another angle!
Operation flashpoint is better than America's army 2 .... Flashpoint give u more tactical control over ur squad than America's army. Americas army fells stiff when I'm playing it compared to flashpoint. Unlike America's army 1 America's army 2 does not hve a story line to it it's just a collection of random missions.
For Objective 2: Eliminate Air Defences, I just called in a fire mission on that area and completed the objective allowing me to skirt past enemies to overwatch.
How do you think this game compares to the ArmA ii series?
What happens is, in my opinion, the enemies there are much stronger. I always get pinned down between them, the patrols from the other side of the Sunburn launcher, and the Chinese helo. What I figured out is, instead of blowing up the launcher immediately, instead, after placing the C4, gather your squad and move north. After about 200 meters, blow the C4. The enemy helo doesn't appear until after you detonate, so it gives you breathing room. Then I set my team on column, tight spread, and fire on lead, and move up the mountain, using the trees for cover, and ignoring the village. I hook around the radar to the left, through the trees, and ambush it's guards from behind (upslope). After that, it is an easy matter to complete the level.
Stuck on the second objective where you have to get past the guys along the tree line up the hill. I spawn from the checkpoint behind the logs but within 3 or 4 minutes my helos fly overhead and somehow get shot down, making me fail the mission. It happens even if I just sprint straight to the radar sight I can barely make it in time and get shot to pieces. Anyone know why this happens?
Where is my applesauce
Very helpful videos thankyou.