Treasure Borrachos - C2
Lost Planet 2 Walkthrough and Guide
Treasure Borrachos
Chapter 2
Mission 1
Objective: Clean Out the Ship!
First -- Complete the mission in seven minutes or less to earn this GJ award. You must deplete the enemy's Battle Gauge -- which is visible at the bottom of the screen -- to complete the mission.
Head southwest at the start of the level and toss a Hand Grenade at the three soldiers along the walkway. Shoot the grenade when it reaches the group to blow them away. Then, look west and toss a grenade across the gap to kill the three soldiers standing on the walkway there. With that, open the T-ENG chest on the walkway and pick up the VS Rocket Launcher inside. The other T-ENG chest holds a human Rocket Launcher.
Continue south to the other end of the deck and gun down the two soldiers at the top of the stairs. Activate the Data Post at the top of the stairs and then carry the VS Rocket Launcher over to the turret emplacement on the platform at the south end of the ship.
Objective: Smack the Flies Out of the Sky!
Smackdown -- Destroy all of the enemy Ospreys to earn this award.
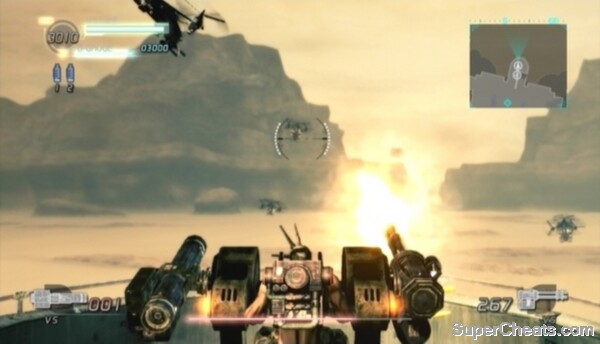 Shoot down the Ospreys! |
Throughout this mission, enemy Osprey VSs will fly in from the south. Rocket Launchers are most effective against Ospreys. You need to wait for the right moment before firing a rocket at one of the Ospreys, otherwise it will be difficult to hit.
Attach the VS Rocket Launcher to the left side of the turret emplacement and hop in. This turret is armed with a Gatling Gun already, which can down Ospreys quite quickly when coupled with the Rocket Launcher. Fire the Gatling Gun at one of the Ospreys as it approaches, but wait until your target stops moving for a moment before firing. Don't waste any rockets firing at an Osprey that's moving to the side, as it'll likely miss.
There's another VS Rocket Launcher in the southwest corner of the platform. Pick it up and attach it to the turret emplacement if it's still intact. The Gatling Gun will run out of ammo quickly, but you can detach the Gatling Gun from the other turret along the west side of the platform and swap it with yours.
Aside from the turret, there are several human Rocket Launchers on the ship you can pick up and use to down the Ospreys. Three direct hits from a Rocket Launcher are required to shoot down one Osprey on the Normal difficulty level.
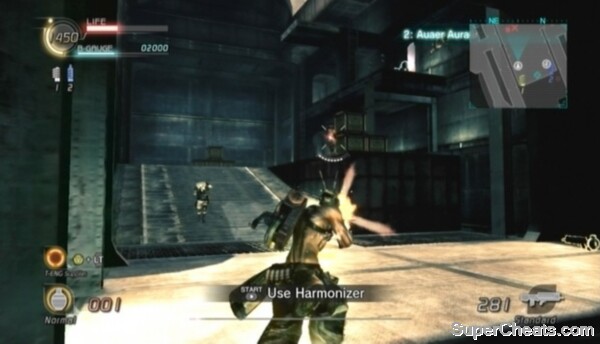
Objective: Don't Let Those NEVEC Scum Open the Hatch!
NEVEC will eventually send in an advance team to open the hatch in the ship's interior. If they succeed, you'll fail the mission. All these soldiers need to do is activate the two locks next to the hatch. This can happen quite quickly, and you really can't rely on AI teammates to prevent them from doing so. Unfortunately, this is another one of those missions that's a lot easier with humans on your team.
 Prevent the NEVEC advance teams from opening the hatch. |
Two advance teams will be sent in. The first team will drop in shortly after this objective appears onscreen. So, when this objective appears, stop what you're doing and drop down to the hatch. Hang around the hatch for a bit and kill any enemies that drop down into the ship's interior. Keep an eye on the locks as well, as these enemies will often ignore you and attempt to open the hatch in the middle of a firefight.
Once you've dealt with the first advance team, anchor back up onto the deck and continue destroying Ospreys and anything else NEVEC throws at you. Keep an eye on the lock symbols below your life bar and Battle Gauge just in case you missed an enemy down below. If one of the lock symbols turns white, stop what you're doing and drop down to the hatch before the enemy manages to open the second lock.
Stick around the sides of the ship so you'll be able to see when the second advance team drops in. Just shoot down Ospreys with a human Rocket Launcher while waiting for the second team. When you see the first couple of members of the second advance team drop down to the ship's interior, jump down and fight them off to prevent them from taking control. This second group is composed of quite a few soldiers, so make sure you've killed them all before anchoring back up to the deck.
Once back onto the deck, an Osprey will likely have dropped a Granseed VS onboard at the south end of the ship. Hit the enemy VS with grenades or rockets to destroy it.
Keep killing enemies until the Battle Gauge at the bottom of the screen is completely depleted to start the area complete countdown.
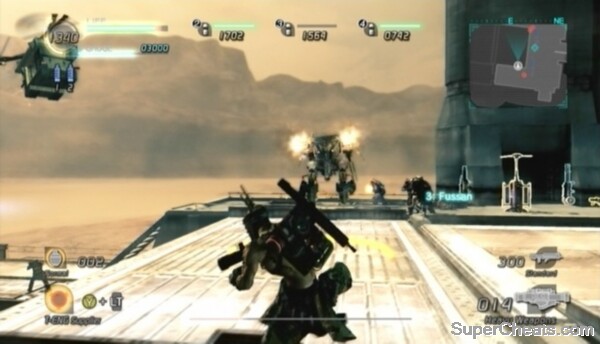 Deplete the enemy's Battle Gauge to complete the mission. |
Objective: Fiesta Time 3!
Emote: All Players -- To earn this award during the area complete countdown, all four players must be performing an Emote at the same time. To perform an Emote, hold the Start button and press one of the shoulder buttons or one of the buttons on the D-Pad.
Human teammates aren't required to earn this award, however AI partners aren't always reliable. You may need to perform an Emote a few times to trigger theirs.
Mission 2
You'll need plenty of T-ENG to operate the cannon. Fortunately, the team spawns right next to two T-ENG Chargers. You have some time before the sub-boss arrives, so be sure to gather plenty of T-ENG before manning the cannon. Stand between the two T-ENG Chargers until you have at least 4000 T-ENG. With that, cross to the other side of the deck and activate the Data Post there.
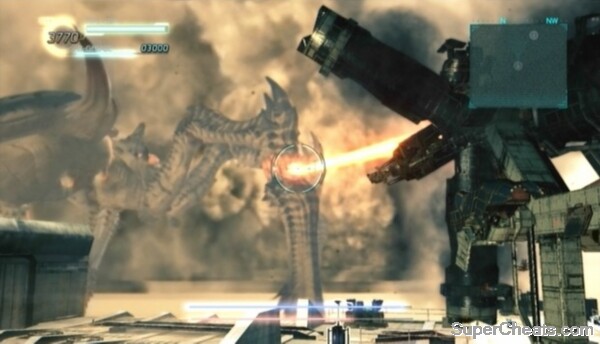
The Baiztencale, a gigantic spider-like akrid, is this episode's sub-boss. Fortunately, this Cat-G Akrid is a pushover with the Overland Battleship cannon at your disposal. Approach the cannon when ready and hop in the seat at the bottom of the steps to take control.
Objective: Fire at Full Power!
Full Charge Shot -- Charge the cannon to level three and fire to earn this GJ award. Earning this award requires more than one player, with one player manning the cannon and the other(s) charging the cannon by shooting T-ENG at its muzzle while it's in firing mode. If you're playing solo, you'll have to settle for the Bronze 'Level 1 Charge Shot' award.
You'll know the cannon is charged to level three when the mass of energy on the muzzle has increased in size twice. About 1000 T-ENG should do it.
 Aim the cannon at the T-ENG deposits on Baiztencale's legs. |
Once in firing mode, you'll have to wait for the cannon to charge before you can fire. The cannon is ready to fire when the bars on either side of the reticule are full and red.
Objective: Take Out the Legs!
4 Legs - Excellent! -- Destroy the T-ENG deposits on all four of Baiztencale's legs to earn this GJ award.
Aim the cannon at the orange bands on Baiztencale's legs. Keep the beam trained on one of these bands for as long as it takes to burst it.
By the time you've destroyed three or four of the bands with the cannon, Baiztencale should be close to death. The akrid will fall onto the battleship when its life bar is down to about 40 per cent. If when Baiztencale falls on the ship you haven't destroyed all four of the bands on its legs, you can still destroy them with the cannon if the intact band is on one of its front legs.
When Baiztencale falls on the ship, you can remain in the cannon and fire the beam at its face to finish it off. There are two more GJ awards to be earned, however, so hop out of the cannon if you're interested in pursuing those.
Objective: Shoot Down the Akrid Projectiles!
Cleared the Skies -- To earn this award, shoot down 10 of Baiztencale's explosive projectiles.
While Baiztencale is slumped over the battleship, it will continuously release a bunch of homing, explosive projectiles from the pods on its back. The best weapon for shooting down these projectiles is the Gatling Gun, so detach the Gatling Gun from one of the turrets at the north end of the deck.
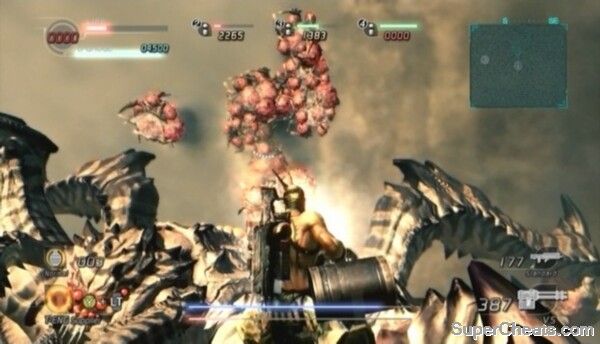 The Gatling Gun is best for shooting down Baiztencale's projectiles. |
Objective: Find the Weak Spot!
Weak Spot Found -- Find the weak spot on Baiztencale's back to earn this award.
To reach the weak spot on Baiztencale's back, anchor onto the wing on the west side of the deck and walk across Baiztencale's arm. The steady stream of projectiles makes getting to Baiztencale's weak spot quite difficult, so clear the skies with your Gatling Gun as you make your approach.
You just need to get close enough to the weak spot to complete the objective. If you are killed by a projectile after earning the reward, hop back in the cannon and finish Baiztencale off with a cannon blast to the face.
Objective: Get Those [?] Boxes!
Got a Bunch -- Collect 10 of the [?] Boxes Baiztencale drops to earn this GJ award.
This is another tough award to earn if you're playing solo because you aren't given much time to collect the boxes once Baiztencale is dead. If you finished Baiztencale with the cannon, you'll have to wait for the seat to lower to the deck before you can get out. If you finished Baiztencale by damaging the weak spot on its back, you'll have to jump down onto the deck and get to the boxes before the cutscene starts. If you're playing with human teammates, the collective number of boxes they collect count toward the award, and you'll earn it too if they do.
Defeating Baiztencale
No comments yet. Tell us what you think to be the first.